























Help center
How to update subscriptions in the merchant dashboard
Managing subscription plans in the Per Diem merchant dashboard is straightforward. Follow these steps to create or update subscriptions effortlessly
Instructions:
- Navigate to the Subscription Plans section in the dashboard to begin.
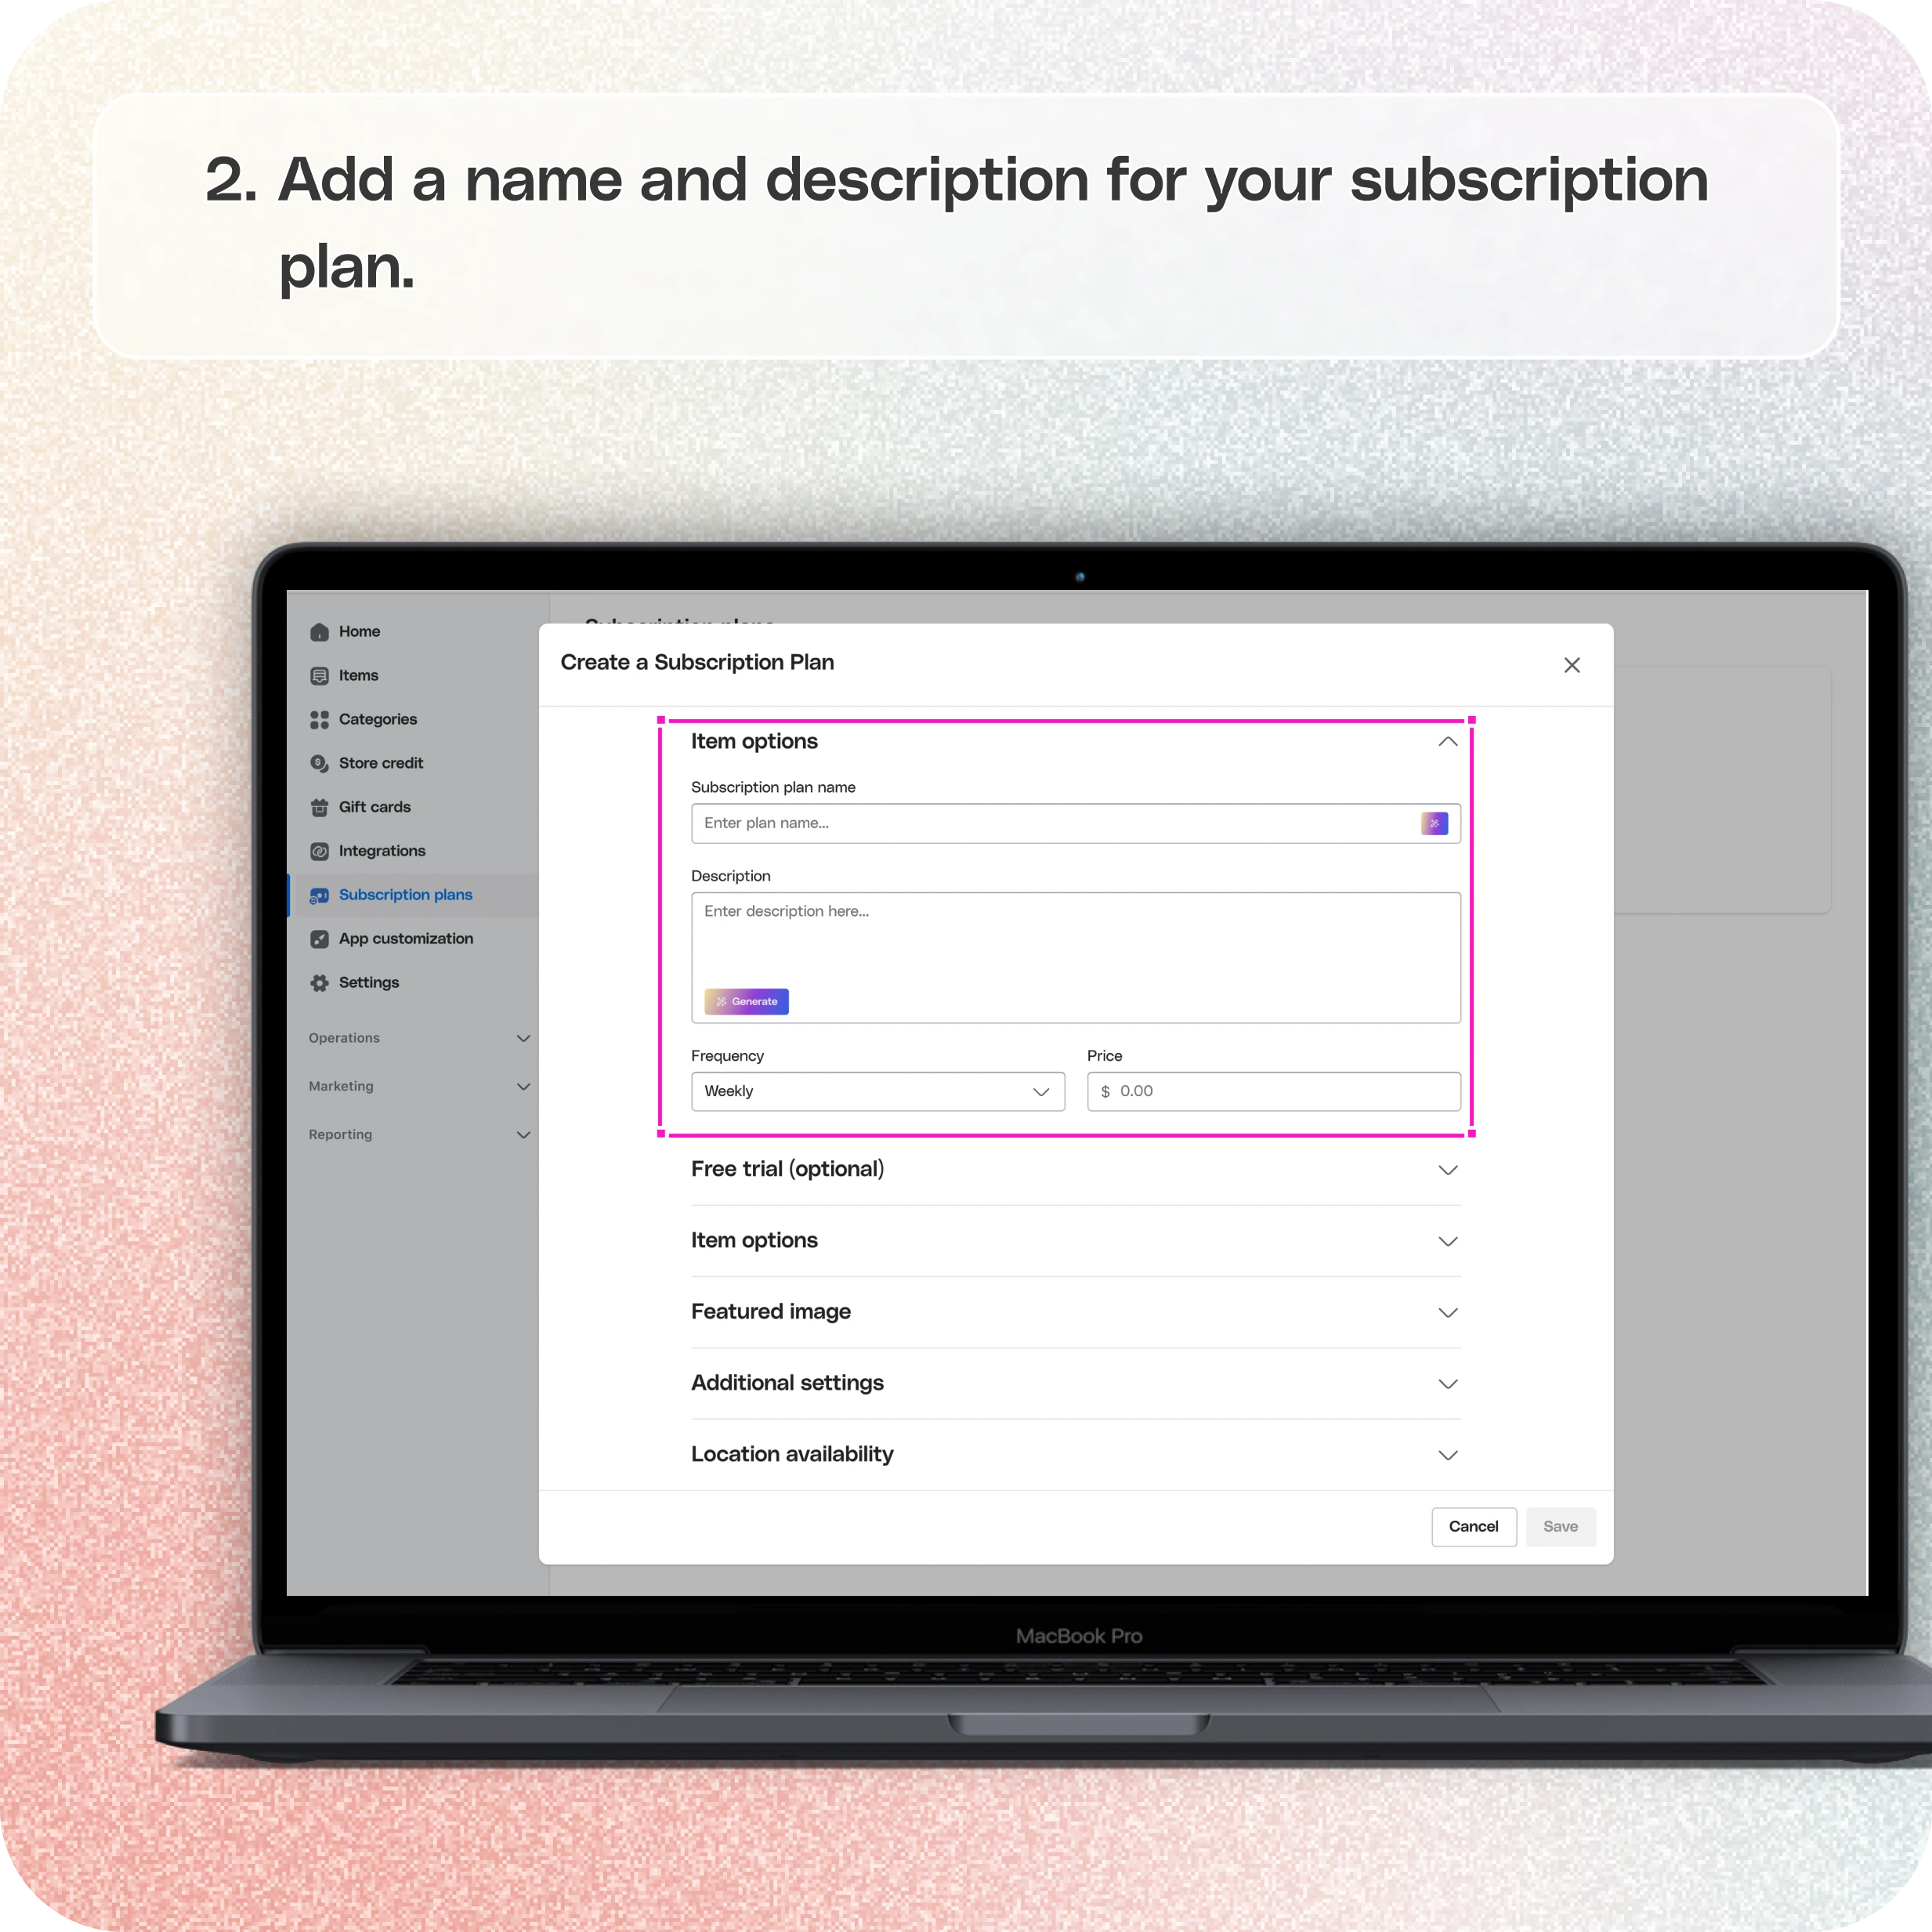
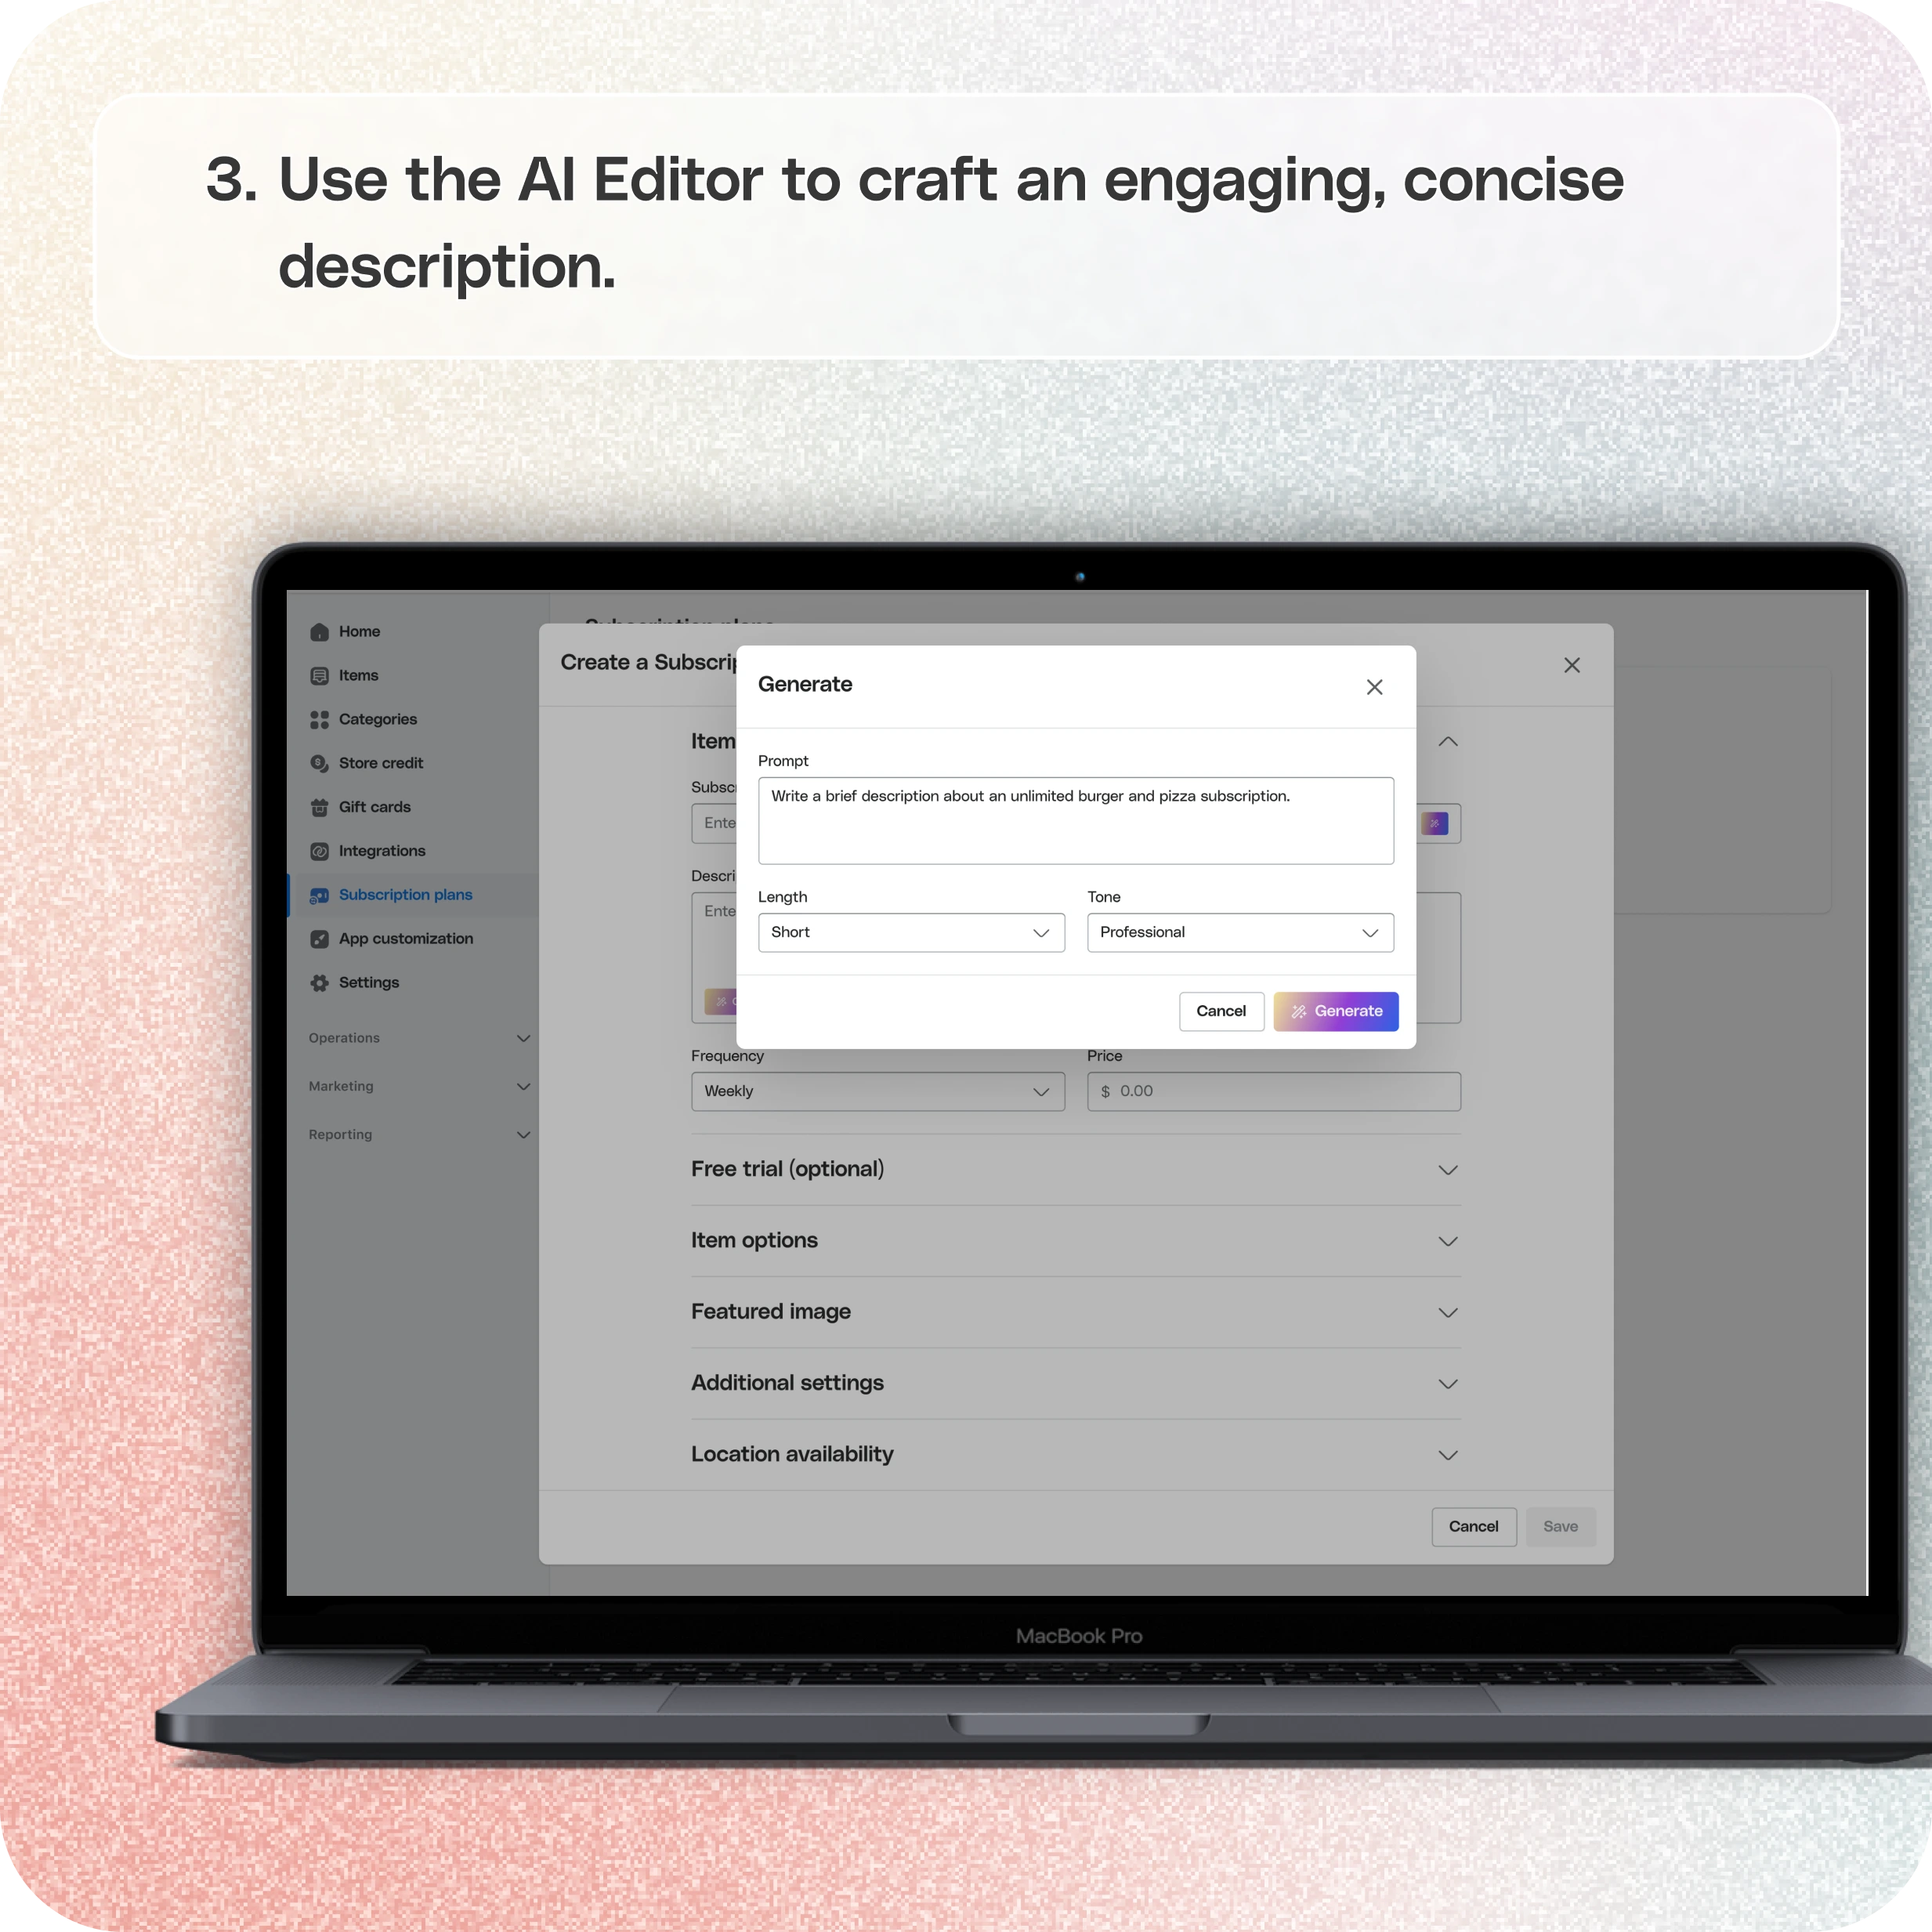
- Provide a name and description for your subscription plan. Use the AI Editor for a compelling, professional description.
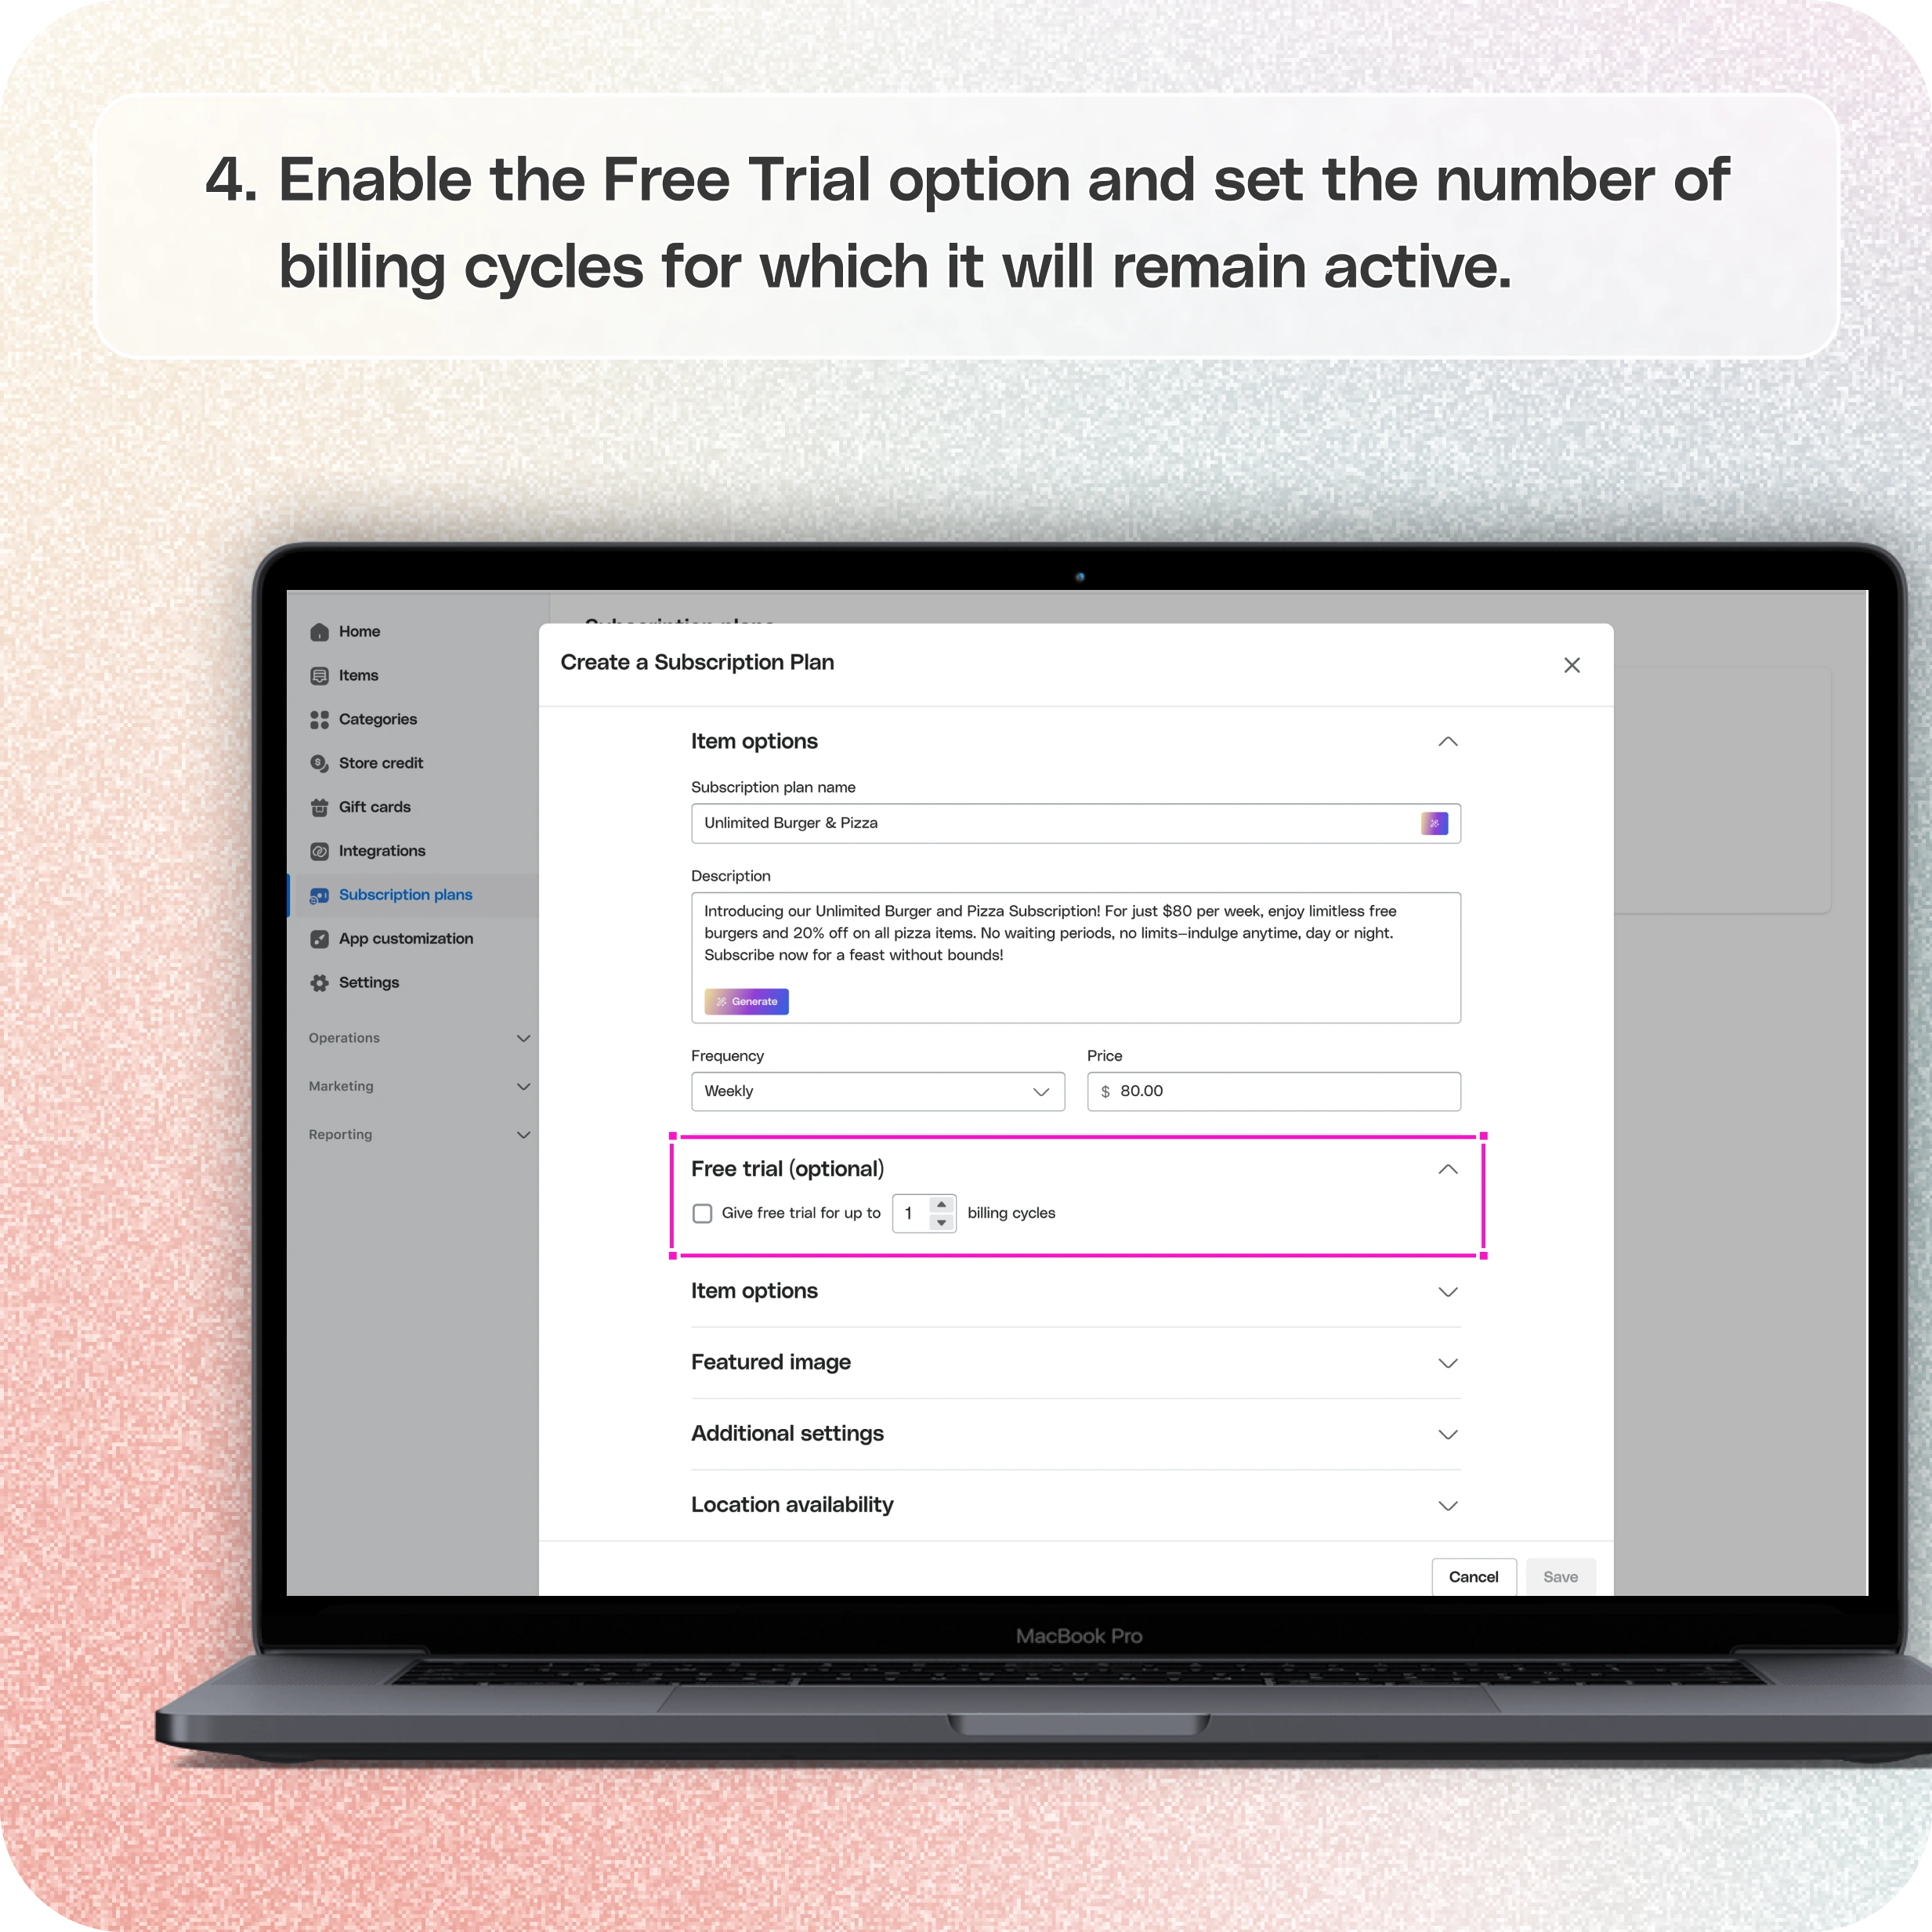
- Enable the Free Trial option and specify the number of billing cycles during which it will remain active.
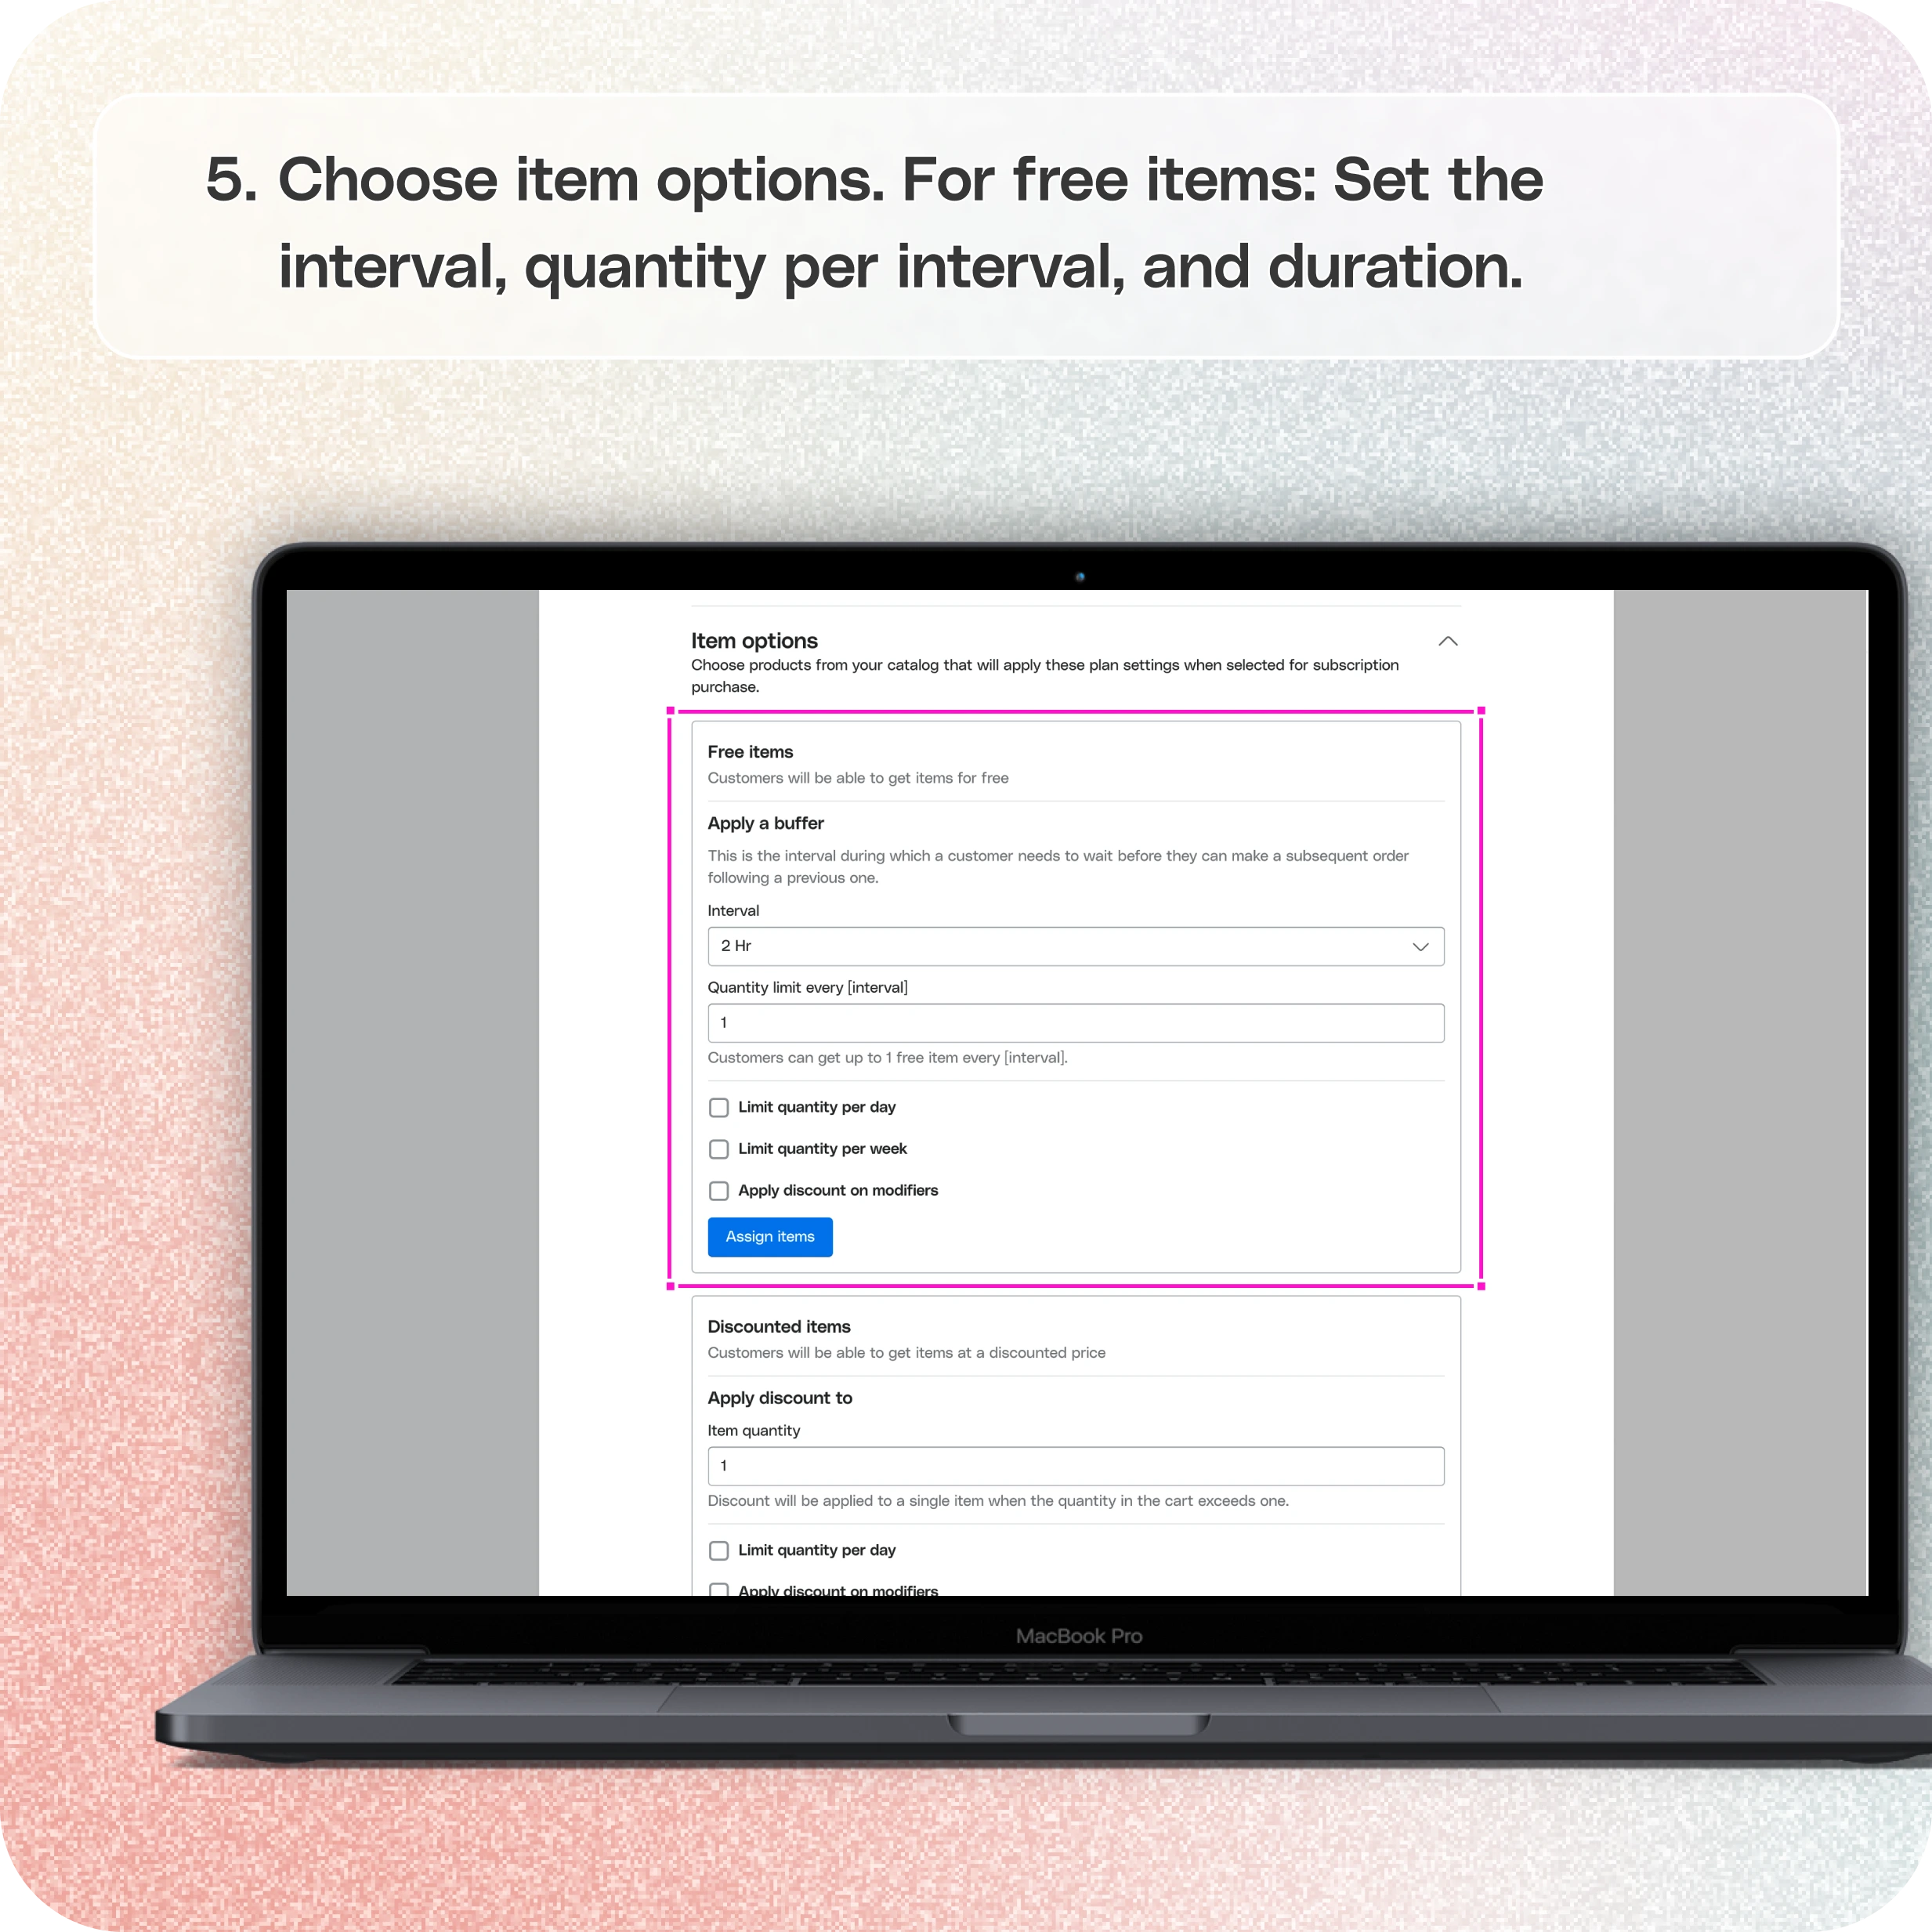
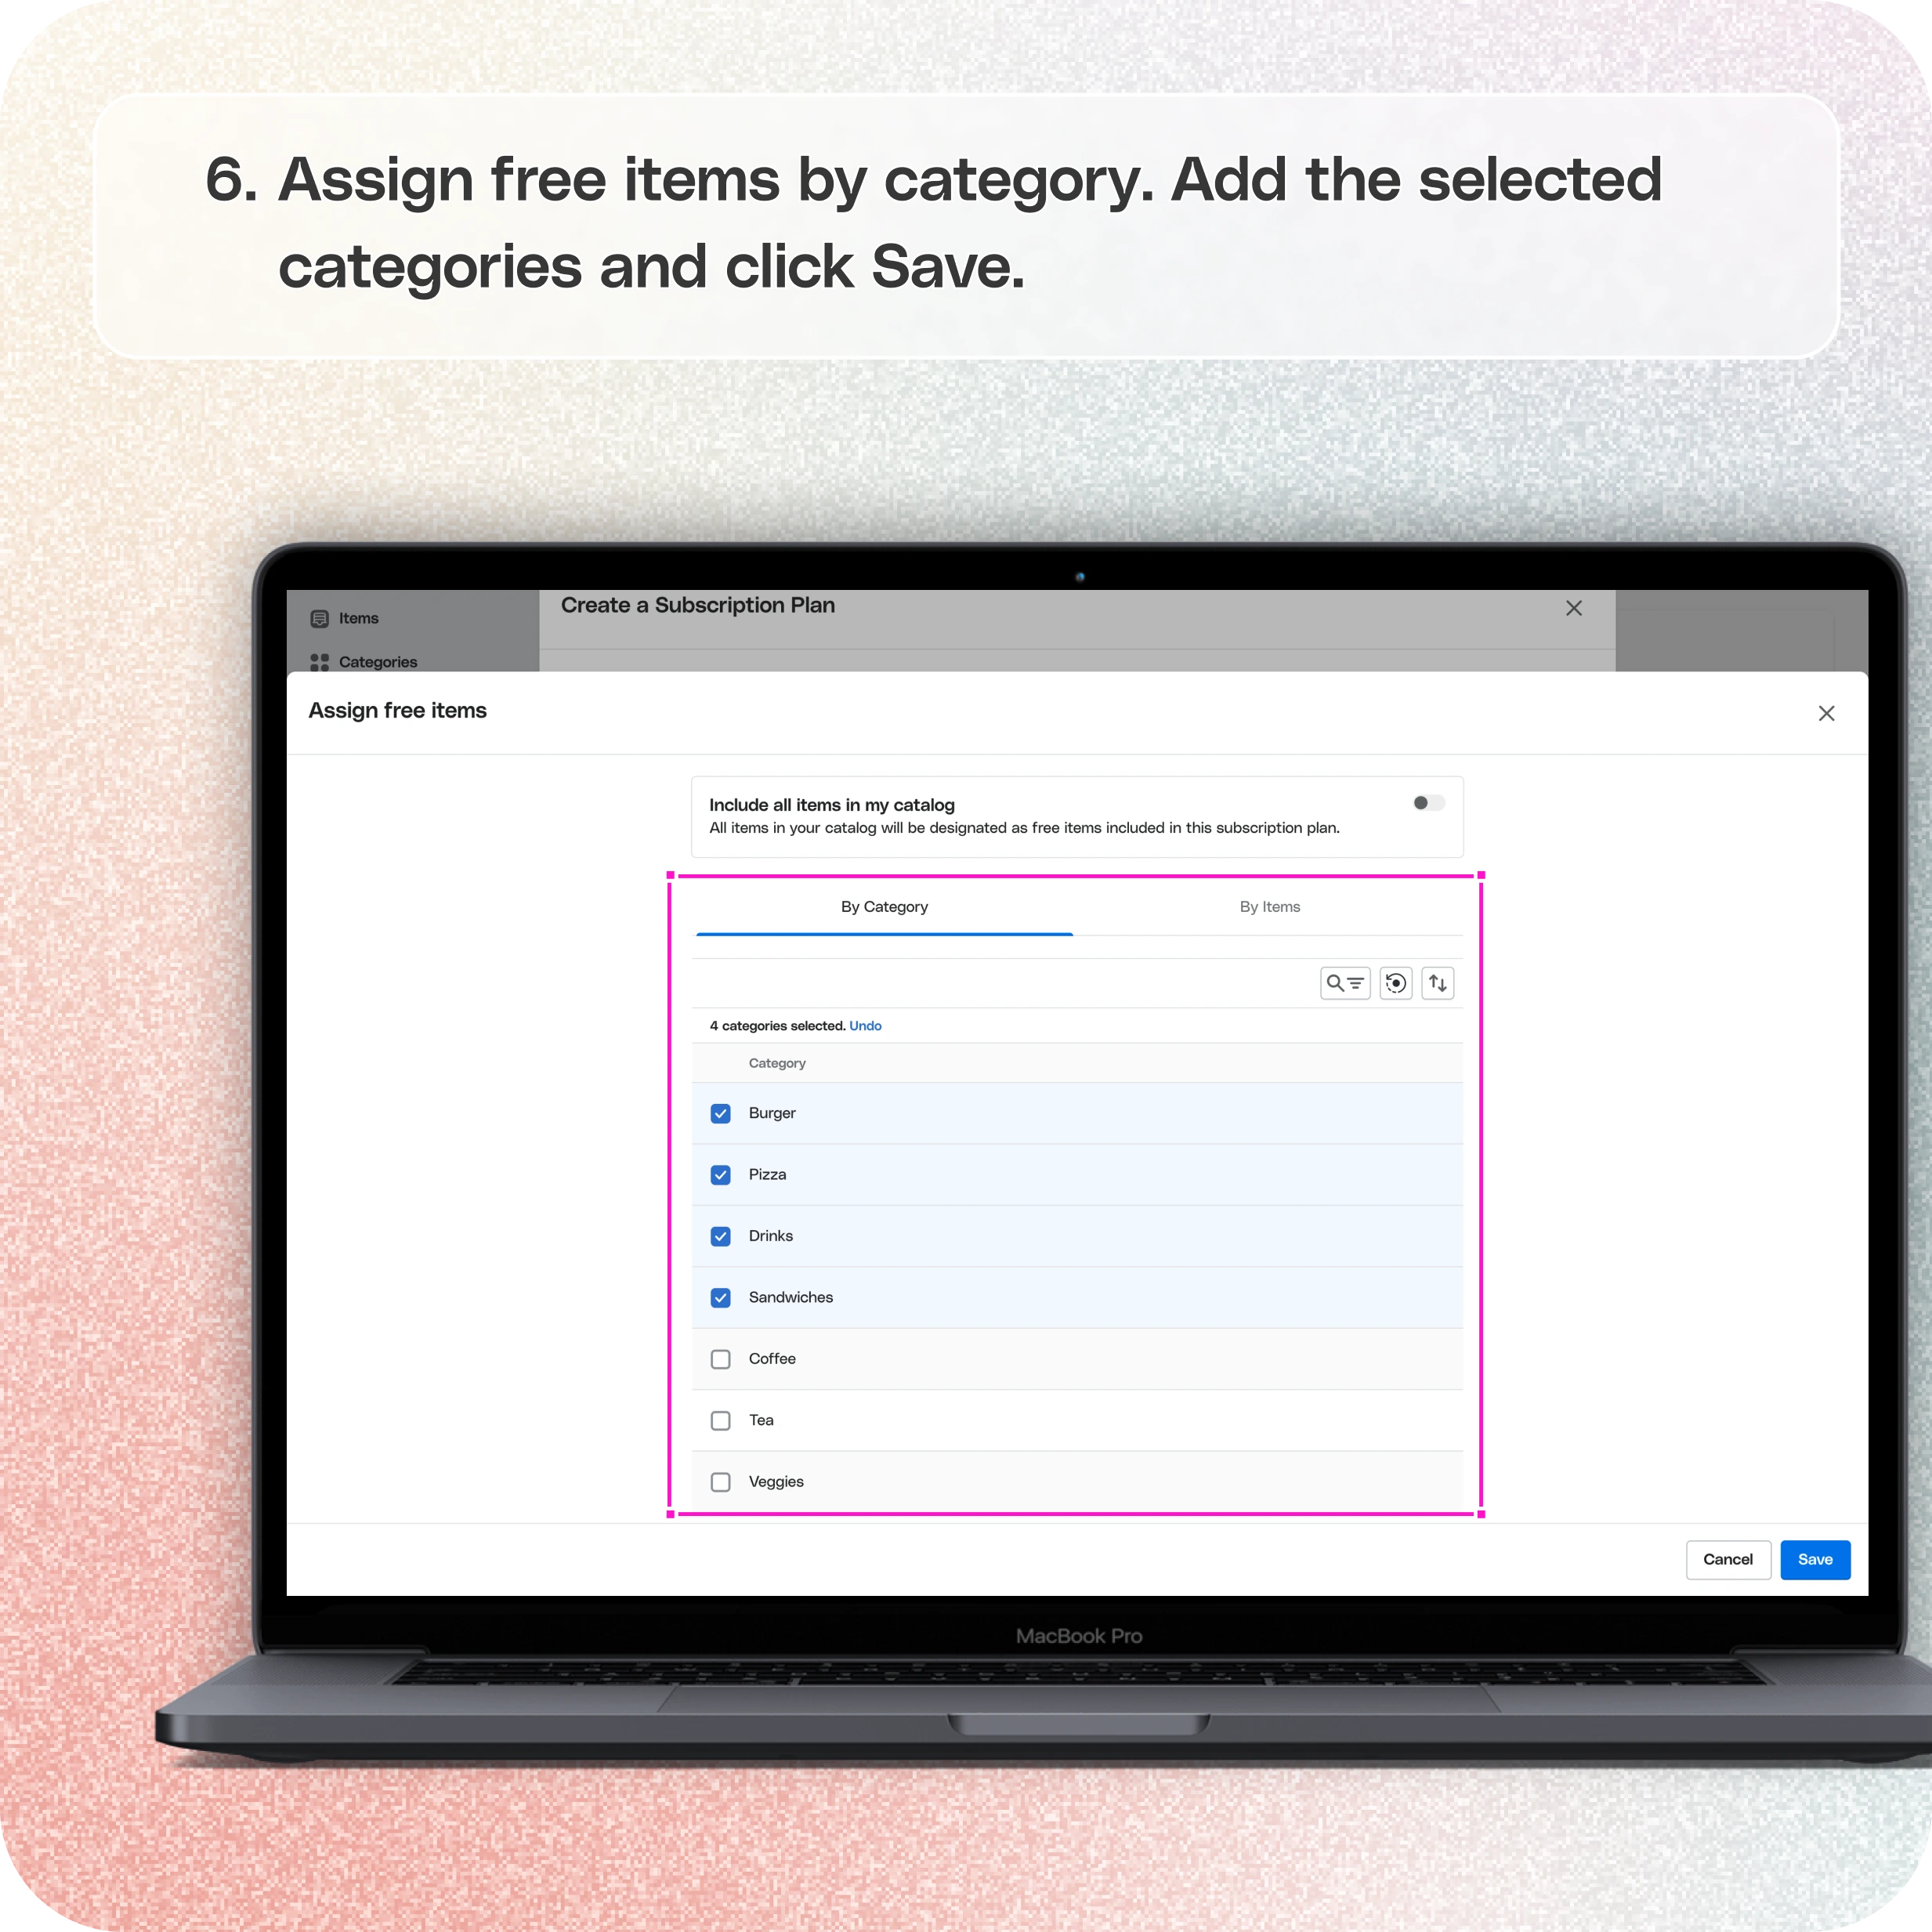
- Free Items by Category
- From the Categories section, select the categories where free items will be available.
- Define the number of free items per category and the duration the offer is valid.
- Add the selected categories and click Save.
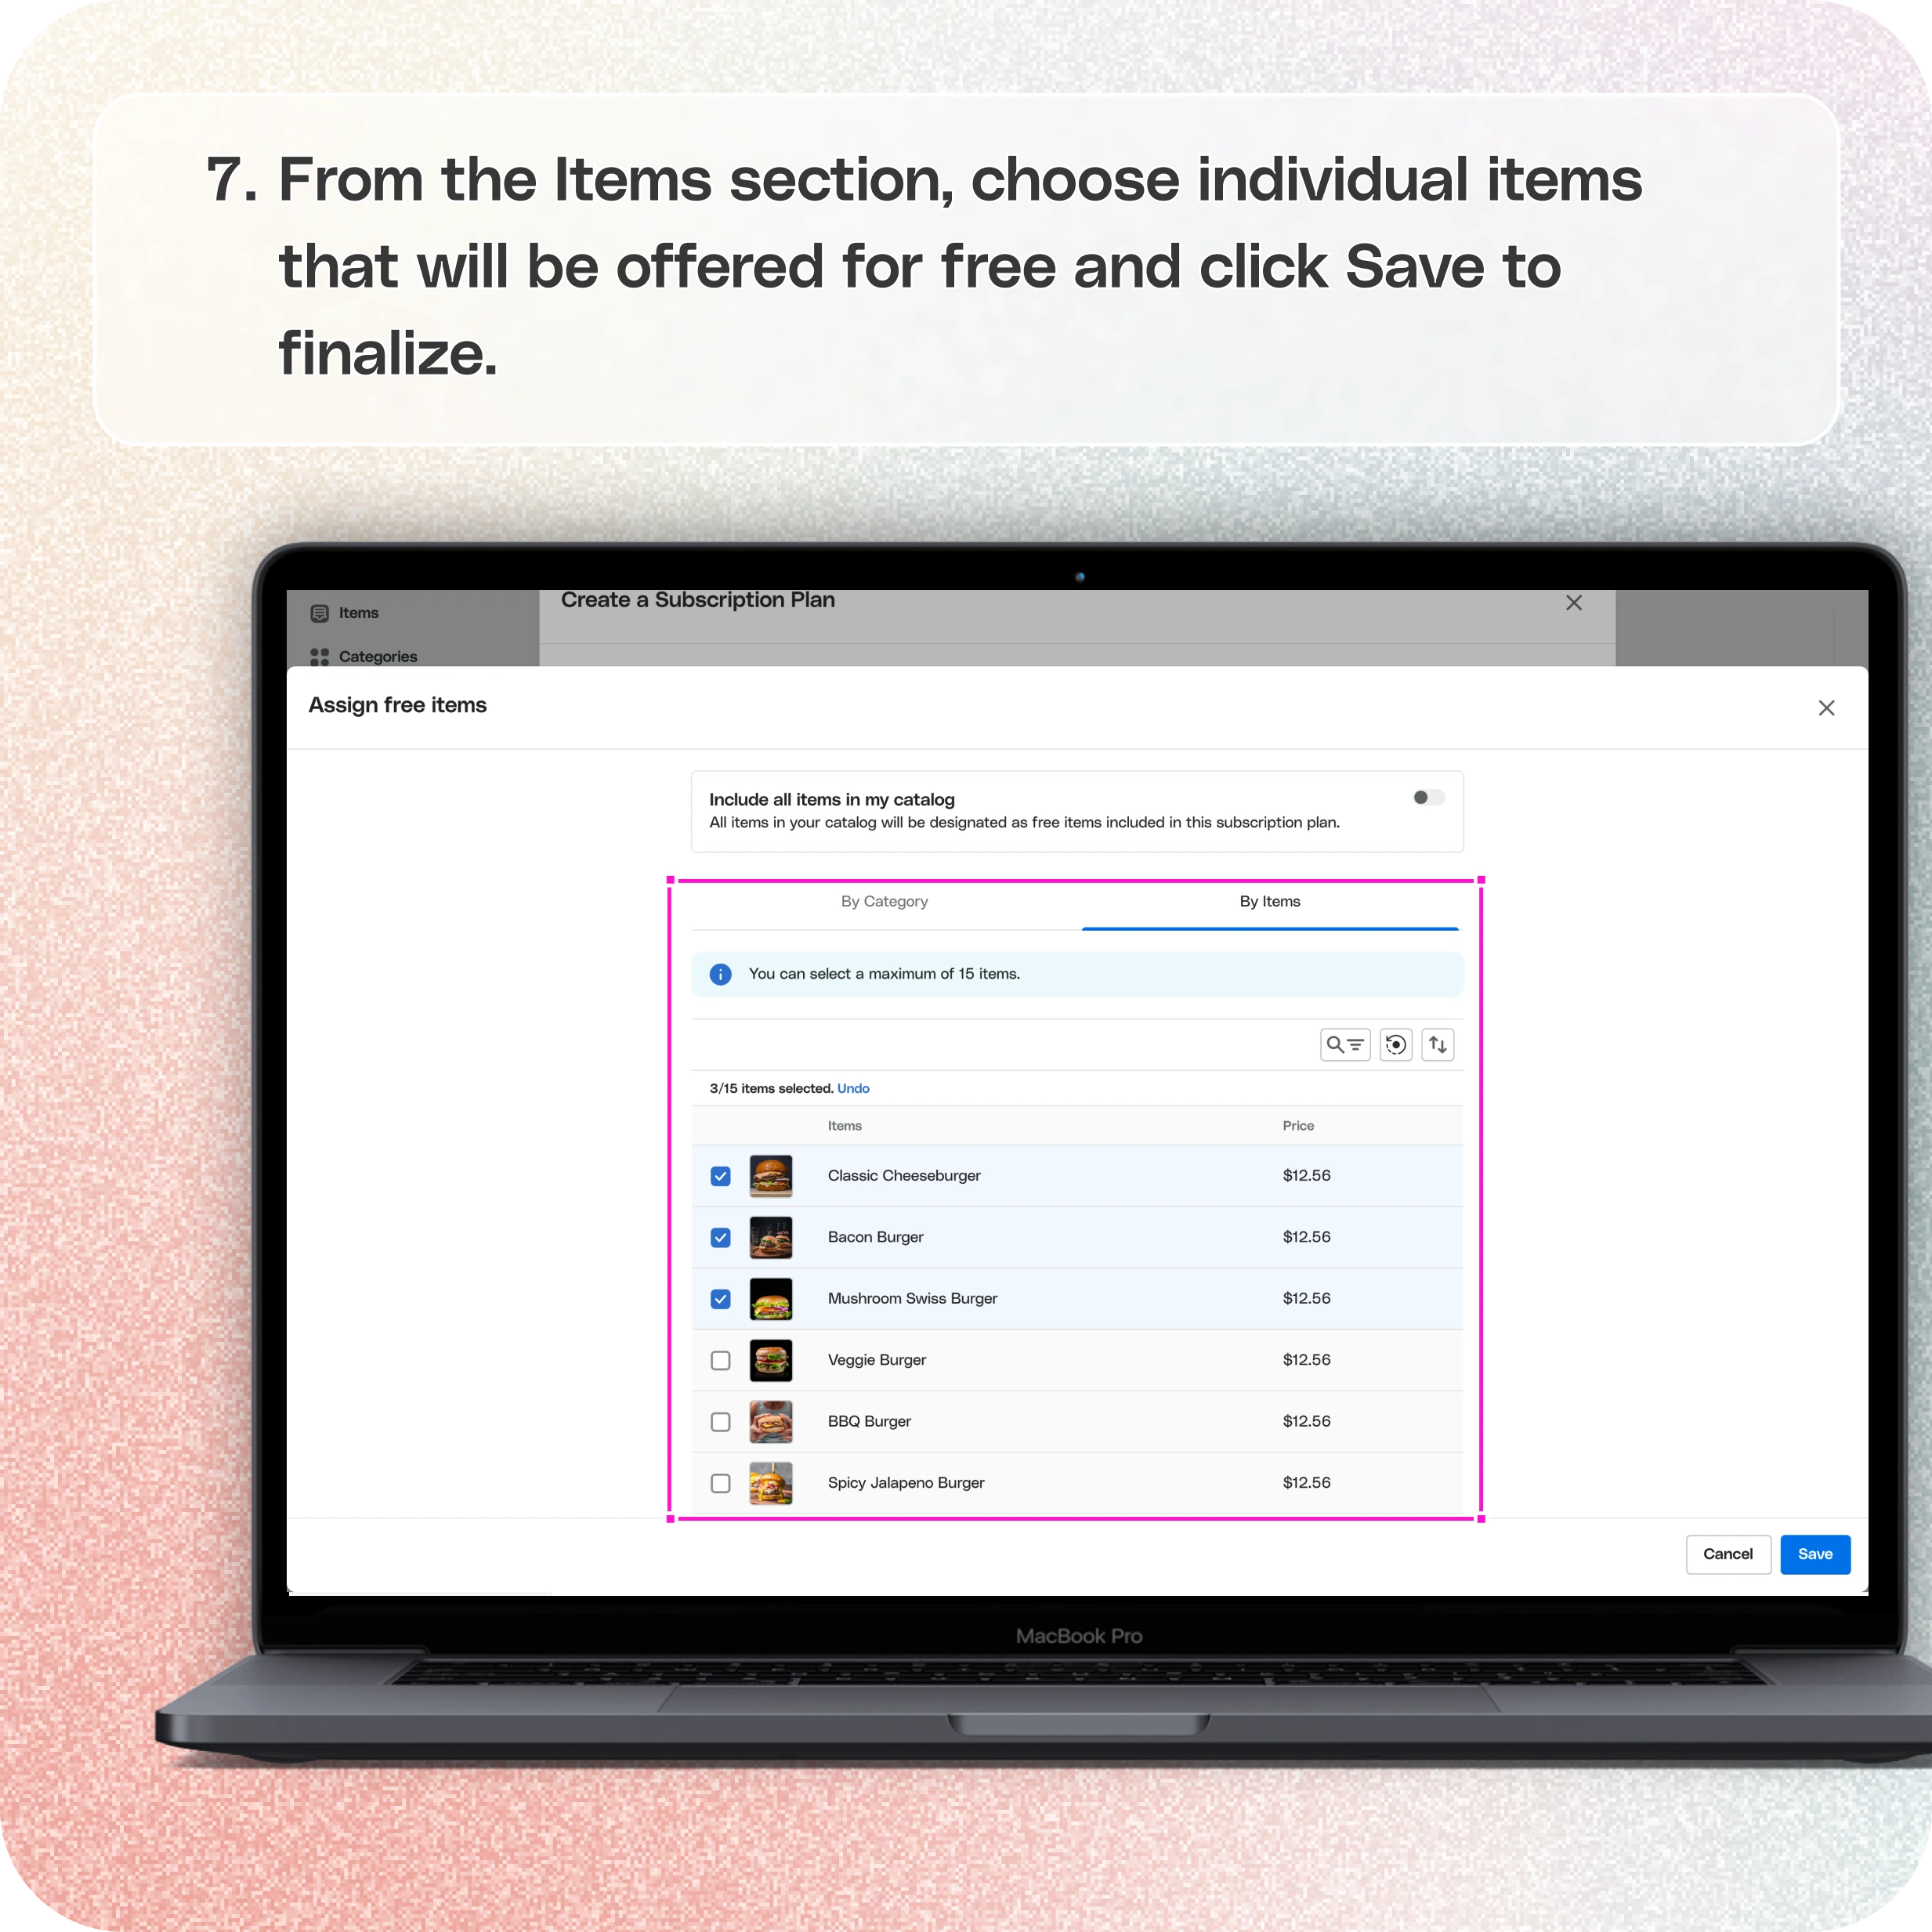
- Free Items by Individual Items
- From the Items section, choose individual items that will be offered for free.
- Specify the quantity of free items, set any limits, and click Save to finalize.
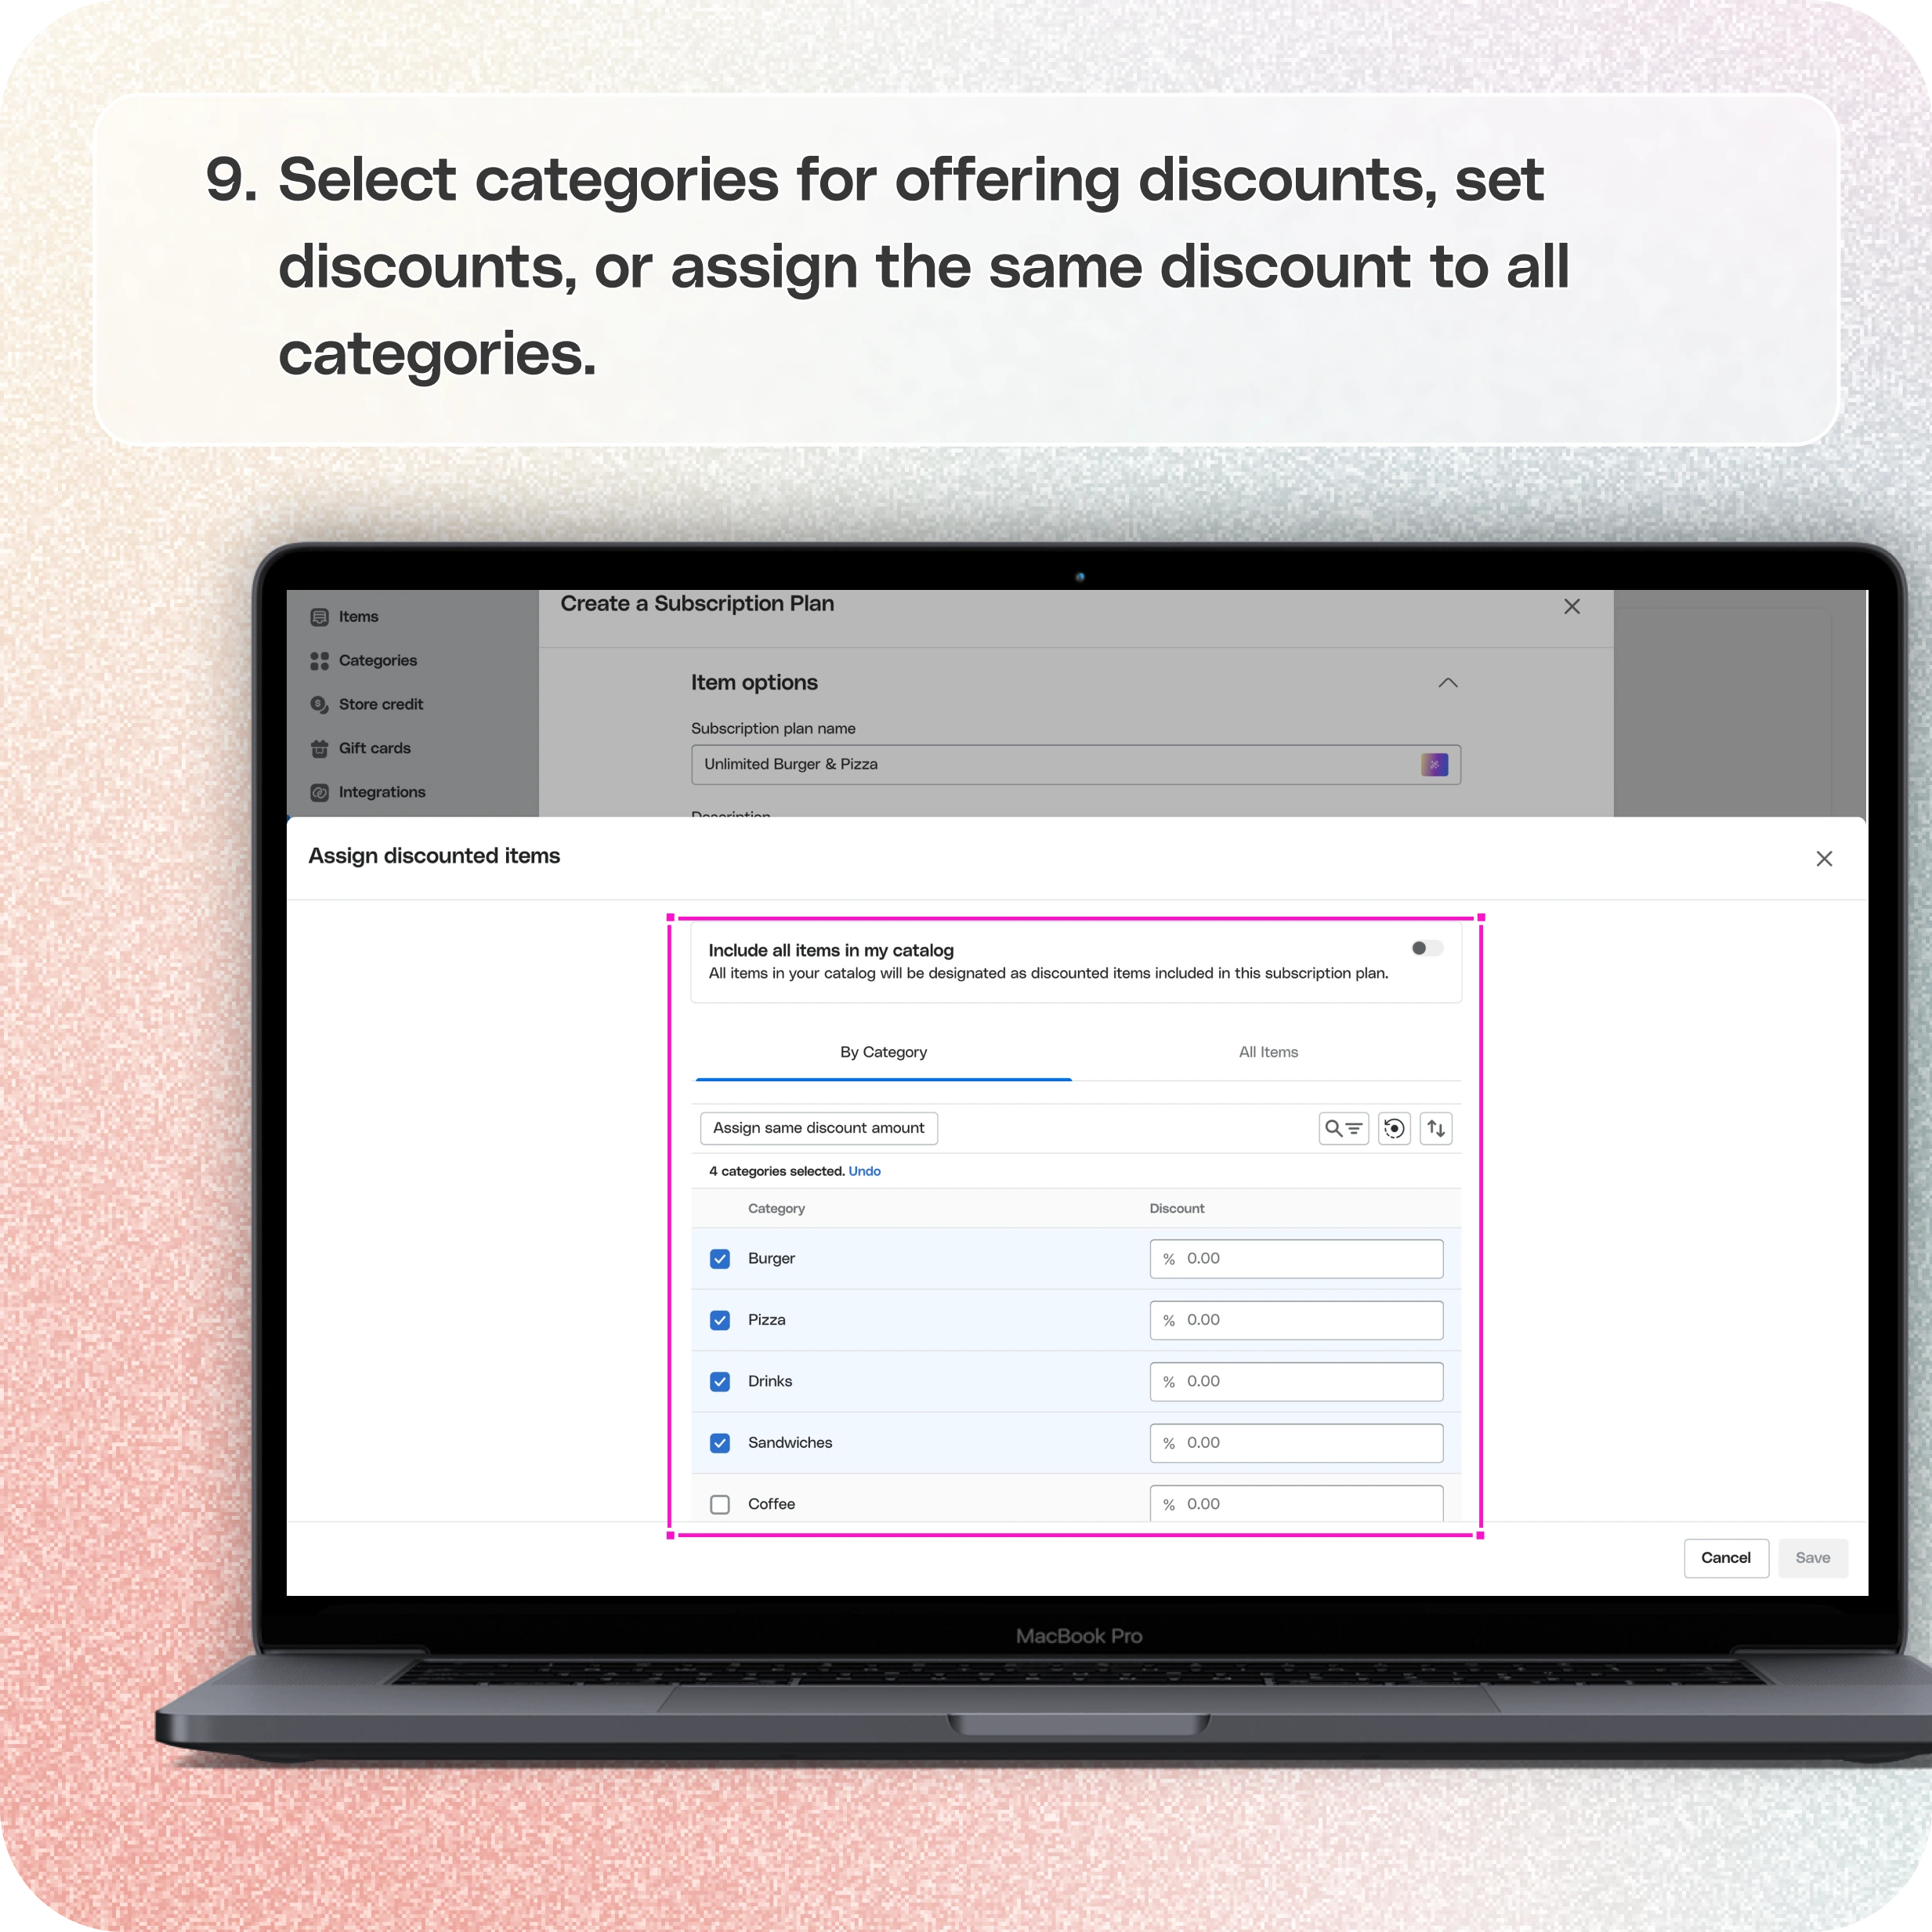
- Discounted Items by Category
- In the Categories section, select the categories eligible for discounts.
- Set the discount percentage or fixed amount, and define the duration.
- Add the selected categories and click Save.
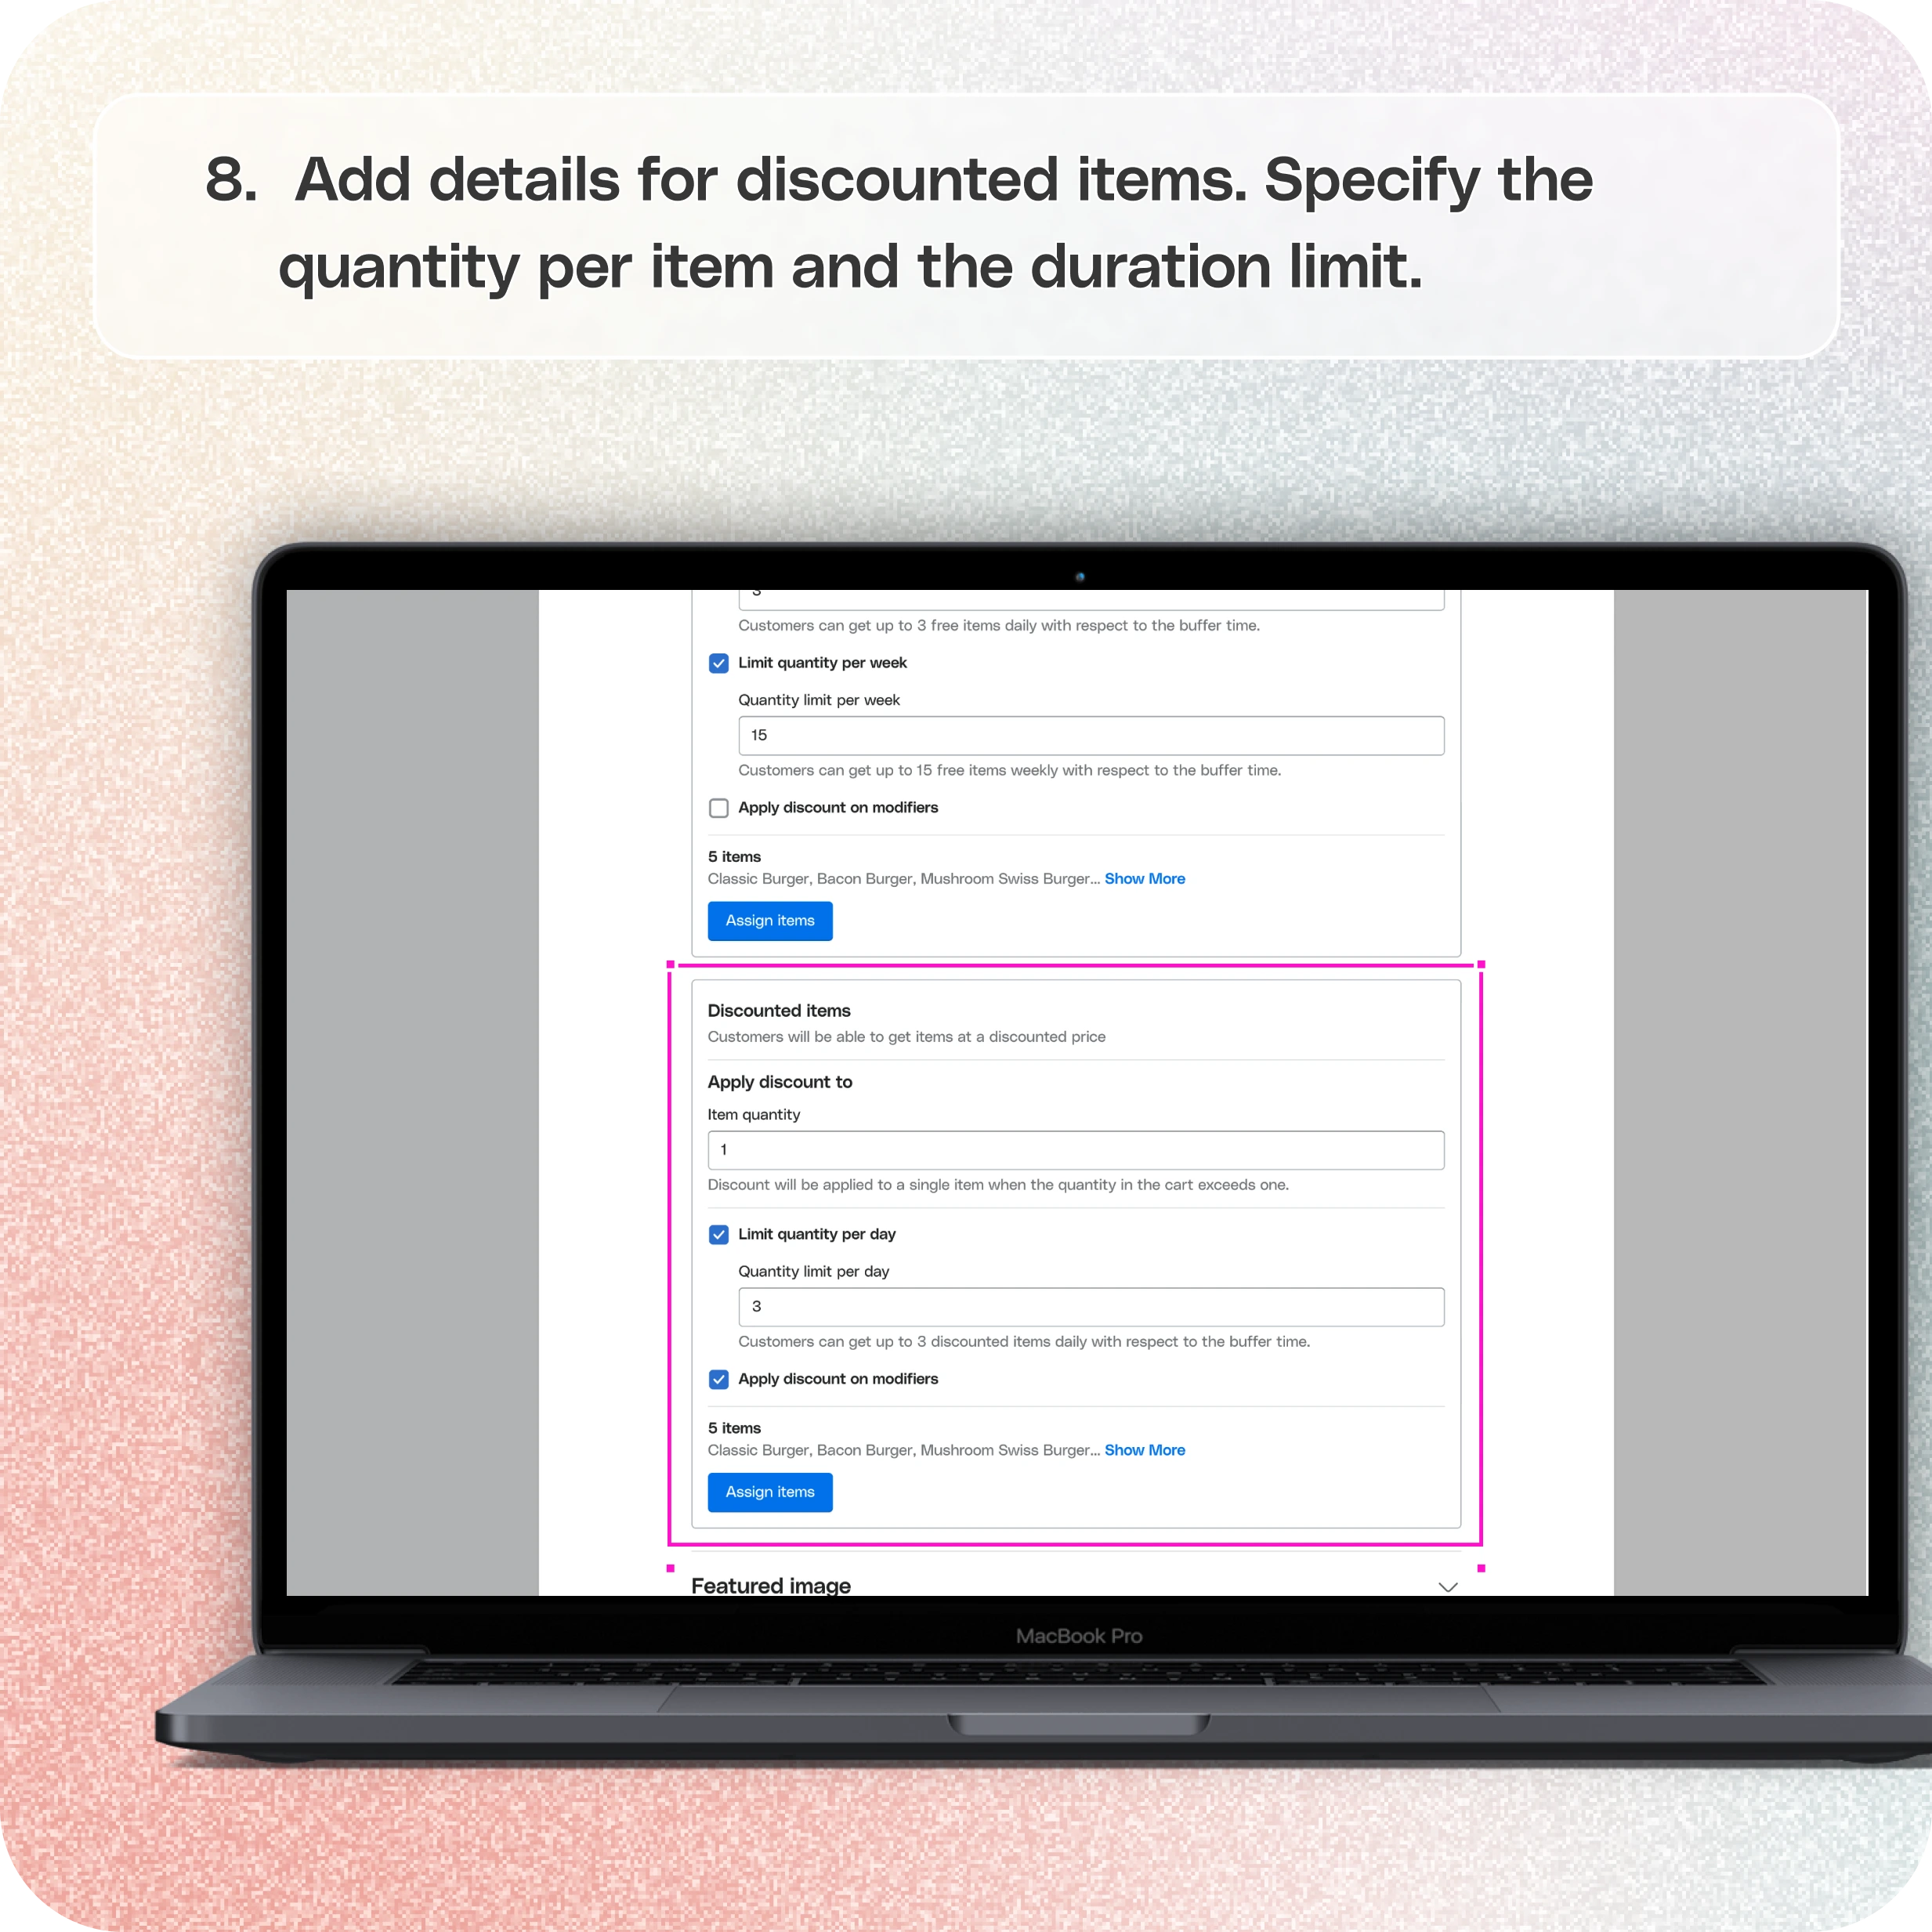
- Discounted Items by Individual Items
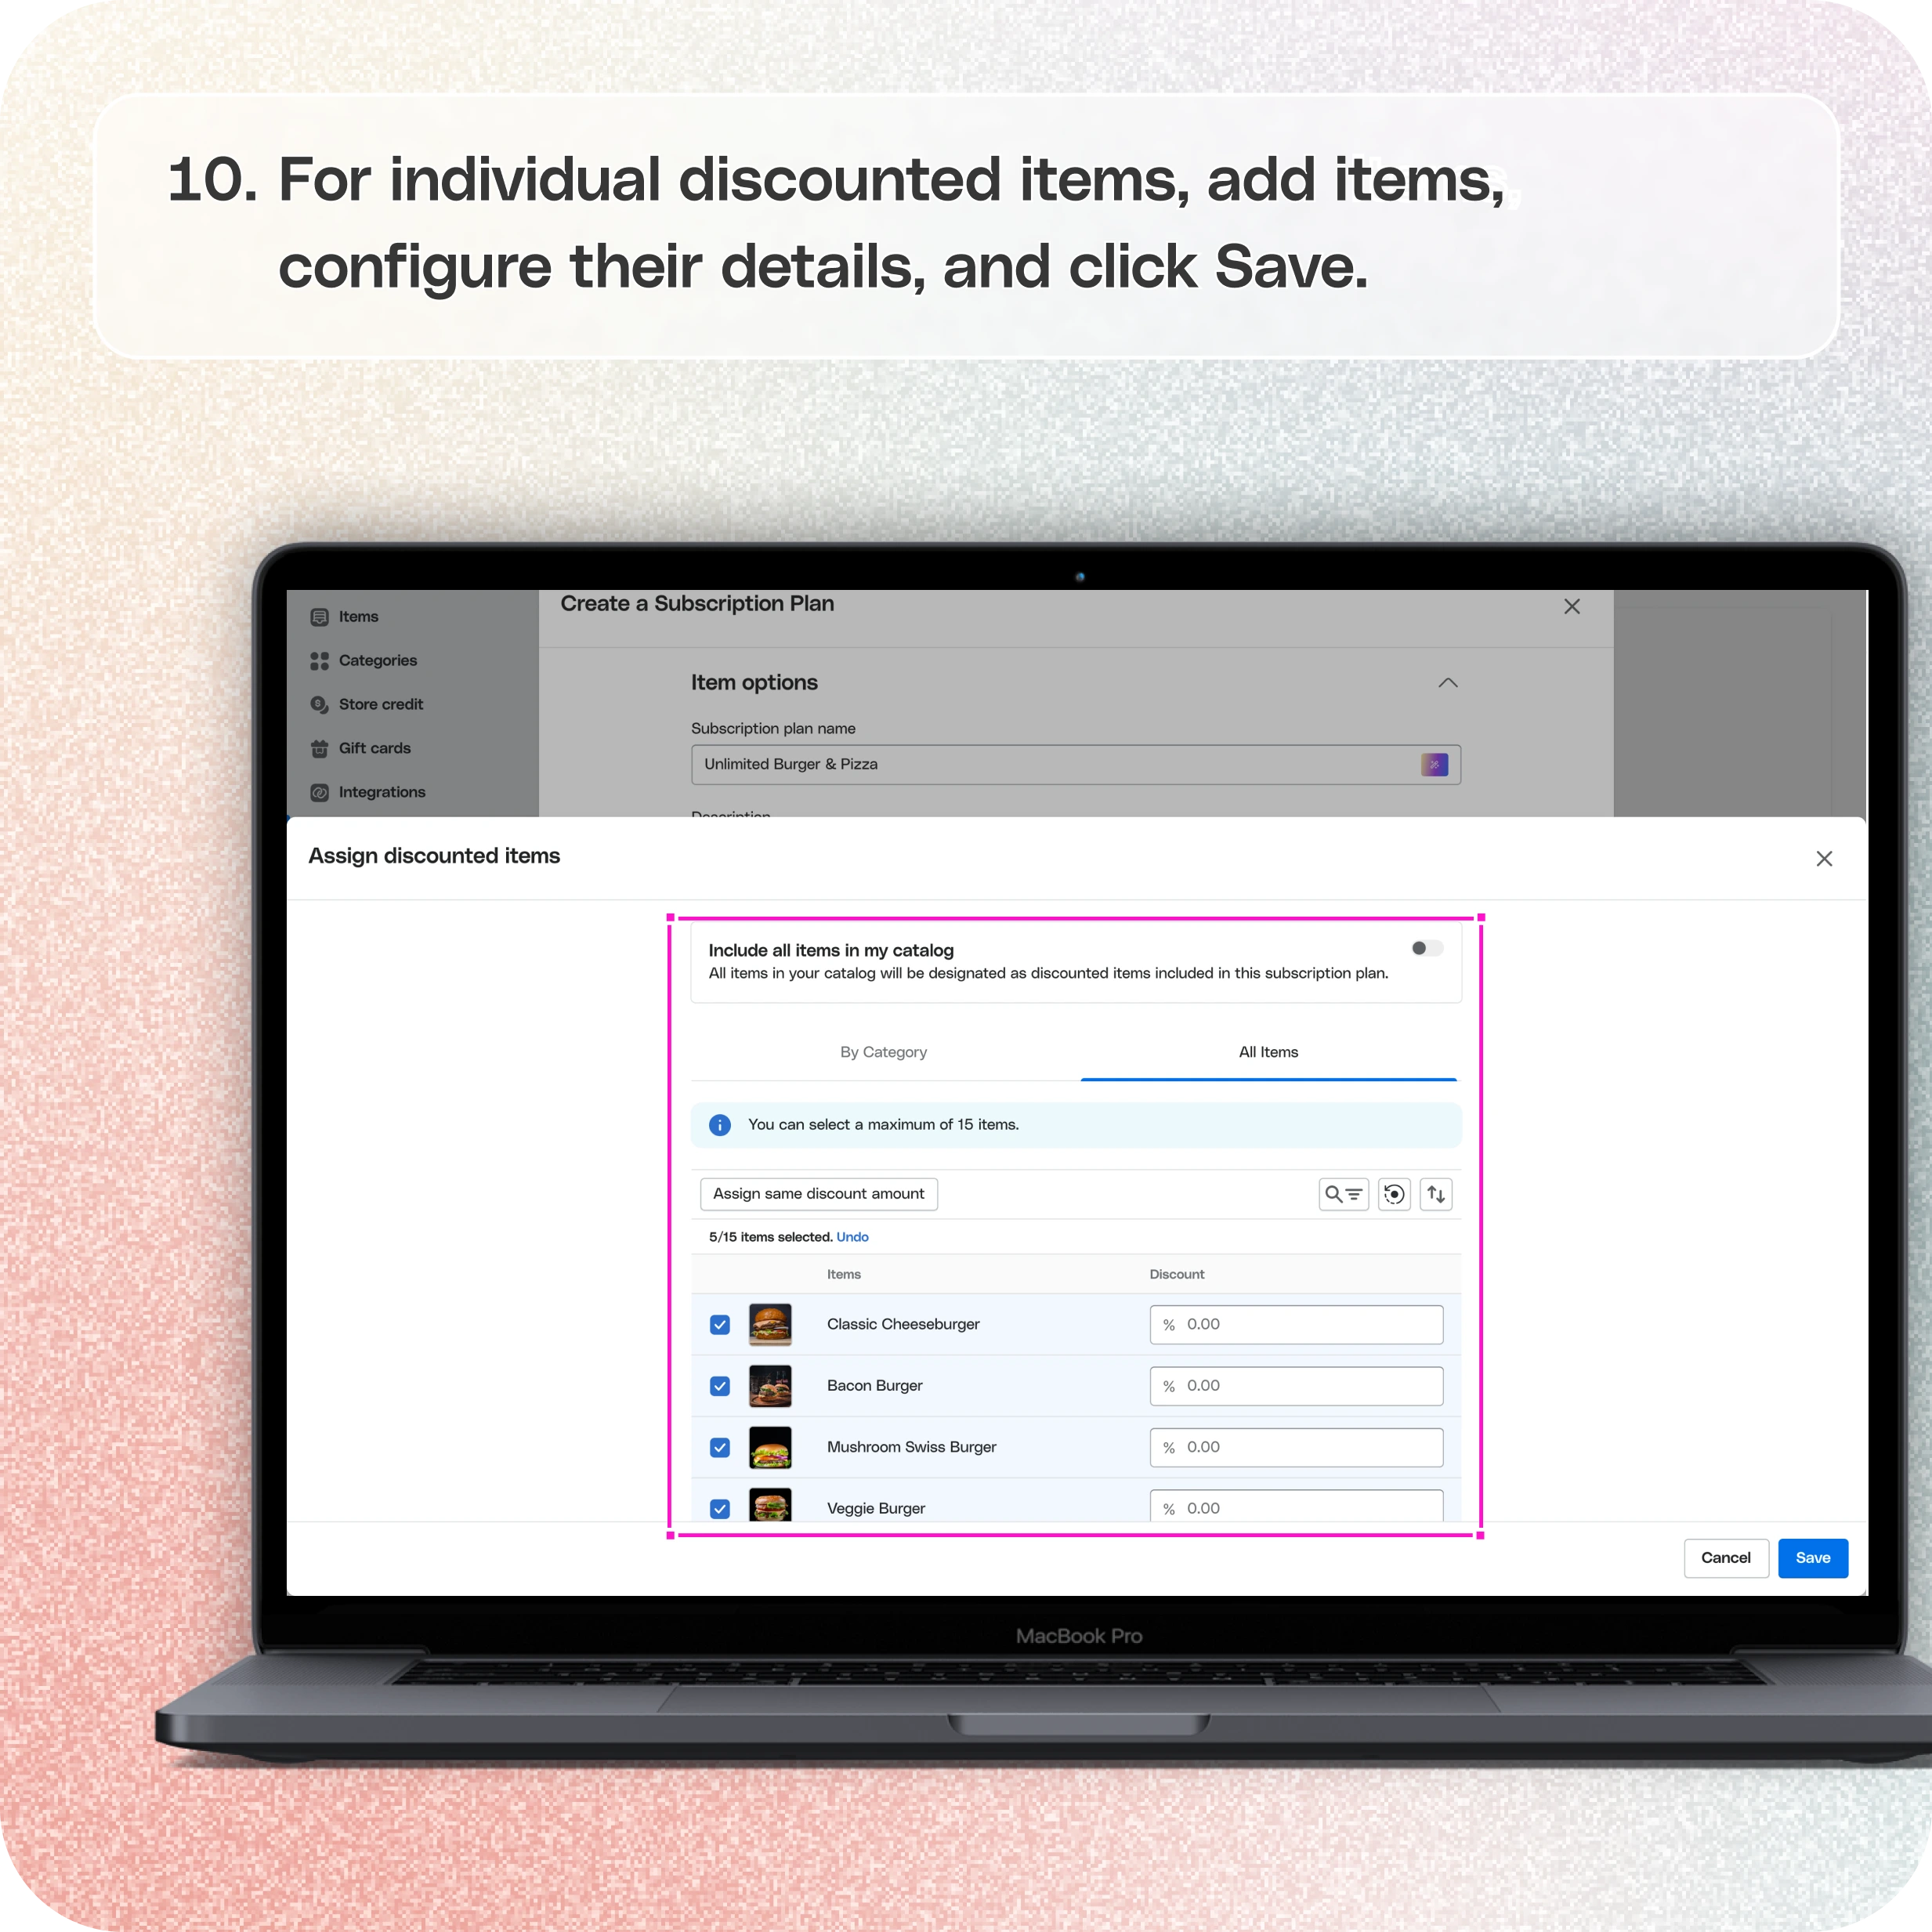
- From the Items section, select specific individual items to offer discounts on.
- Define the discount value (percentage or fixed amount) and the duration of the offer.
- Add the items, configure their details, and click Save.
- Add Featured Images & Additional Settings
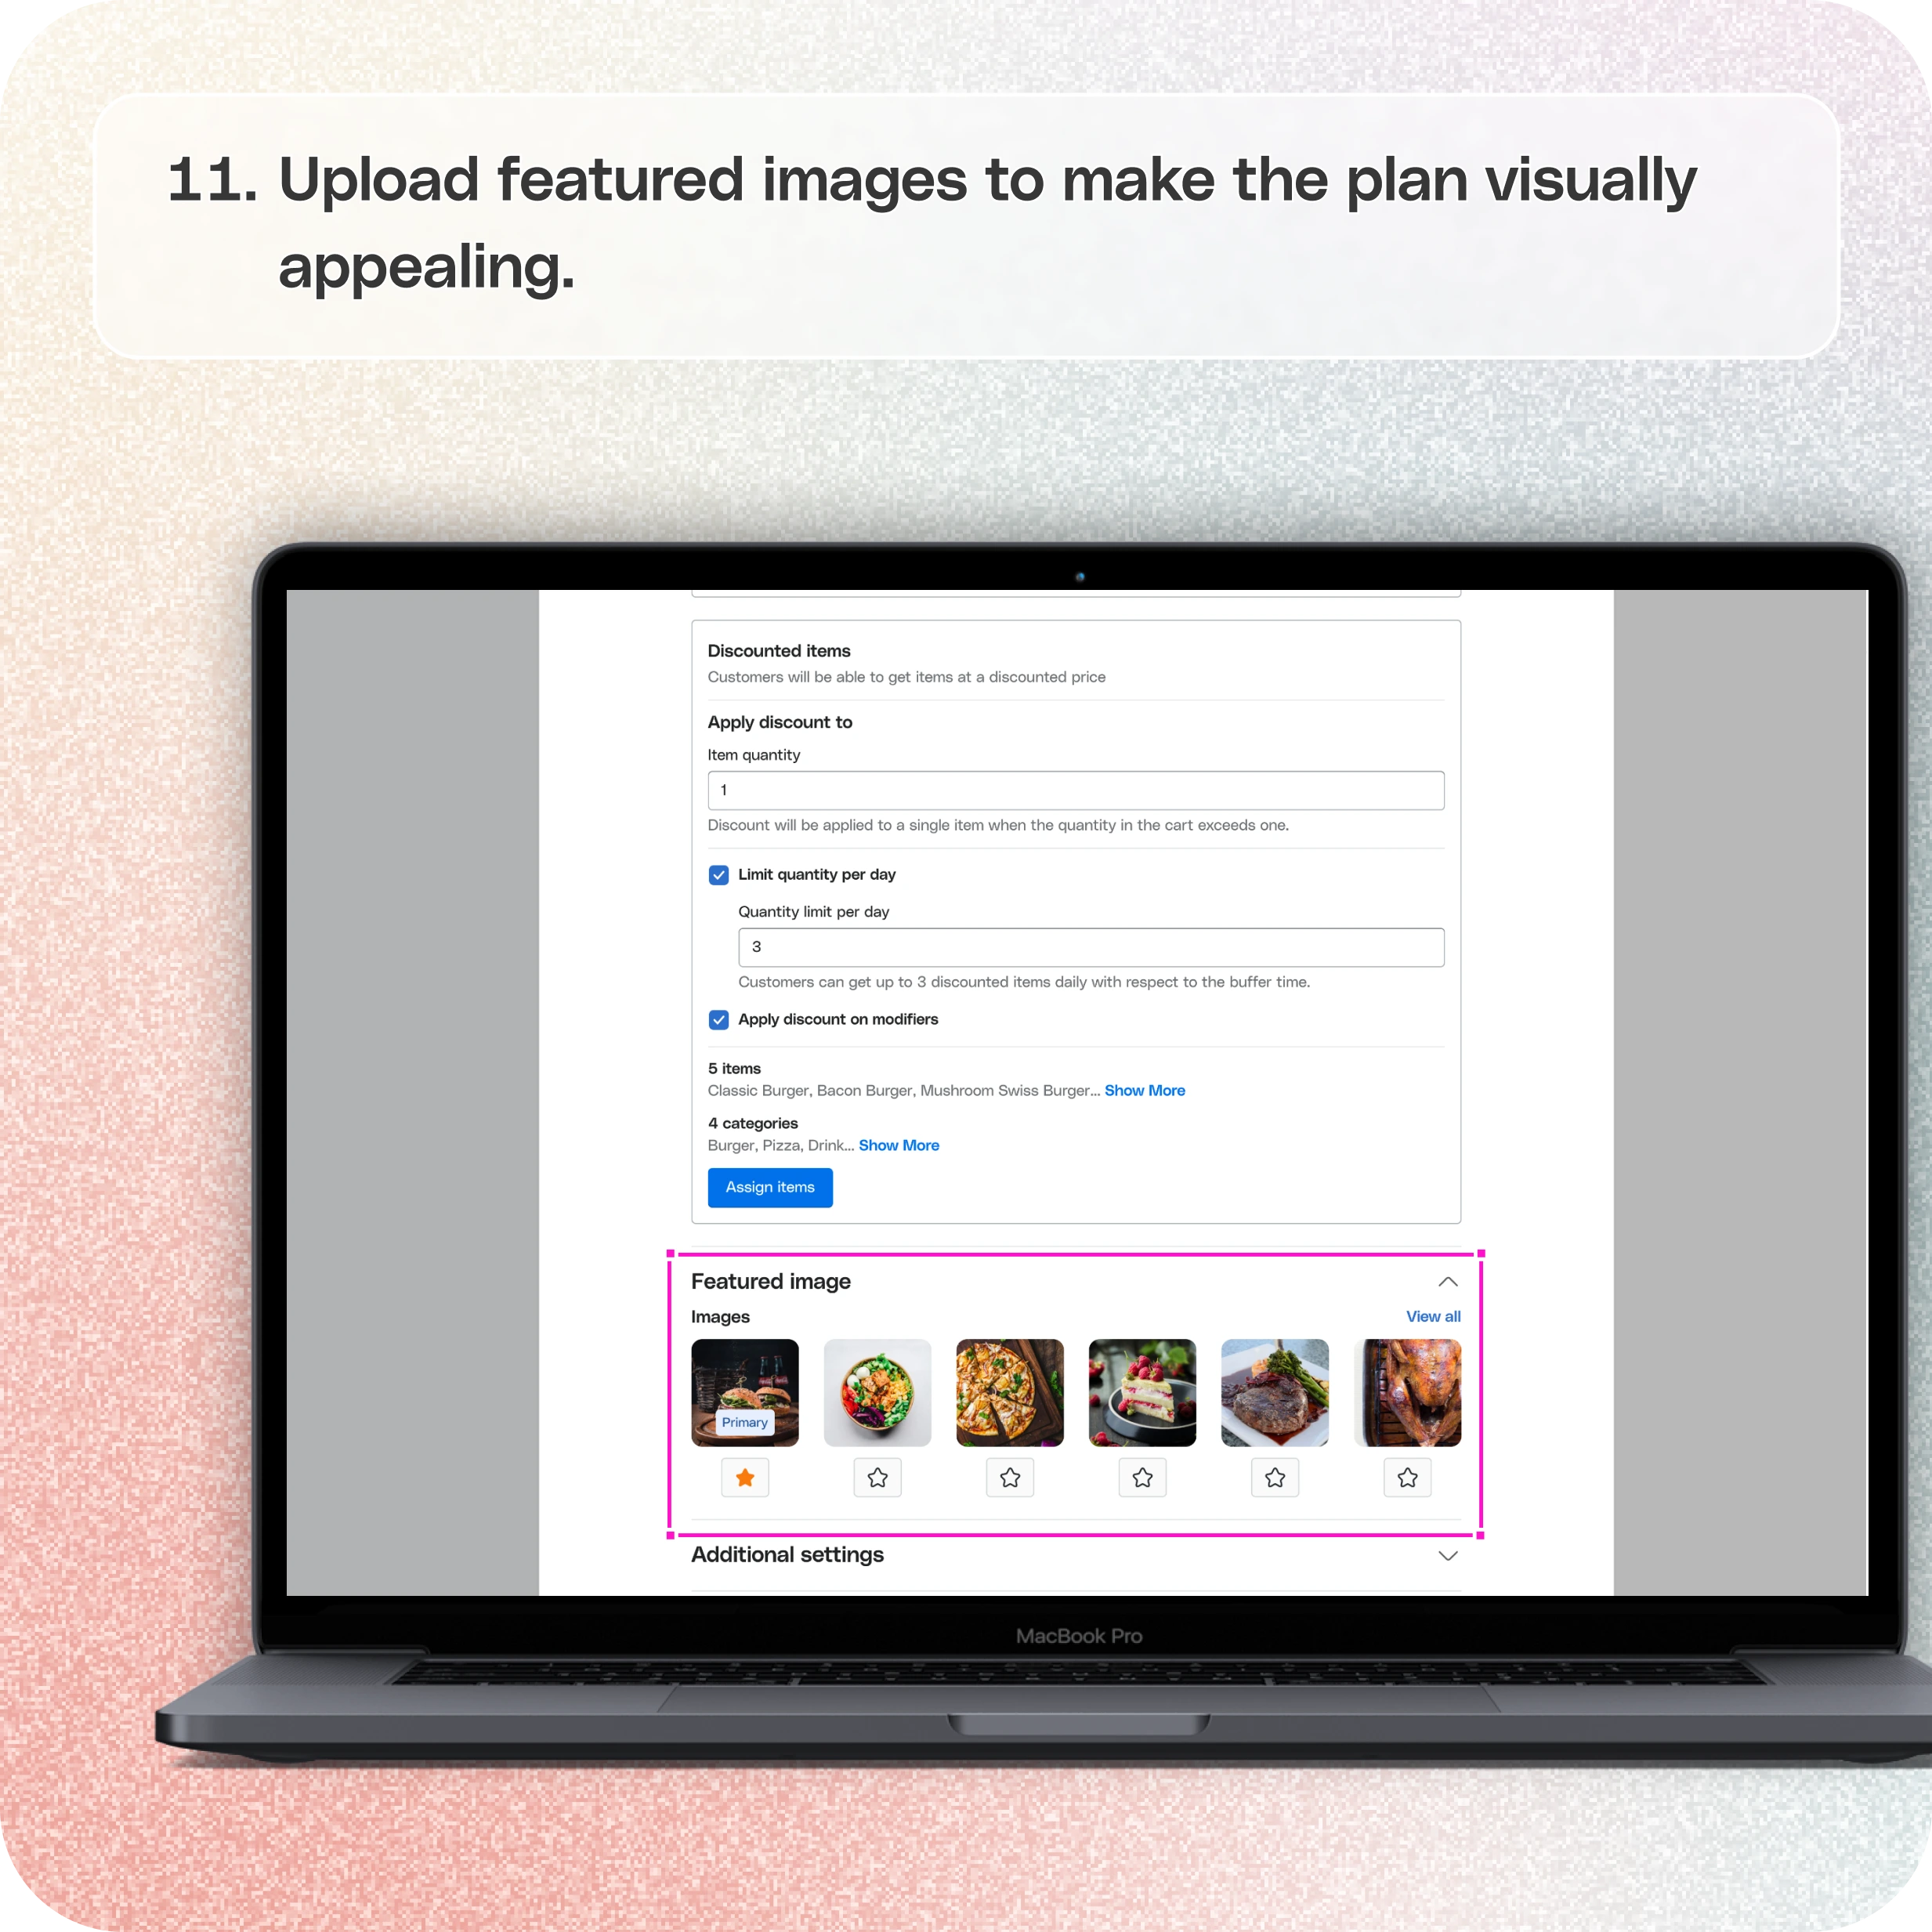
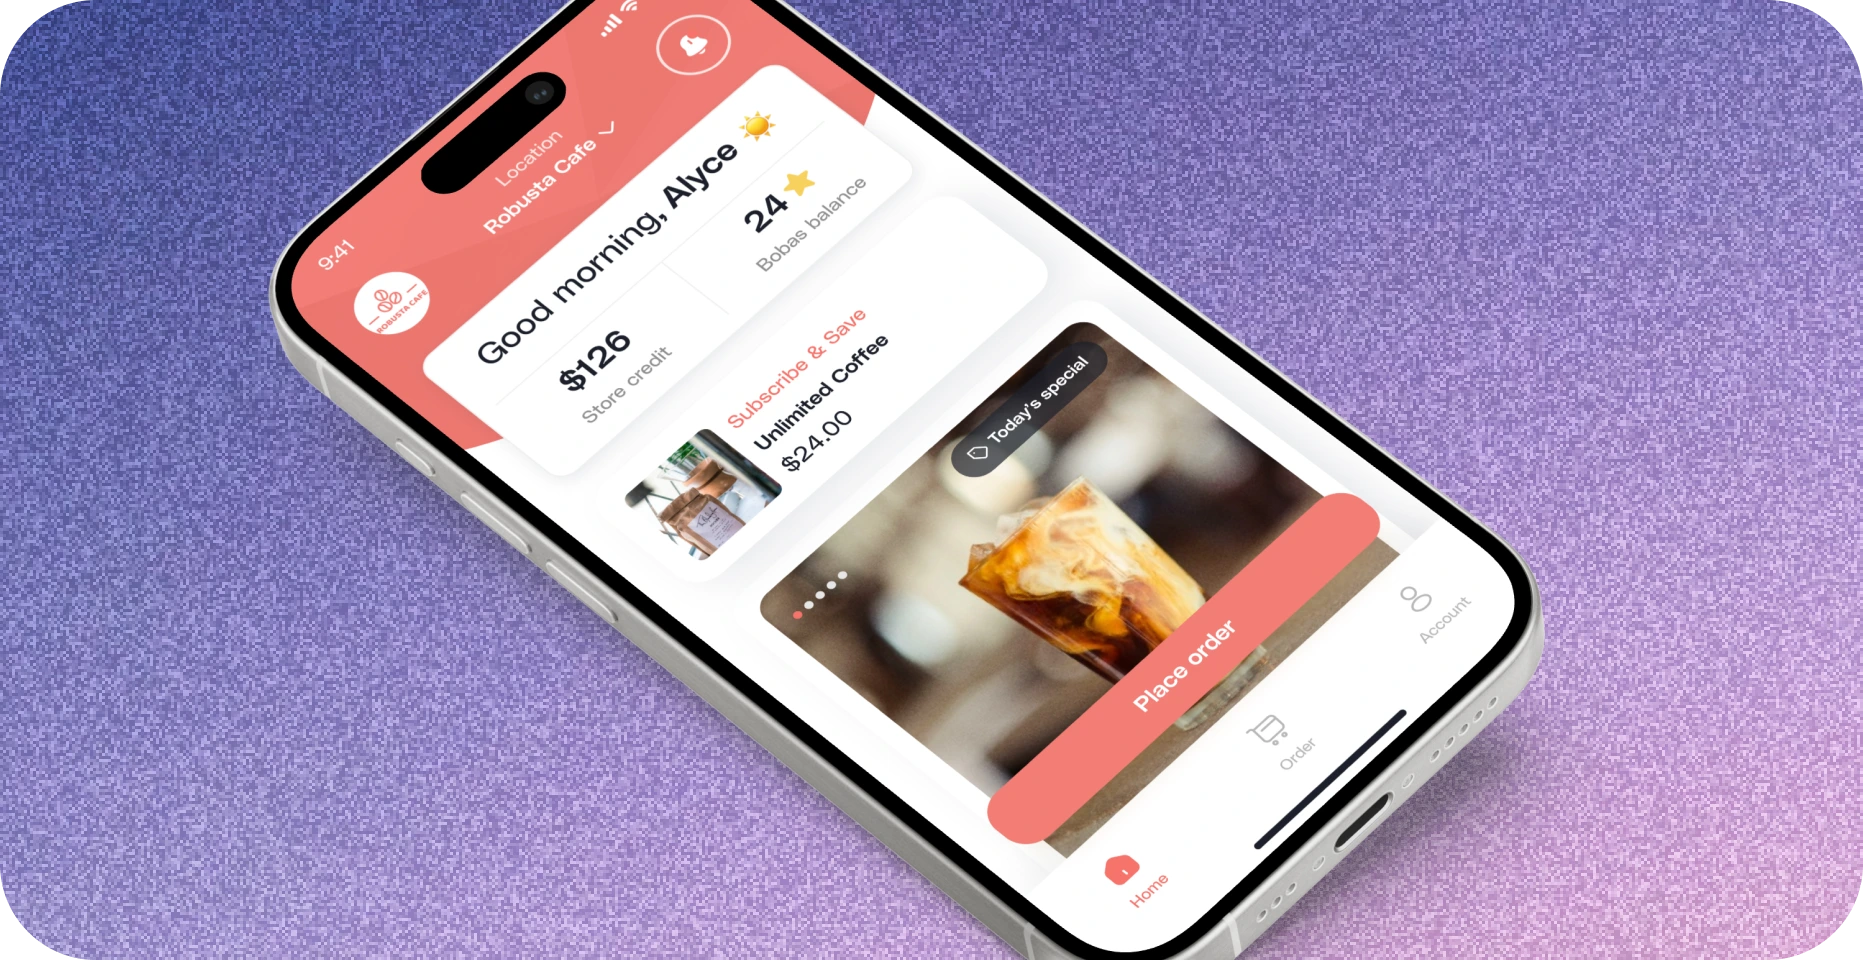
- Upload a featured image for your subscription plan to make it more attractive.
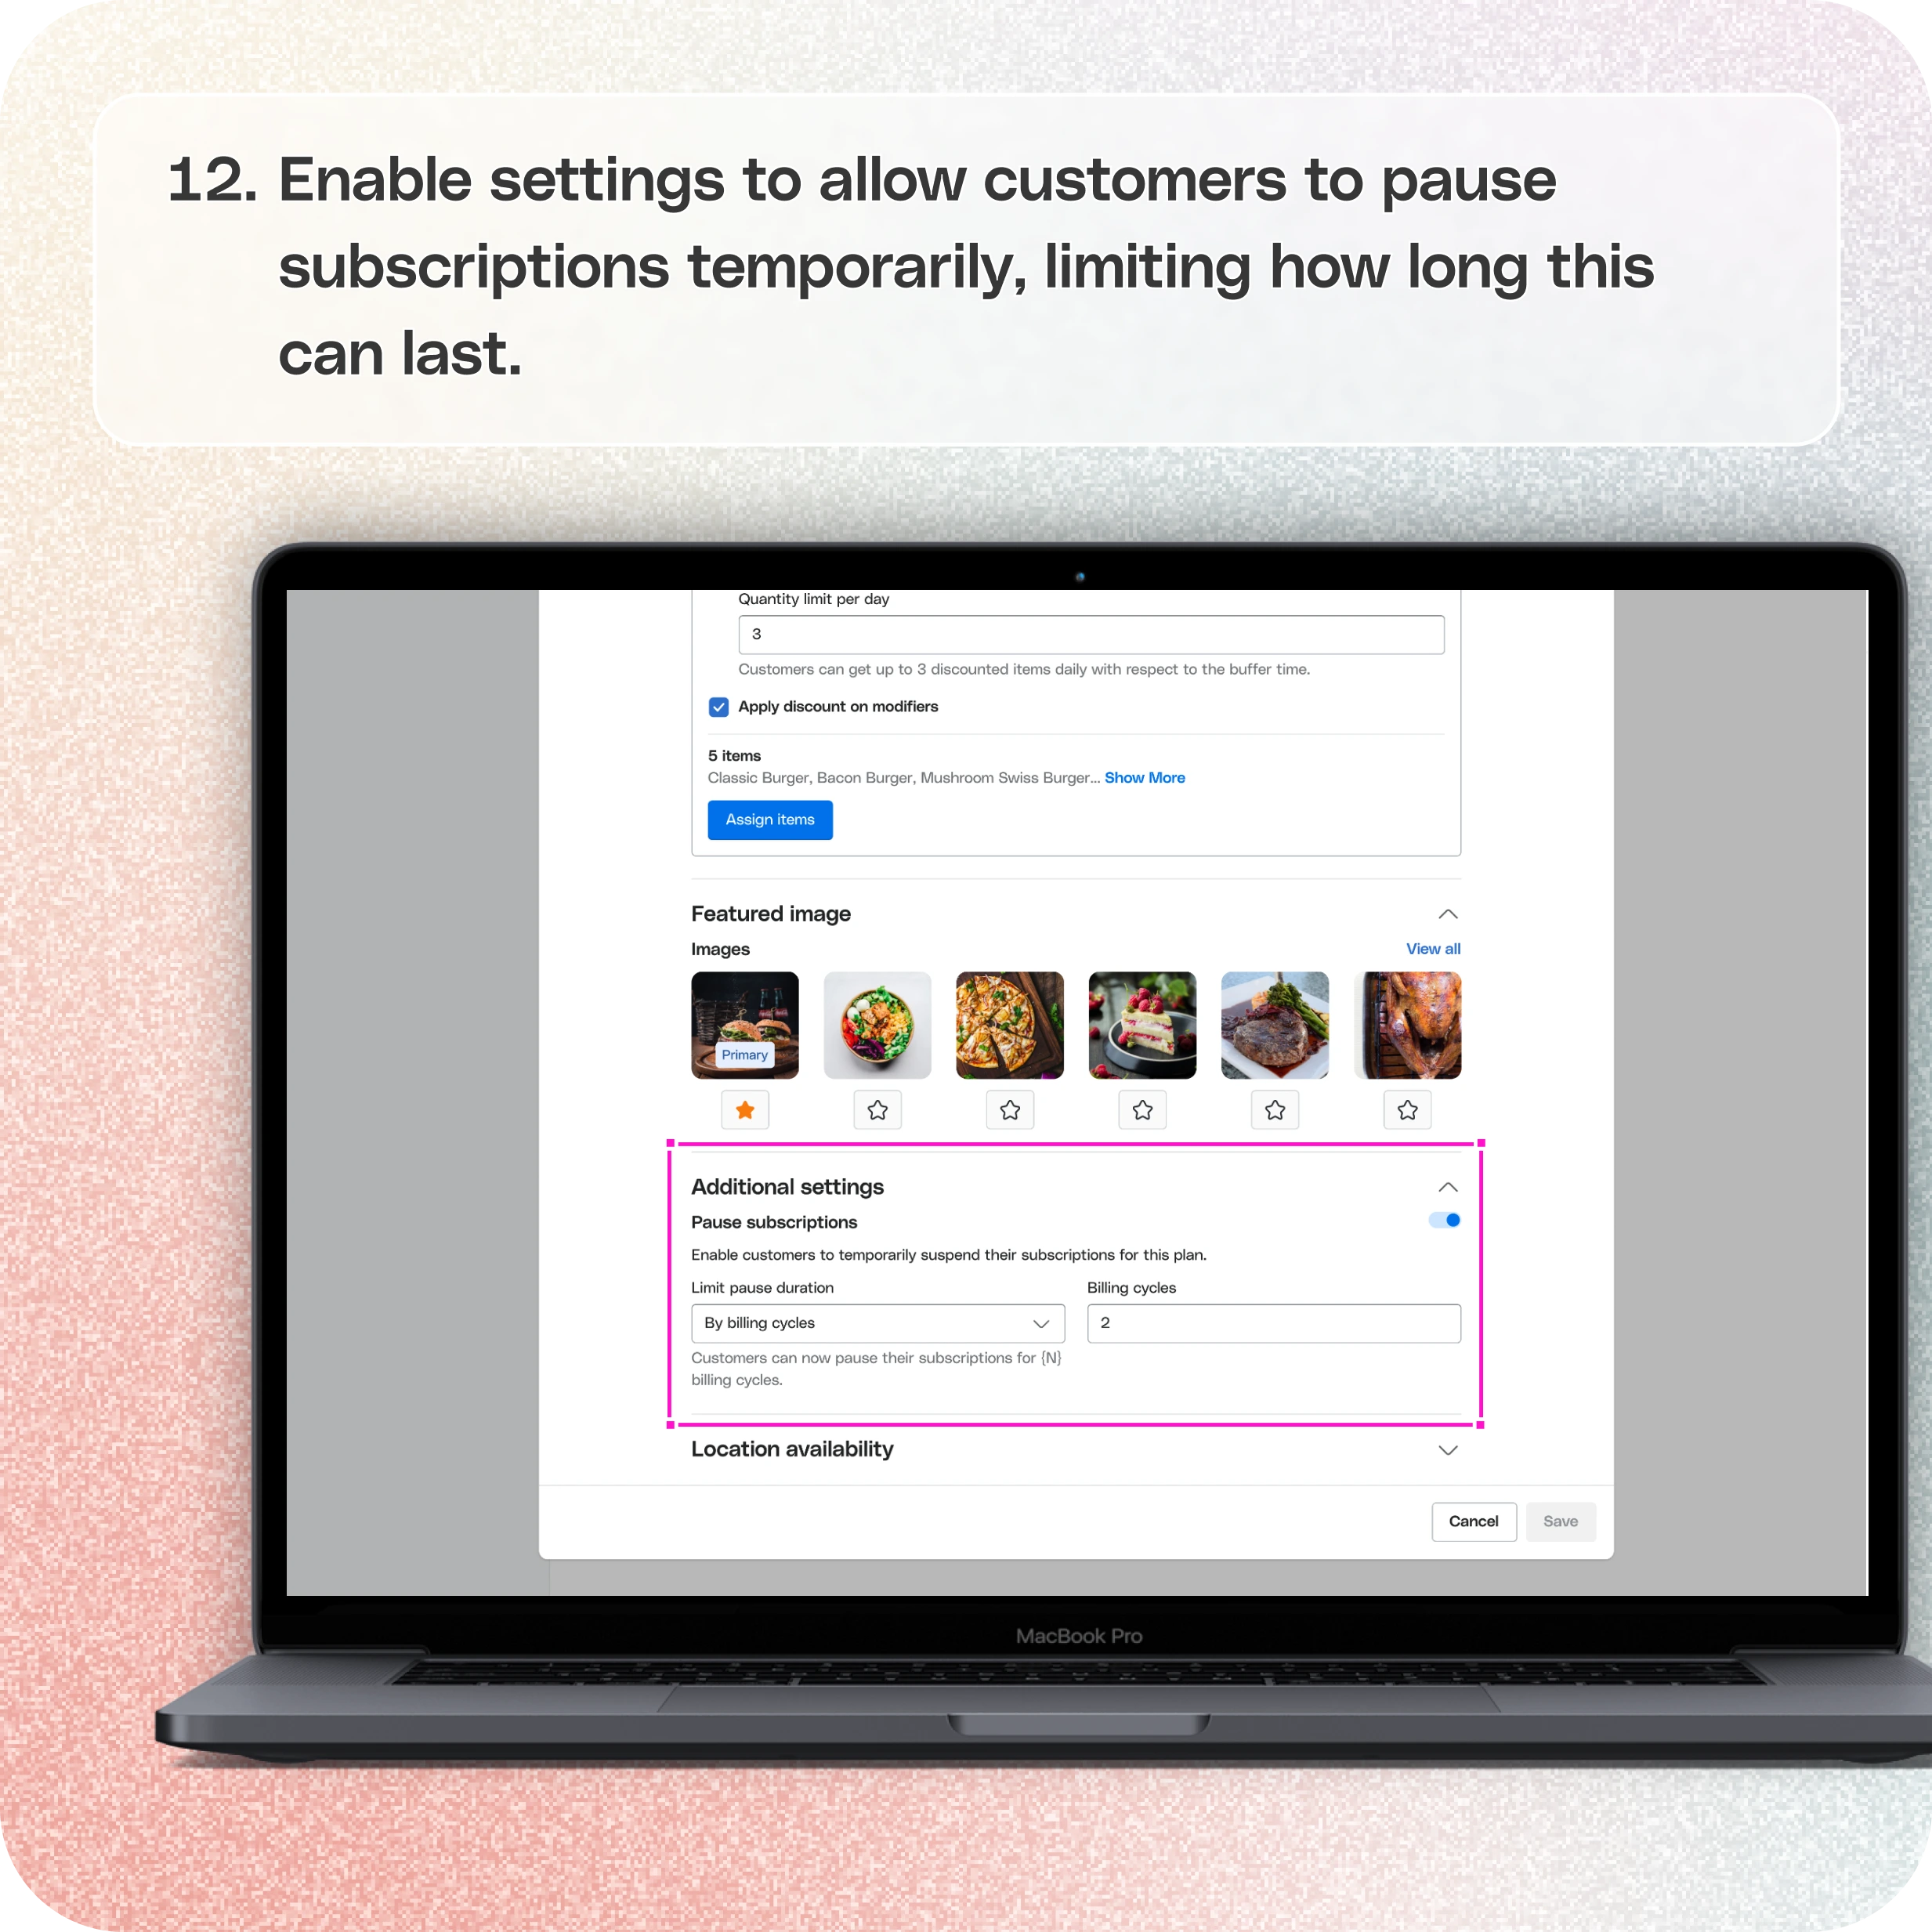
- Enable settings for customers to pause their subscriptions temporarily, specifying the limit for the pause duration.
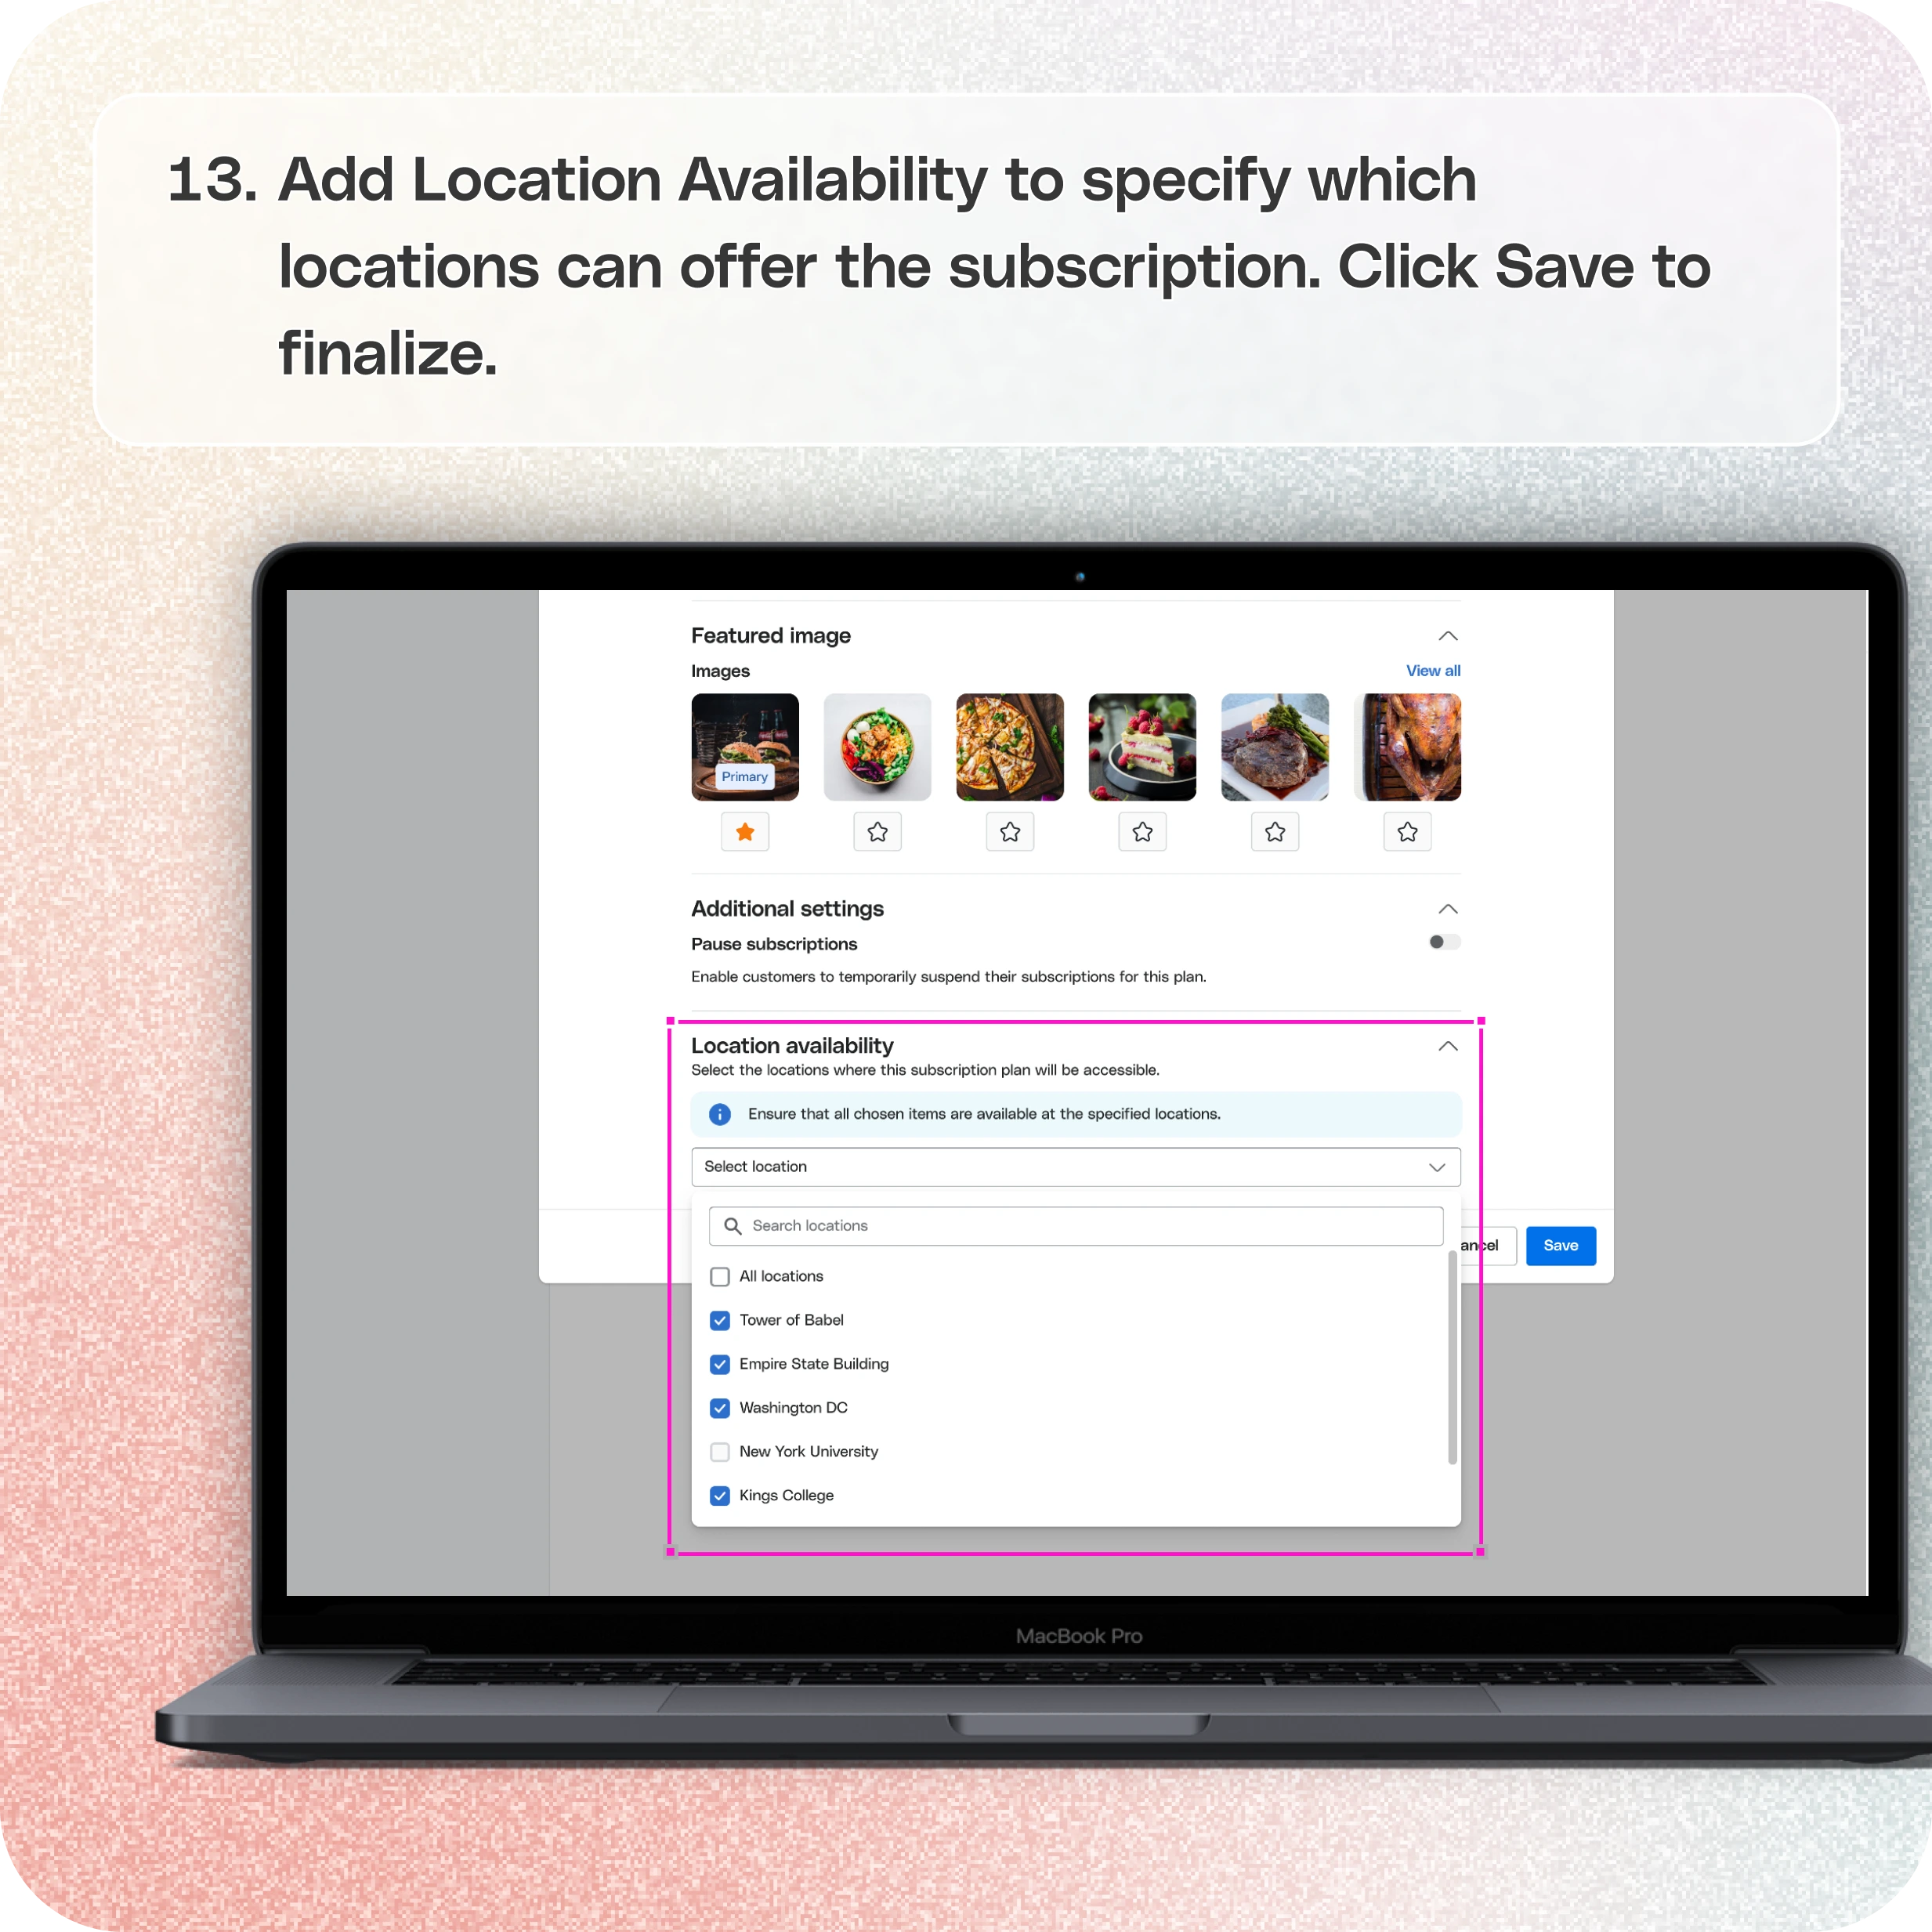
- Assign location availability to determine which store locations will offer the subscription.
Click Save to finalize your subscription. - Manage Subscriptions
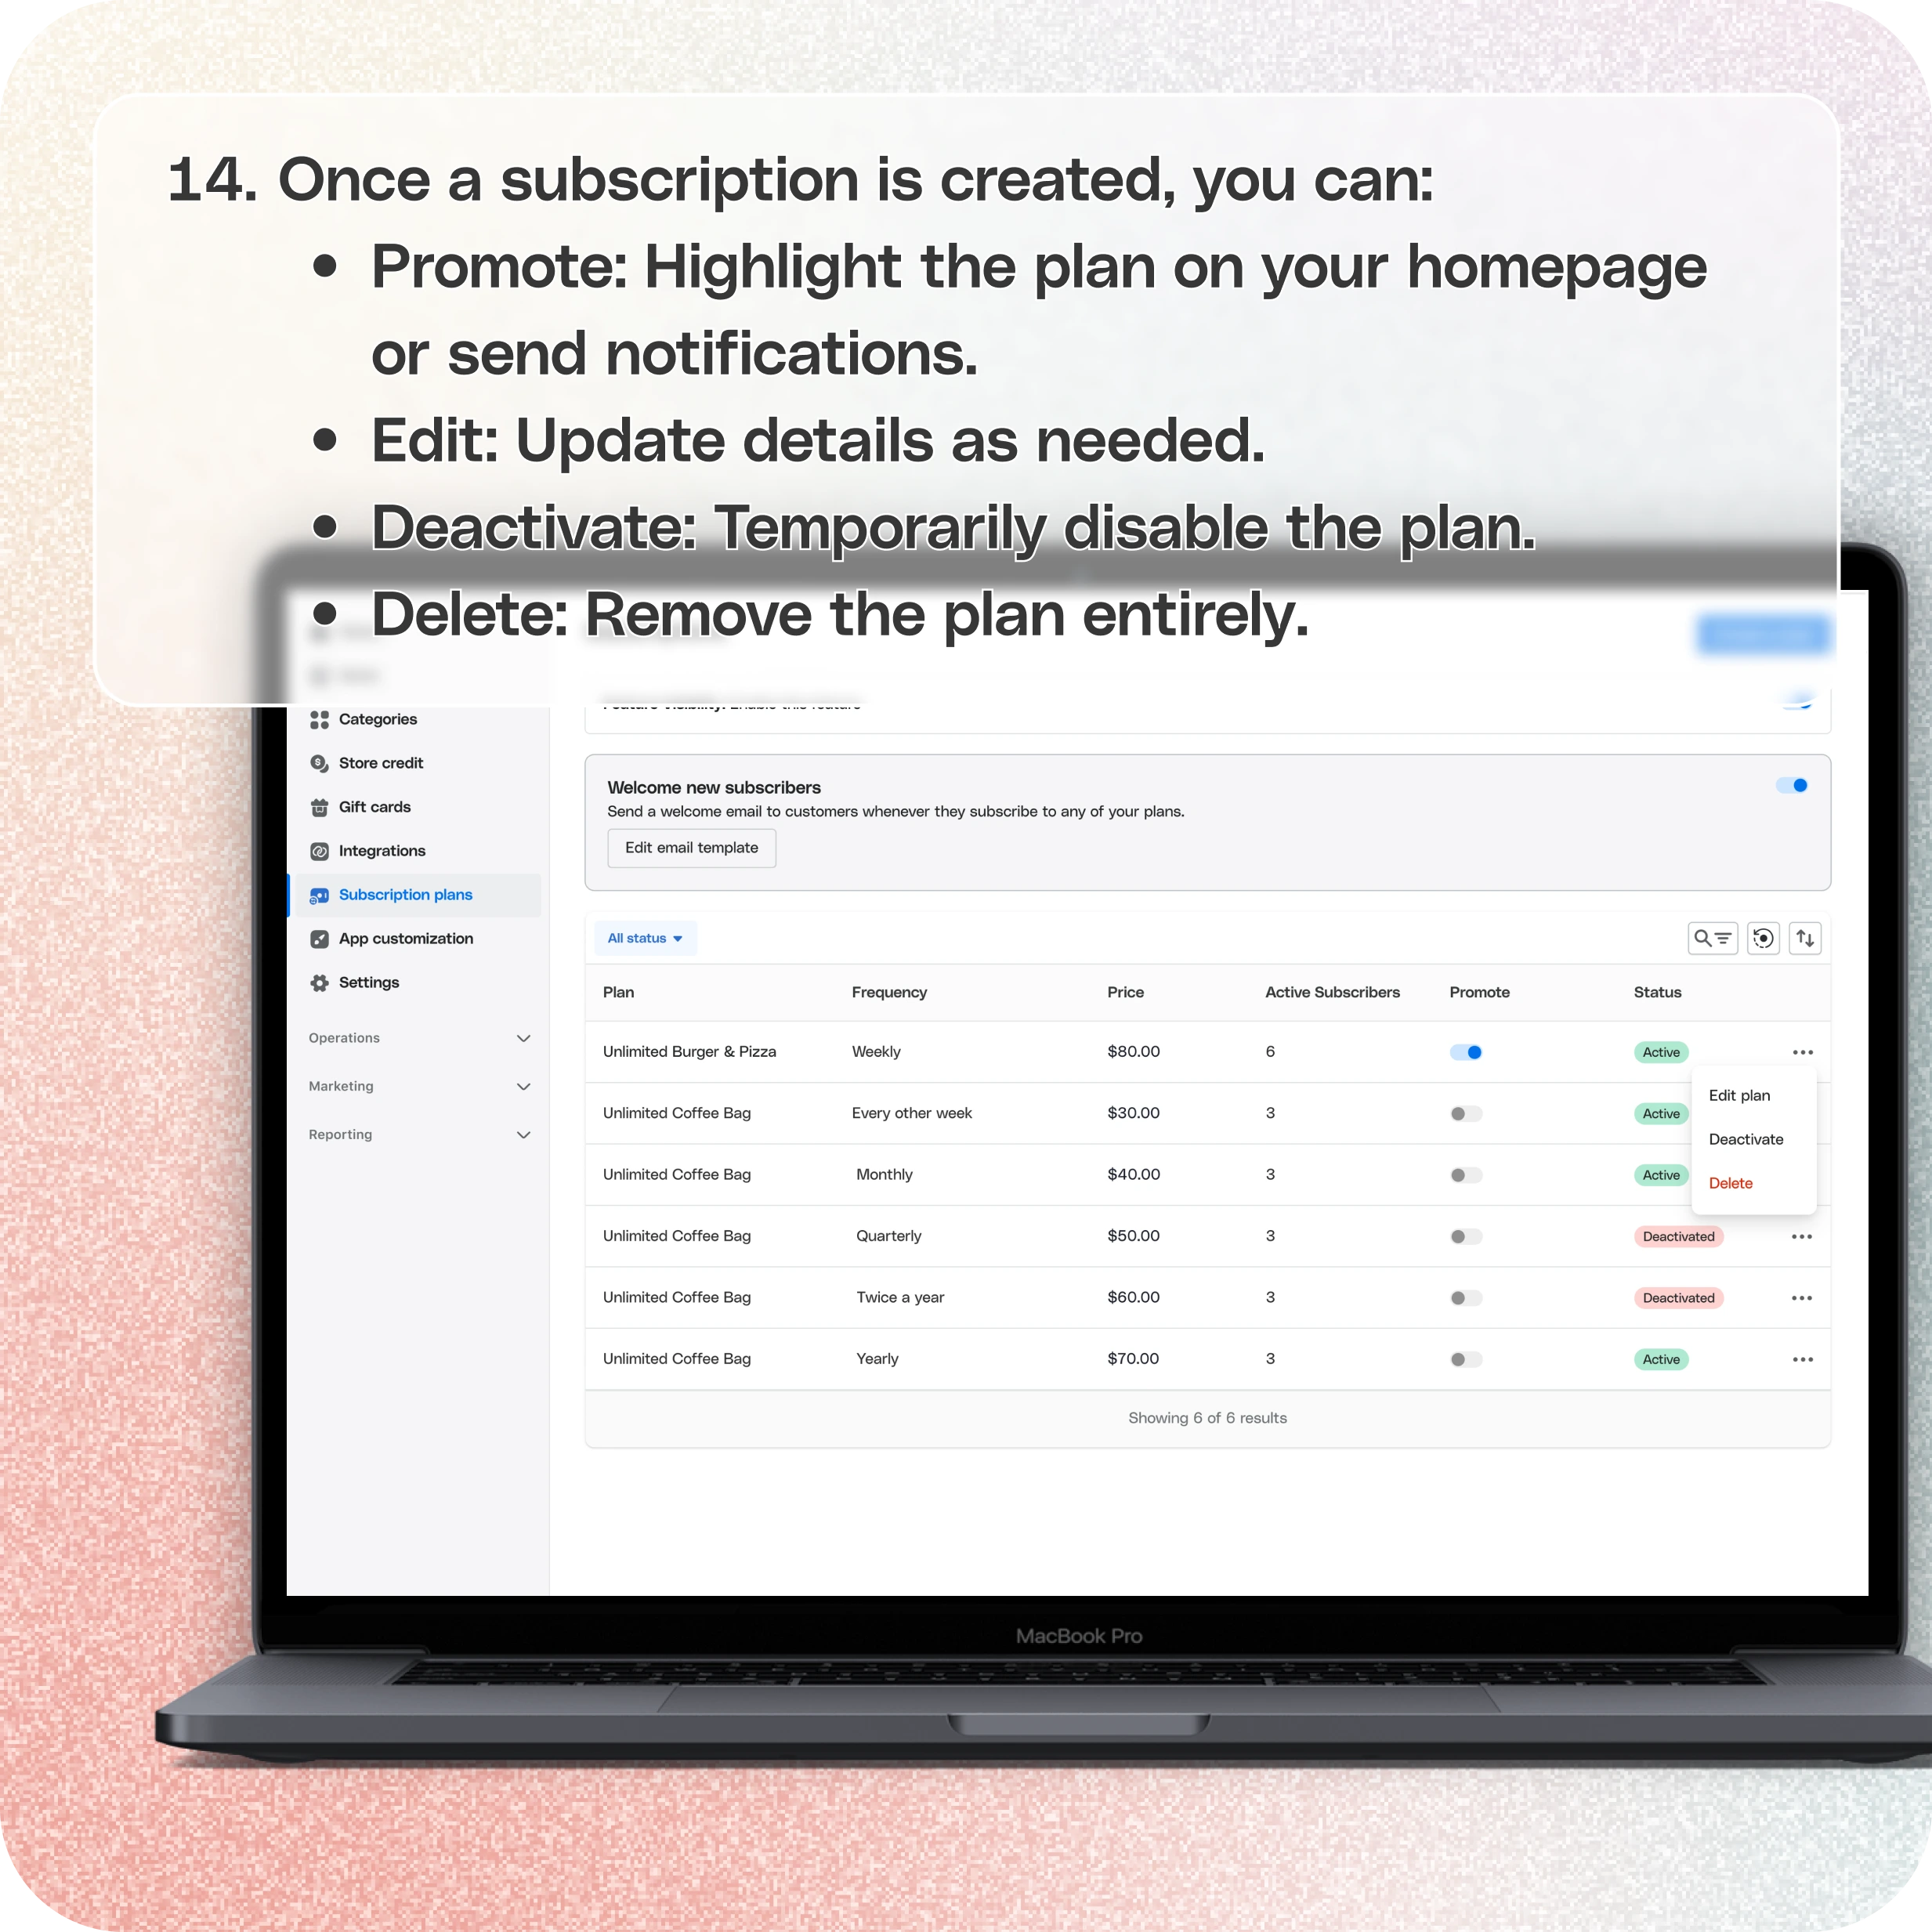
- Promote: Highlight the plan on your homepage or send notifications.
- Edit: Update details as needed.
- Deactivate: Temporarily disable the plan.
- Delete: Remove the plan entirely.
Still require support?
Contact support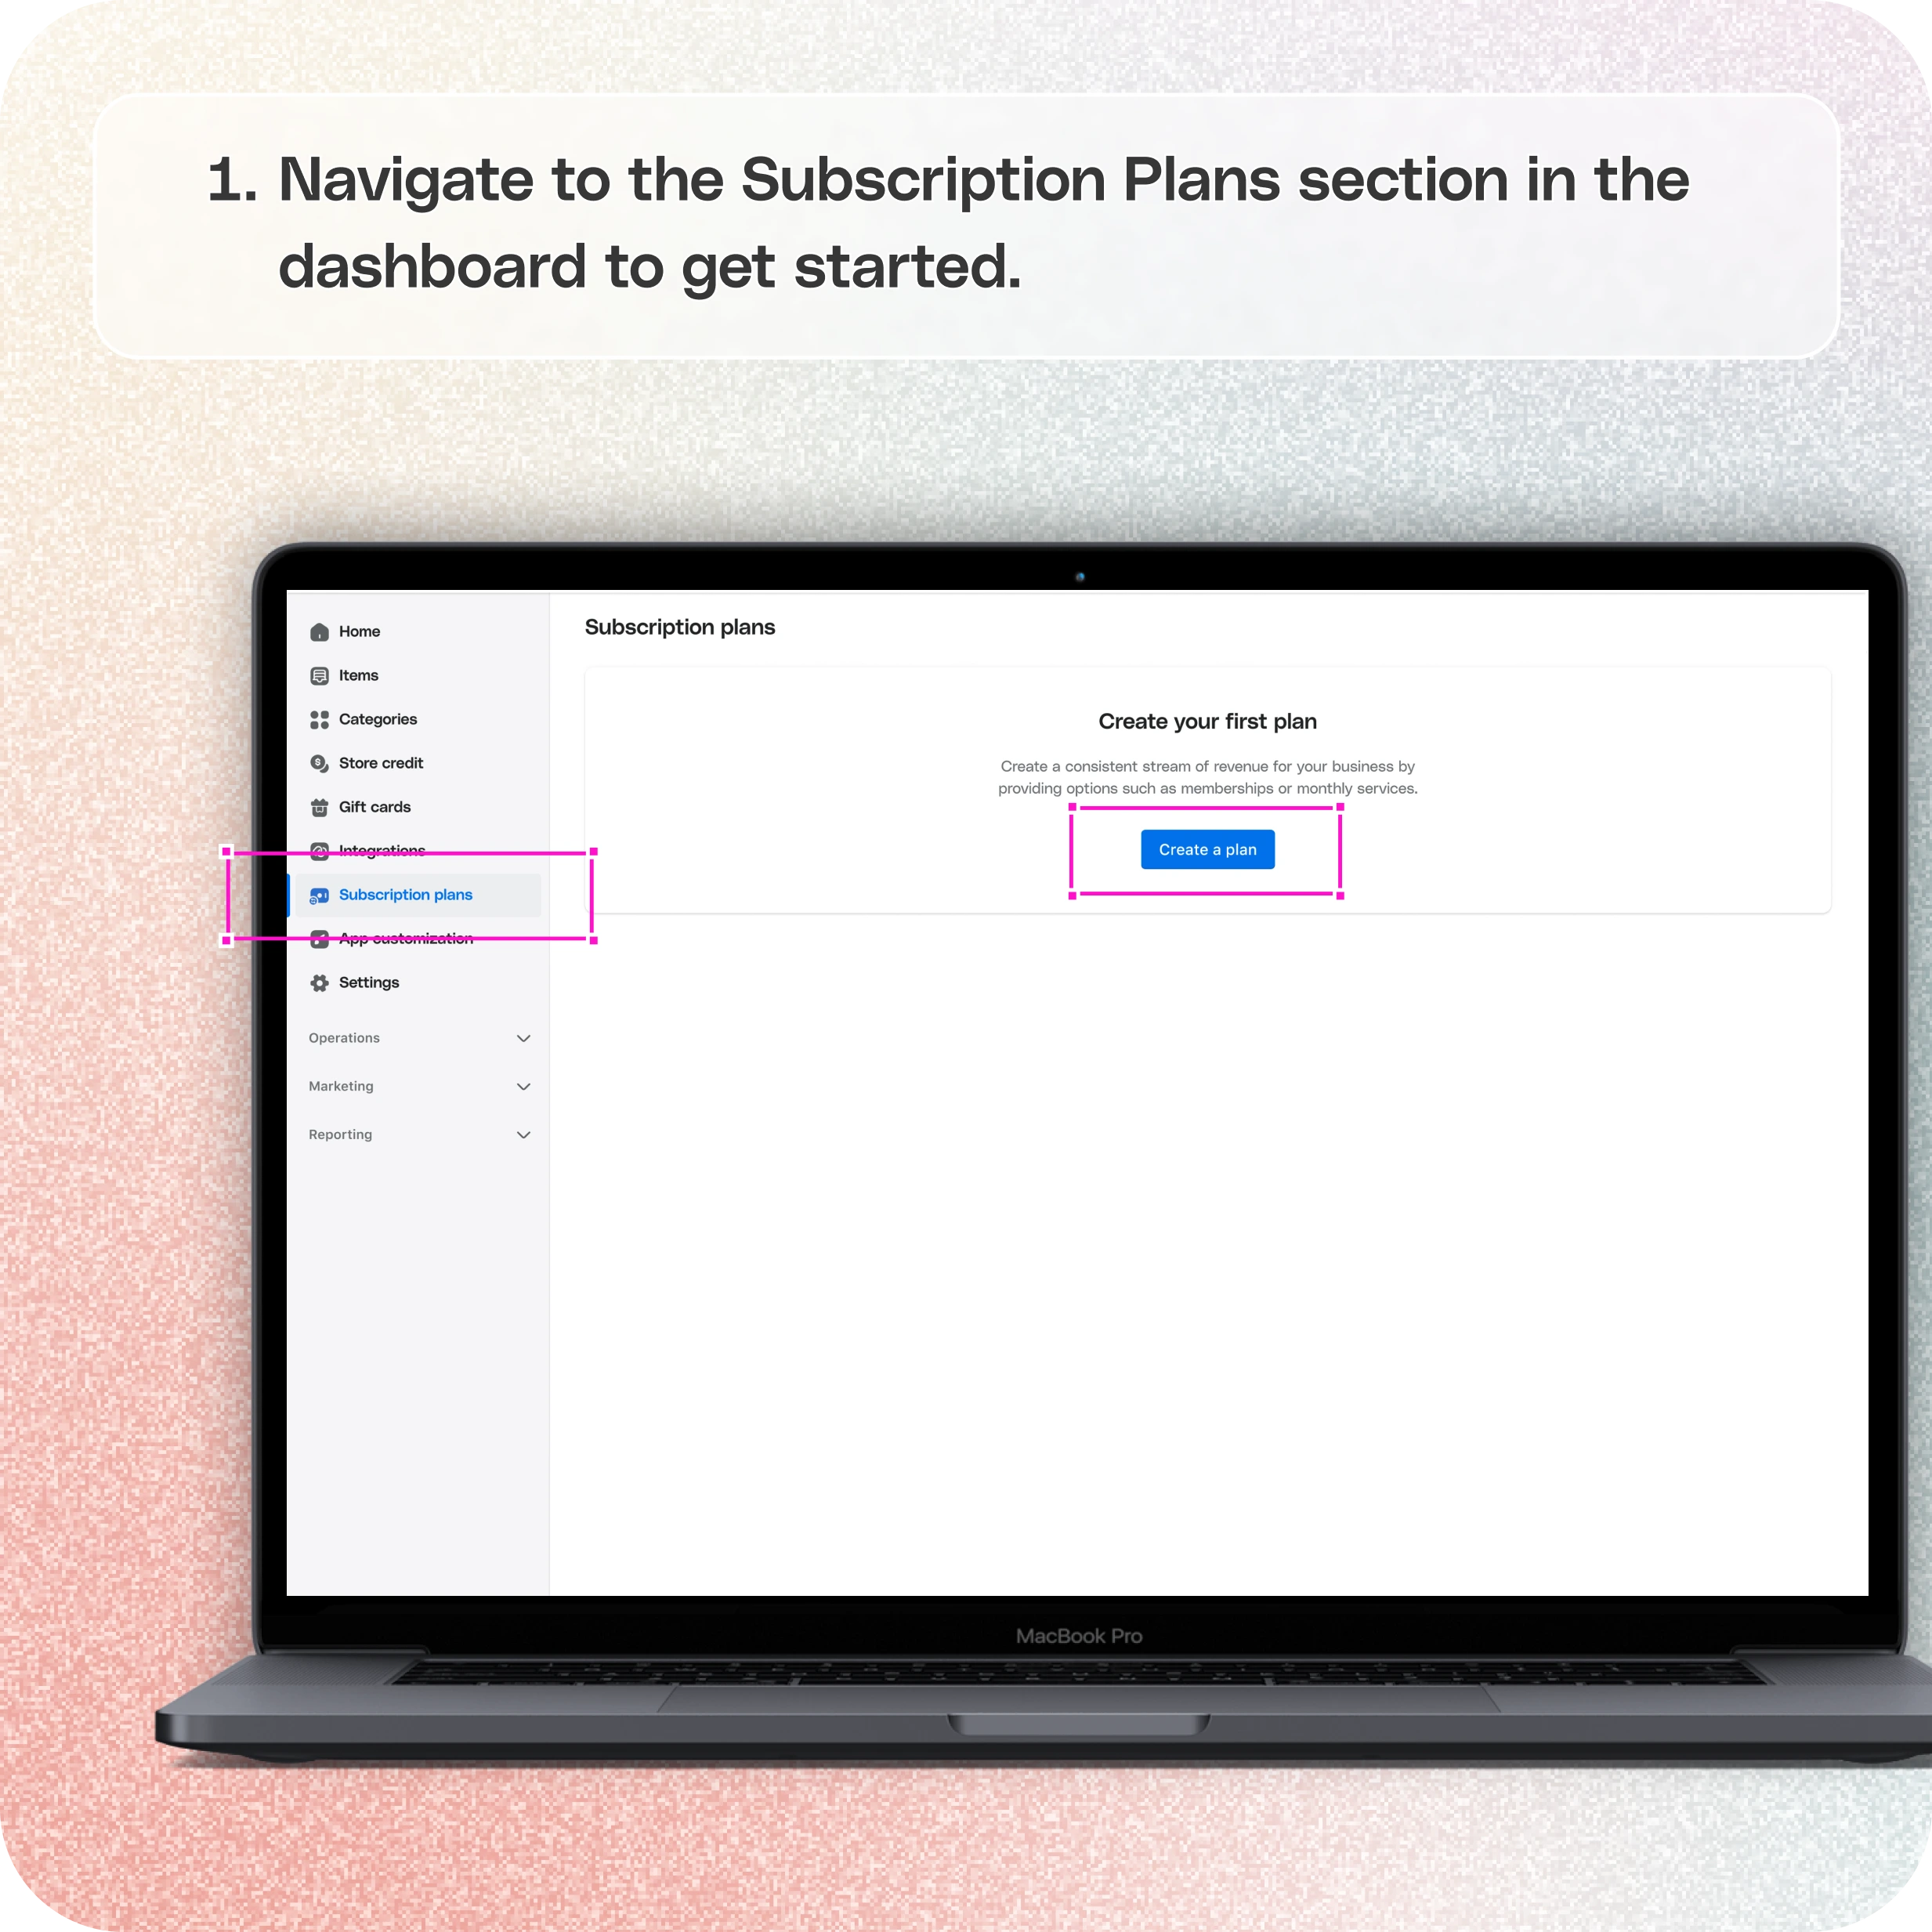
1. Log in to Your Merchant Dashboard
Navigate to the Subscription Plans section in the dashboard to begin.
2. Fill Details & Add Description
Provide a name and description for your subscription plan. Use the AI Editor for a compelling, professional description.
3. To Offer a Free Trial
Enable the Free Trial option and specify the number of billing cycles during which it will remain active.
4. Free Items by Category
- From the Categories section, select the categories where free items will be available.
- Define the number of free items per category and the duration the offer is valid.
- Add the selected categories and click Save.
5. Free Items by Individual Items
- From the Items section, choose individual items that will be offered for free.
- Specify the quantity of free items, set any limits, and click Save to finalize.
6. Discounted Items by Category
- In the Categories section, select the categories eligible for discounts.
- Set the discount percentage or fixed amount, and define the duration.
- Add the selected categories and click Save.
7. Discounted Items by Individual Items
- From the Items section, select specific individual items to offer discounts on.
- Define the discount value (percentage or fixed amount) and the duration of the offer.
- Add the items, configure their details, and click Save.
8. Add Featured Images & Additional Settings
- Upload a featured image for your subscription plan to make it more attractive.
- Enable settings for customers to pause their subscriptions temporarily, specifying the limit for the pause duration.
- Assign location availability to determine which store locations will offer the subscription.
- Click Save to finalize your subscription.
9. Manage Subscriptions
Once a subscription is created, you can:
- Promote: Highlight the plan on your homepage or send notifications.
- Edit: Update details as needed.
- Deactivate: Temporarily disable the plan.
- Delete: Remove the plan entirely.
These simple steps ensure your subscription offerings are up-to-date and appealing to your customers.
Still have questions?Contact us
Ask anything or just say hi