





















Set subscription plan visibility by customer group
Instructions
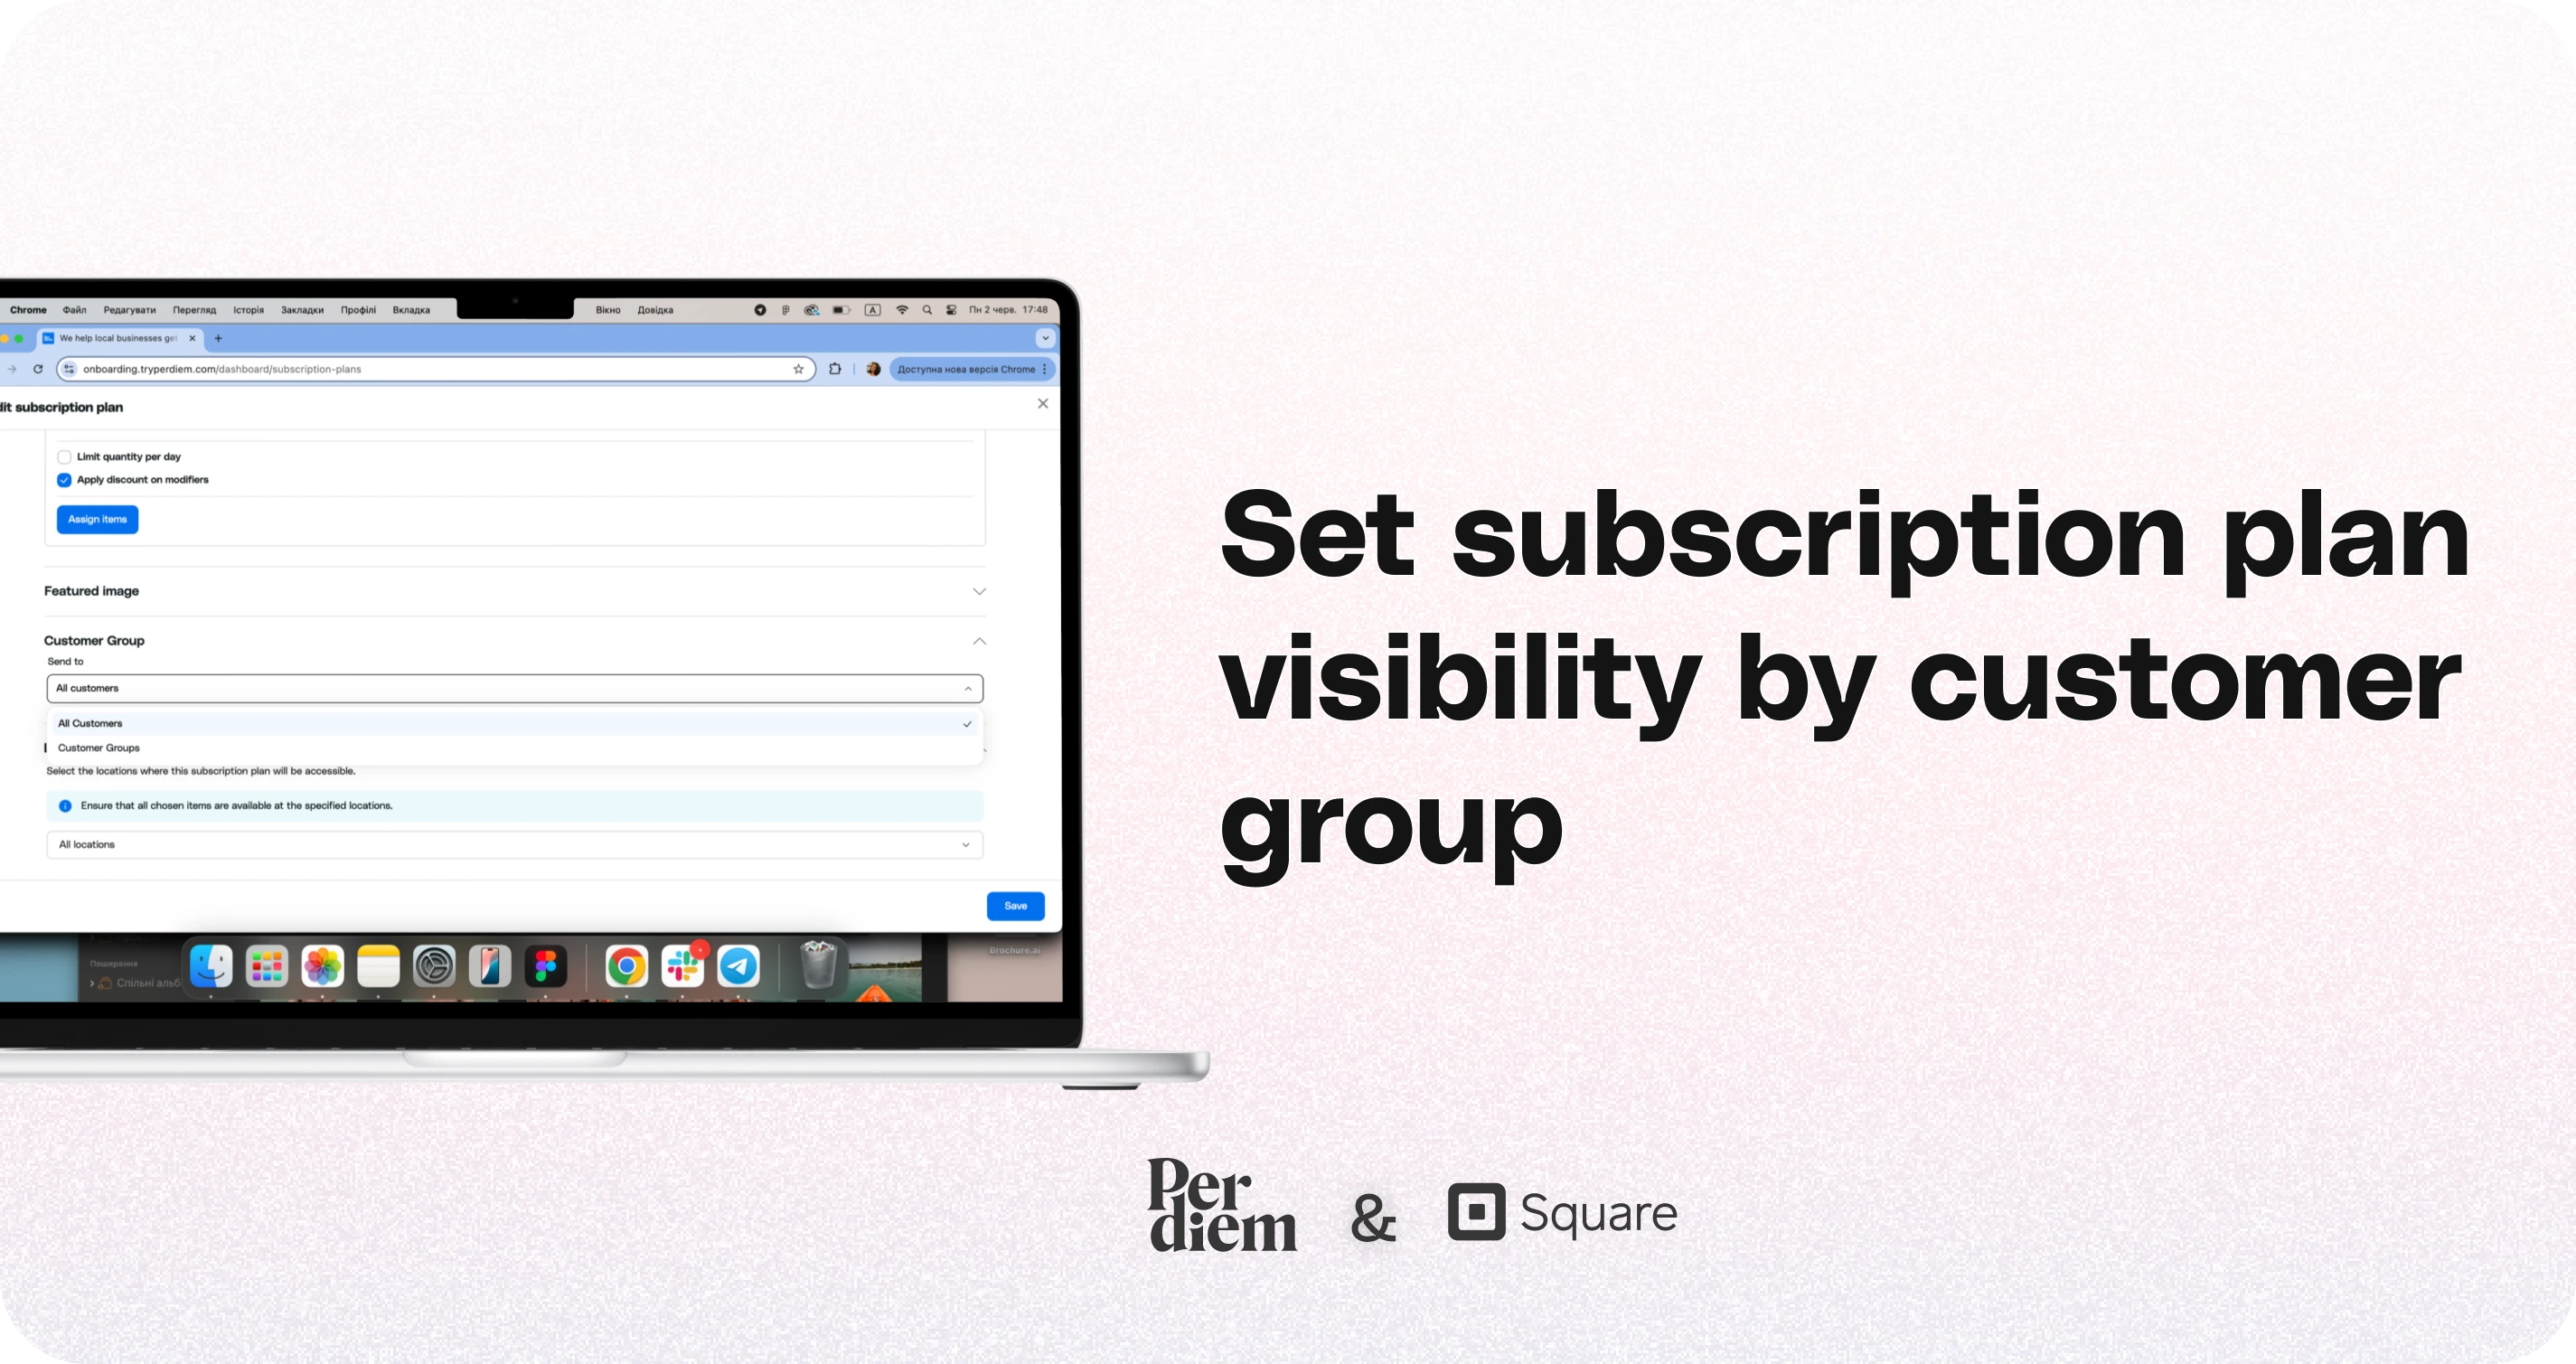
- On the left-hand panel, scroll down and click on Subscription plans in the left panel.
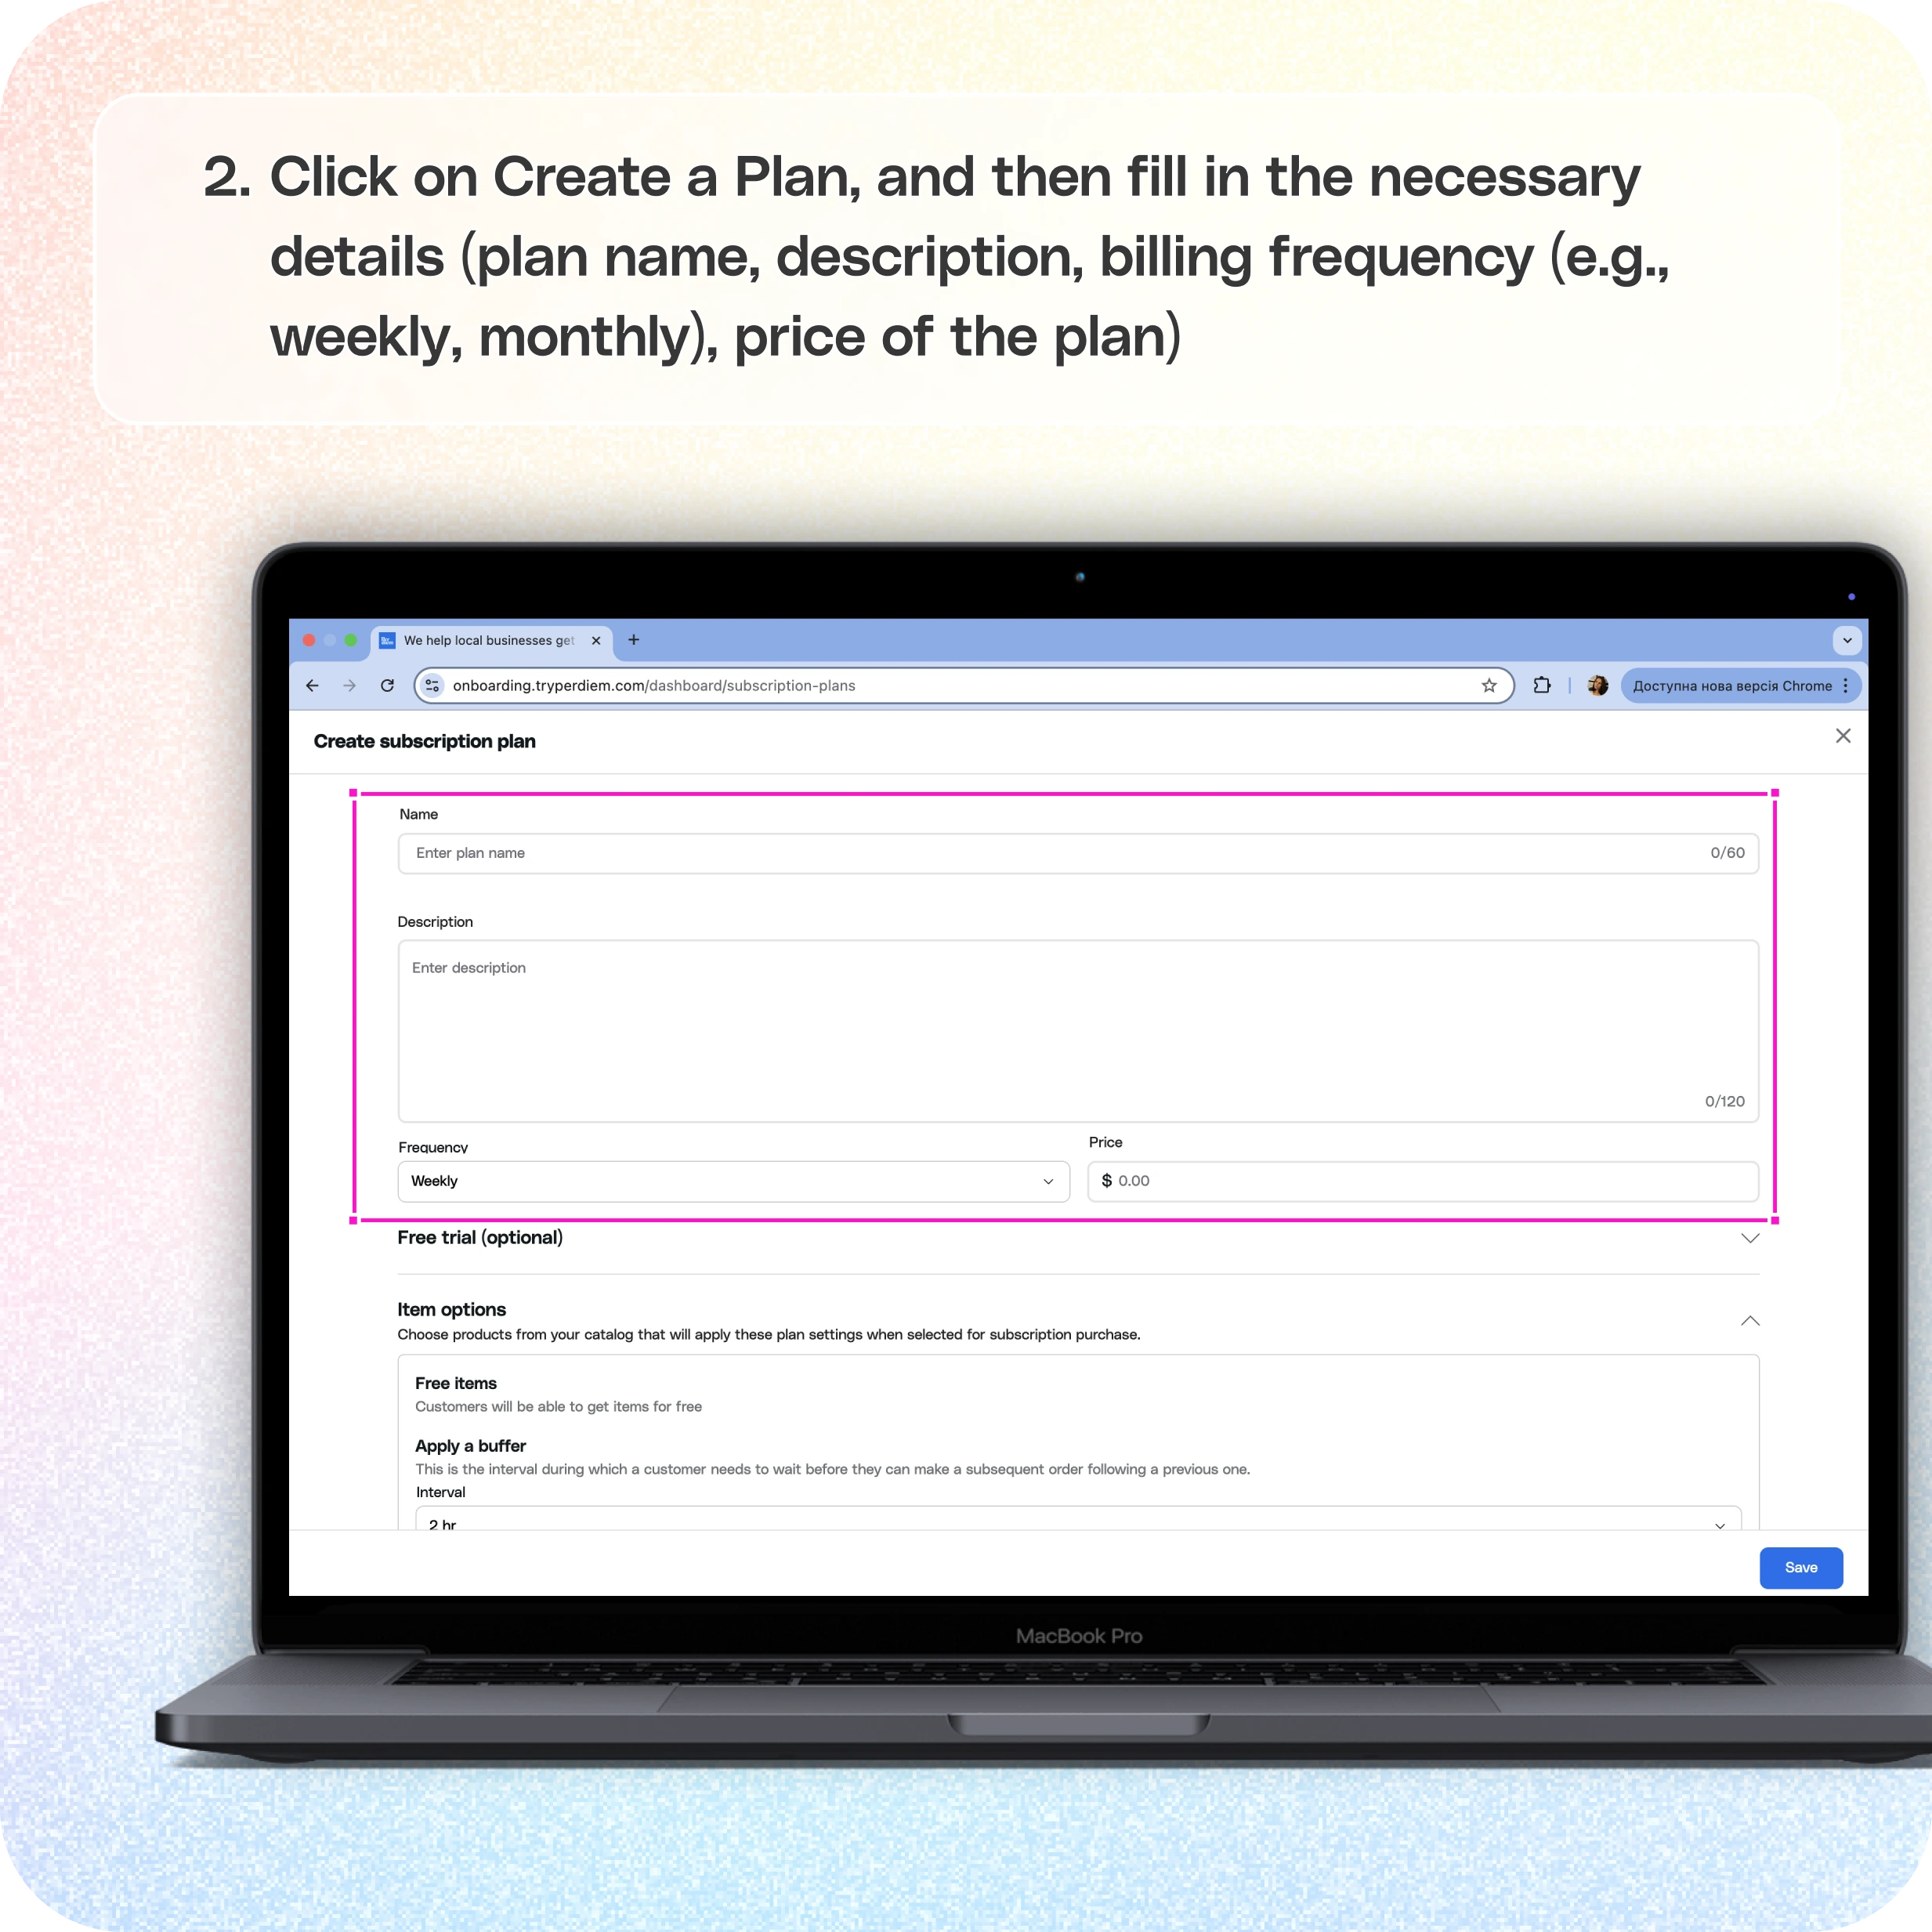
- Click on Create a Plan, and then fill in the necessary details (Plan name, Description, Billing frequency (e.g., weekly, monthly), Price of the plan)
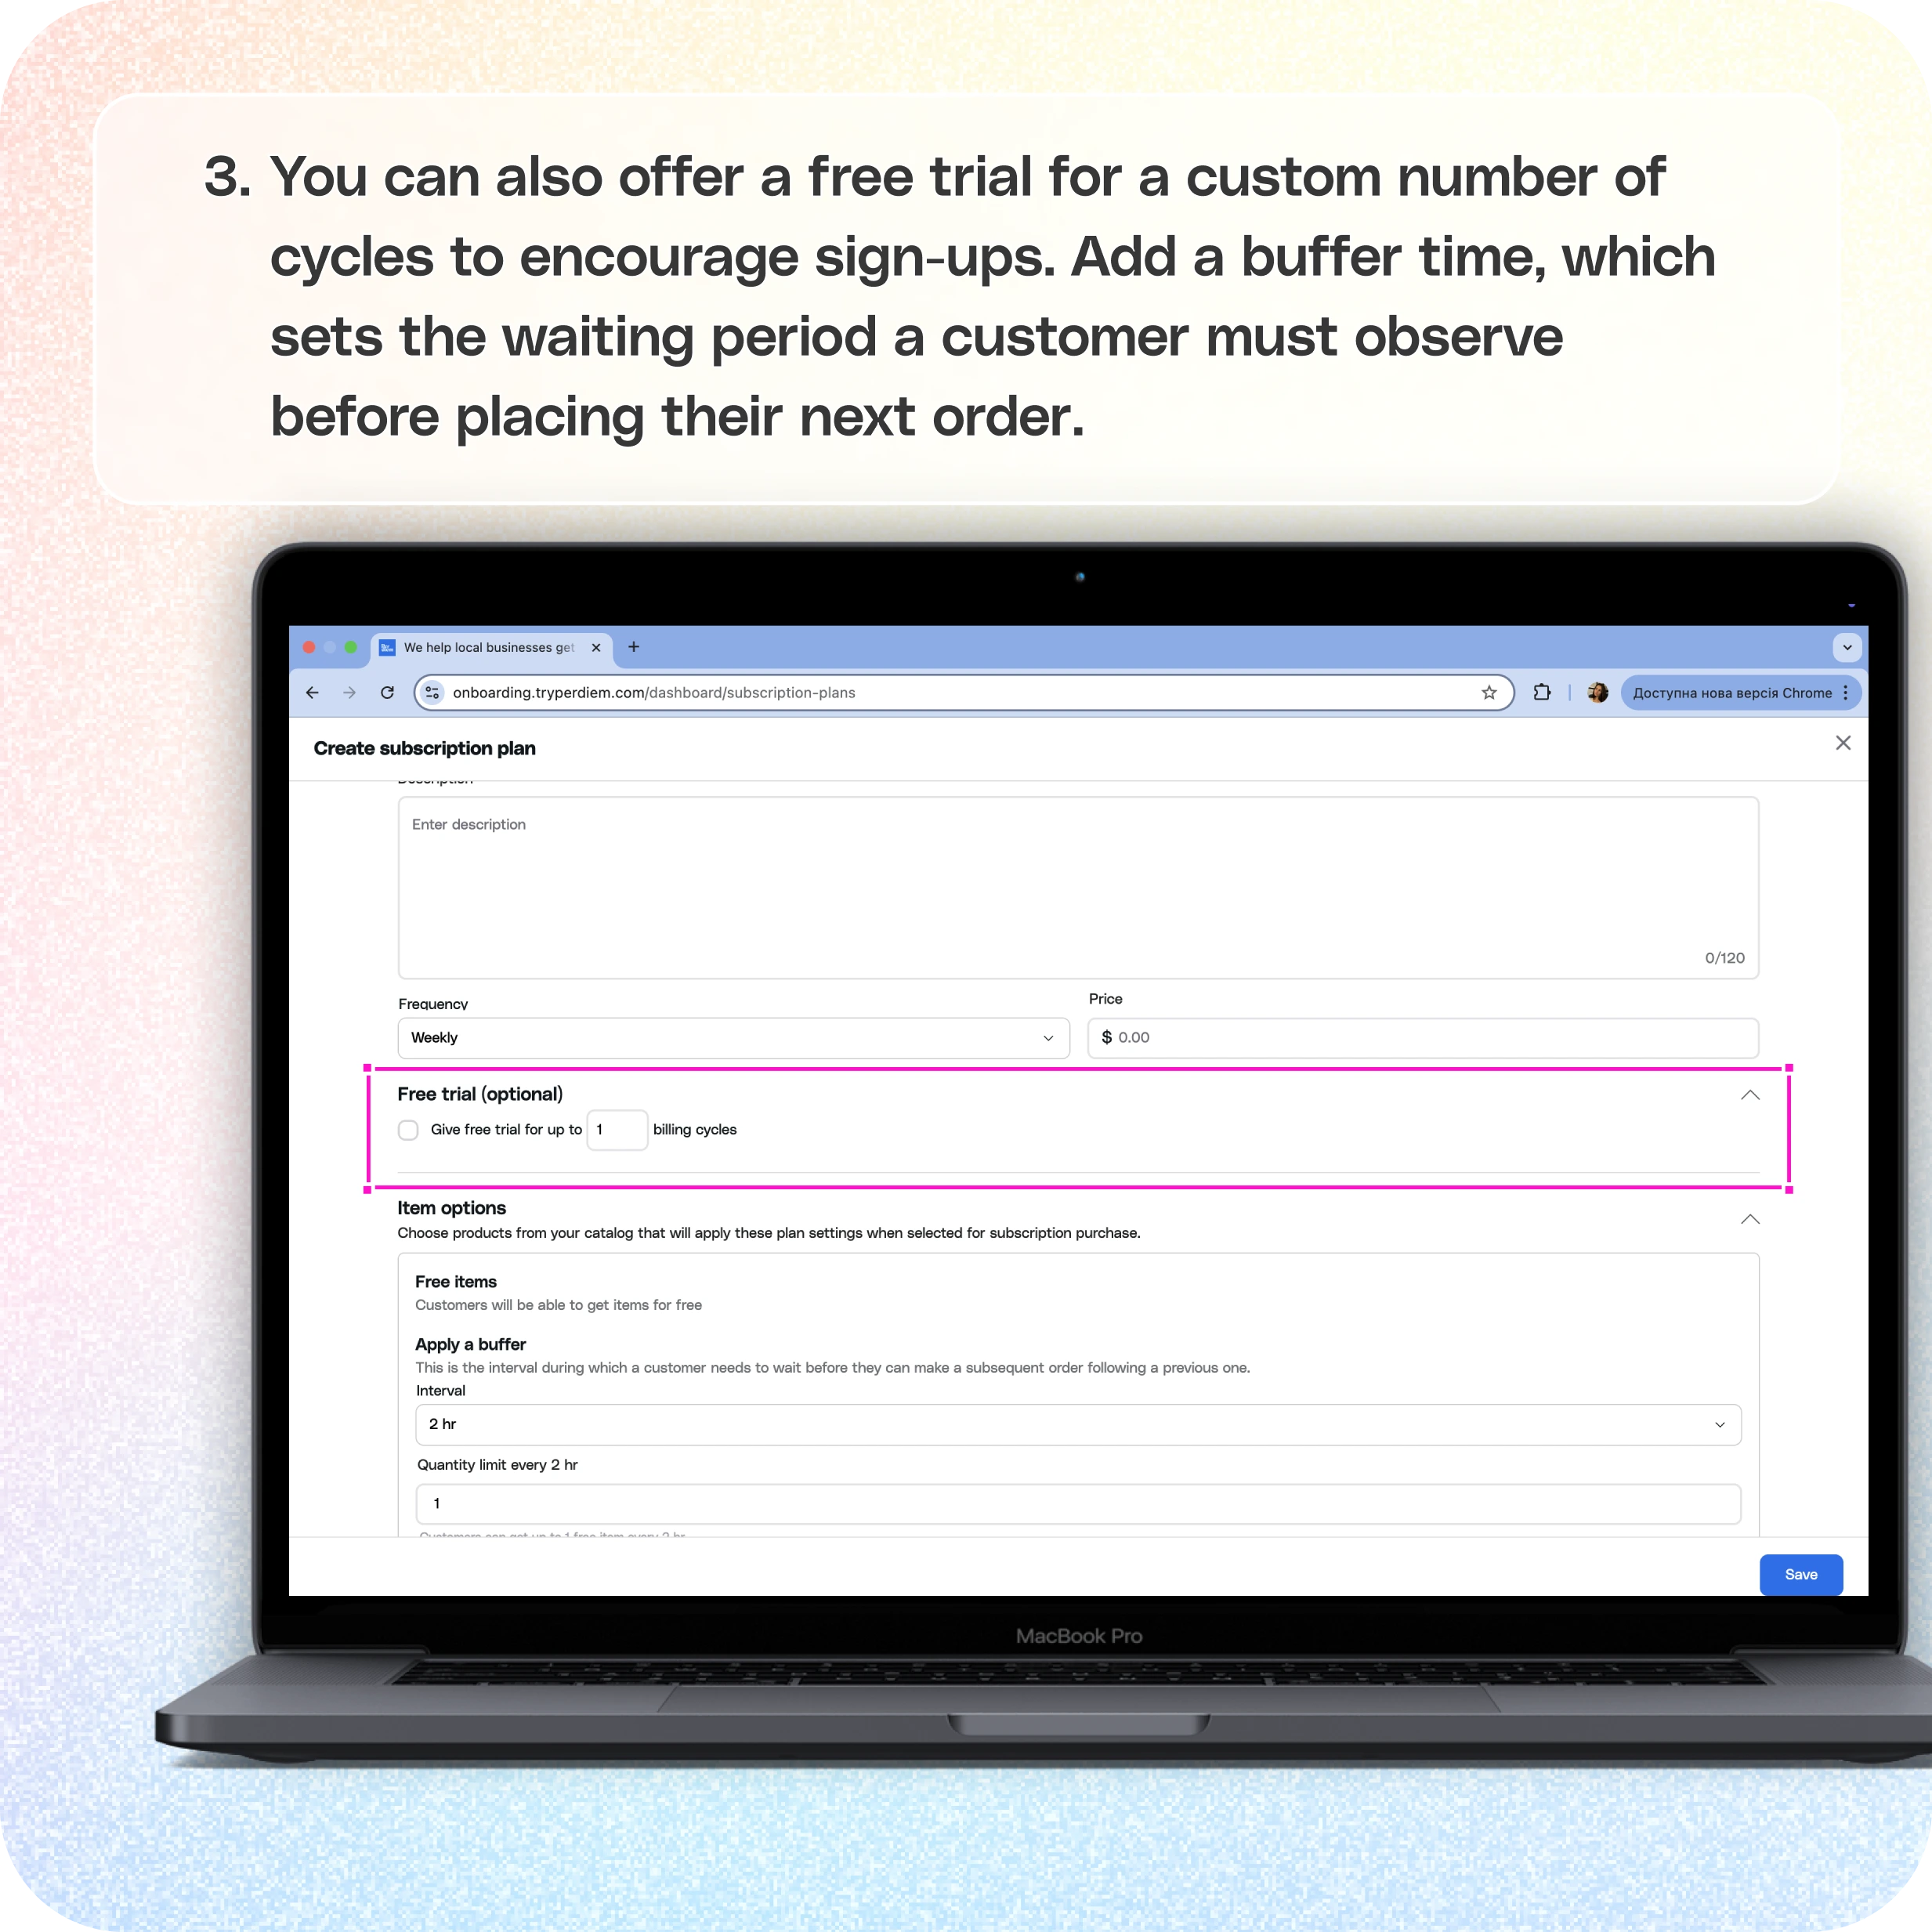
- You can also offer a free trial for a custom number of cycles to encourage sign-ups.
- Add a buffer time, which sets the waiting period a customer must observe before placing their next order.
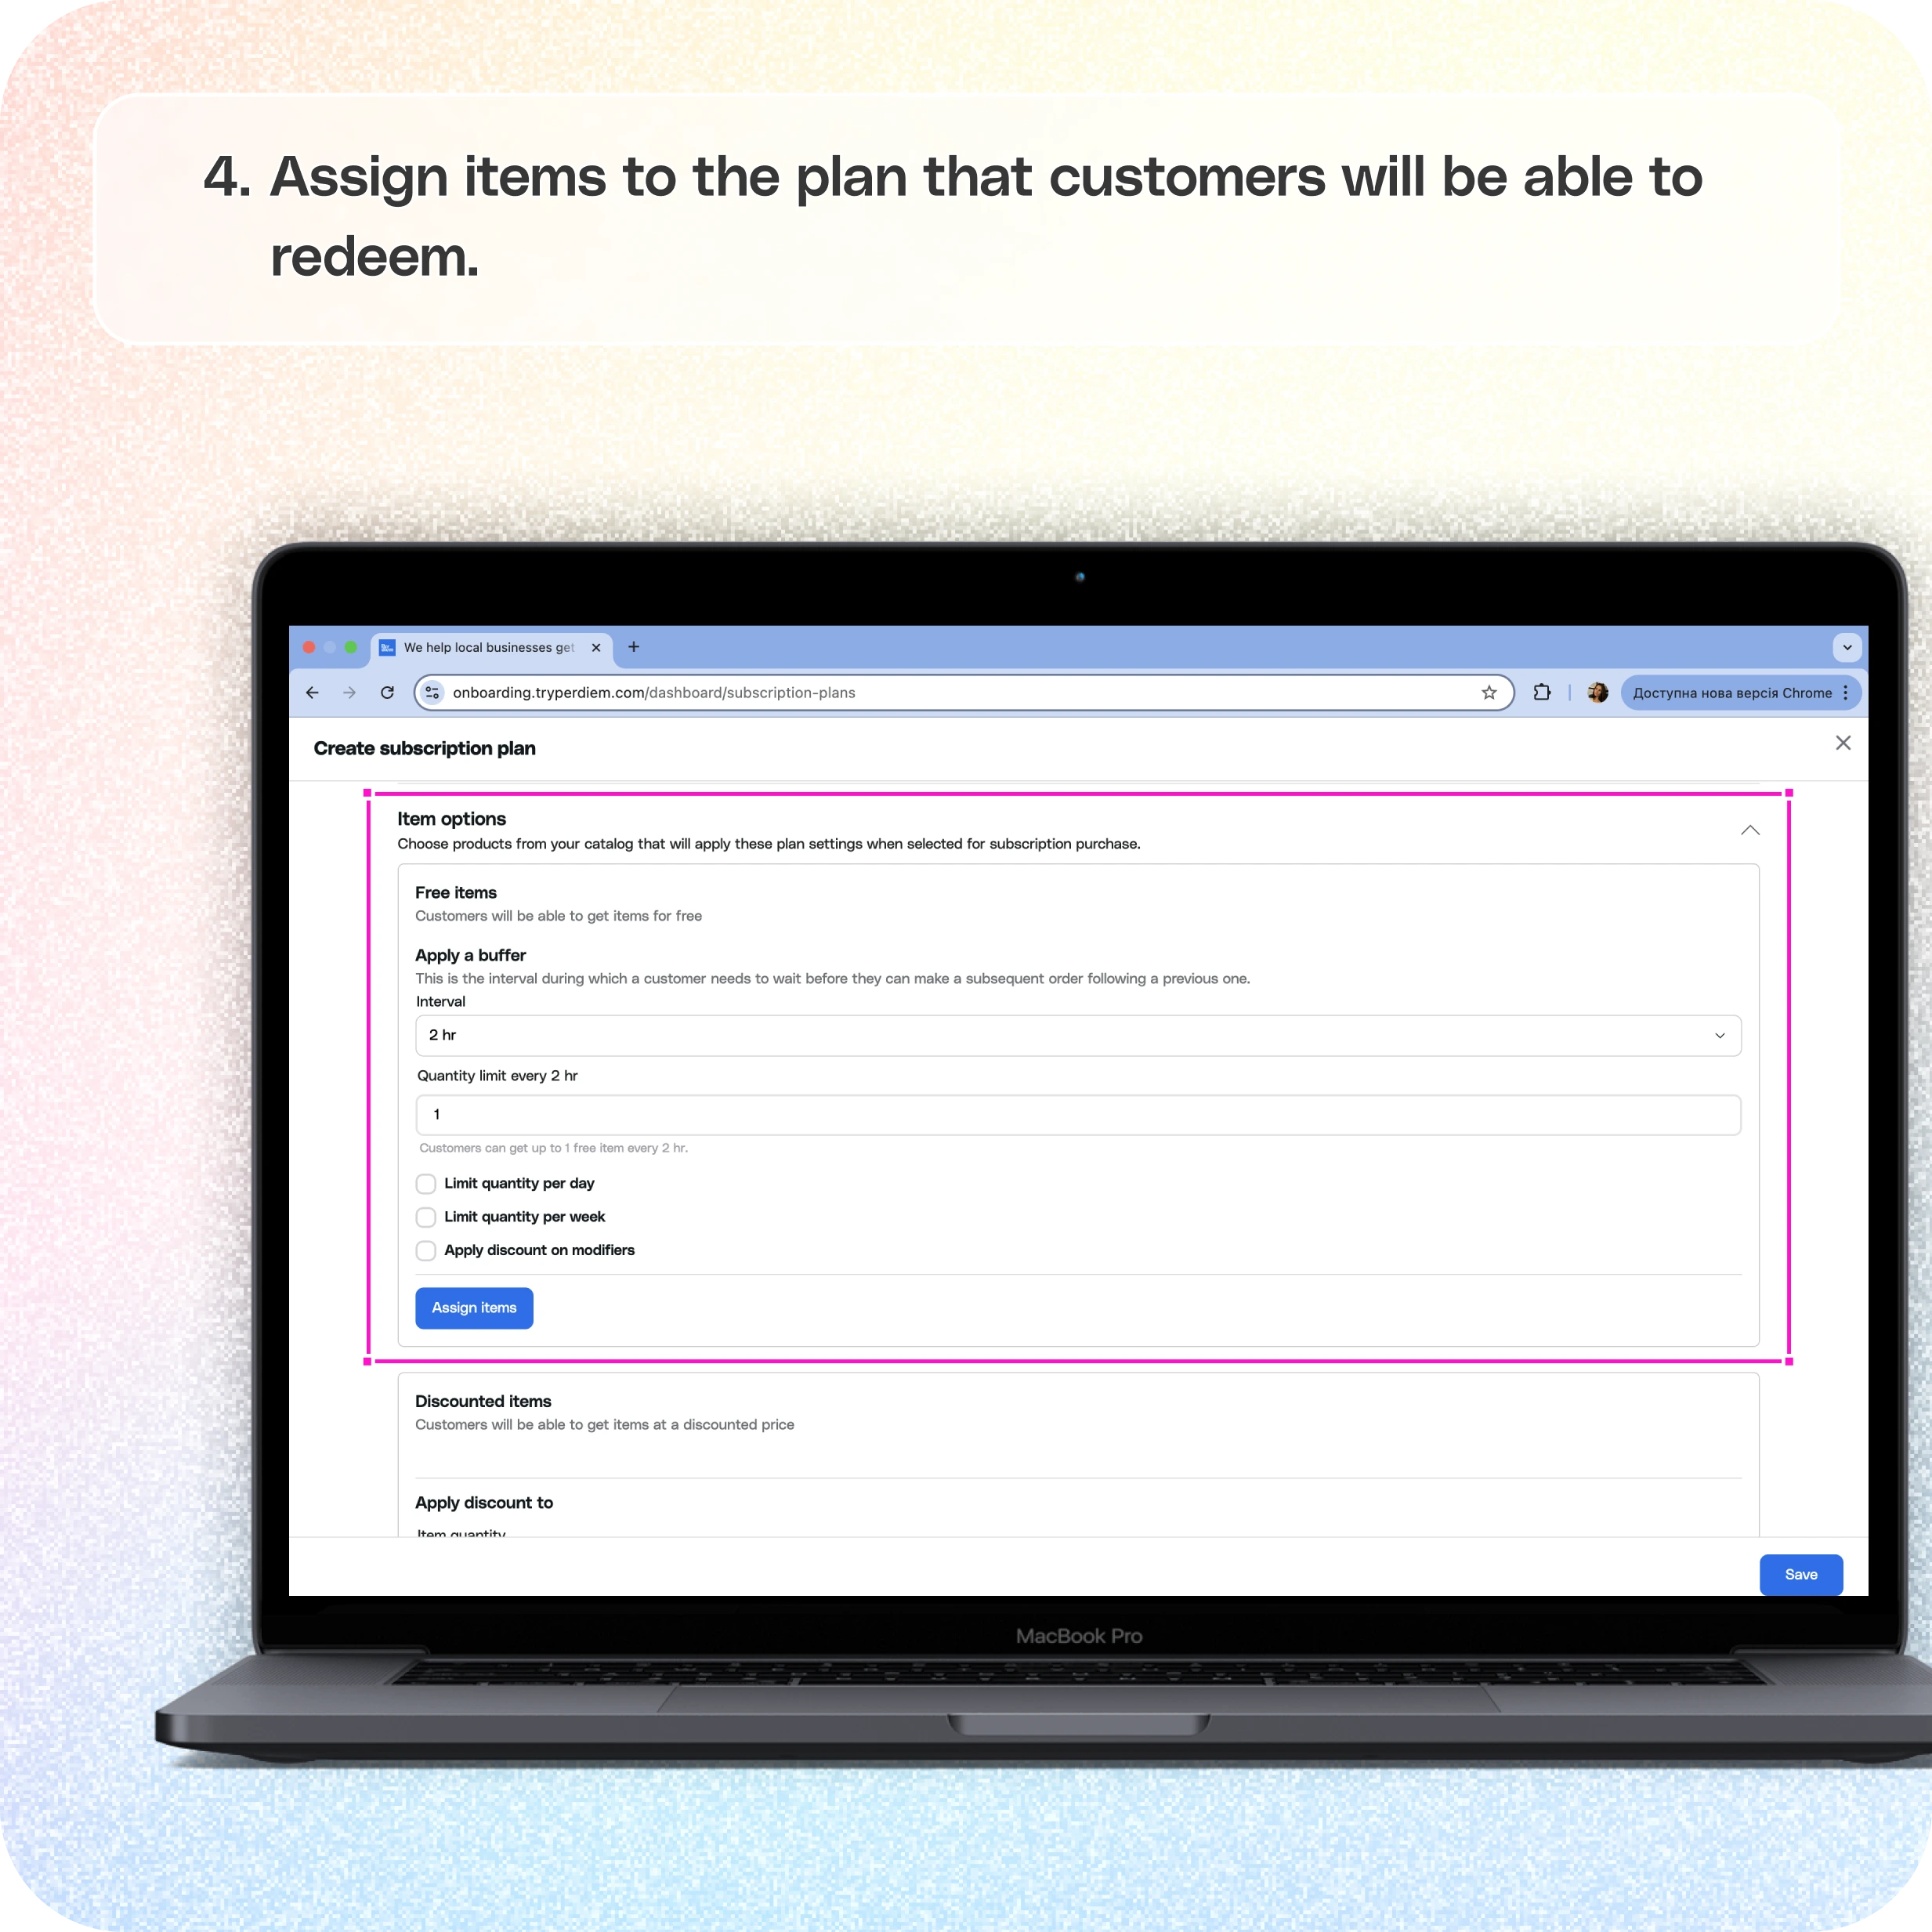
- Assign items to the plan that customers will be able to redeem.
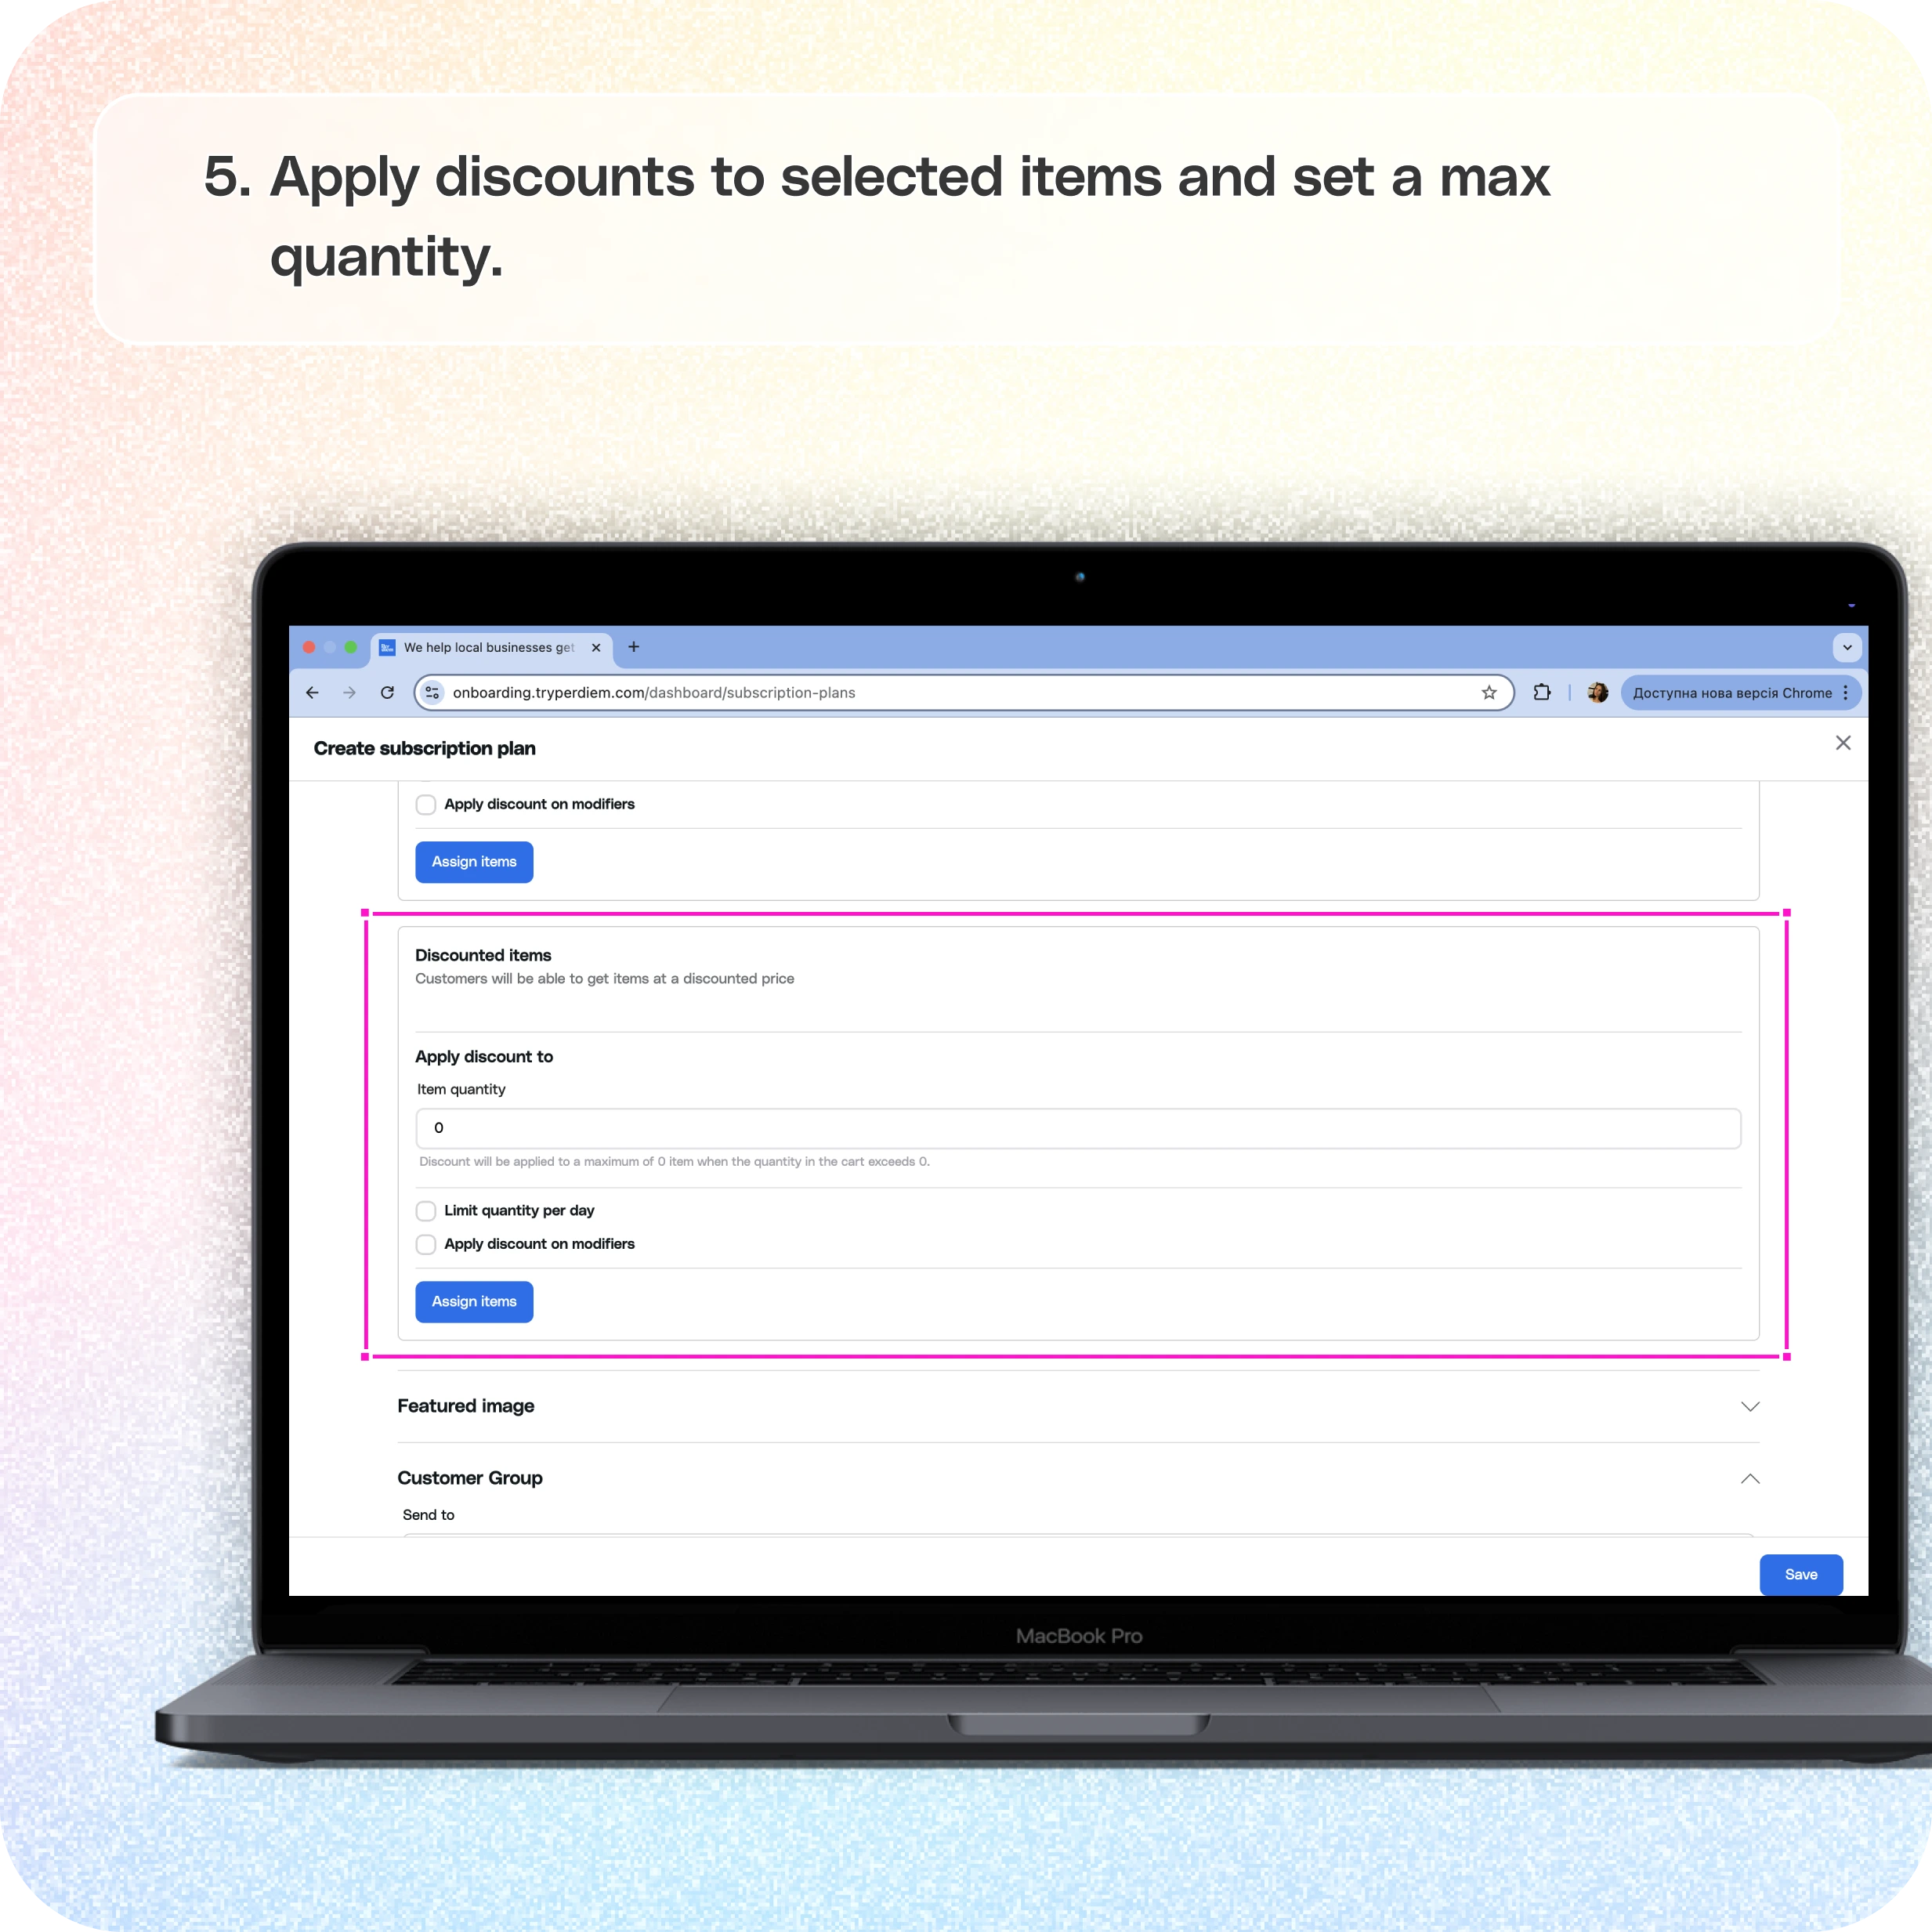
- Apply discounts to selected items and set a max quantity.
- **Select customer groups to associate with the plan.**
Still require support?
Contact support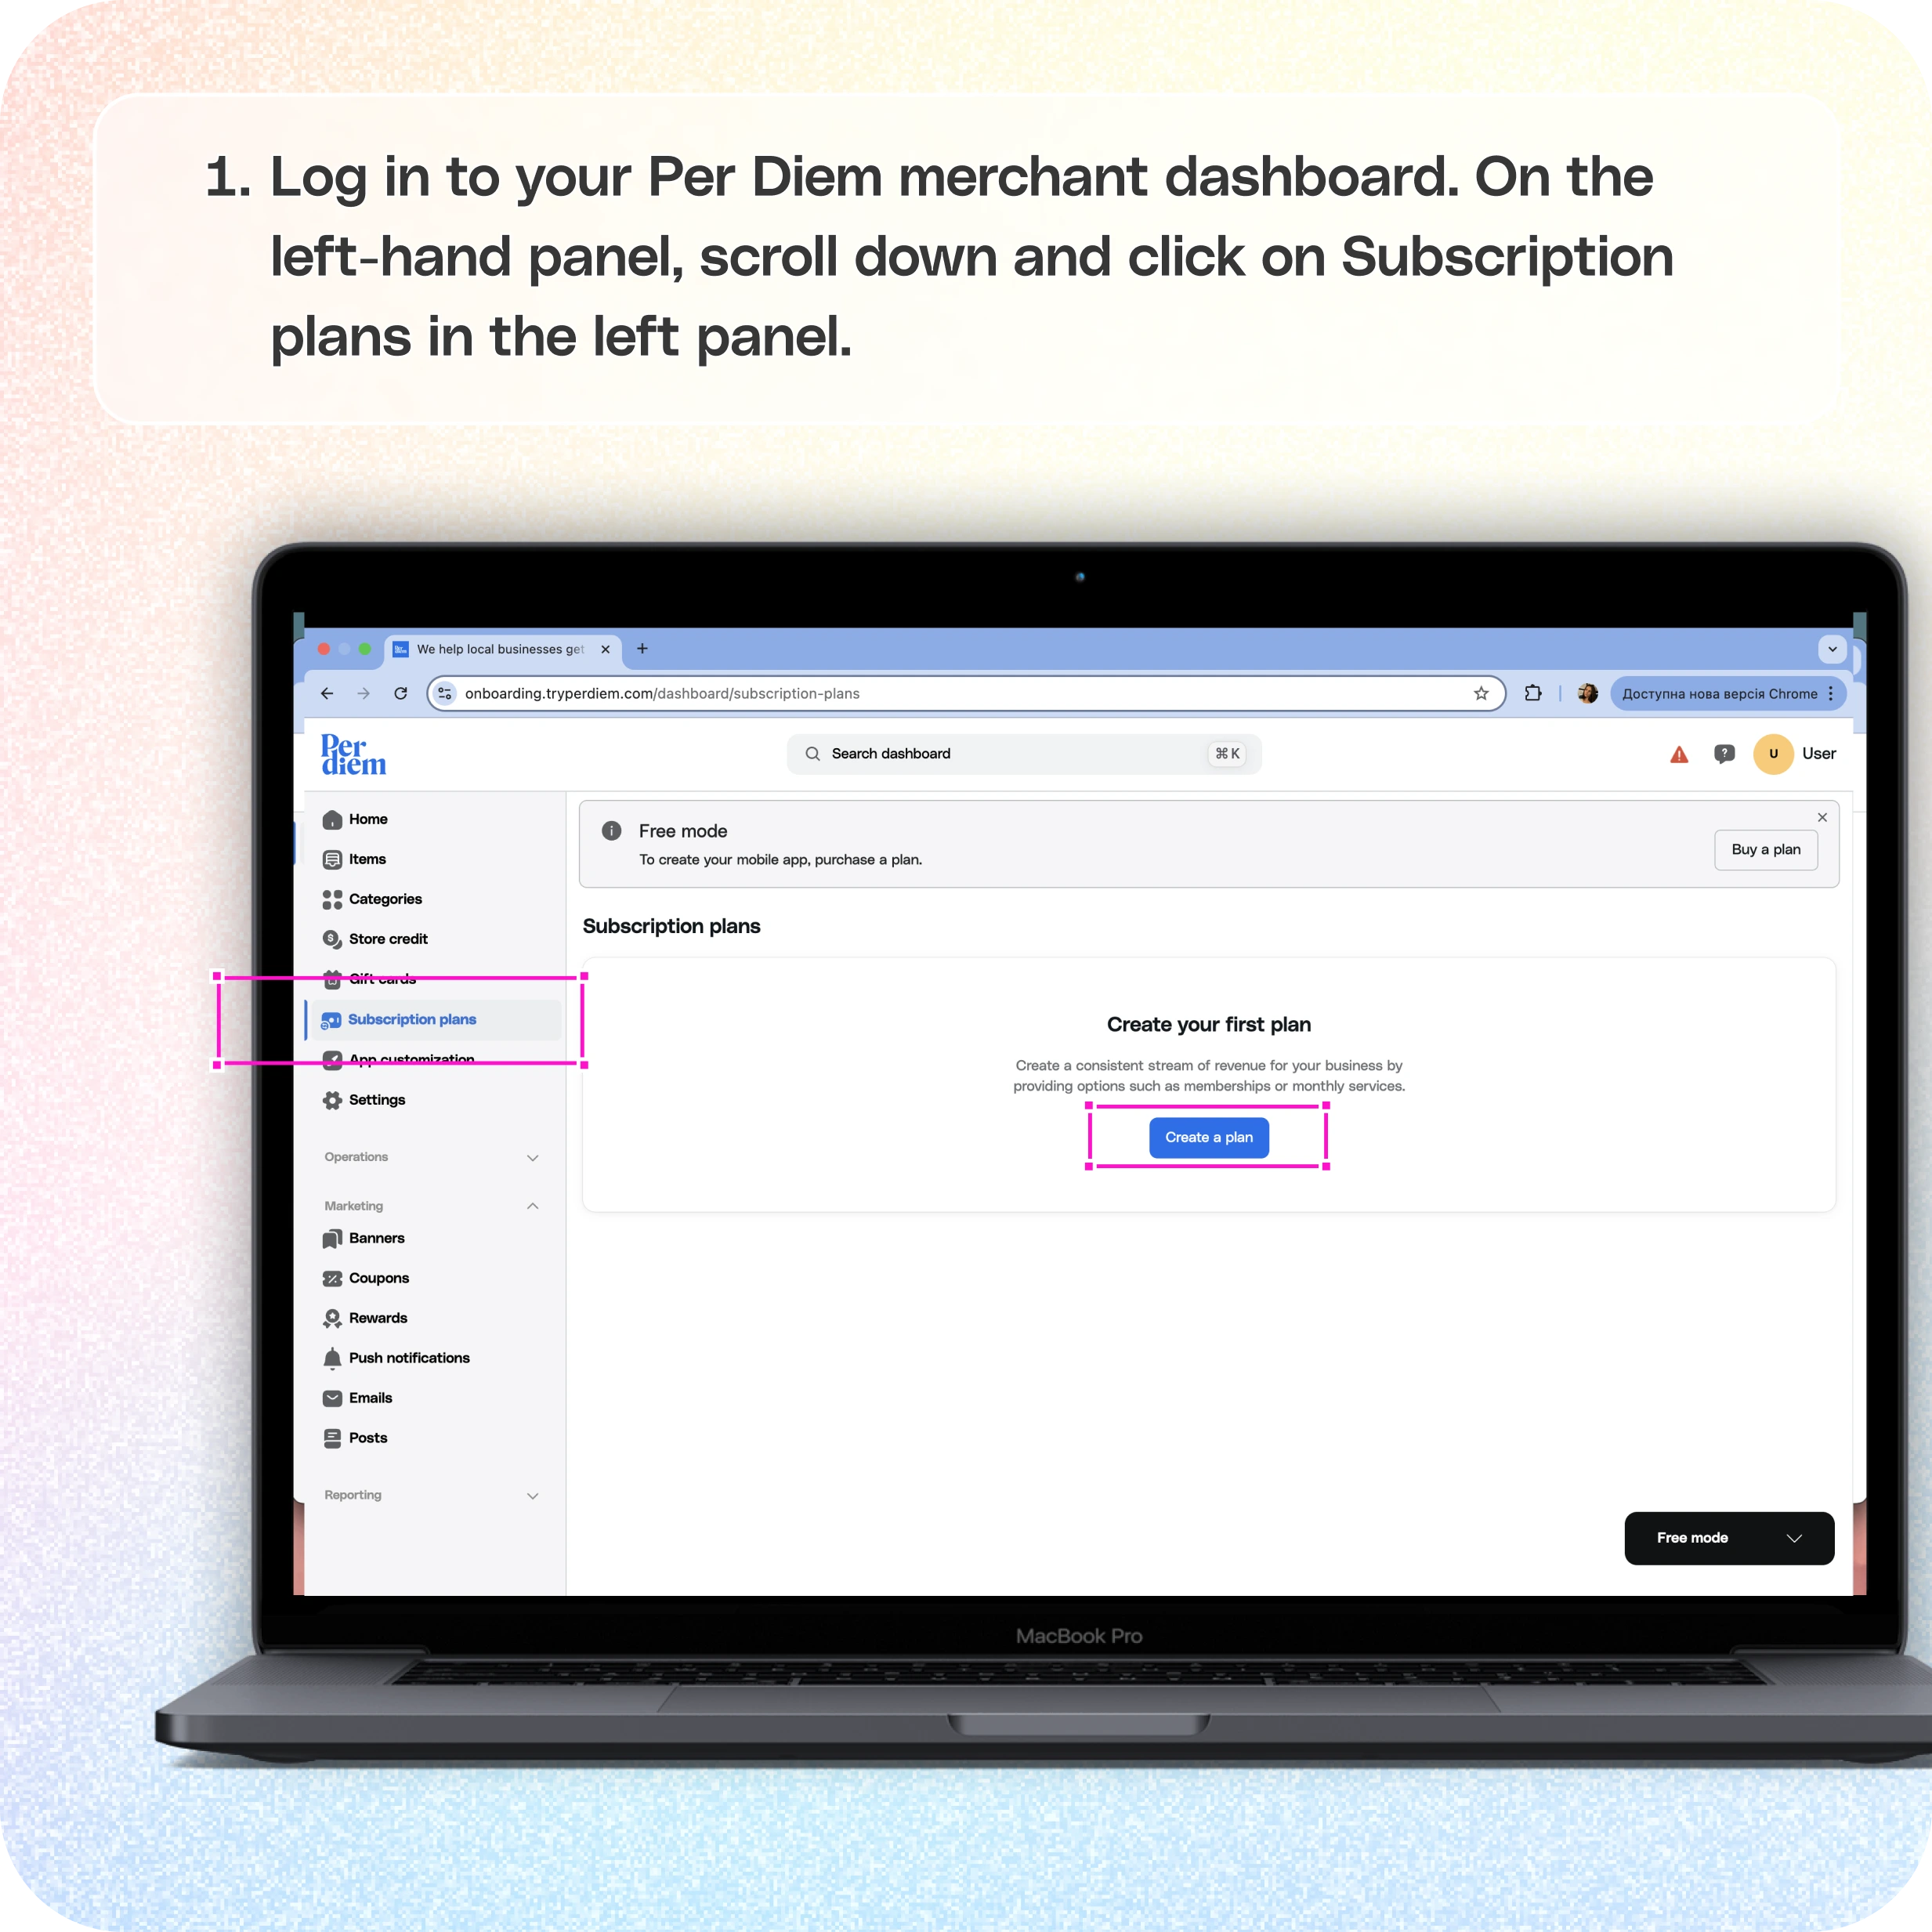
To get started, log in to your Per Diem merchant dashboard. On the left-hand panel, scroll down and click on Subscription plans in the left panel. This is where you can create new subscription plans and manage existing ones.
Click on Create a Plan, and then fill in the necessary details.
Once you’re on the Subscription Plans page, click Create a Plan. Fill in the essential fields like:
- **Plan name
** - **Description
** - Billing frequency (e.g., weekly, monthly)
- **Price of the plan**
You can also offer a free trial for a custom number of cycles to encourage sign-ups. Add a buffer time, which sets the waiting period a customer must observe before placing their next order. Finally, assign items to the plan that customers will be able to redeem.
Apply discounts to selected items and set a max quantity.
You can choose to offer discounts on the plan’s selected items. Just specify the maximum quantity eligible for the discount. If a customer adds more than the allowed quantity to their cart, the discount will only apply up to the limit, keeping your margins in check while offering value.
Select customer groups to associate with the plan.
From the Customer Group dropdown, select the groups you want this plan to be visible to. You can choose from existing customer groups and then smart groups for personalized targeting. Then, select which store locations this plan will apply to and hit Save.
This gives you powerful control over who sees what, ensuring only the right segments access specific plans based on your business goals.
Still have questions?Contact us
Ask anything or just say hi