
.svg)

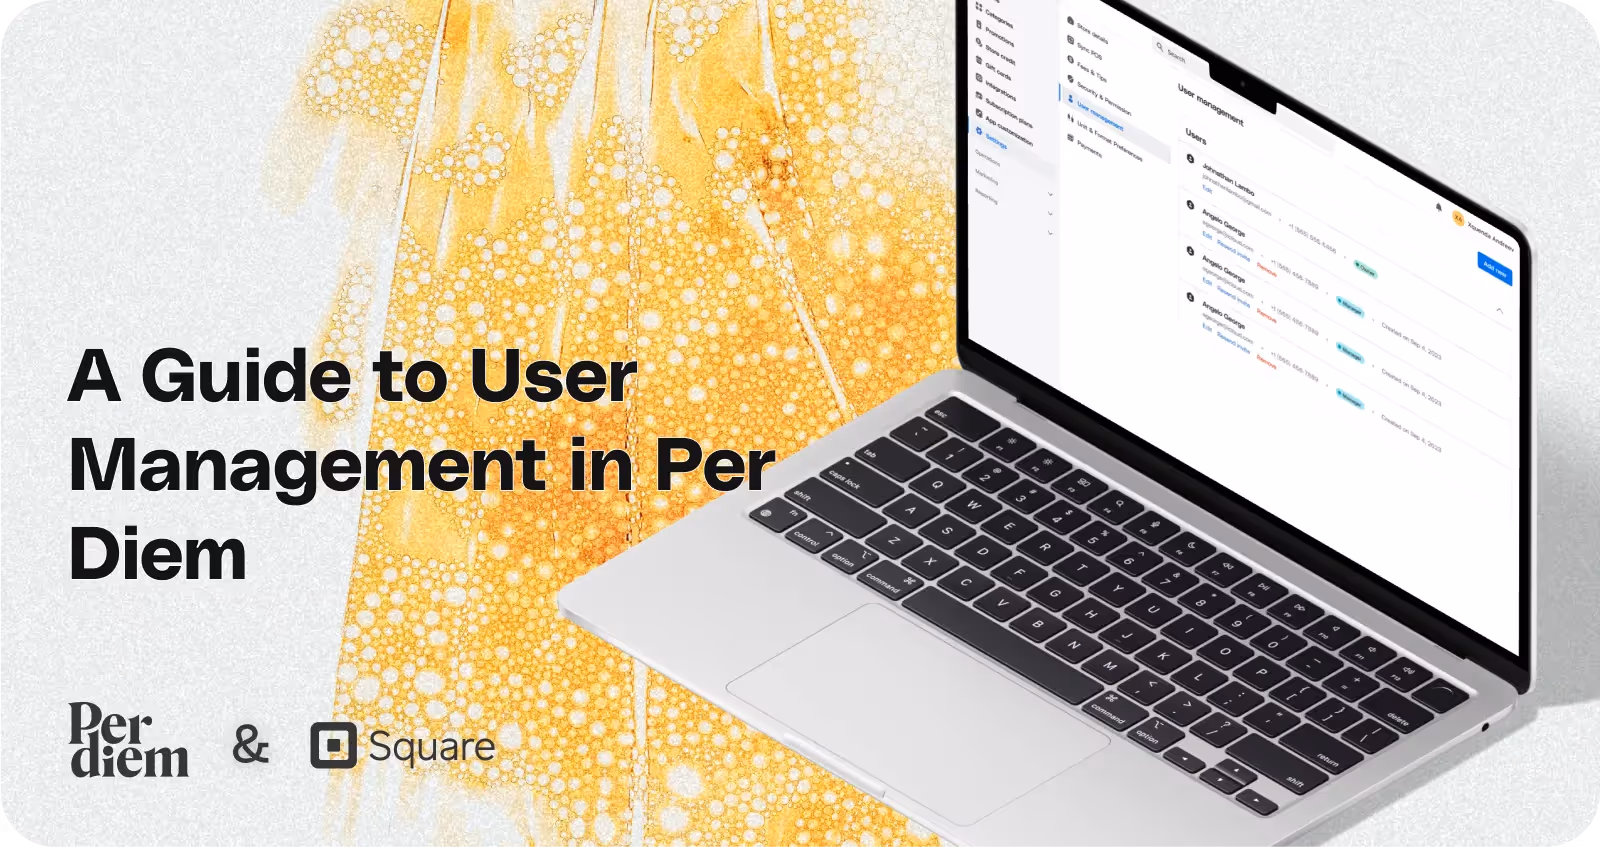
A guide to user management in Per Diem
Instructions
- Log in to your Per Diem merchant dashboard.
- From the left sidebar of your dashboard, click on "Settings."
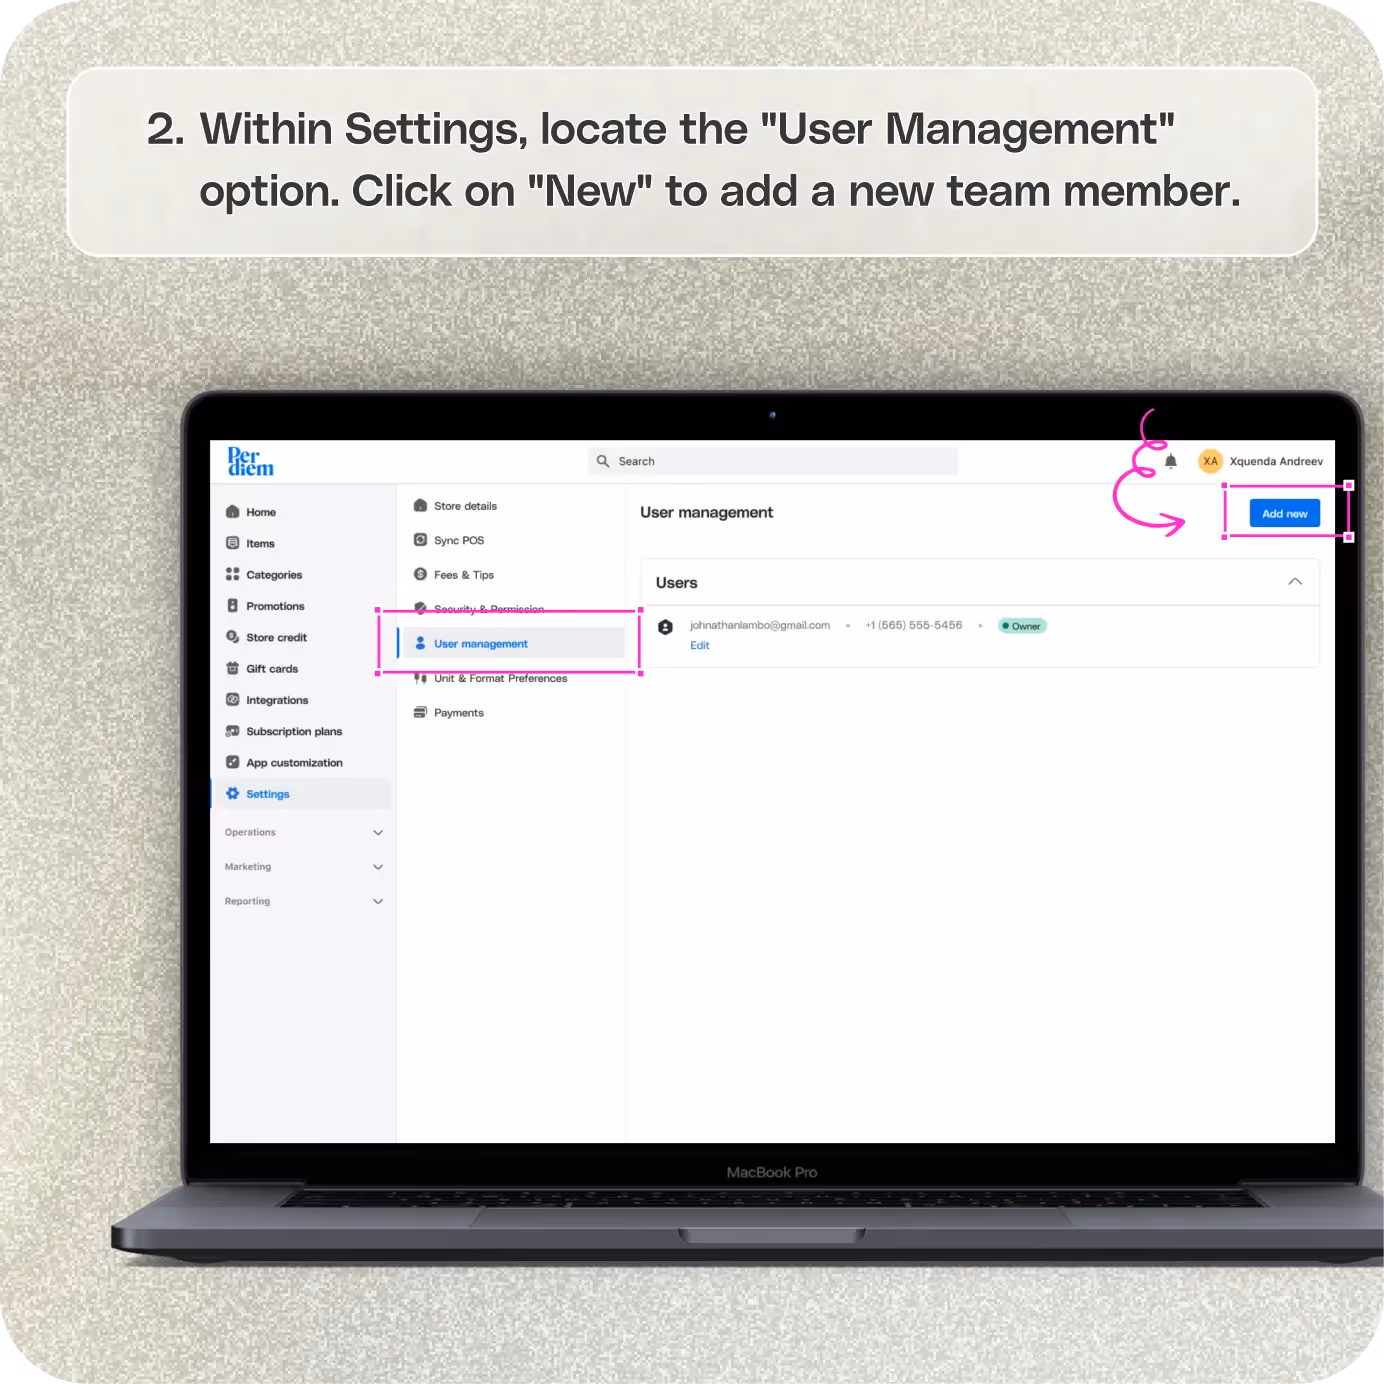
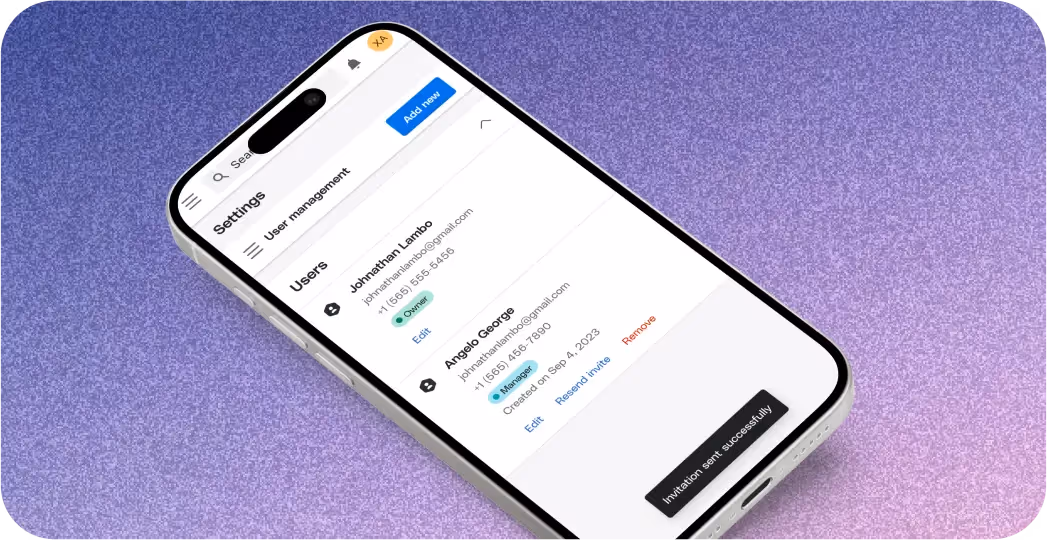
- Within Settings, locate the "User Management" option.
- Click on "New" to add a new team member.
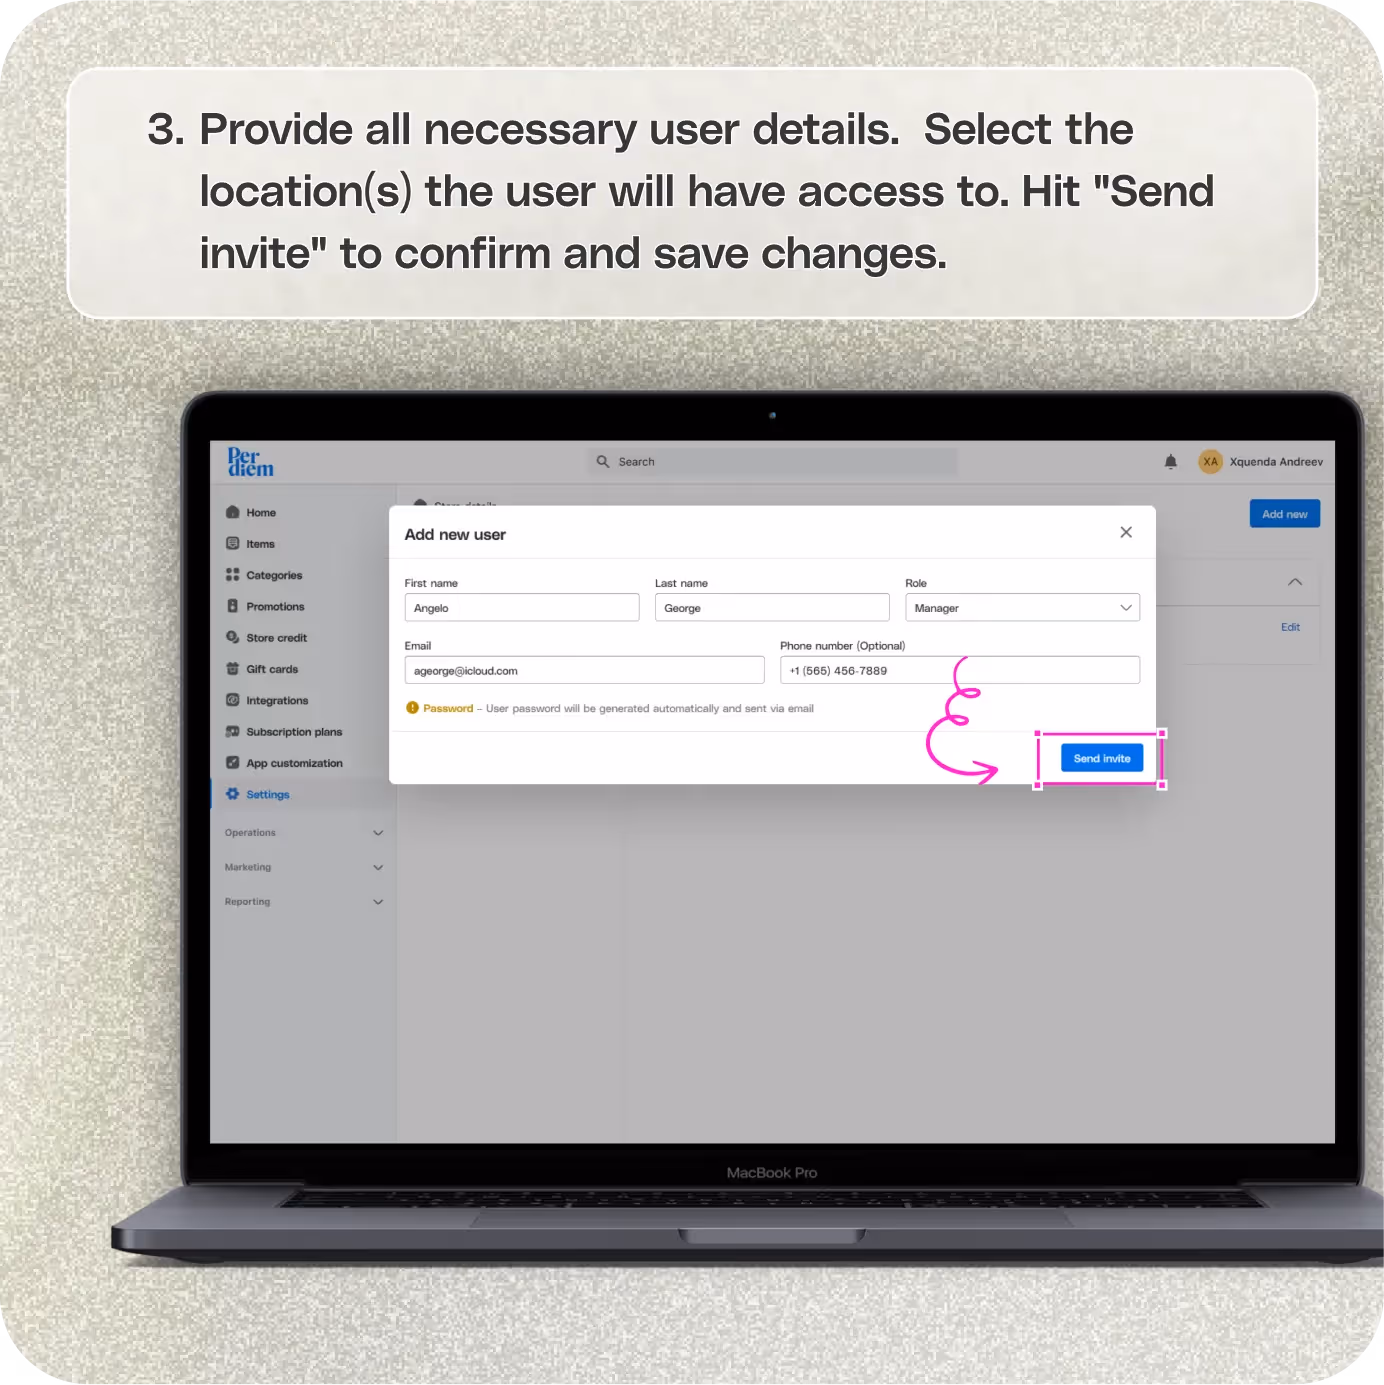
- Provide all necessary user details.
- Select the location(s) the user will have access to.
- Hit "Save" to confirm the changes.
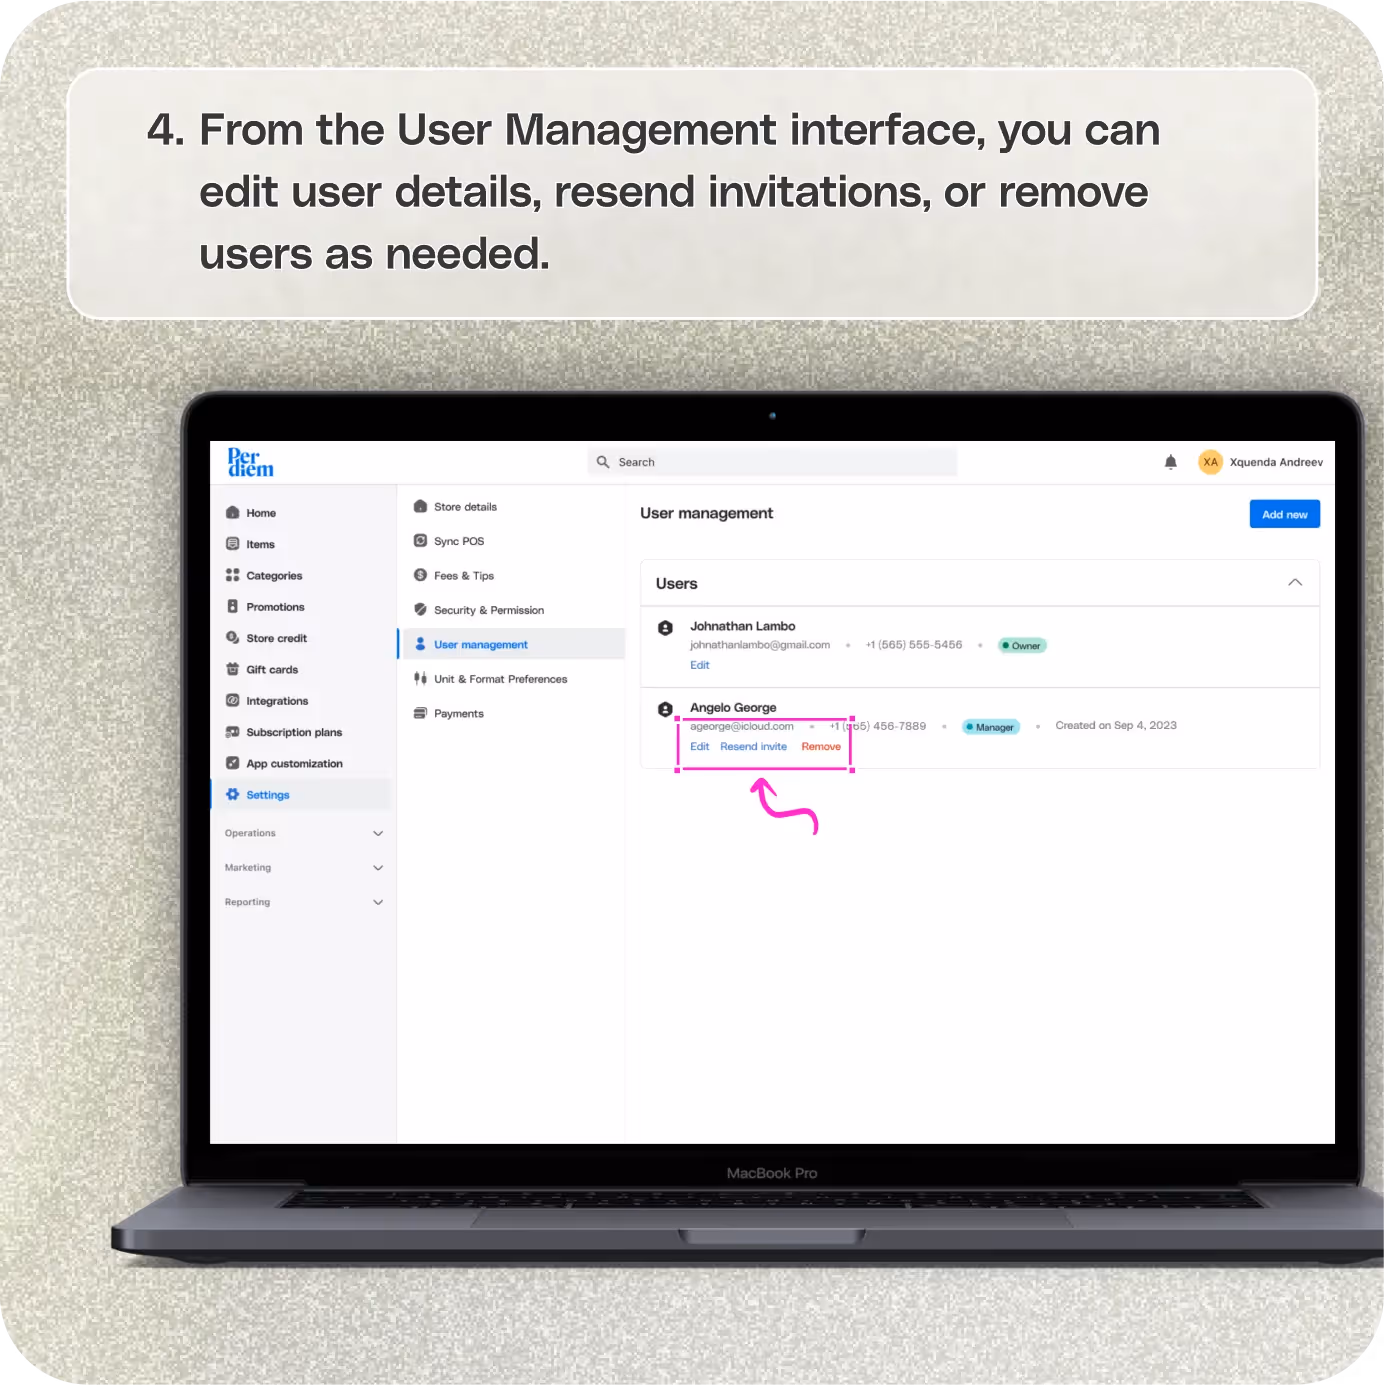
- From the User Management interface, you can edit user details, resend invitations, or remove users as needed.
Still require support?
Contact support
Log in to Your Merchant Dashboard
Gain control over user access:
Step 1
Log in to your Per Diem merchant dashboard.
Go to Settings
Navigate to the heart of user management:
Step 1
From the left sidebar of your dashboard, click on "Settings."
Access User Management
Empower your team with tailored permissions:
Step 1
Within Settings, locate the "User Management" option.
Step 2
Click on "New" to add a new team member.
Join the Per Diem Local Partner Program
Submit updates to your business details for review by Per Diem’s moderation team before they go live.
Fill in the Details
Customize access and permissions with precision:
Step 1
Provide all necessary user details.
Step 2
Select the location(s) the user will have access to.
Step 3
Hit "Save" to confirm the changes.
Manage User Permissions
Stay in control with flexible user management options:
Step 1
From the User Management interface, you can edit user details, resend invitations, or remove users as needed.
With Per Diem, managing user access and permissions is a breeze. Take charge of your team's access levels and streamline your operations with ease.


.svg)


Still have questions?Contact us
Ask anything or just say hi

