


























How to Build a Website with Per Diem Website Builder
Per Diem Website Builder lets you create a fully branded, SEO-optimized website with no coding required. Using the drag-and-drop editor, you can choose a design theme, customize every section, preview your site, and publish it directly from your merchant dashboard.
- Navigate to: Merchant Dashboard → Sales Channels → Website Builder
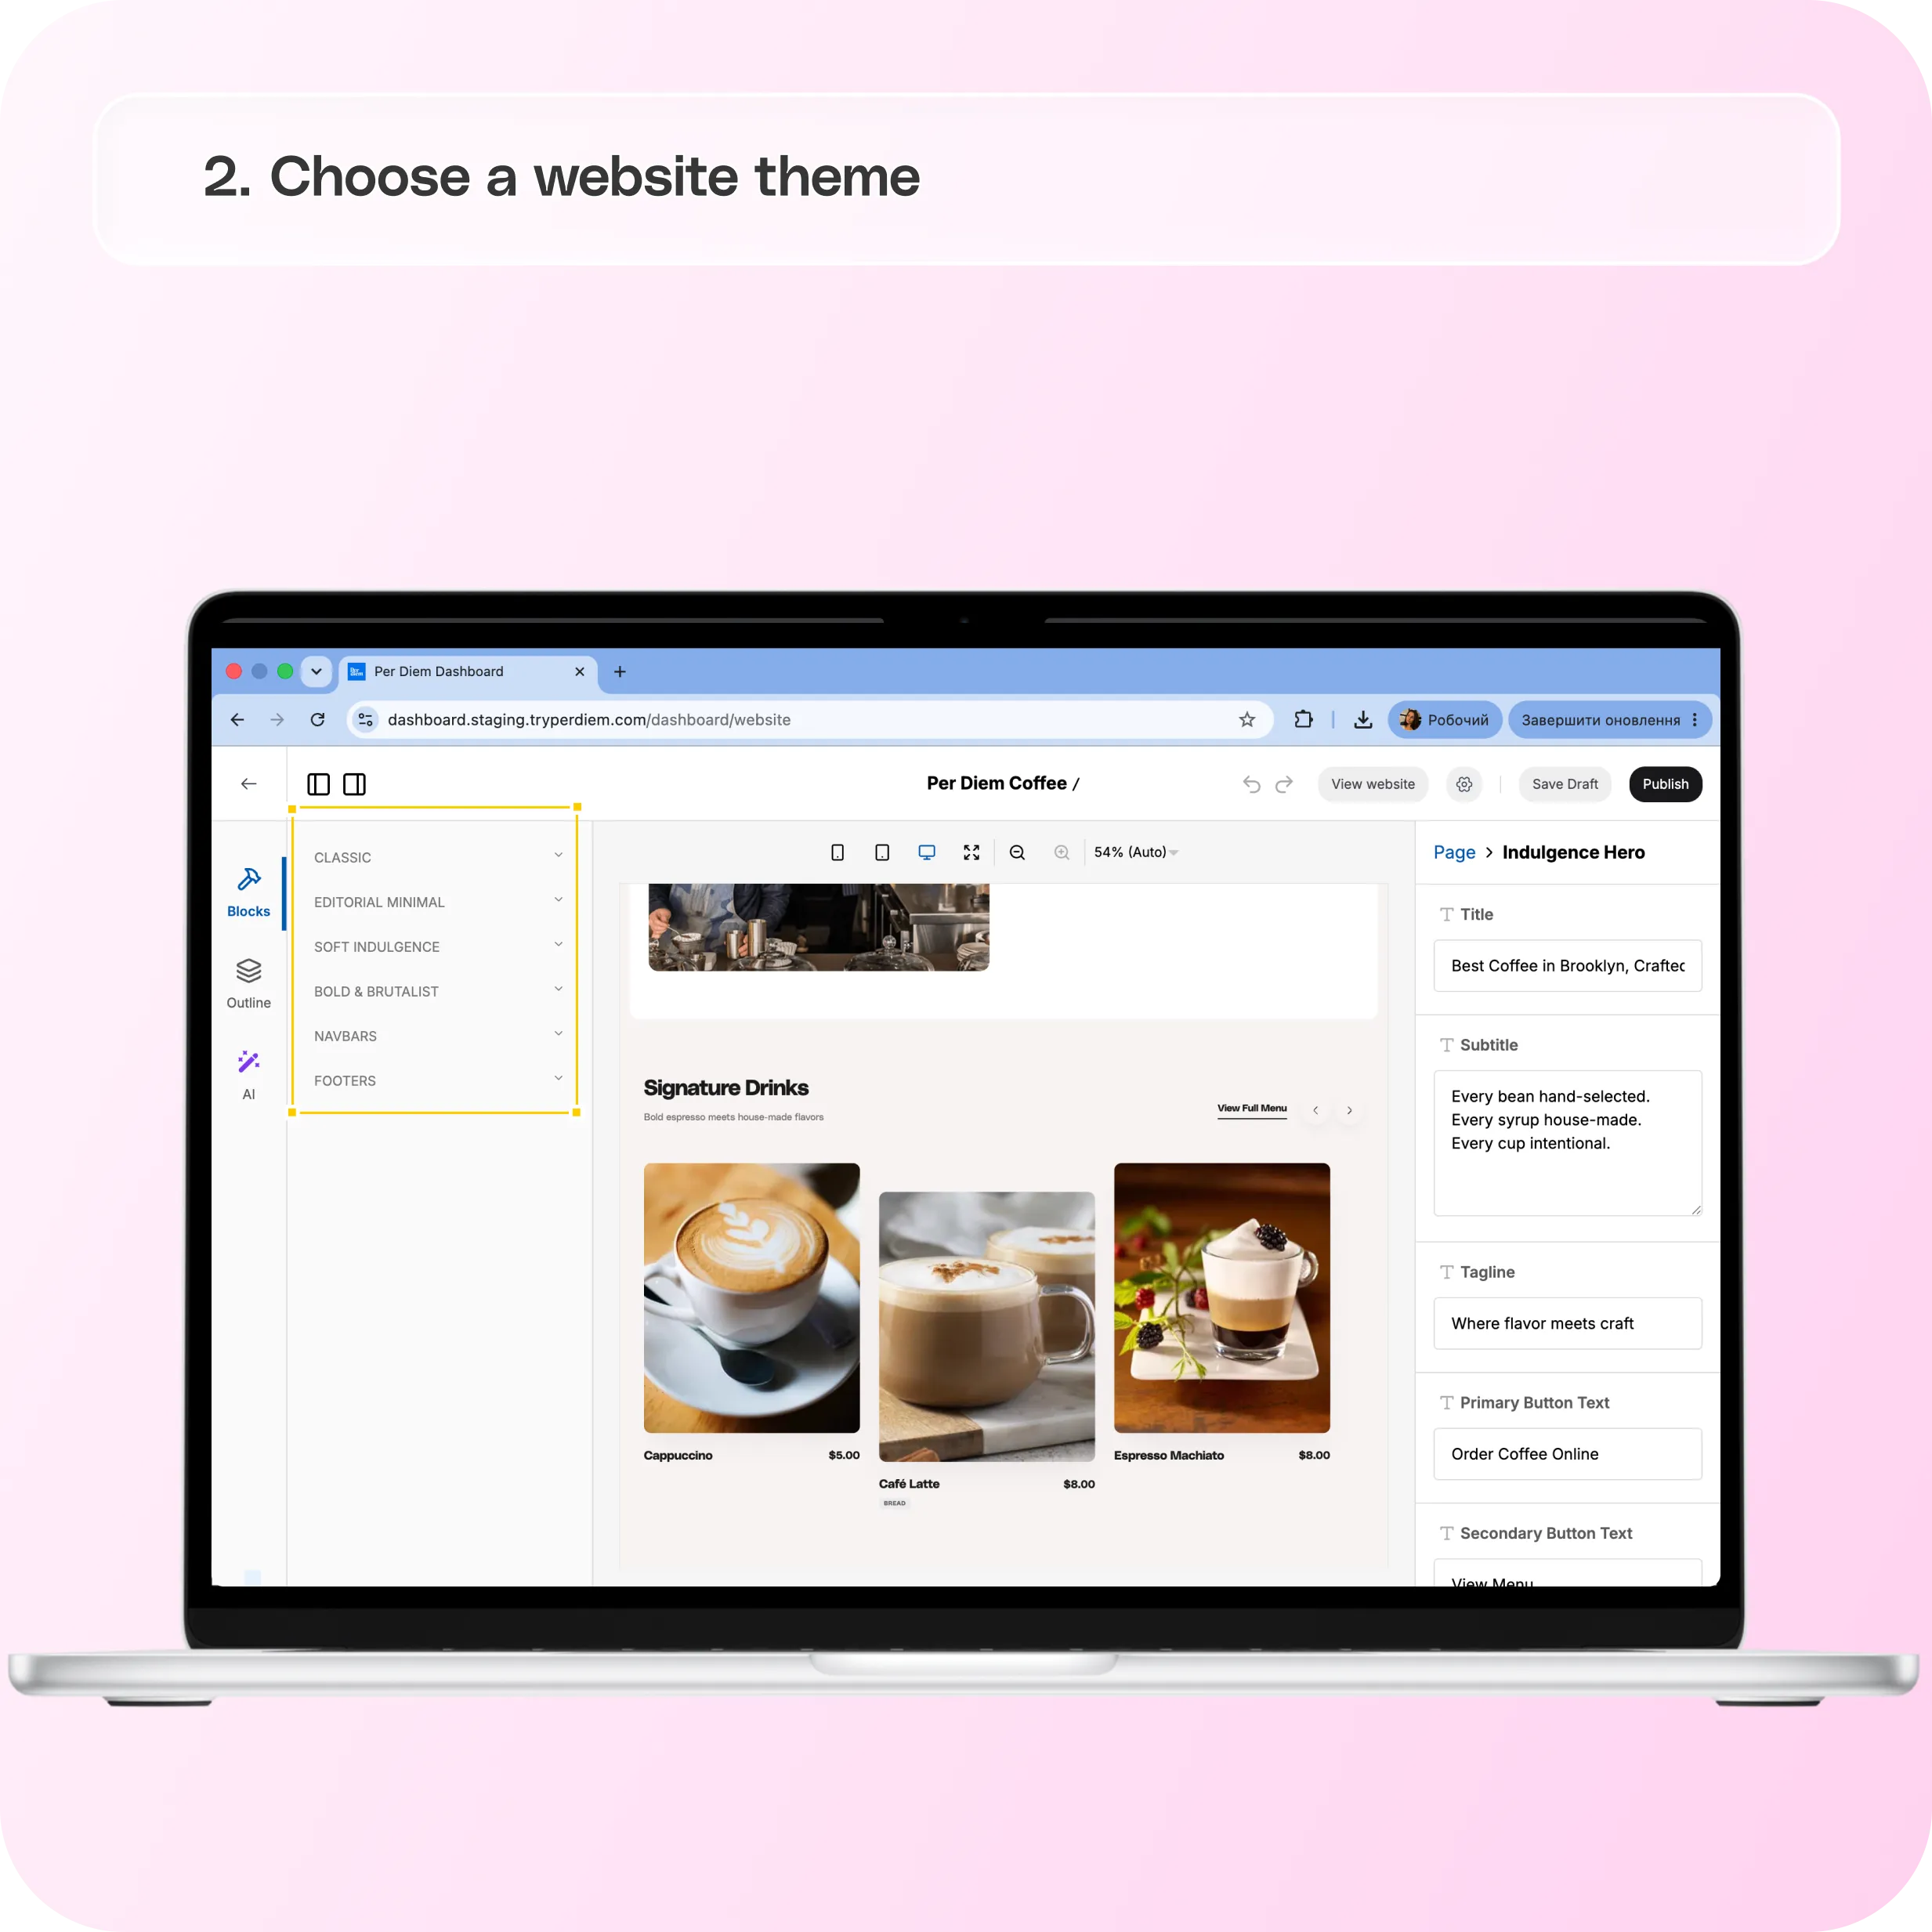
- Open the Blocks tab on the left side of the editor.
- Choose one of four available design themes:
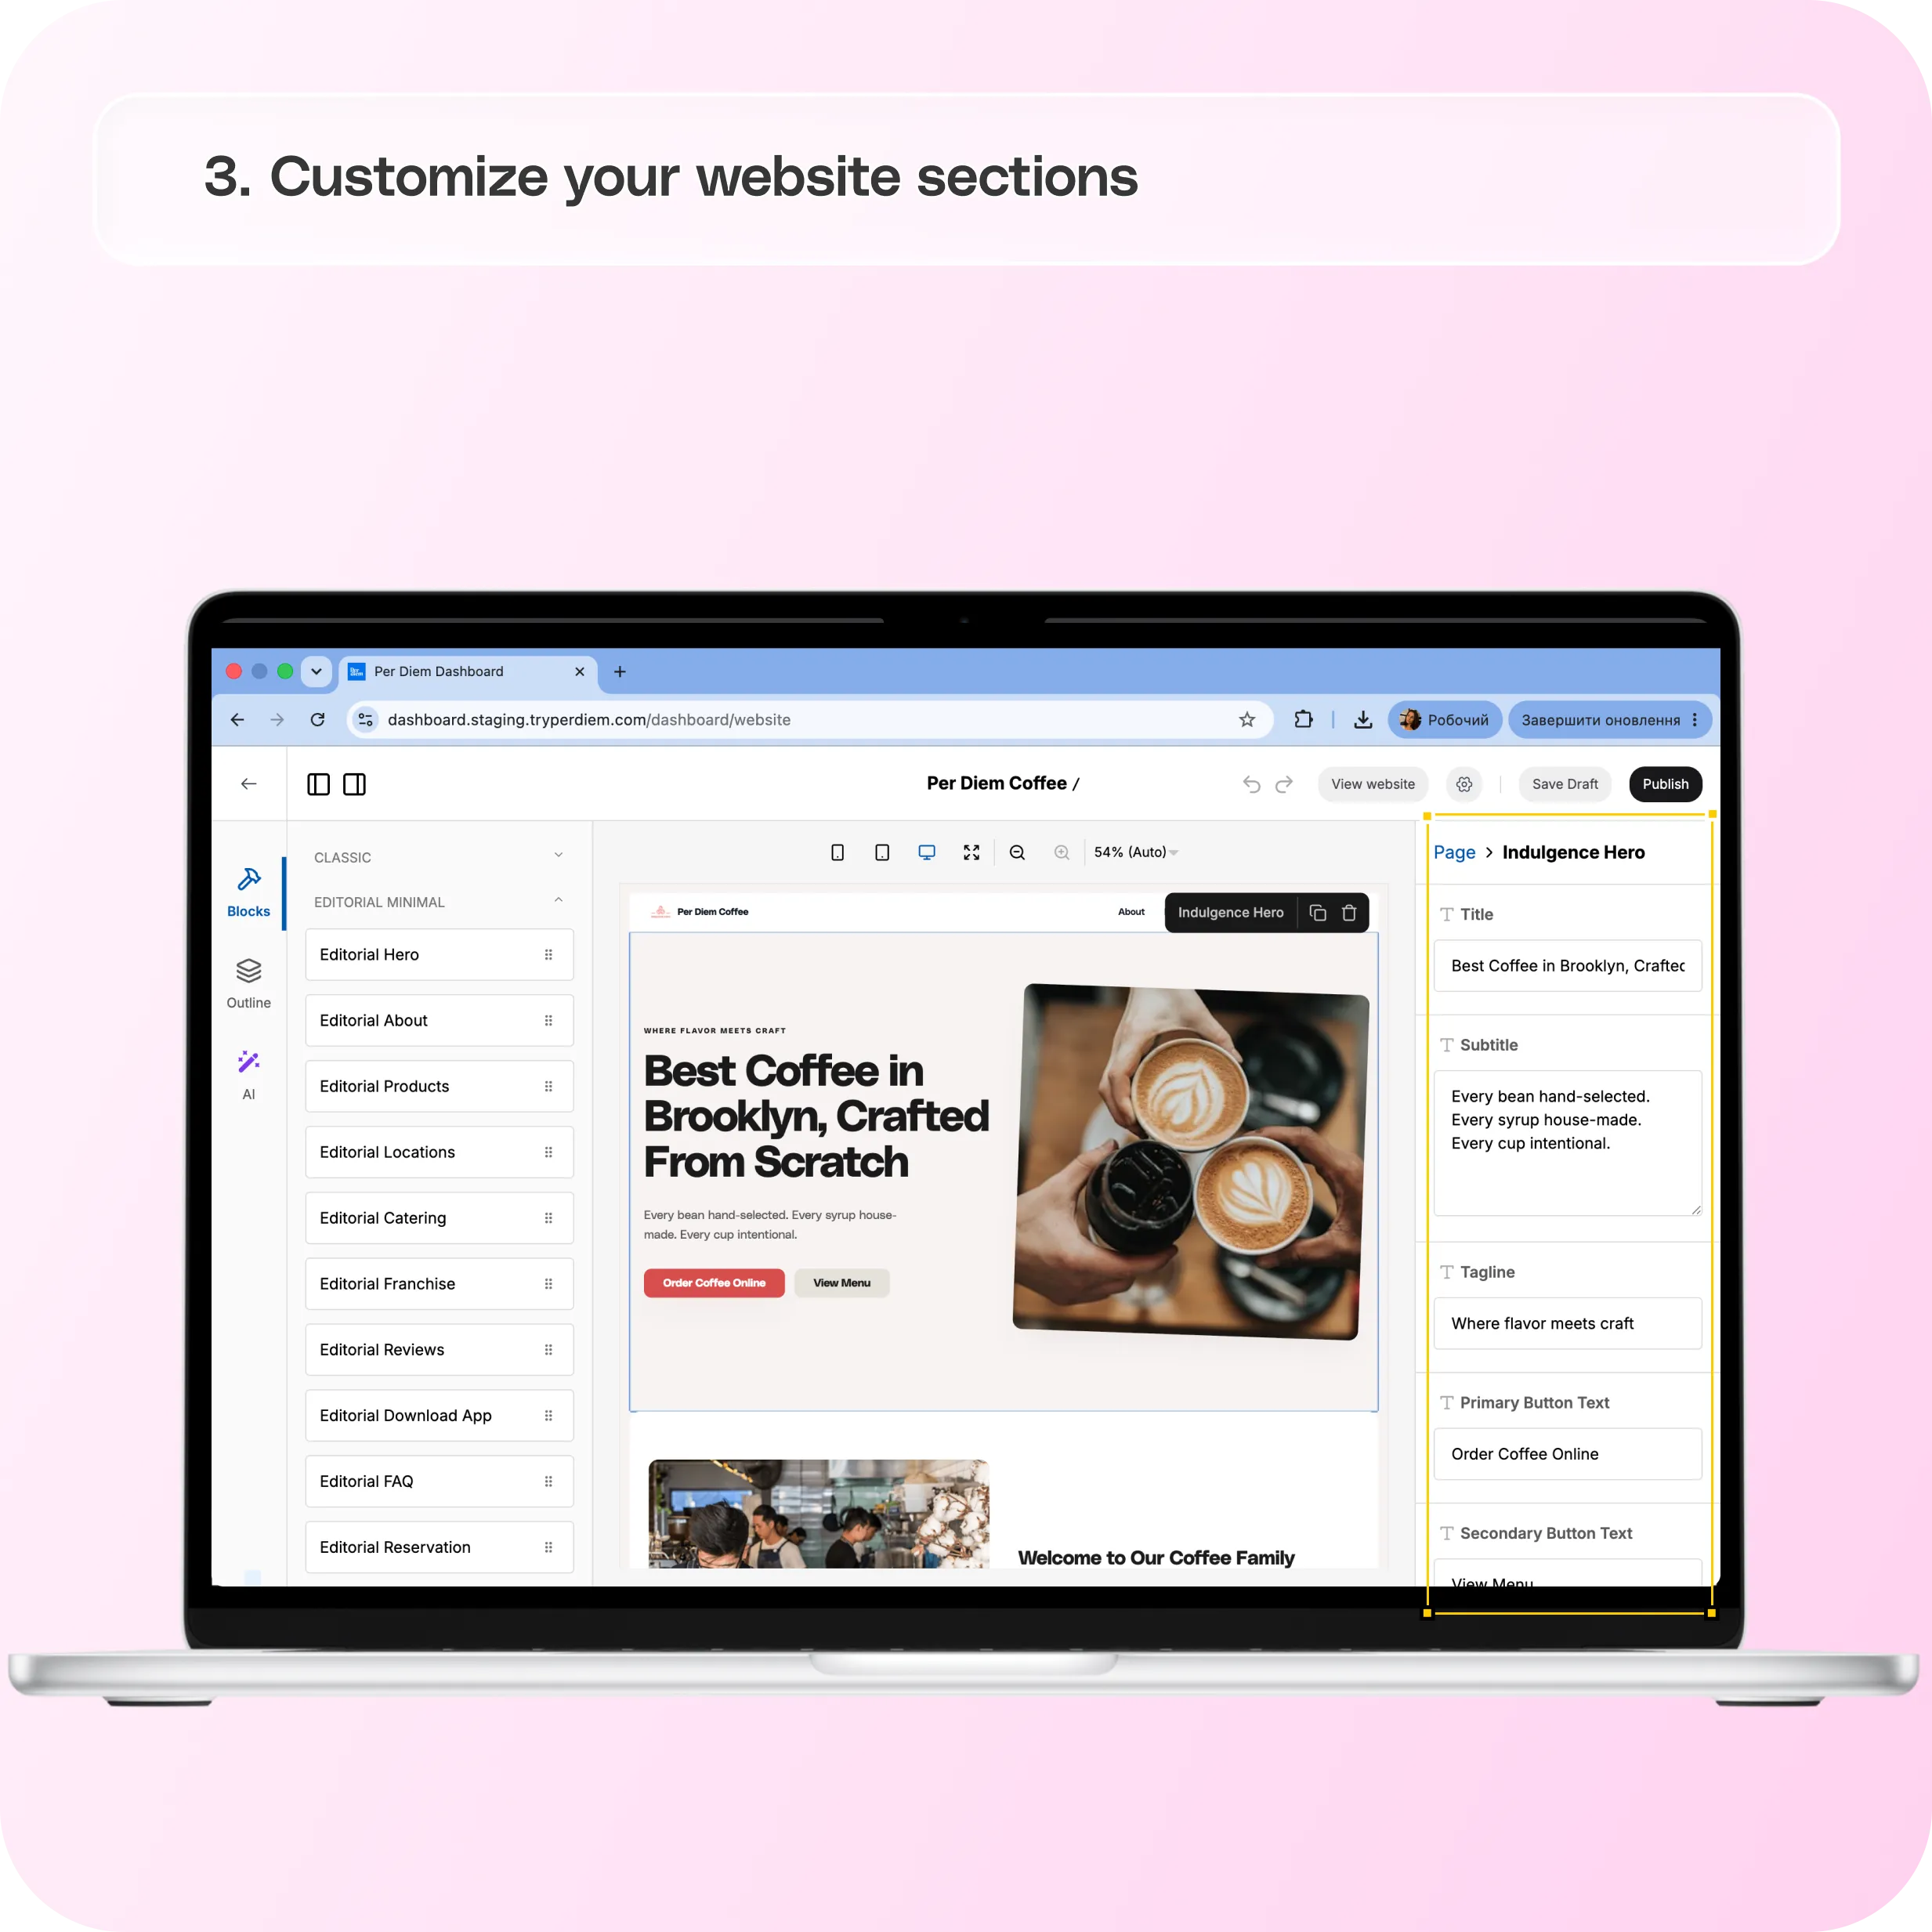
- Click any section on the page to open its editing panel on the right. From there you can update text, images, colors, and buttons for that section.
- Open the Outline tab to see your full page structure top to bottom, in the order it currently appears on your site.
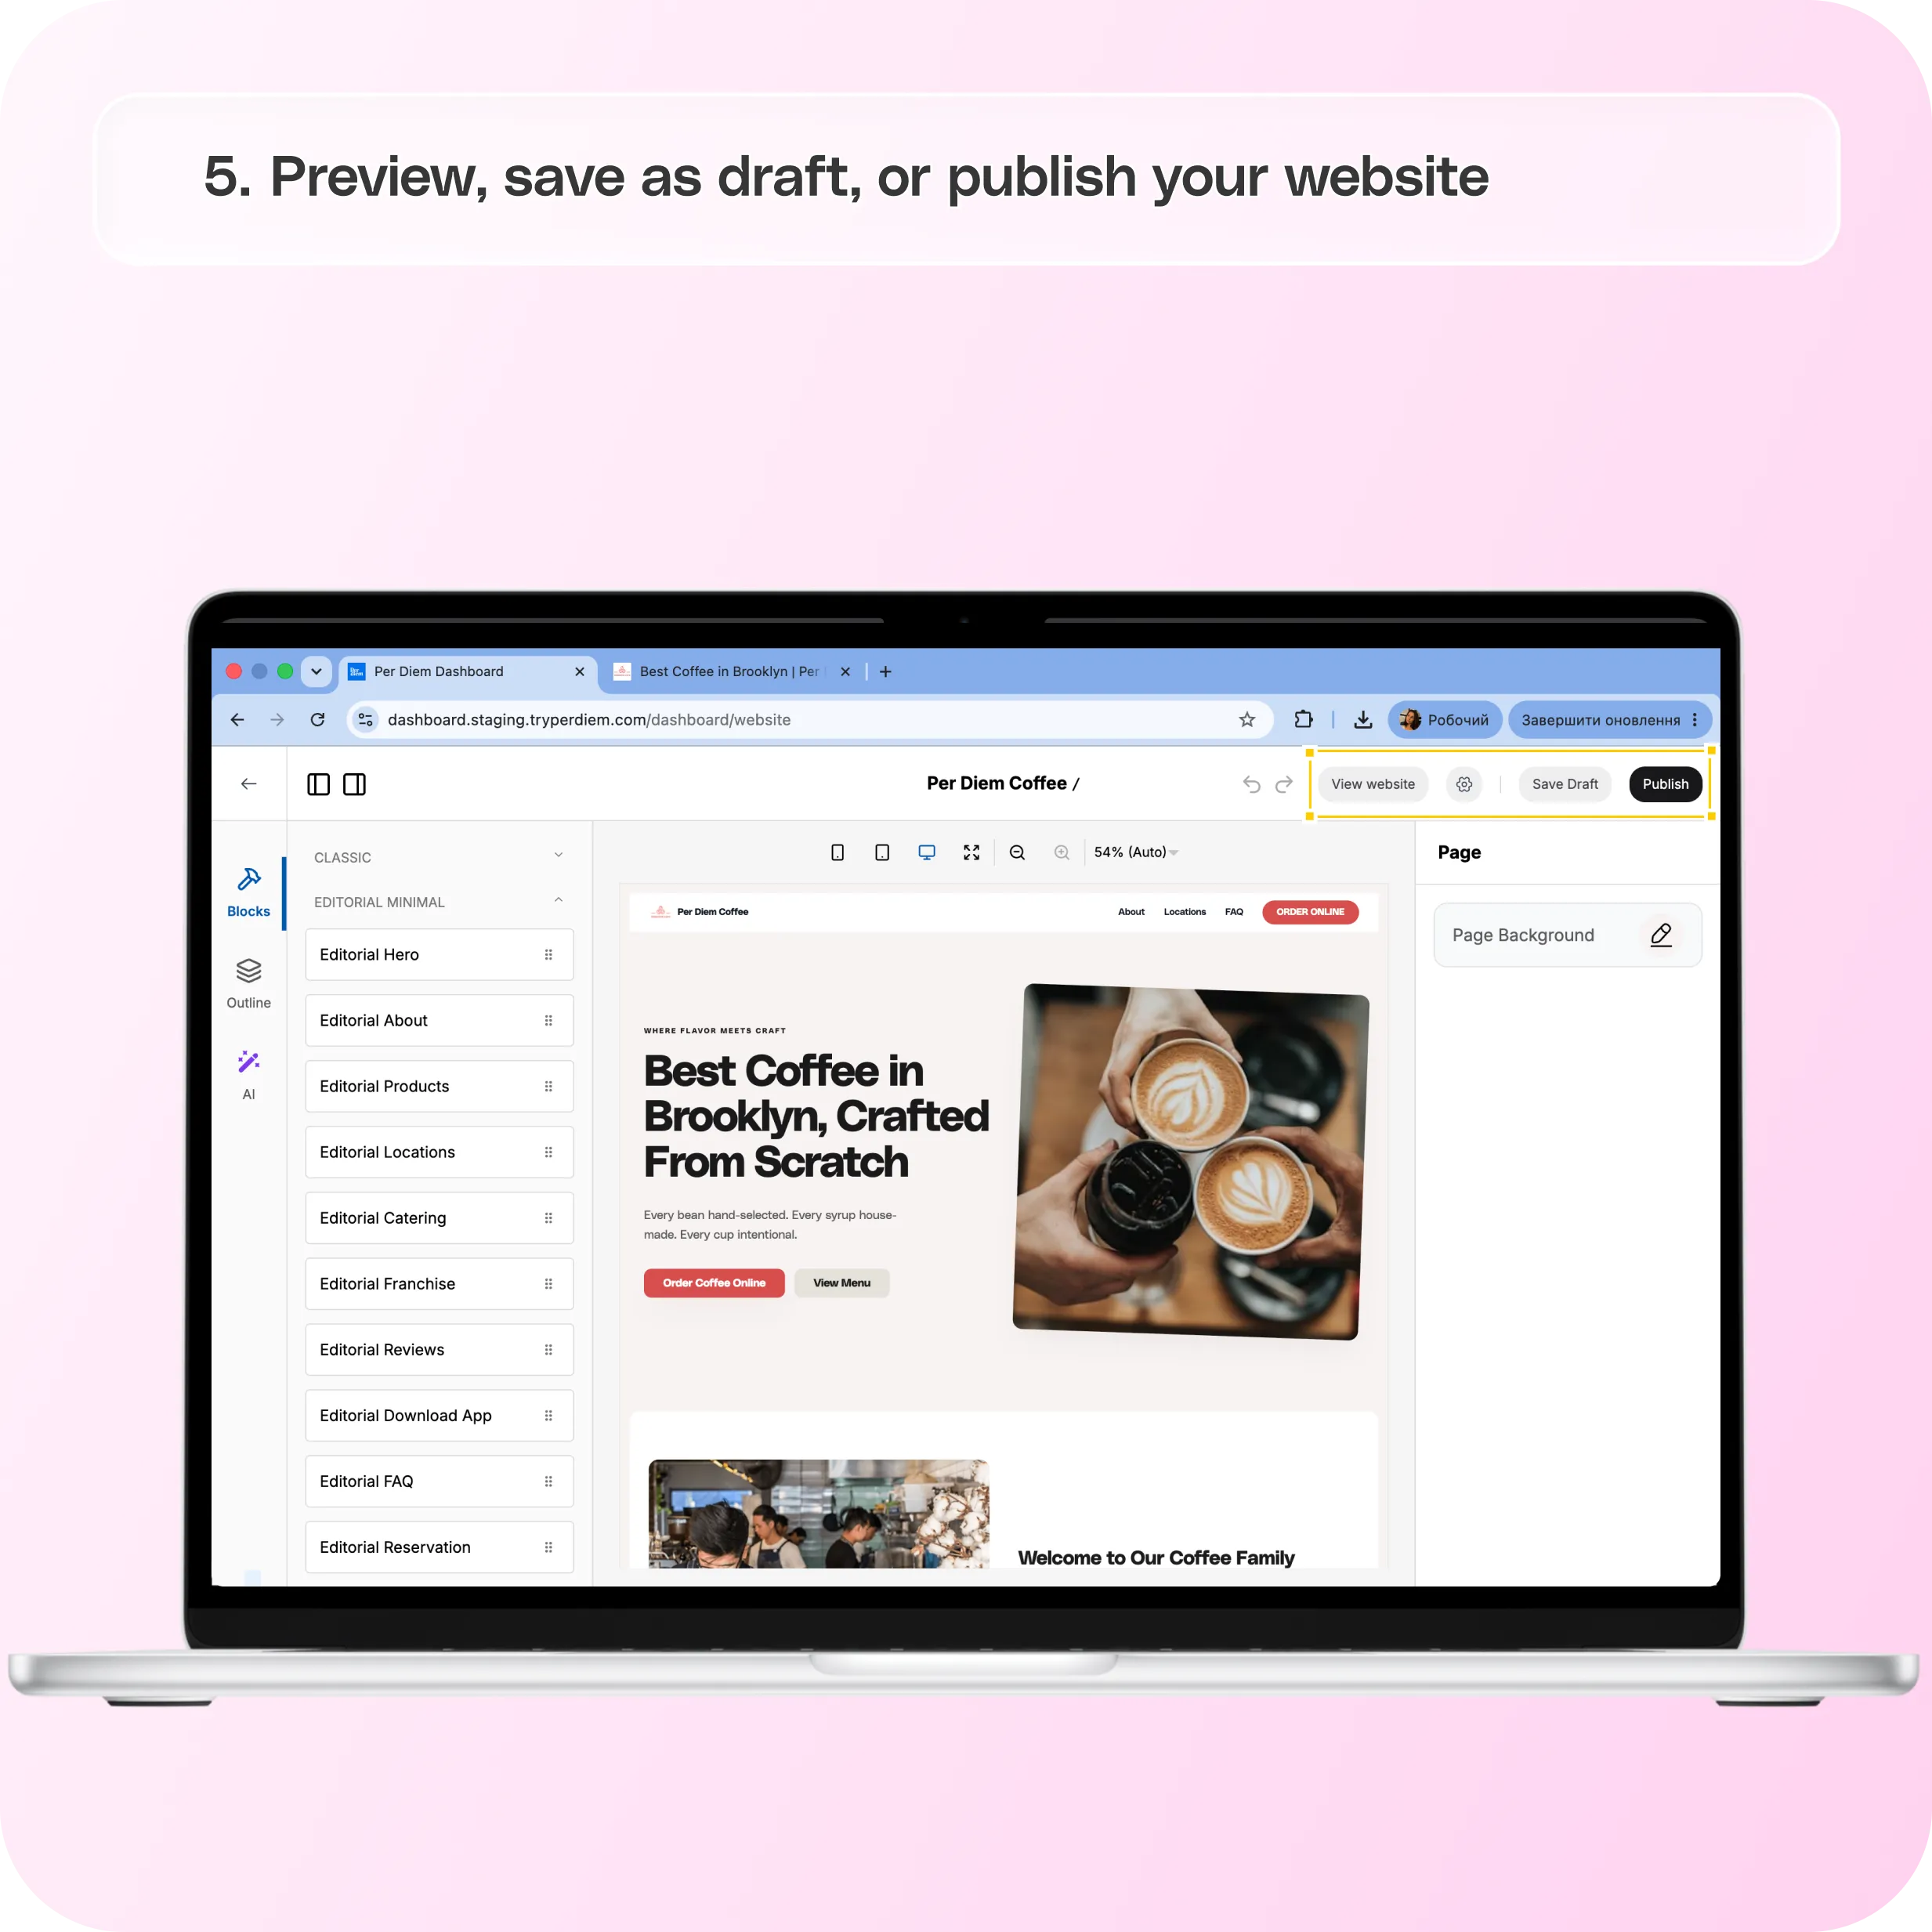
- Preview, save as draft, or publish your website
Still require support?
Contact support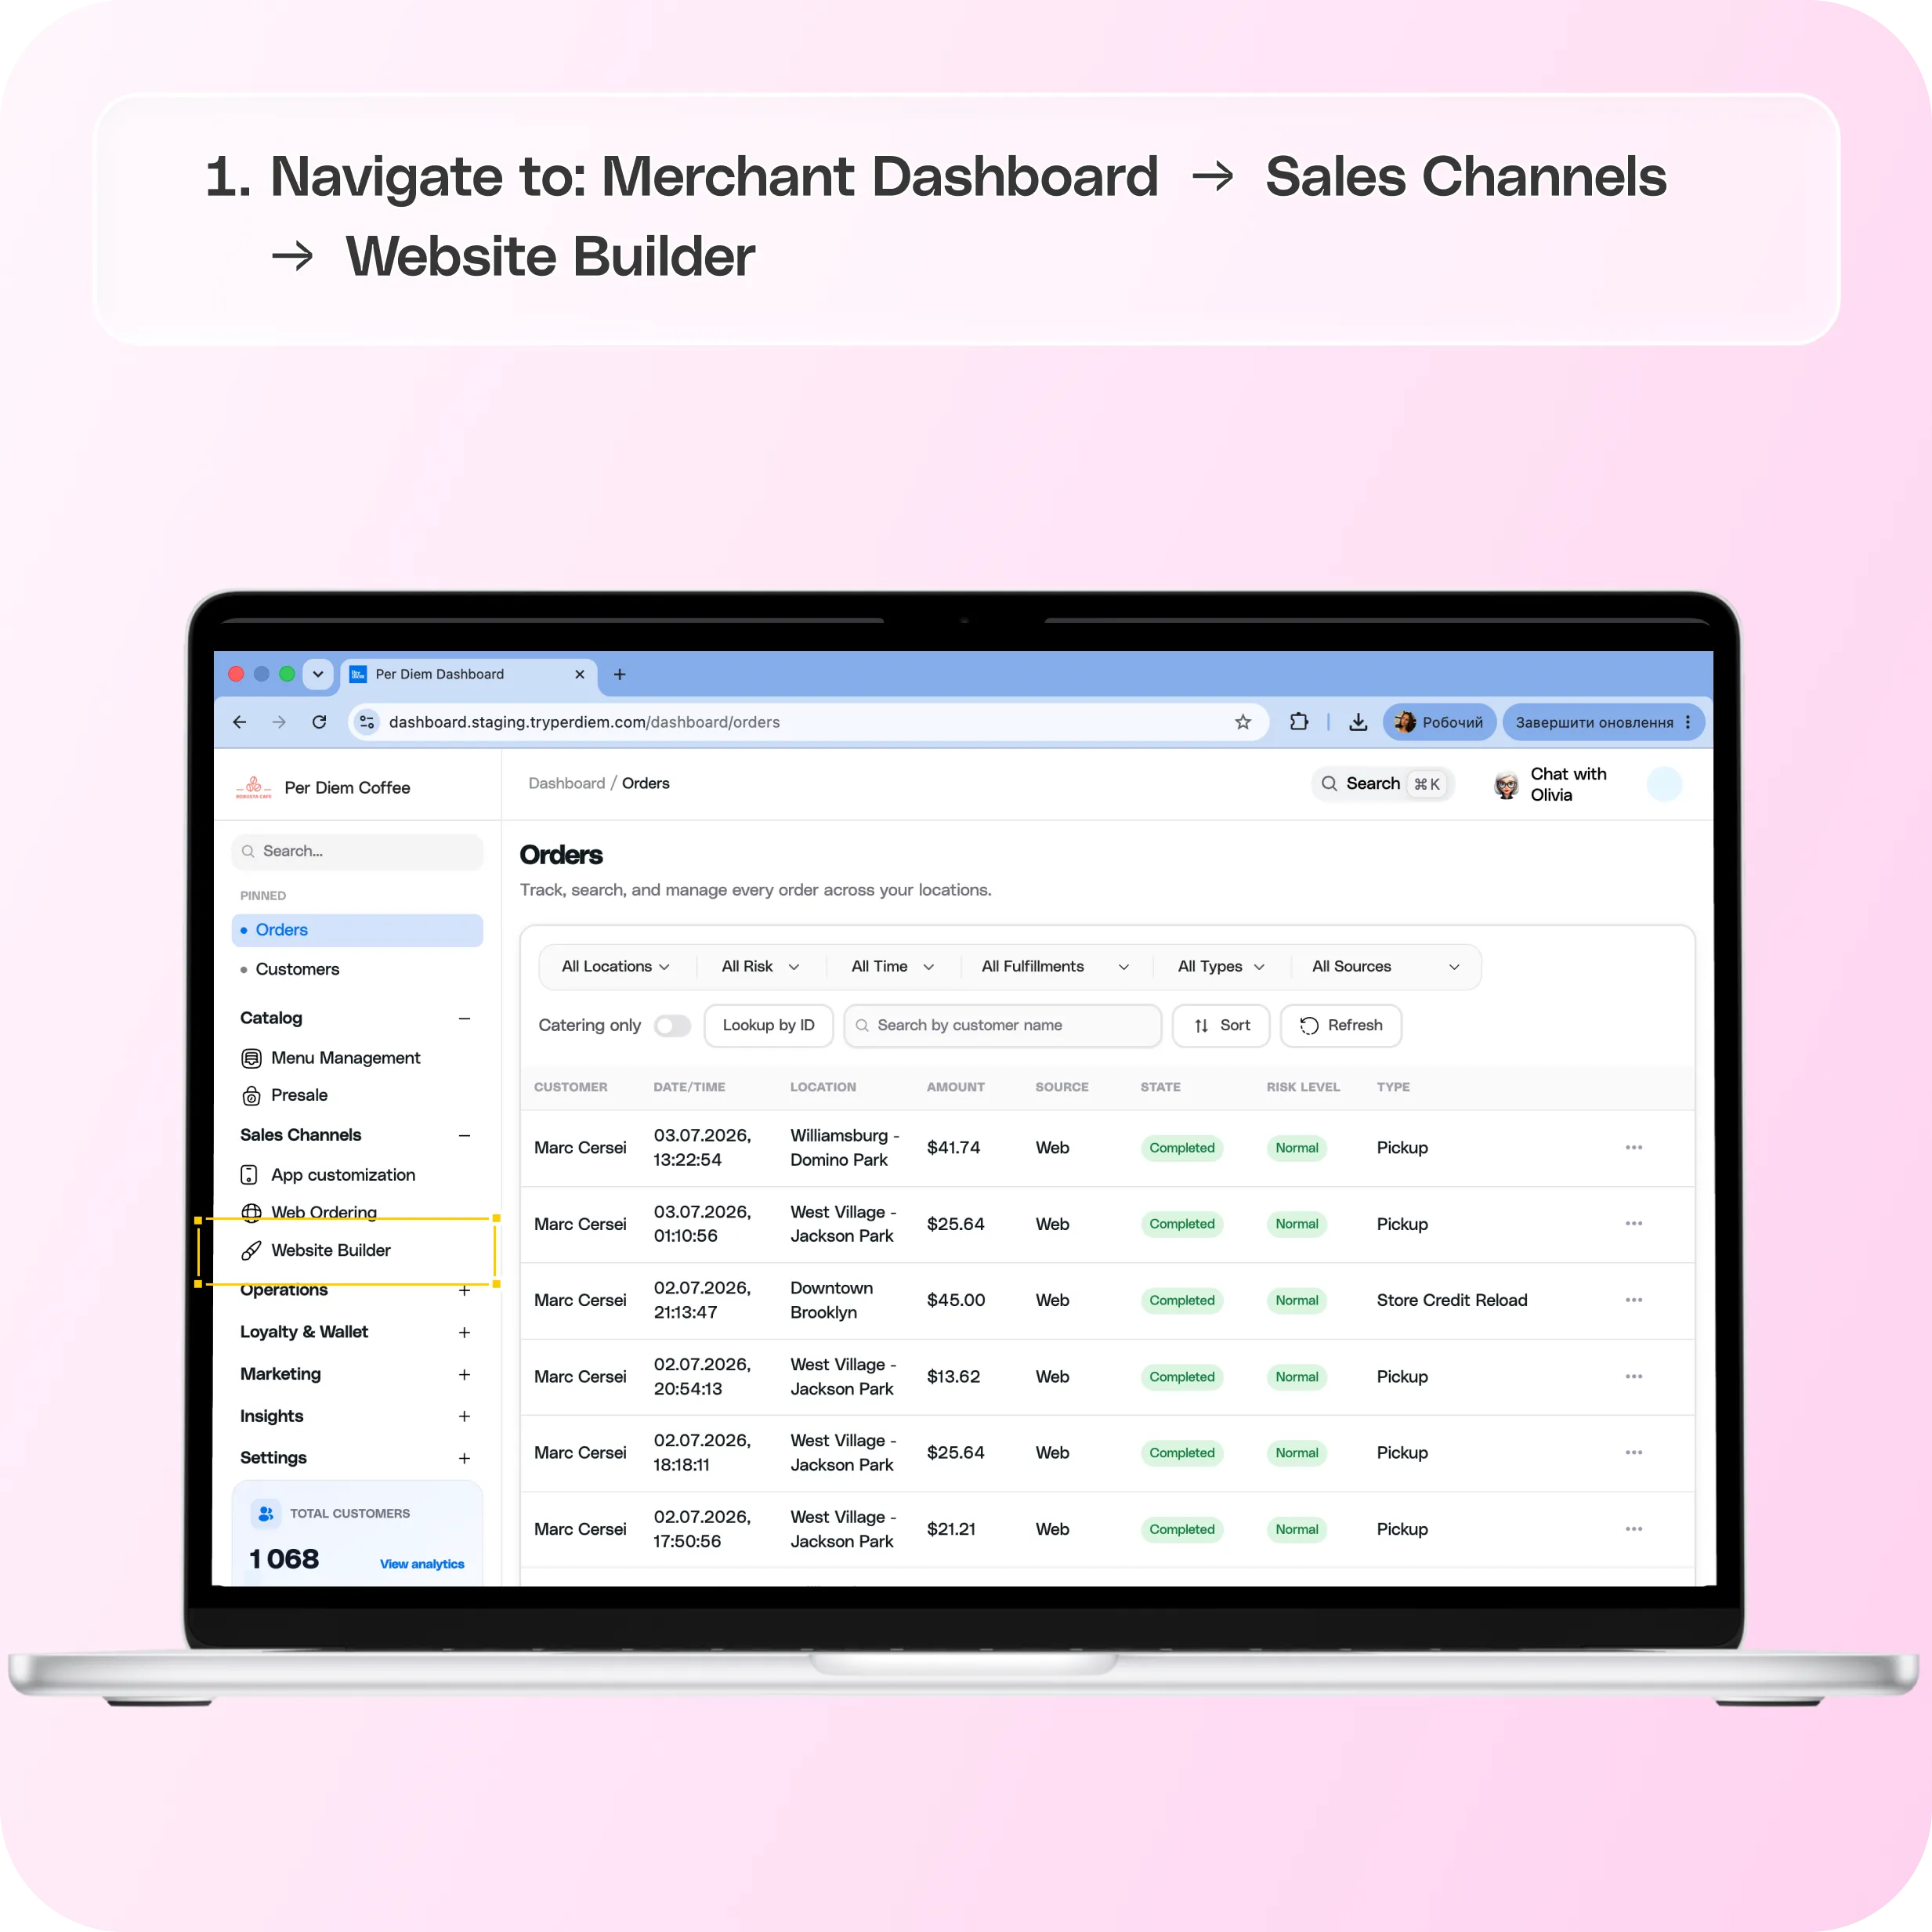
Where to Find Website Builder
Navigate to: Merchant Dashboard → Sales Channels → Website Builder
Website Builder opens directly into the visual editor, where you can begin designing your website right away.
The editor has three tabs on the left (Blocks, Outline, AI), a live preview of your site in the center, and an editing panel on the right that updates based on whatever you have selected.
STEP 1. Choose a Website Theme
Open the Blocks tab on the left side of the editor.
Choose one of four available design themes:
- Classic
- Editorial Minimal
- Soft Indulgence
- Brutalist
Each theme includes matching versions of every section, including the Navbar and Footer, so the whole site stays visually consistent.
**
STEP 2. Customize Your Website Sections**
Click any section on the page to open its editing panel on the right. From there you can update text, images, colors, and buttons for that section.
Hero
This is the first thing visitors see, so make sure it clearly communicates your brand and encourages customers to order online. You can edit:
- Title, Subtitle, and Tagline
- Primary and Secondary button text
- Background image and overlay opacity
- Background, text, and button colors
Navbar
- CTA button text
- Background, text, button, and button text colors
Your logo and business name pull in automatically from your account settings.
Products
The Products section automatically displays menu items marked as Promoted in Menu Management. If no items are marked as promoted, this section will show “No promoted products found.”
You can also customize the section title, “View All” button text, and colors.
About
- Quote and Attribution
- Description
- Image
Use this section to tell your brand story in your own voice.
Locations
- Title and Description
- Background, text, and button colors
This section automatically pulls in real data for each location on your account, including address, hours, phone number, email, a map, and “Get Directions” / “Order Online” buttons. Make sure your store details and hours are accurate in Settings before publishing.
Reviews
- Title
- Background and text colors
Customer reviews populate here automatically — there’s nothing to fill in manually.
Download App
- Title and Description
- App preview image
- App Store and Google Play buttons (linked automatically)
FAQ
- Title
- A fully custom list of questions and answers
Add, edit, remove, or drag to reorder individual FAQ items to answer the questions your customers ask most.
Catering and Franchise
If your business offers catering or supports multiple franchise locations, matching Catering and Franchise sections are available in the same four themes, with their own title, description, and color options.
Footer
- Tagline
- Background and text colors
Navigation and legal links (like Terms of Service) are generated automatically.
STEP 3. Reorder Your Website
Open the Outline tab to see your full page structure top to bottom, in the order it currently appears on your site.
Click any section in the Outline to jump straight to it in the editor, or drag sections up and down to rearrange the order they appear on your page.
STEP 4. Generate Content with AI (Optional)
Website Builder includes two AI tools:
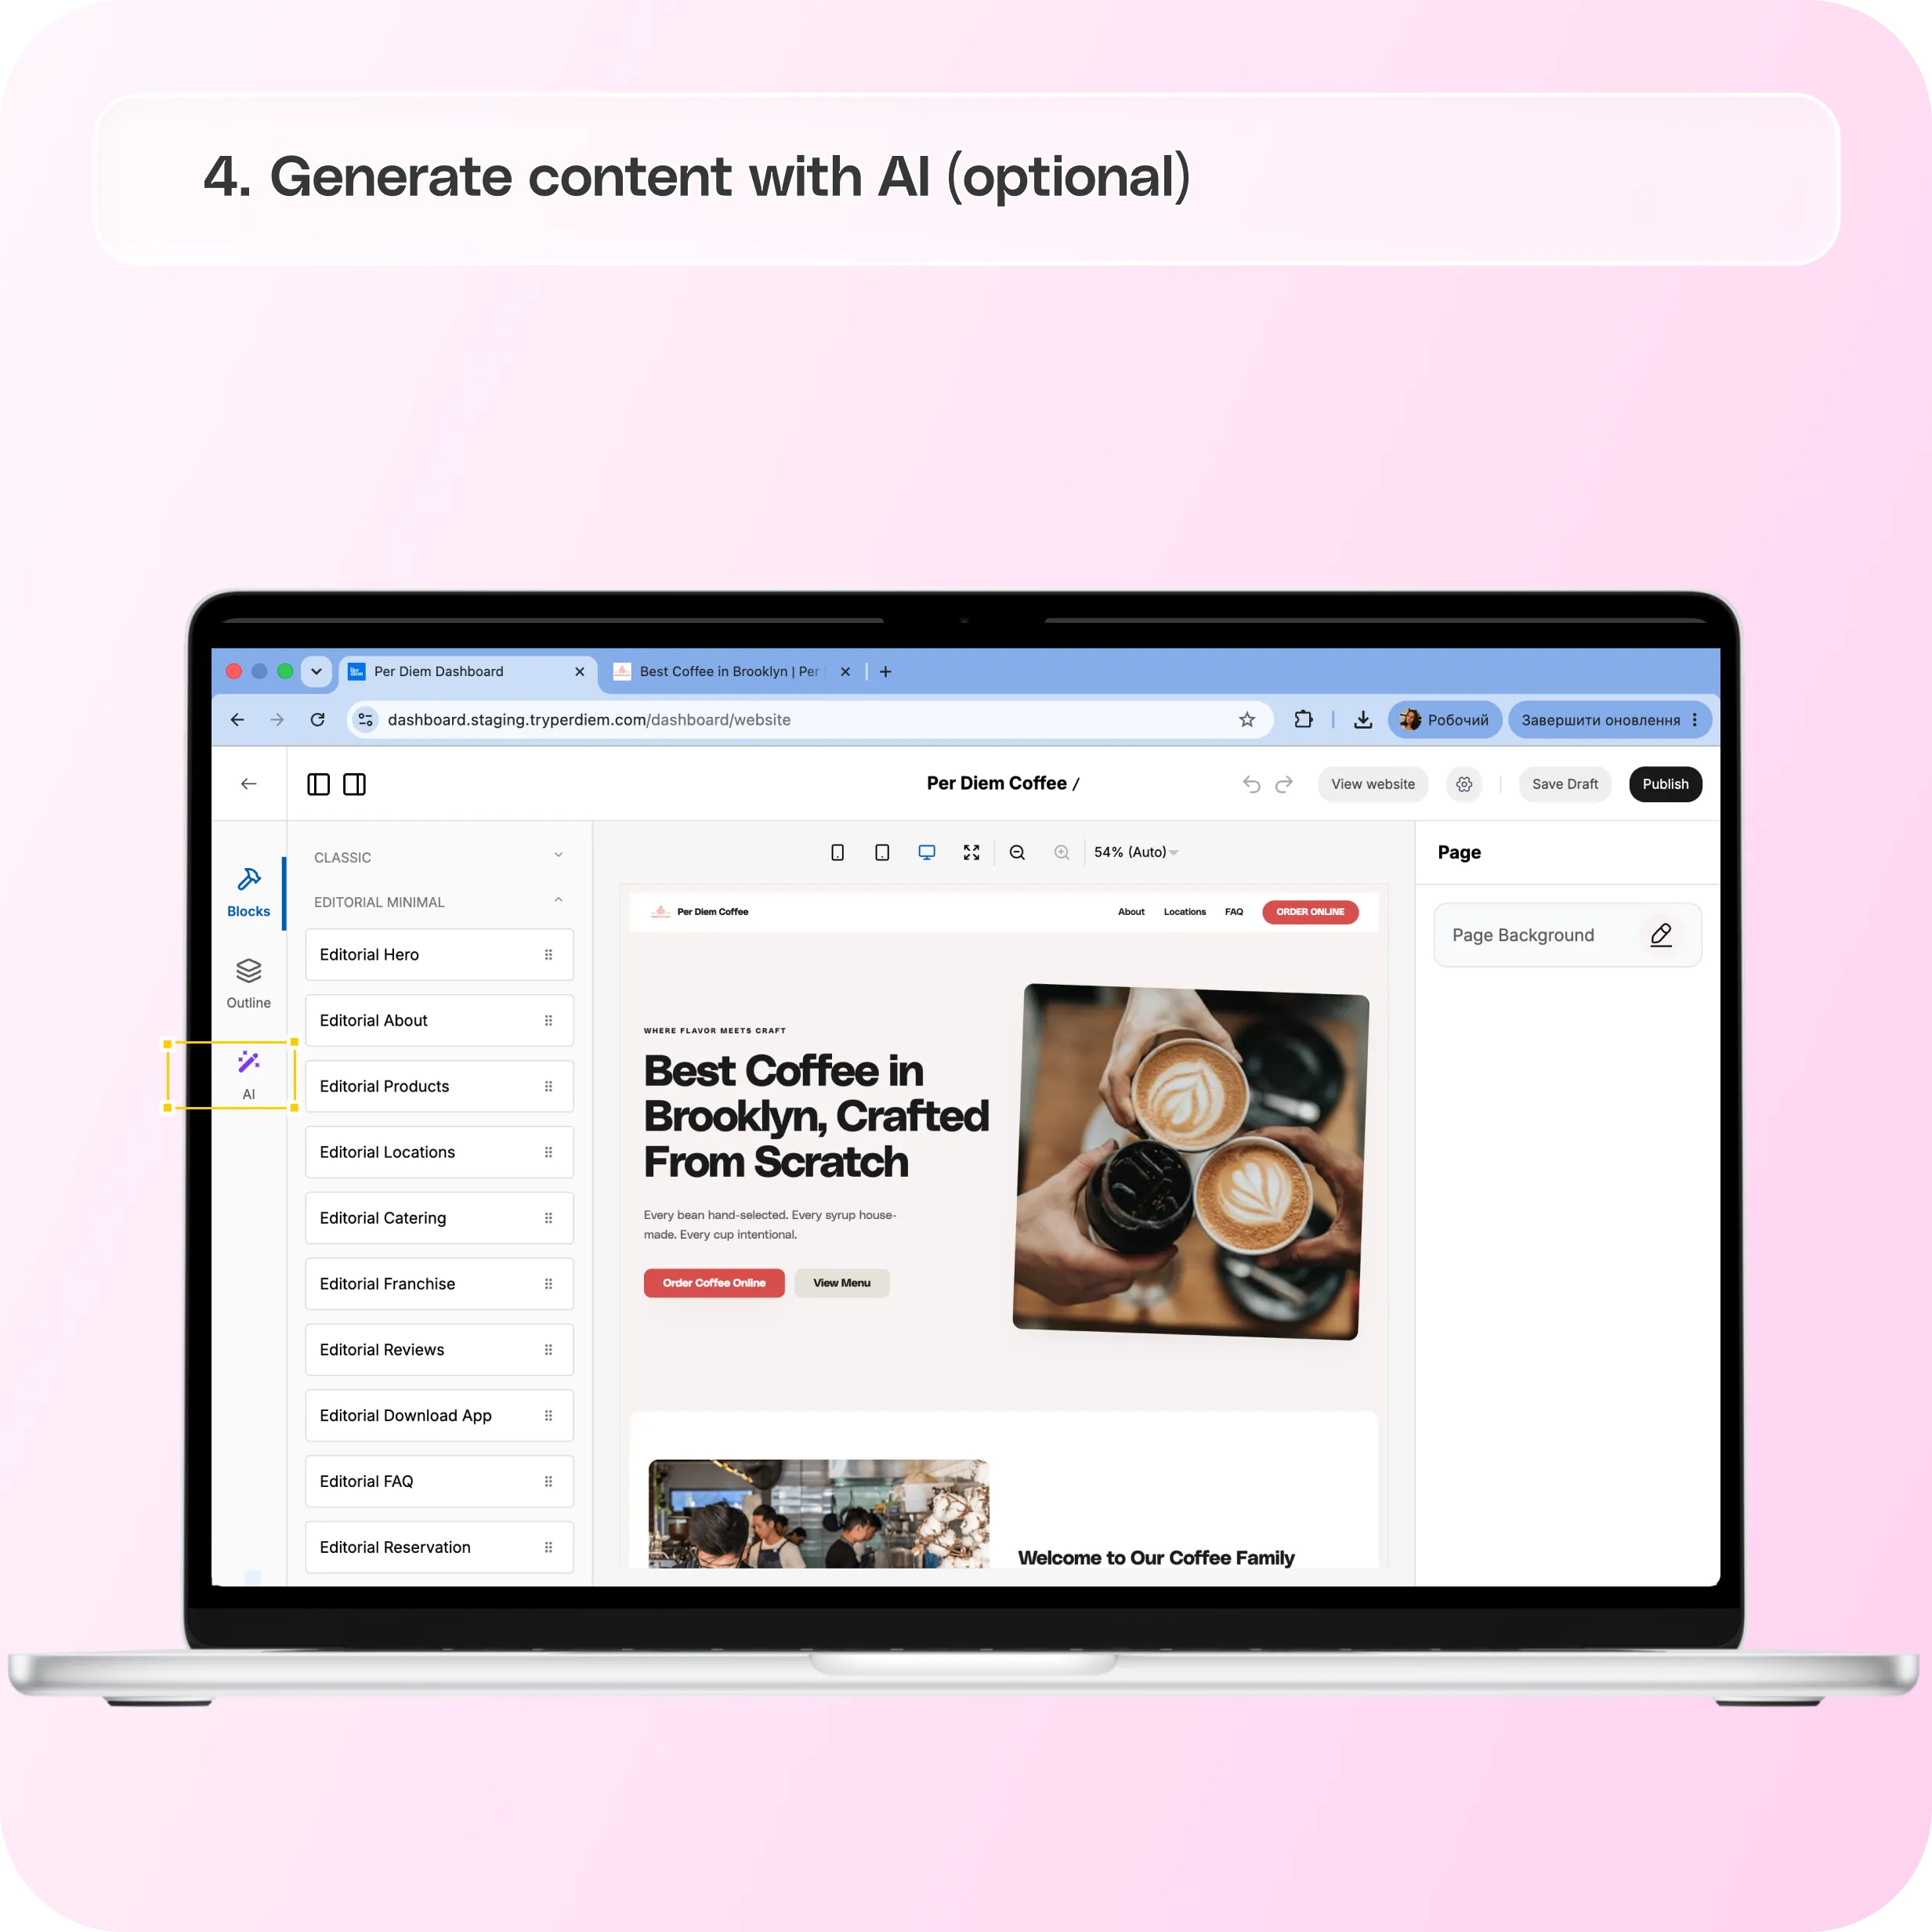
- AI Copywriter (the AI tab): Select any section and use it to generate or rewrite that section’s copy — titles, descriptions, CTAs, and more. This only affects the section you have selected.
- Regenerate with AI (gear icon, top right): Builds an entirely new version of your website from scratch and saves it to your draft.
STEP 5. Preview Your Website
Use the device icons above the canvas to preview your site on mobile, tablet, and desktop sizes. Use the zoom control to adjust how much of the page you see at once, or the fullscreen icon to preview the page at full size.
Always preview on all three device sizes before publishing — content that looks great on desktop can crowd or overflow on mobile.
STEP 6. Save as Draft
Click Save Draft in the top right to save your progress without making it live. Your draft is private and only visible to you in the editor — customers won’t see it until you publish.
Use Save Draft as often as you like while you’re building or editing.
STEP 7. Publish Your Website
When you’re happy with how everything looks, click Publish in the top right. This pushes your draft live to your public website immediately.
STEP 8. Turn Your Website On or Off
Click the gear icon in the top right to access the Website active toggle. Turning this off takes your published website offline and hides it from customers, without deleting any of your content or design work. Turn it back on any time to make your site visible again.
This is useful if you need to temporarily take your site down (for maintenance, a rebrand, etc.) without losing your setup.
Still have questions?Contact us
Ask anything or just say hi