


























Manage Prep Time in Your Merchant Dashboard
Prep time settings help you control when orders are accepted and how long they take to prepare across Web Ordering and Mobile. With the updated Prep Time system, you can create more flexible rules based on fulfillment type, order size, menu categories, locations, and business hours.
With the latest updates, you can now:
- Control when orders start and stop with buffers
- Set prep time by fulfillment type
- Customize settings by location and day
All changes apply only after you click Save.
Still require support?
Contact support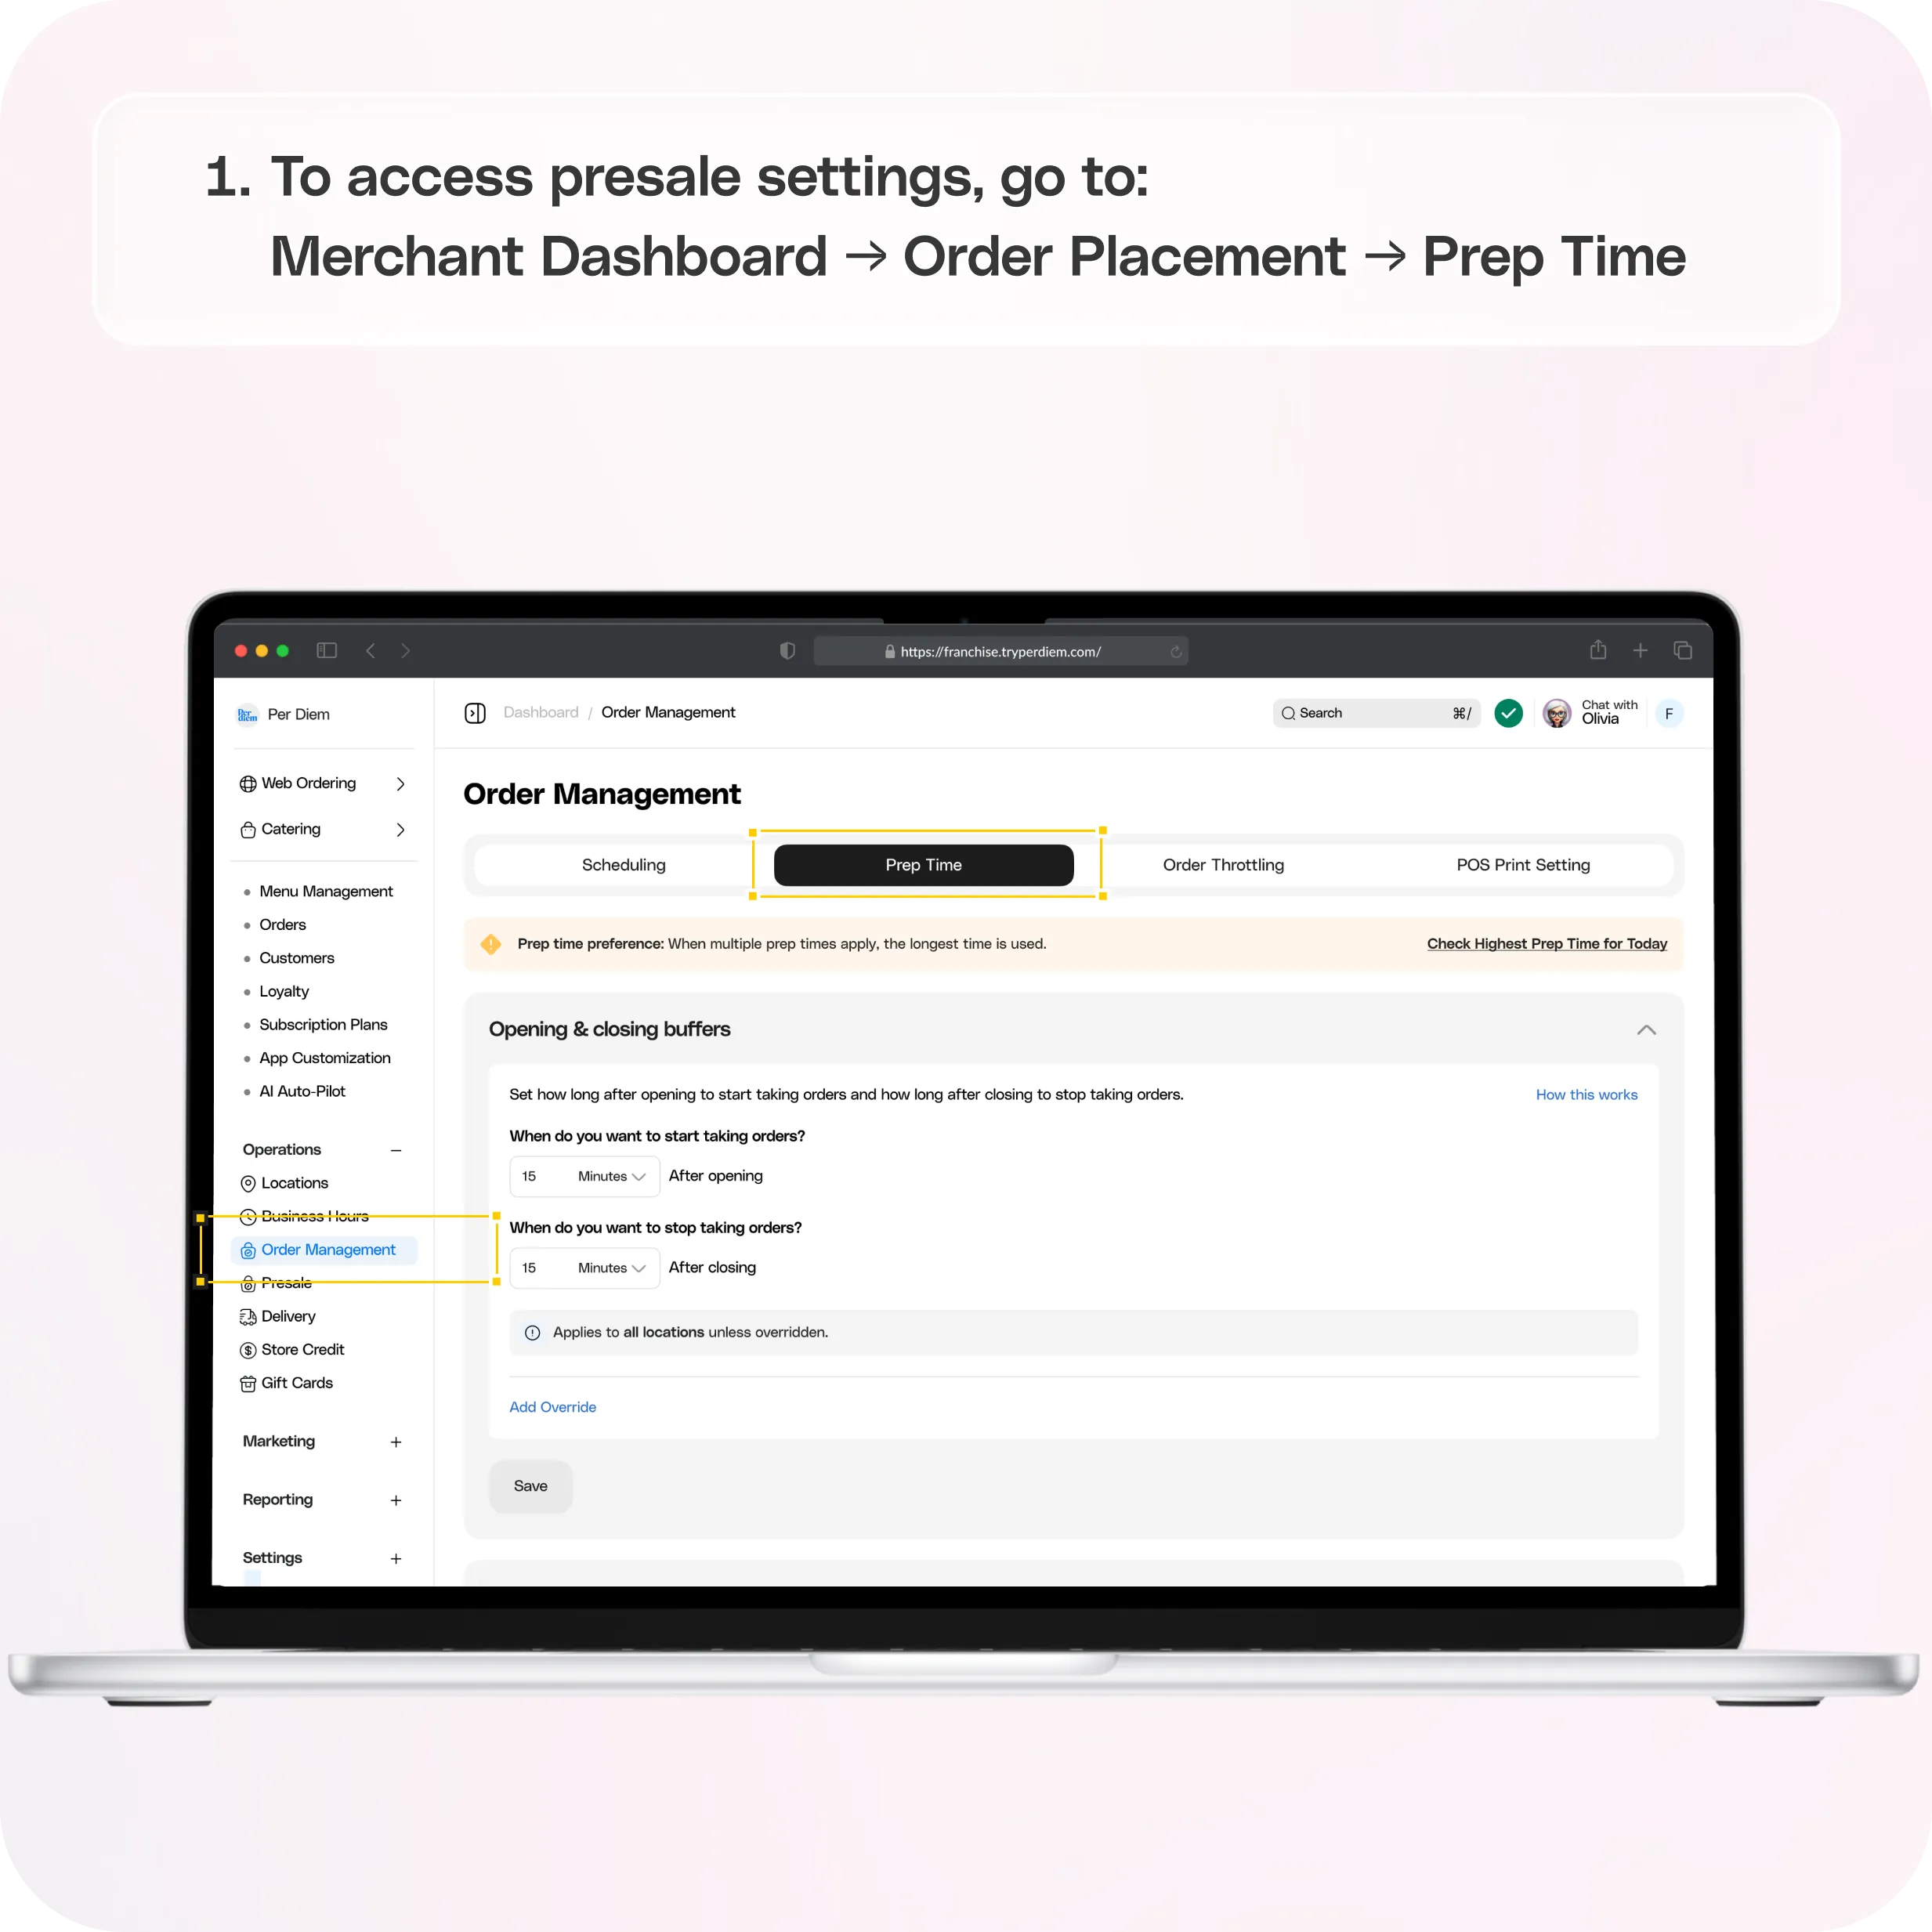
Where to find Prep Time settings
Go to:
Merchant Dashboard → Operations → Order Placement → Prep Times
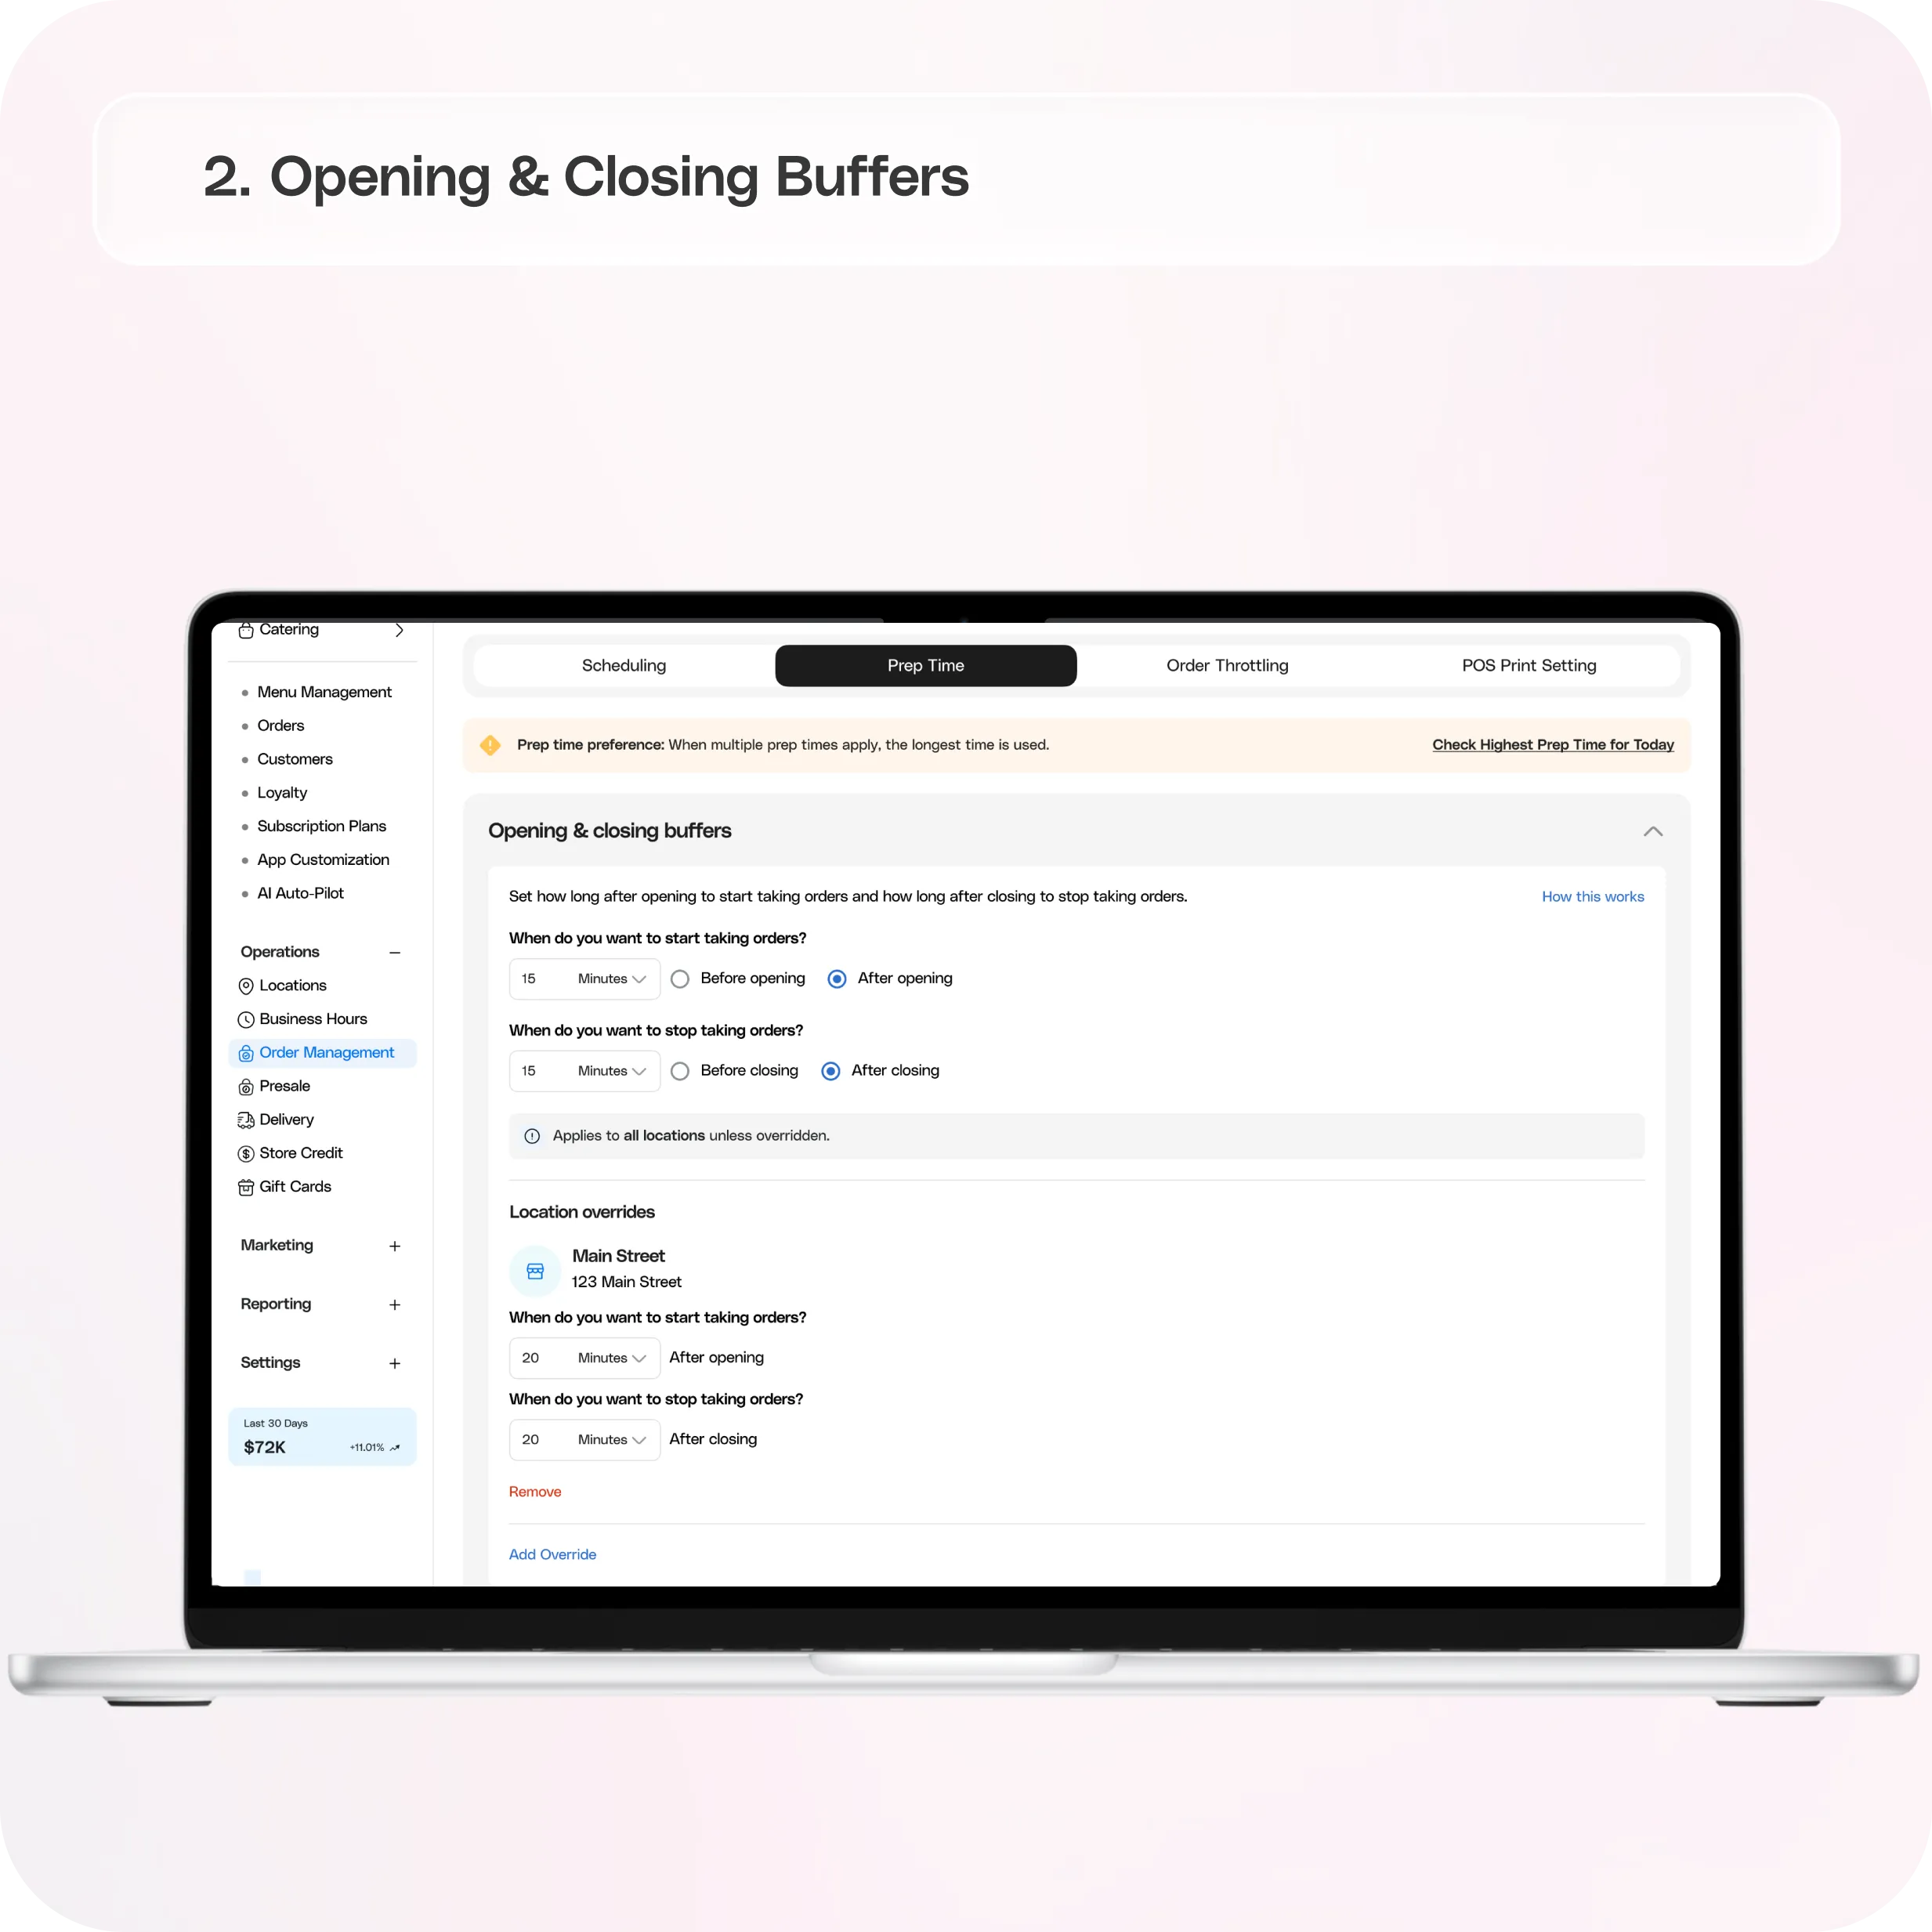
Opening & Closing Buffers
Opening and closing buffers let you control when orders can be accepted relative to your store hours.
This helps you avoid early rushes and last minute order pressure.
You can:
- Delay when orders start after opening
- Stop accepting orders before closing
- Apply settings to all locations or override specific ones
How to set Opening & Closing Buffers
Step 1: Set opening buffer
Under When do you want to start taking orders?
- Enter the prep time value
- Select the time unit (minutes/hours)
This defines how long after opening orders will begin.
Example:
If set to 30 minutes, orders will begin 30 minutes after opening.
Step 2: Set closing buffer
Under When do you want to stop taking orders?
- Enter the prep time value
- Select the time unit (minutes/hours)
This defines how long before closing orders stop.
Example:
If set to 1 hour, orders stop one hour before closing.
Step 3: Save your changes
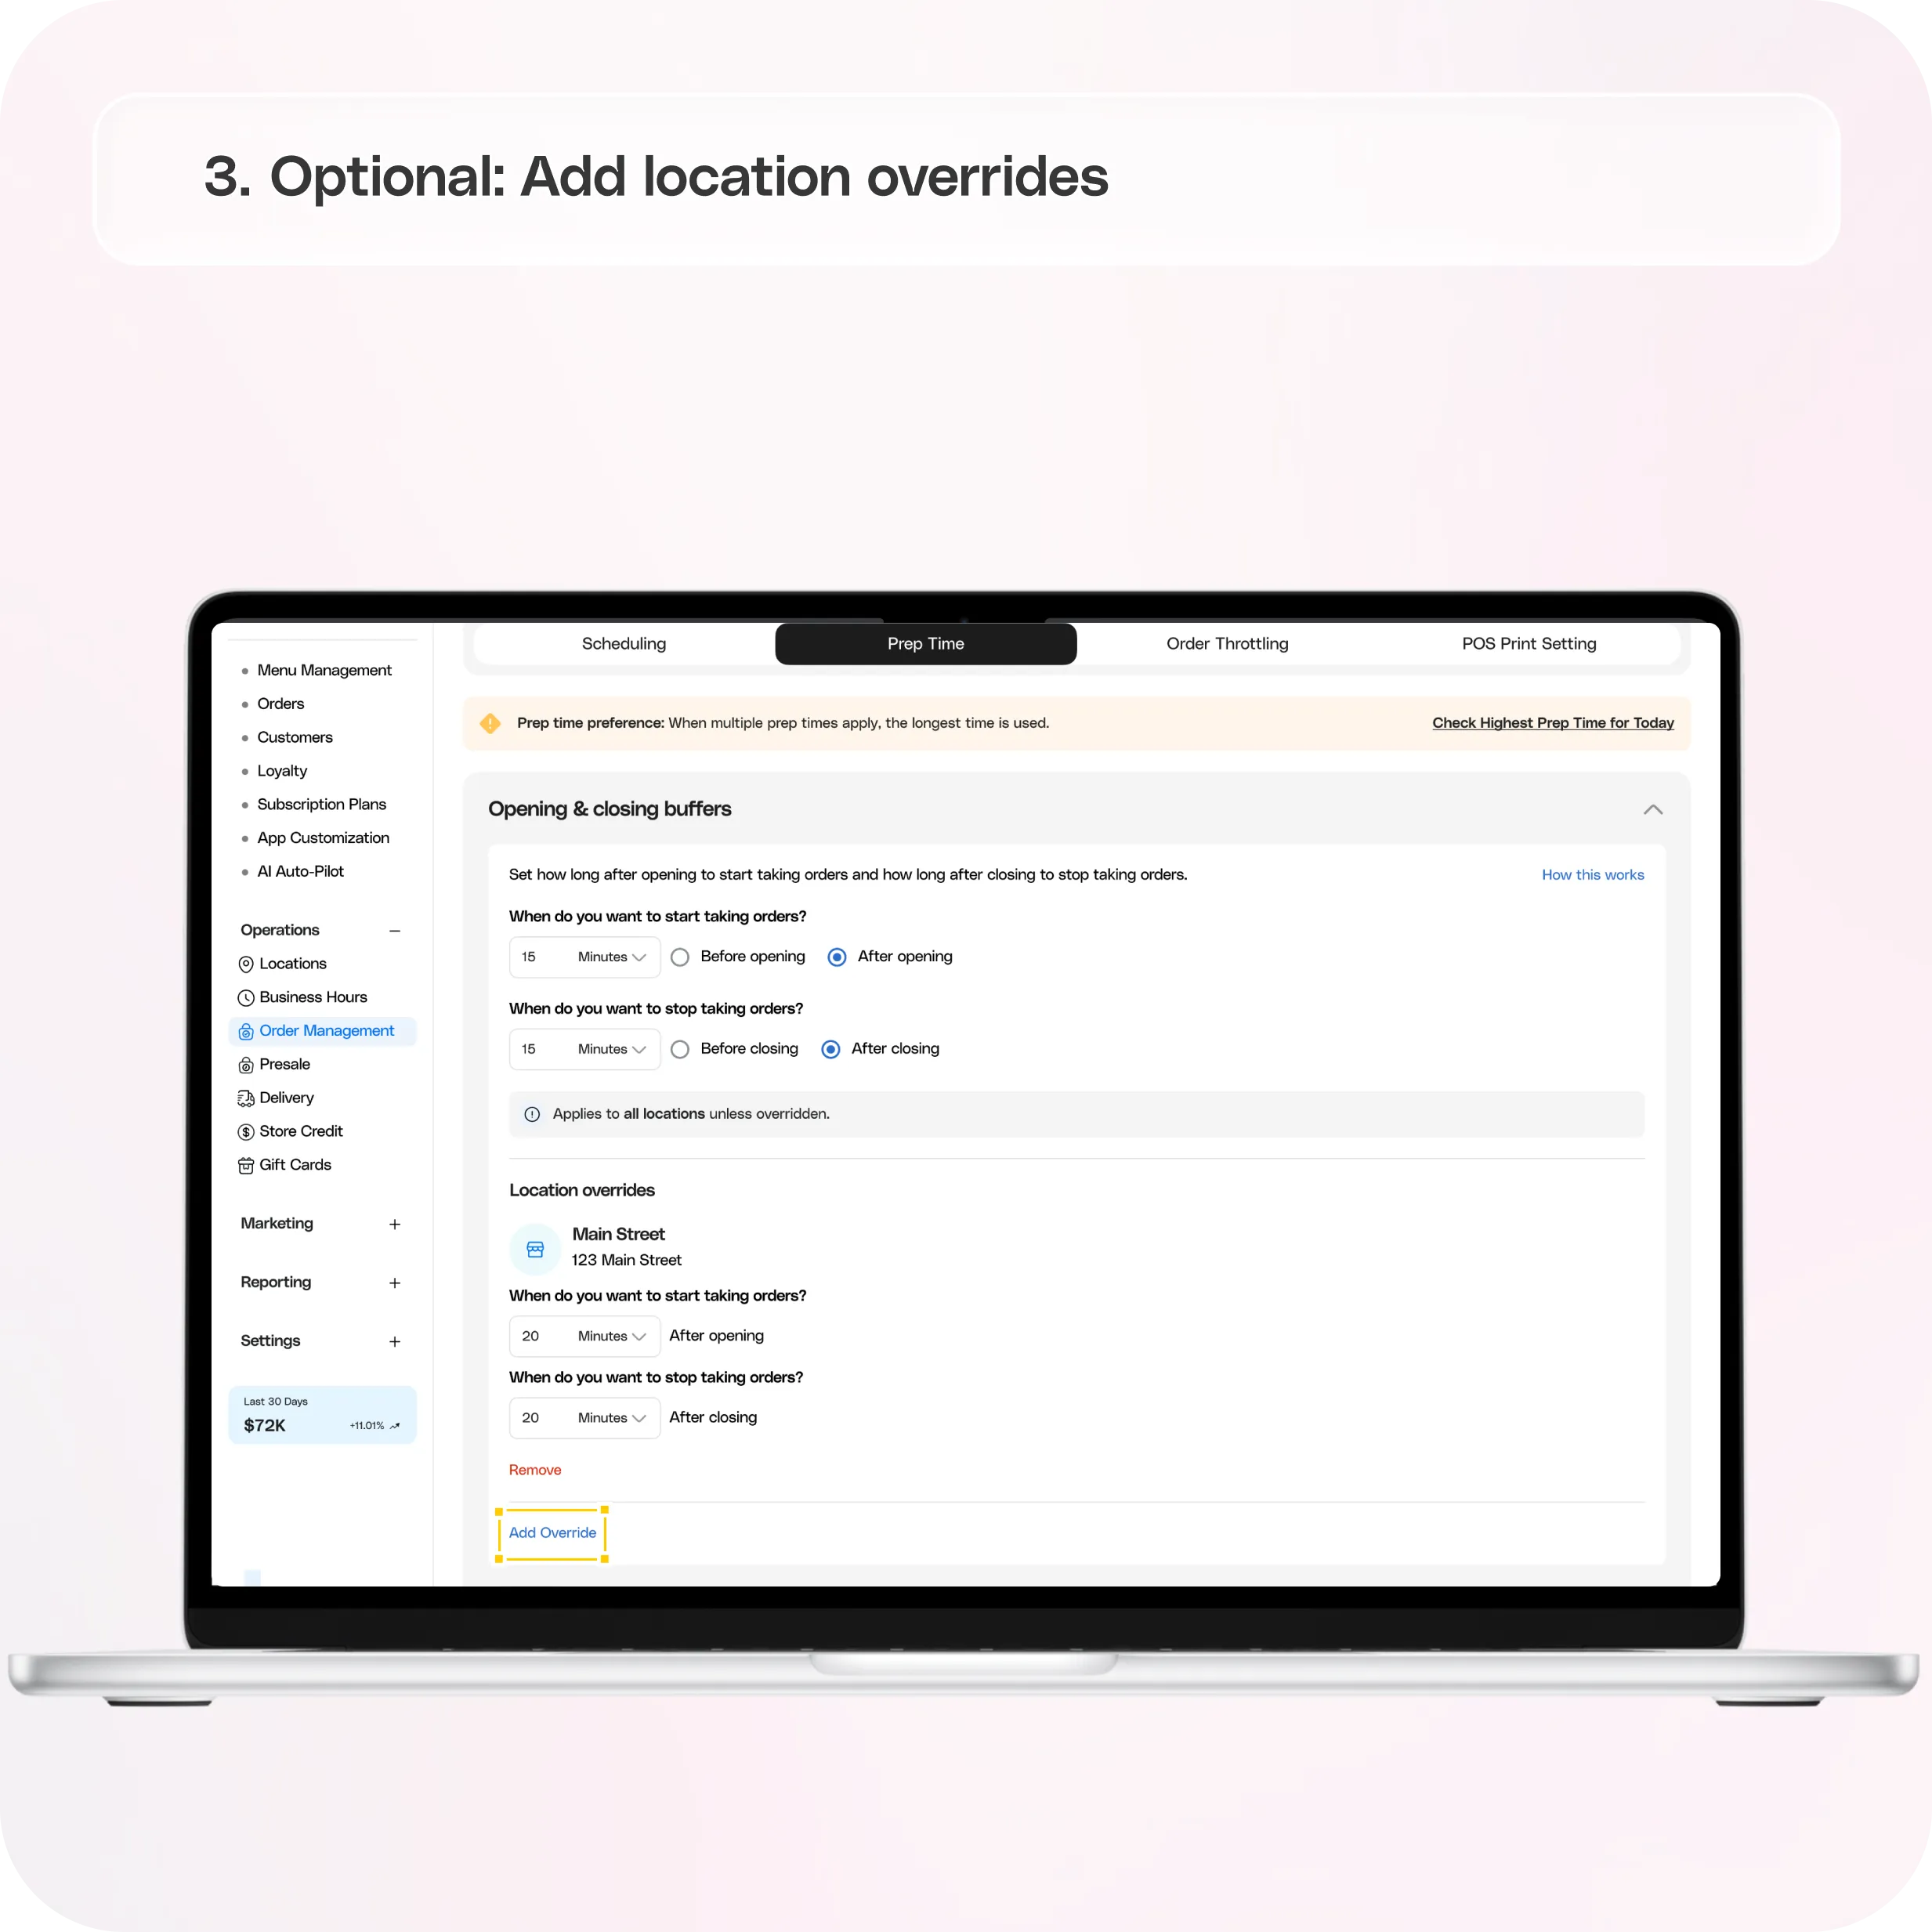
Optional: Add location overrides
By default, buffers apply to all locations.
To customize:
- Click Add Override
- Select a location
- Set different opening and closing buffers
- Click Save
This lets you create location specific timing rules.
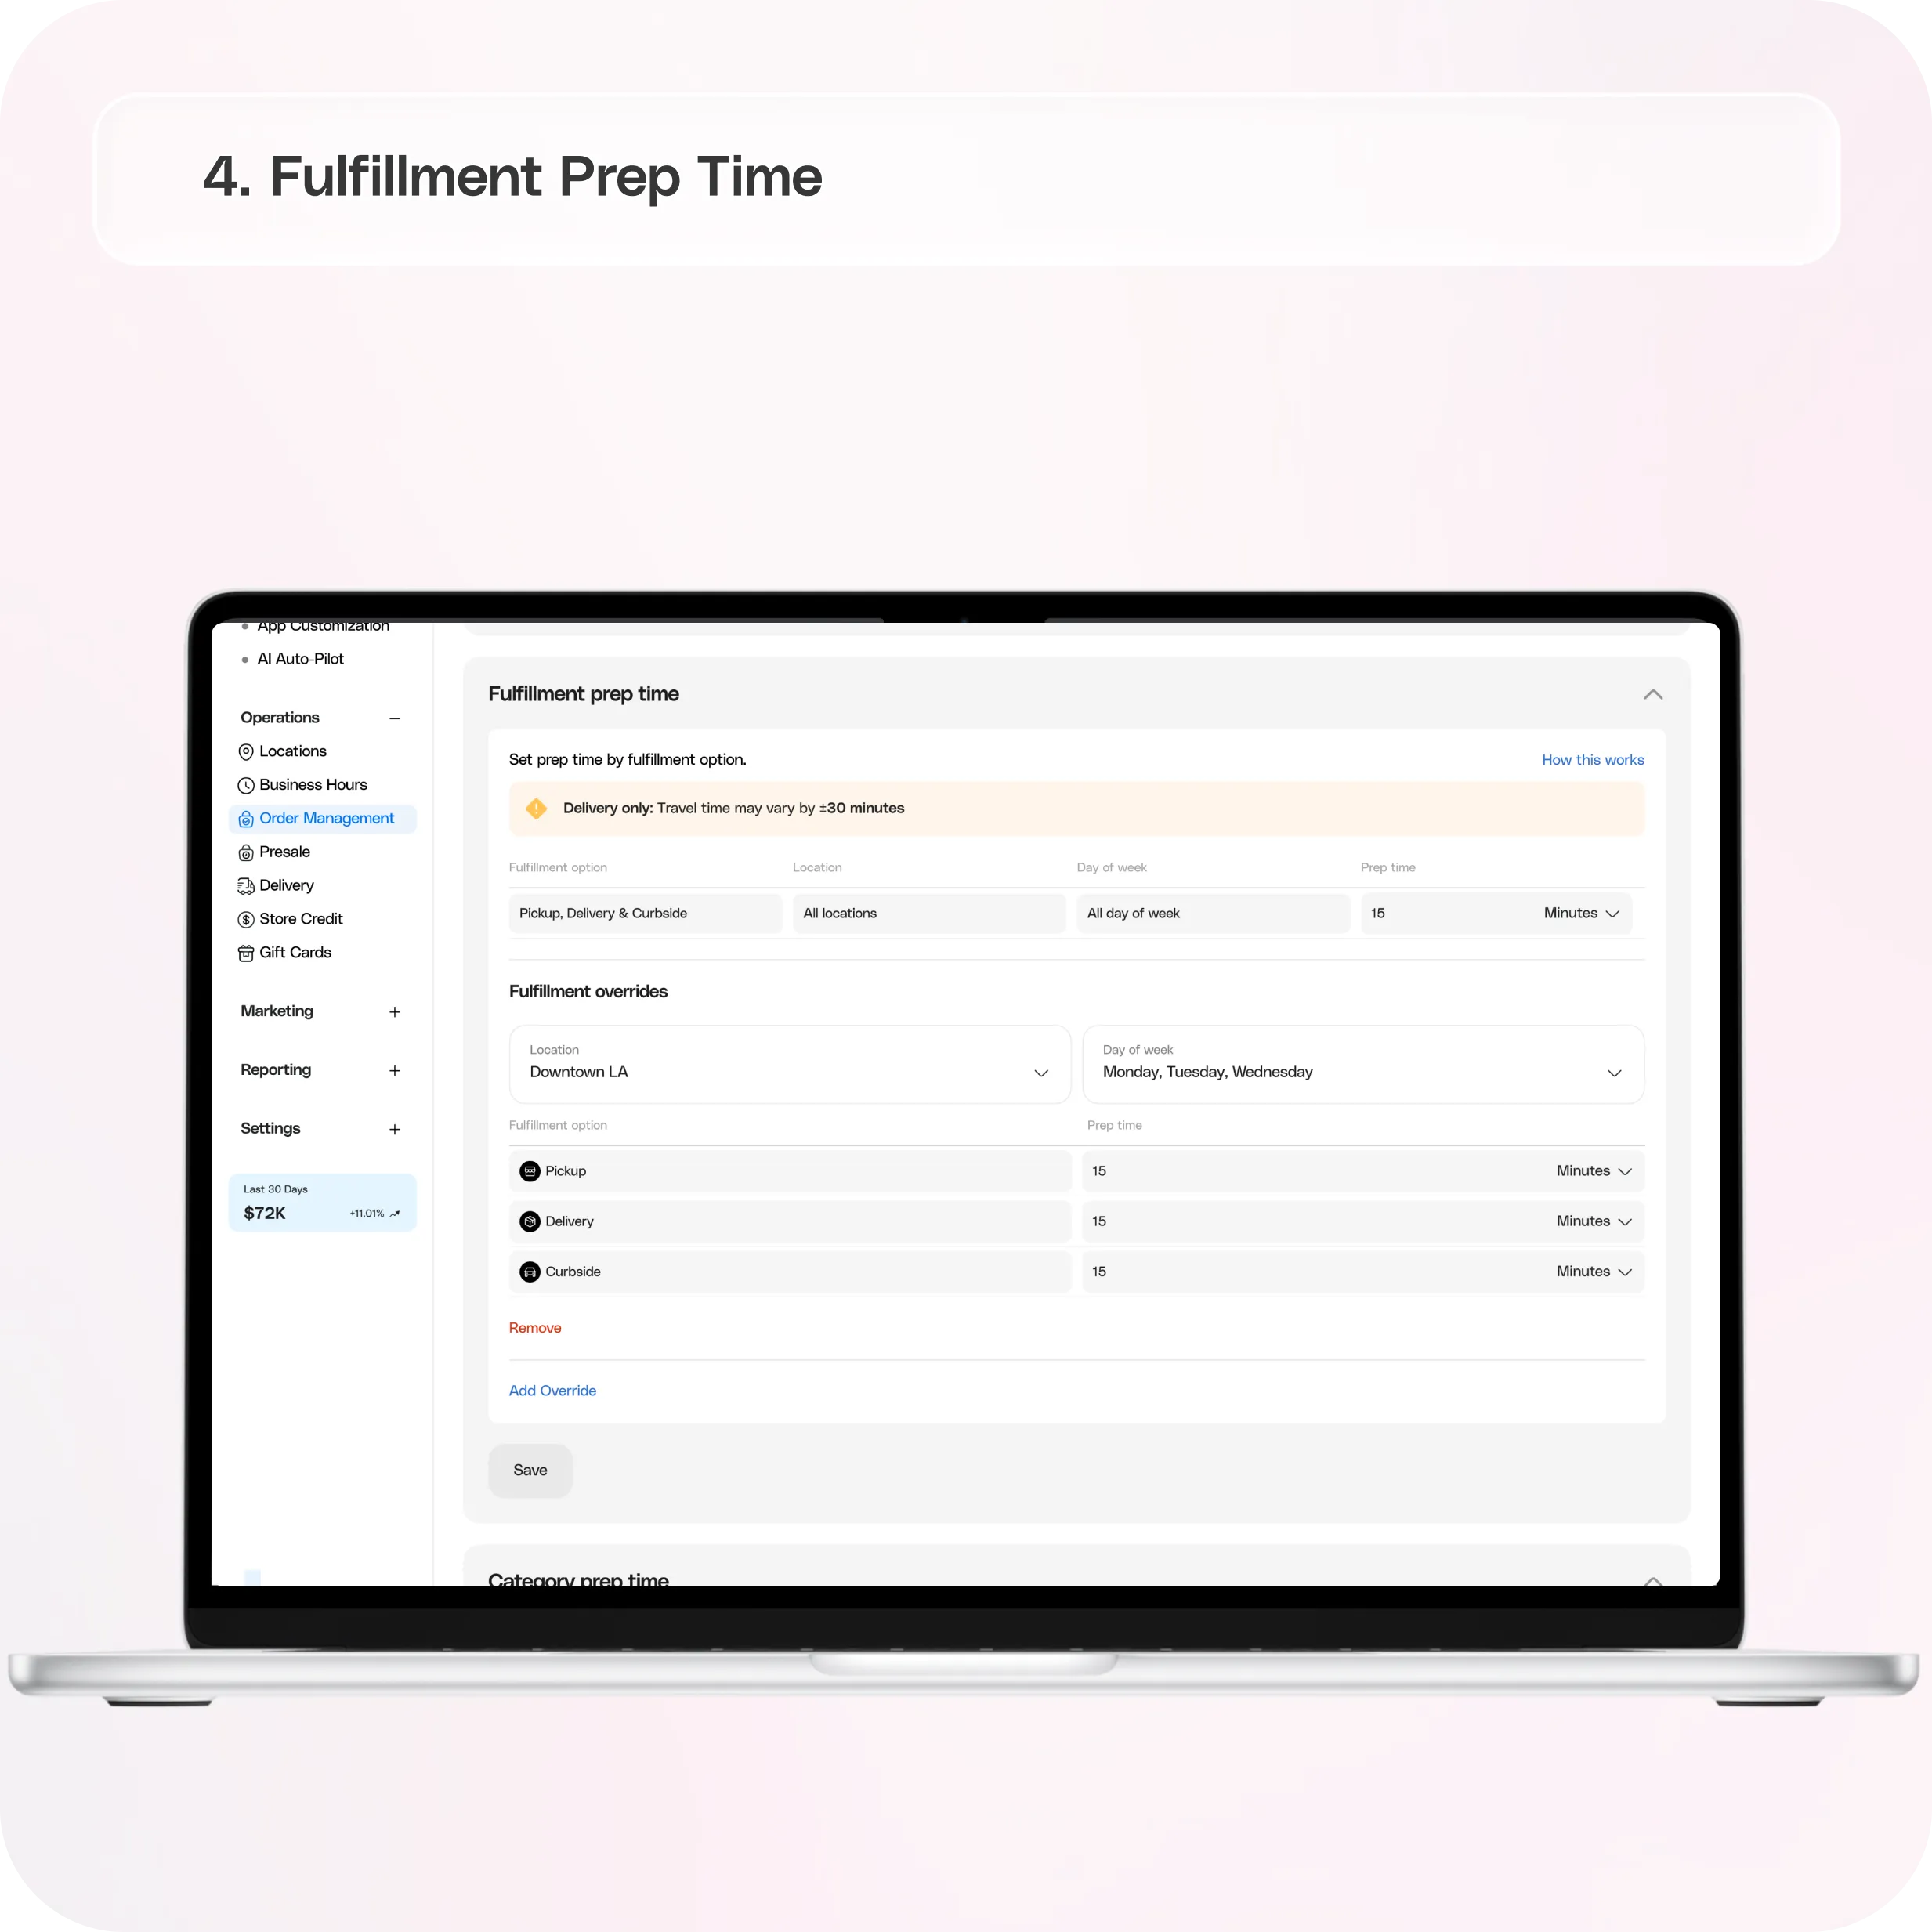
Fulfillment Prep Time
Fulfillment prep time lets you define how long orders take based on how they are fulfilled.
You can set different prep times for:
- Pickup
- Delivery
- Curbside
You can:
- Set a default prep time for all locations
- Customize by fulfillment type
- Override by location or day of the week
Supported Time Formats
Prep time supports multiple formats:
**Minutes / Hours
**Adds an exact amount of time from when the order is placed.
Days
Moves fulfillment to the next available business day based on store hours.
How to set Fulfillment Prep Time
Step 1: Set default prep time
Under Fulfillment prep time:
- Select fulfillment options (Pickup, Delivery, Curbside)
- Choose locations/location
- Choose days of the week
- Enter prep time
- Select the time unit
This acts as your default rule.
Step 2: Add overrides (optional)
To customize further:
Click Add Override
Select:
- Location
- Day of week
Set prep time for:
- Pickup
- Delivery
- Curbside
Step 3: Adjust prep time per fulfillment type
Each fulfillment type can have its own prep time.
Step 4: Save your changes
Click Save to apply your prep time settings.
Delivery Timing Logic
For delivery orders, fulfillment timing is calculated using:
Prep Time + Delivery Duration
Delivery duration is automatically pulled from:
- In house delivery settings
- Uber Direct estimates
- DoorDash estimates
depending on the selected delivery method.
This creates more accurate fulfillment timing and customer expectations.
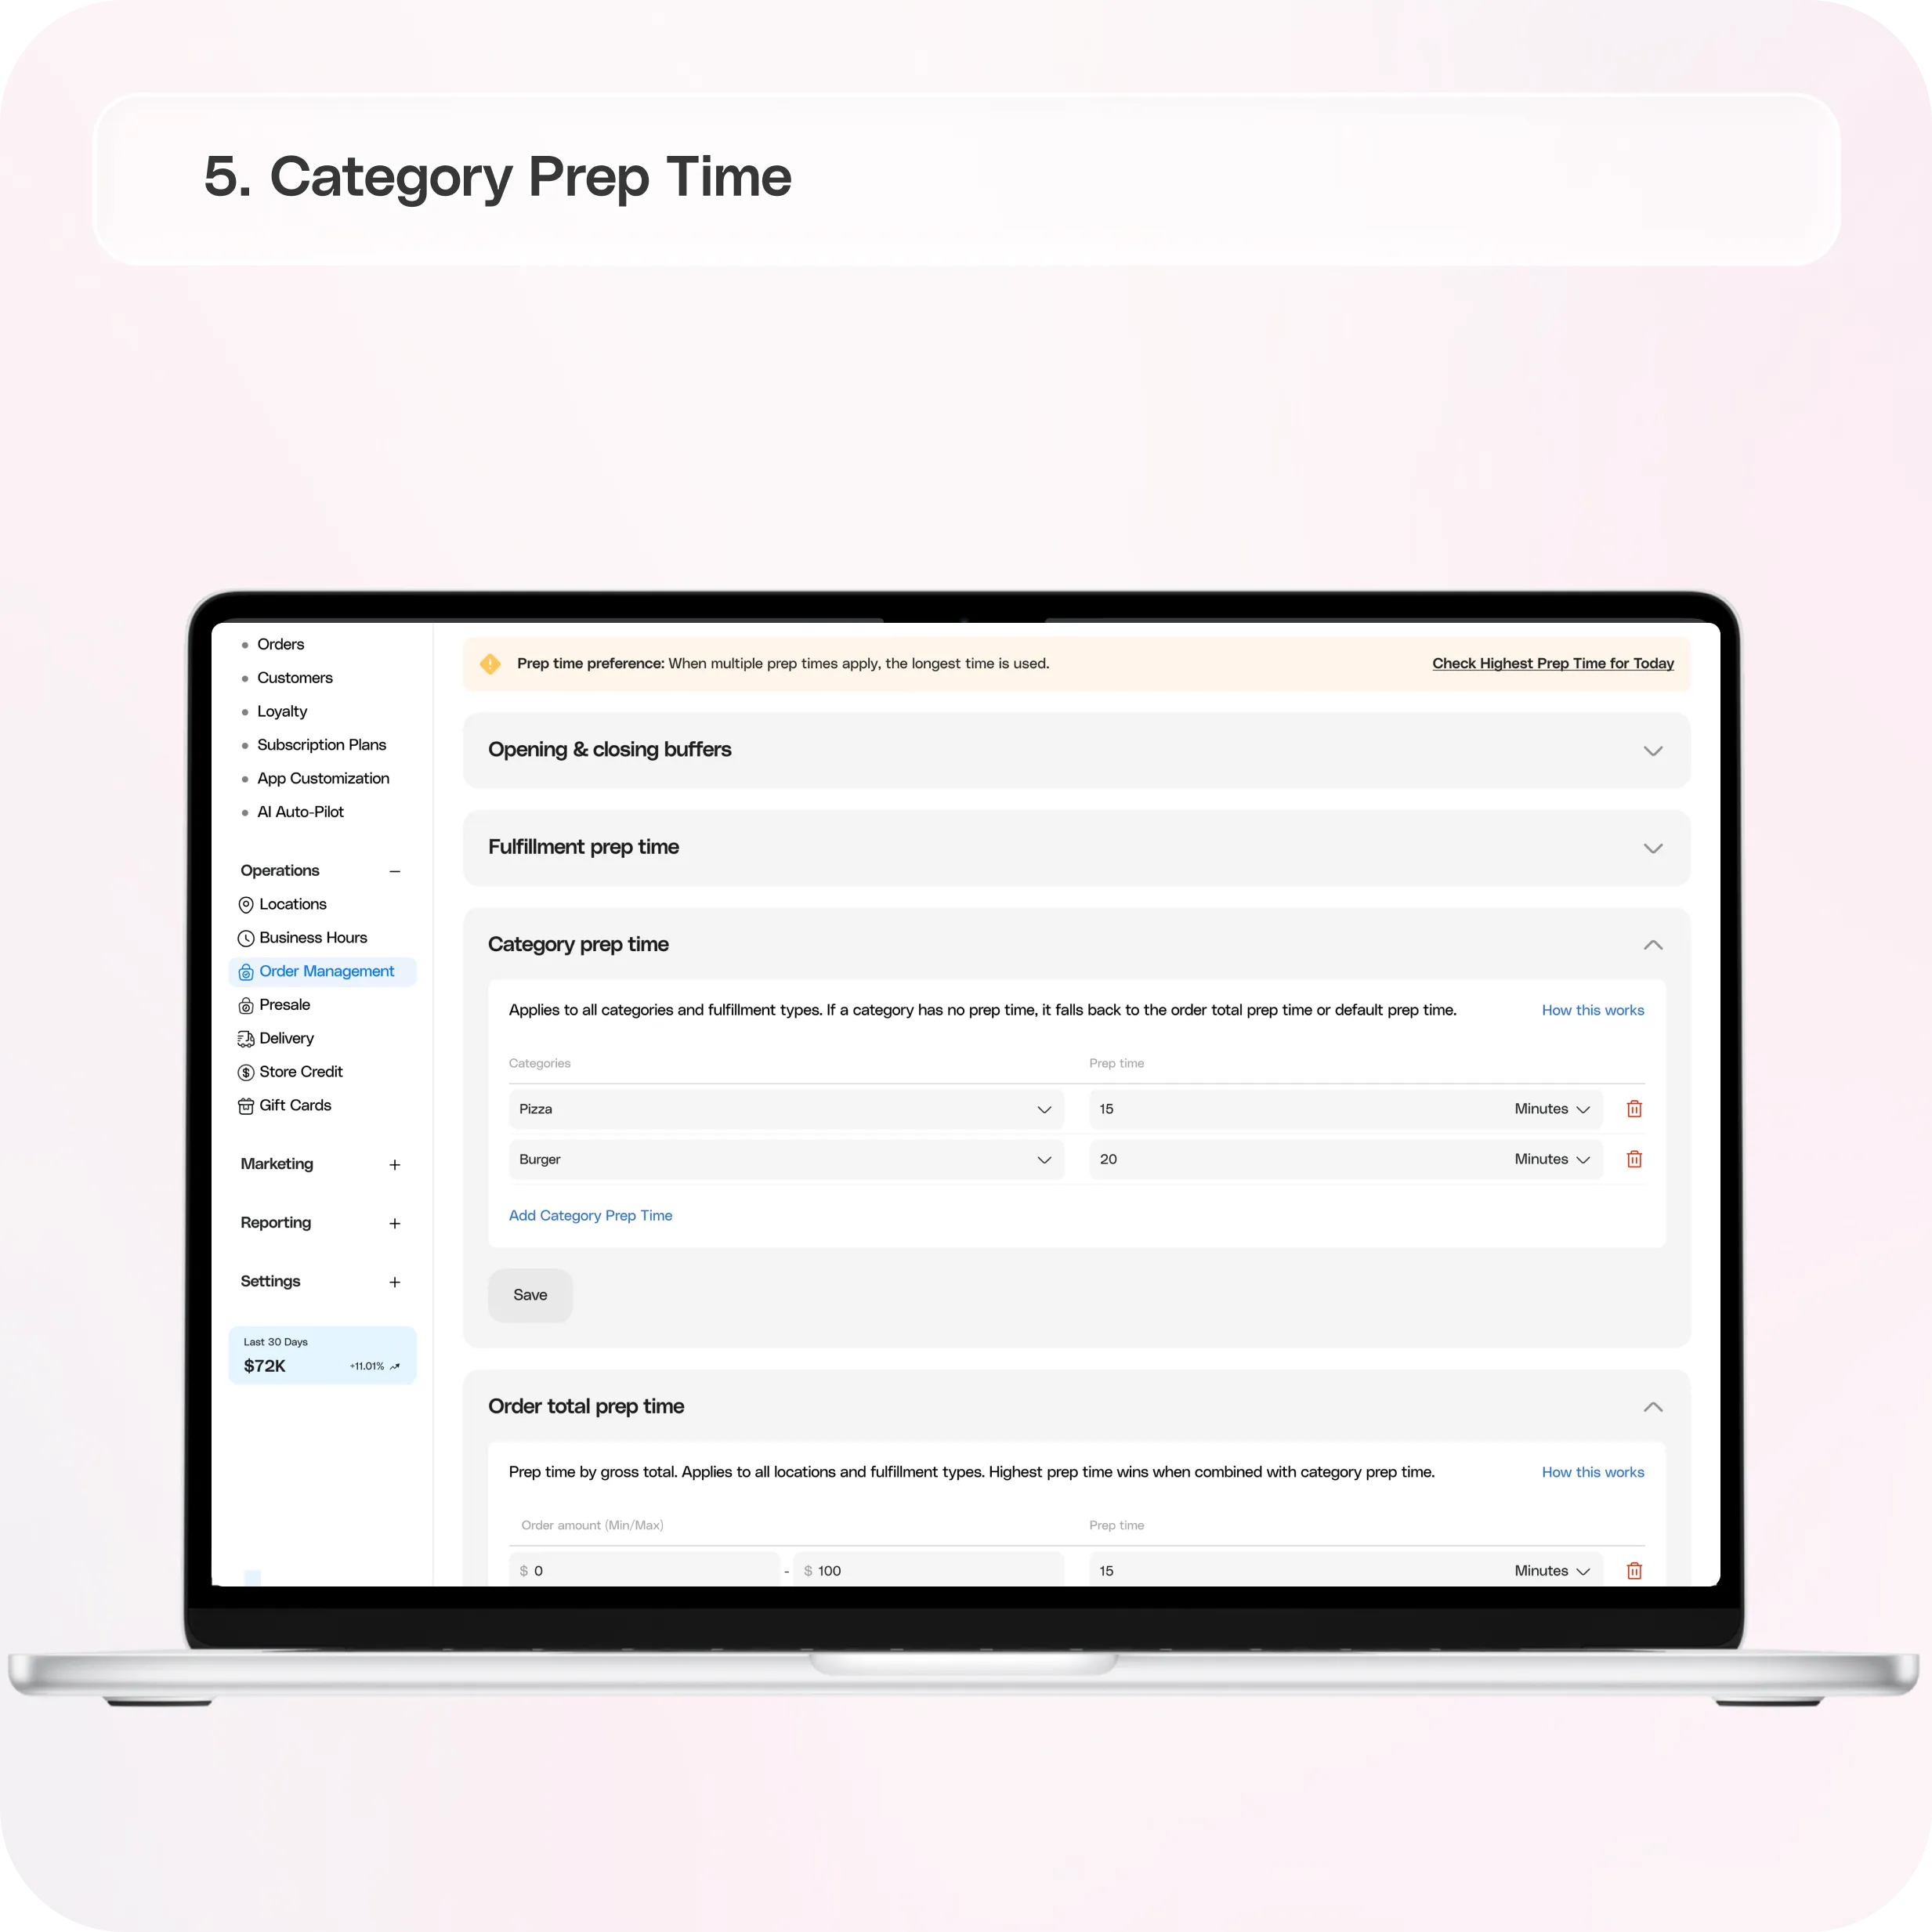
Category Prep Time
Category prep time lets you assign specific prep times to different menu categories.
This is useful when certain items take longer to prepare than others.
Examples:
- Platters
- Catering Trays
- Large Orders
You can:
- Set prep time for specific categories
- Apply rules across all fulfillment types
- Override default prep time for selected items
If a category does not have a prep time set, it falls back to:
- Order Total Prep Time, or
- Default fulfillment prep time
How to set Category Prep Time
Step 1: Add a category prep rule
Under Category prep time:
- Click Add Category Prep Time
- Select one or more categories from the dropdown
Step 2: Set prep time
- Enter the prep time value
- Select the time unit (minutes, hours, or days)
This prep time applies to all items within the selected category.
Step 3: Save your changes
Click Save to apply the category prep time.
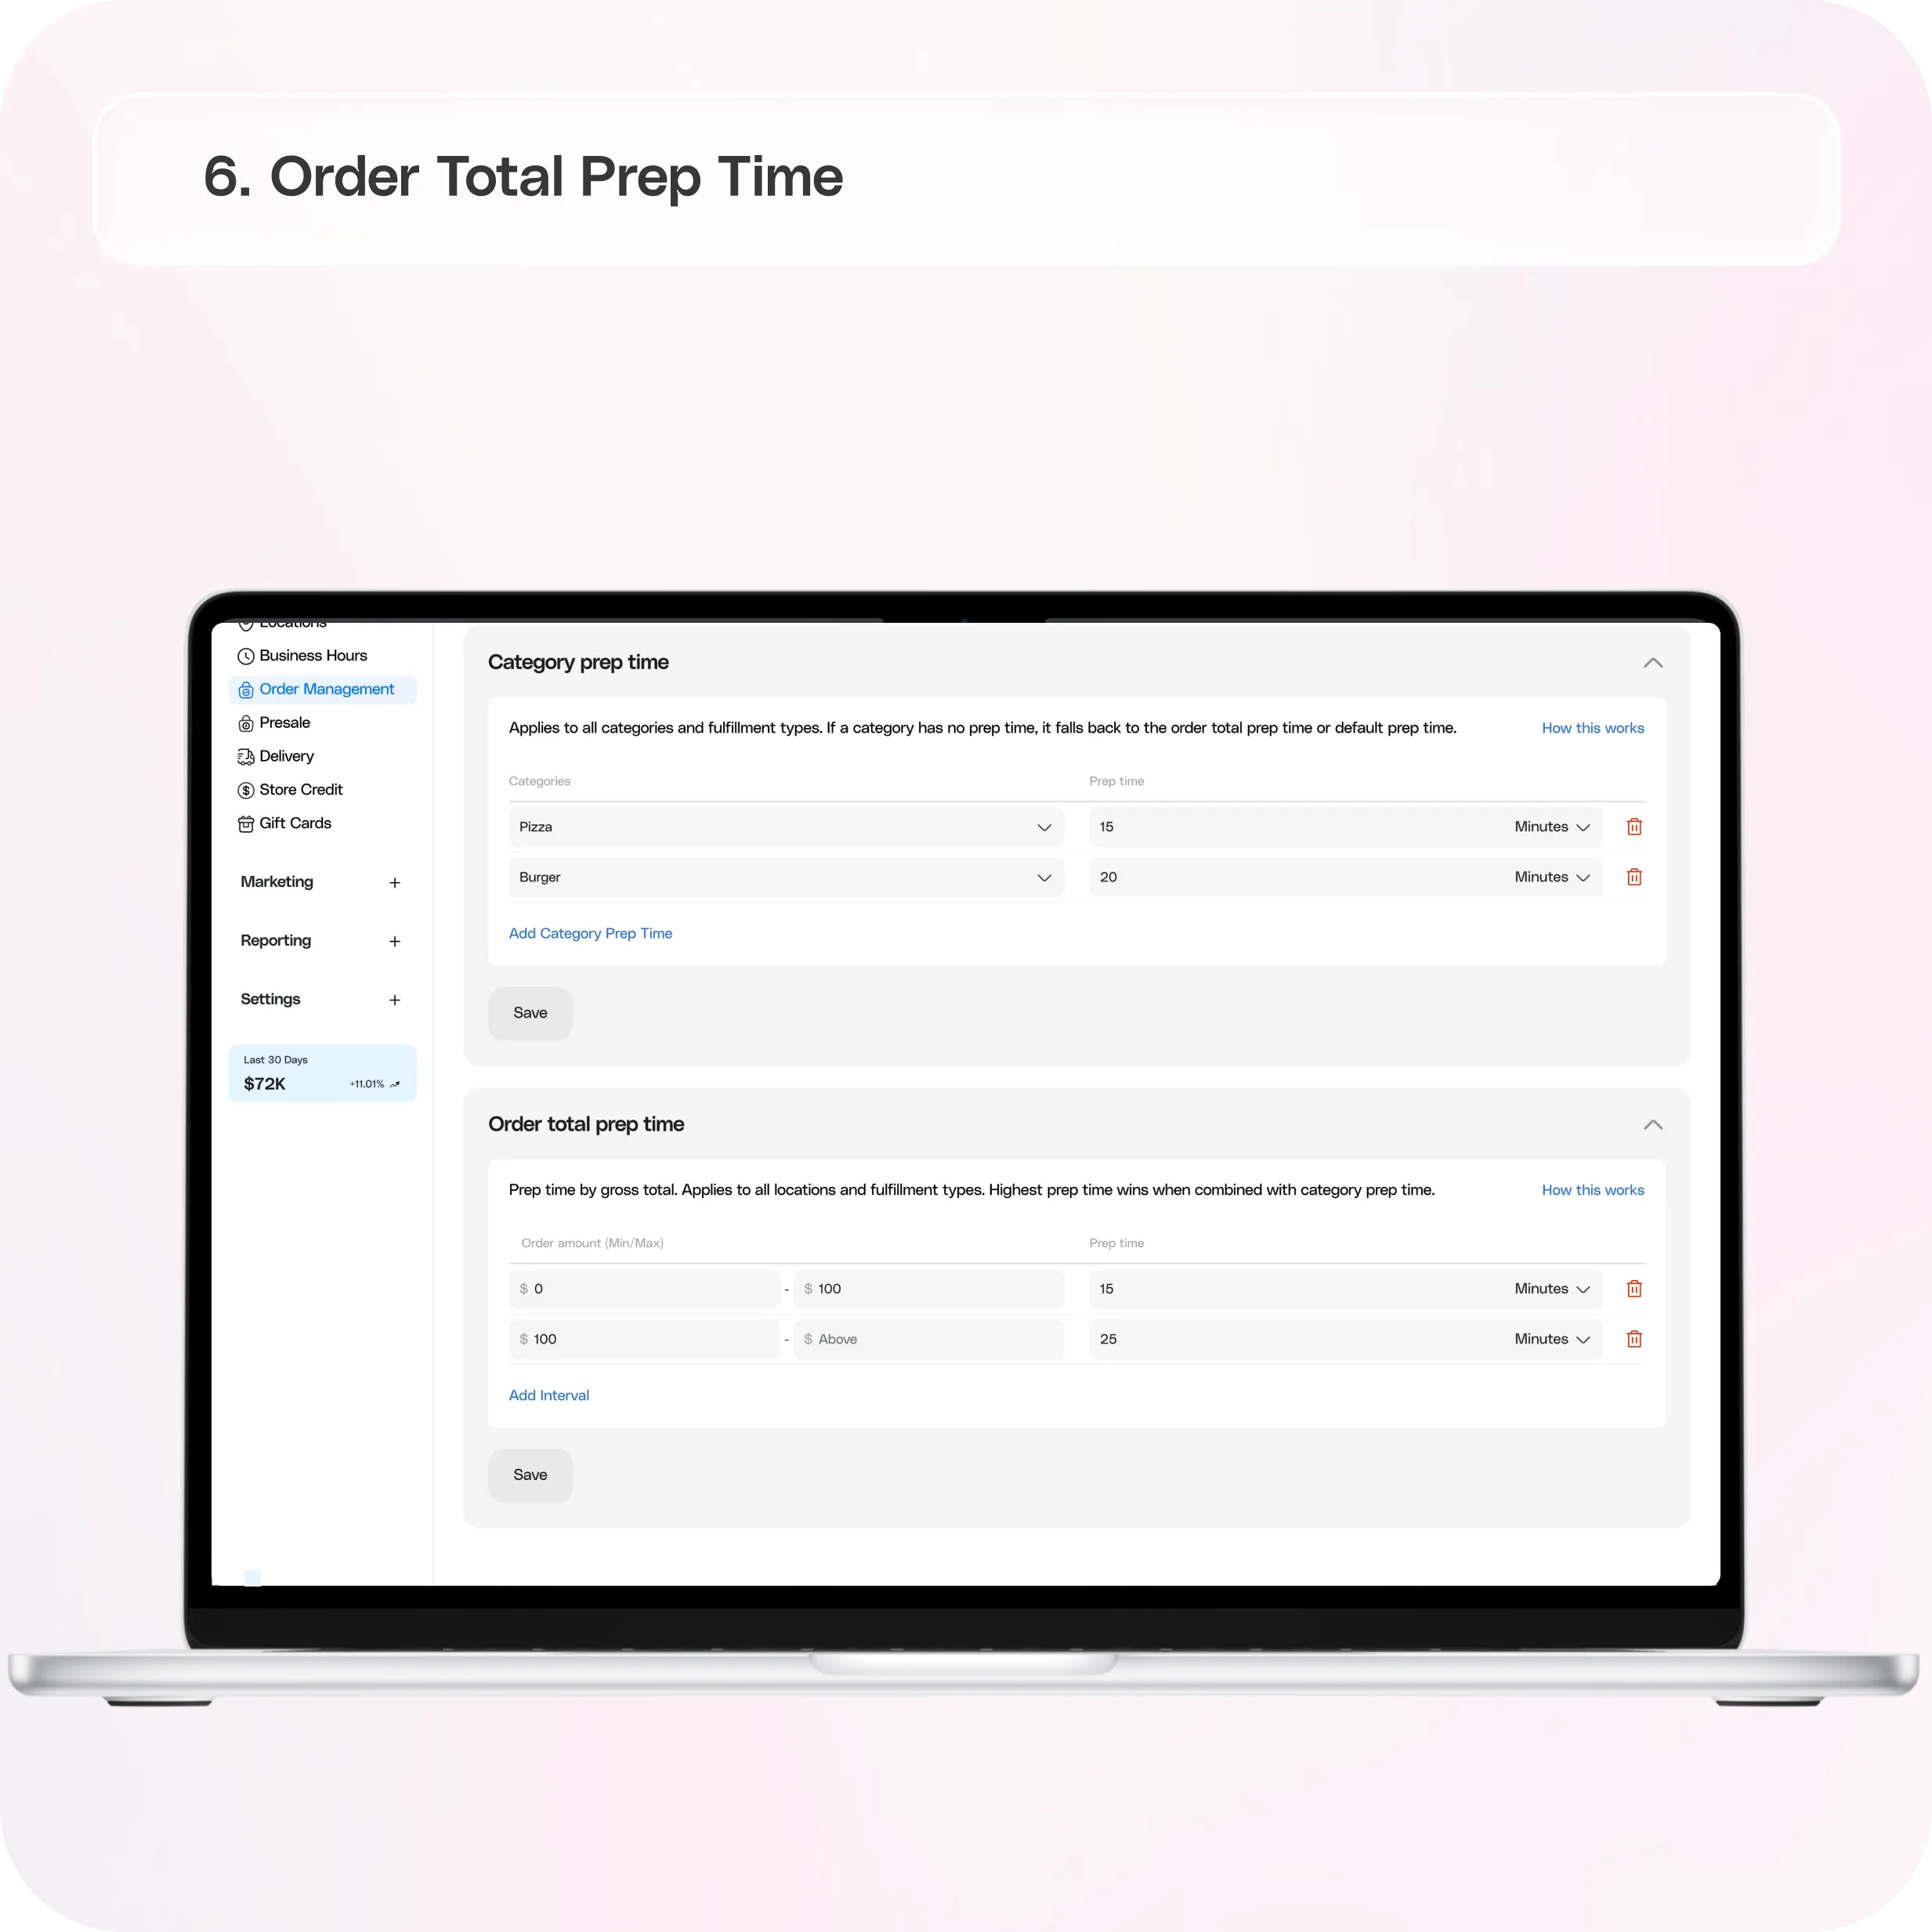
Order Total Prep Time
Order total prep time lets you define prep time based on the order subtotal.
This helps adjust prep time dynamically for larger or more complex orders.
You can:
- Set prep time based on order amount
- Create multiple subtotal intervals
- Automatically increase prep time for larger orders
When combined with category prep time, the higher prep time is applied.
How to set Order Total Prep Time
Step 1: Add an interval
Under Order total prep time:
Click Add interval
Step 2: Define order range
- Enter a minimum order amount
- Optionally enter a maximum amount
If no maximum is set, the rule applies to all orders above the minimum amount.
Step 3: Set prep time
- Enter the prep time
- Select the time unit (minutes, hours, or days)
Step 4: Add more intervals (optional)
You can create multiple subtotal ranges for different order sizes.
Step 5: Save your changes
Click Save to apply your intervals.
**
Important Rule**
If subtotal ranges overlap at a value:
The higher range takes priority.
Example:
- $0–$50
- $50+
Orders at overlapping values use the higher prep time rule.
**
Prep Time Priority Logic**
When both:
- Category Prep Time
- Order Total Prep Time
apply to the same order, the system automatically uses the higher prep time.
This ensures merchants always have enough preparation time for larger or more complex orders.
Still have questions?Contact us
Ask anything or just say hi