


























Presale: How to Set Up a Presale in Per Diem
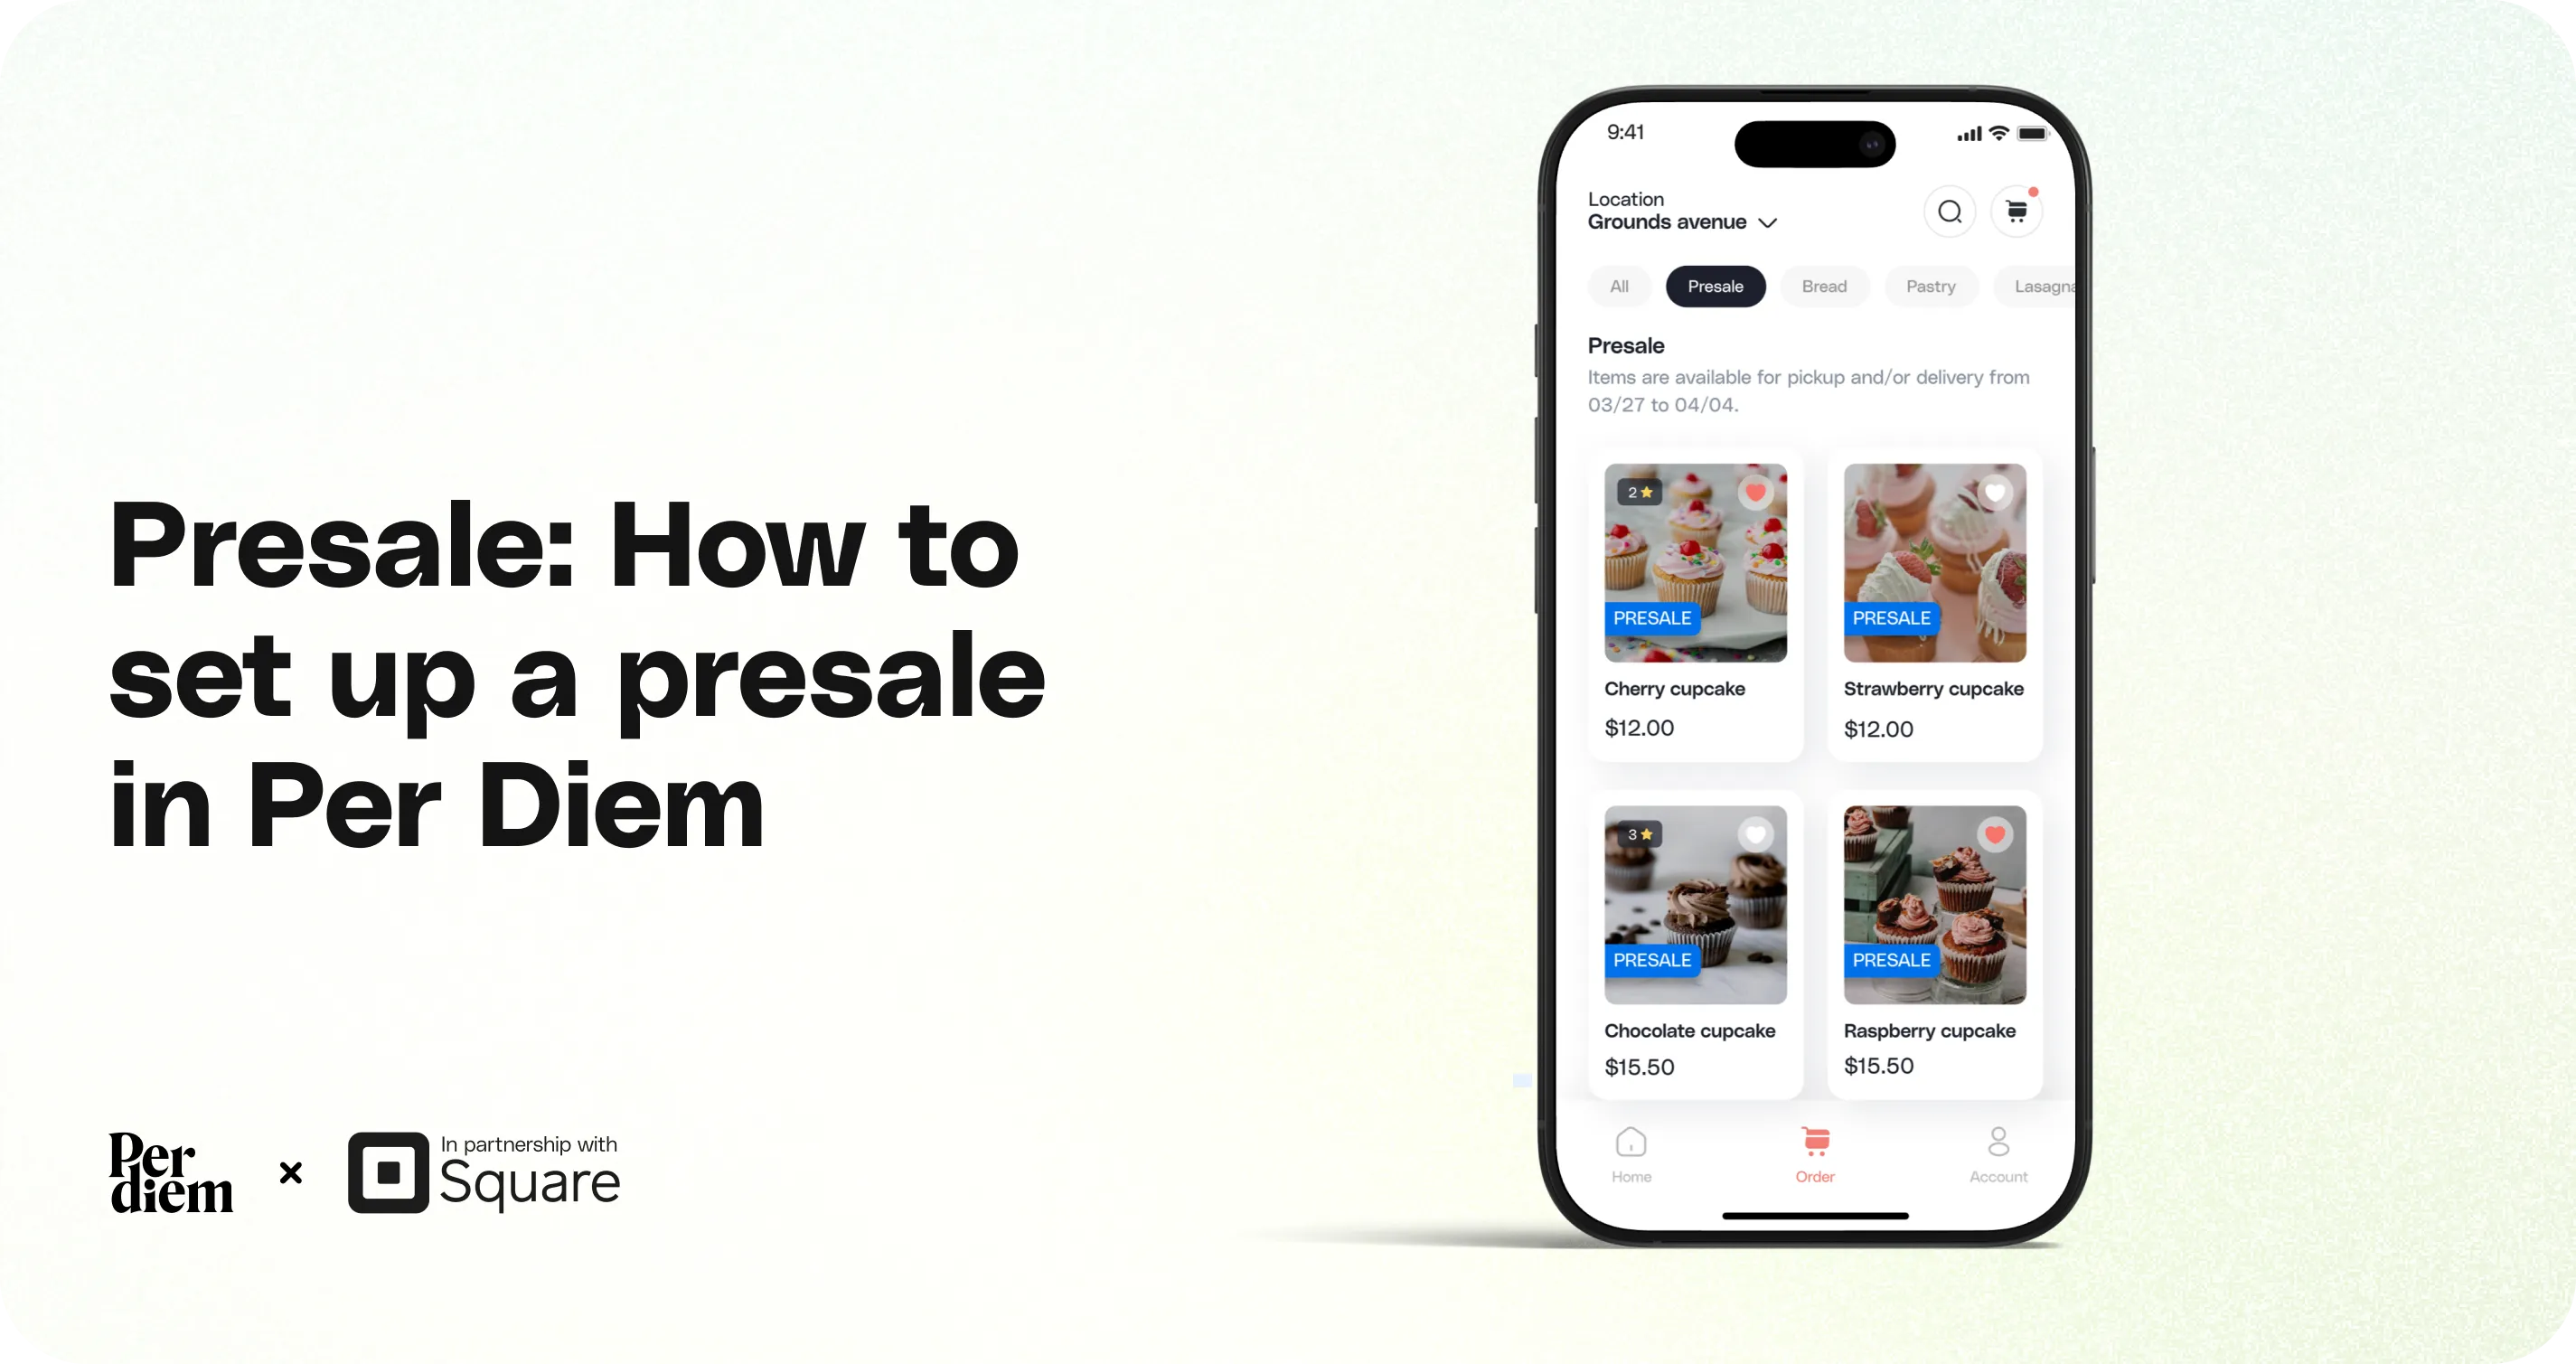
Presales allow you to accept orders in advance for a specific date or on a recurring weekly schedule.
- Enable Weekly Presale
- Choose Ordering Days and Pickup Day
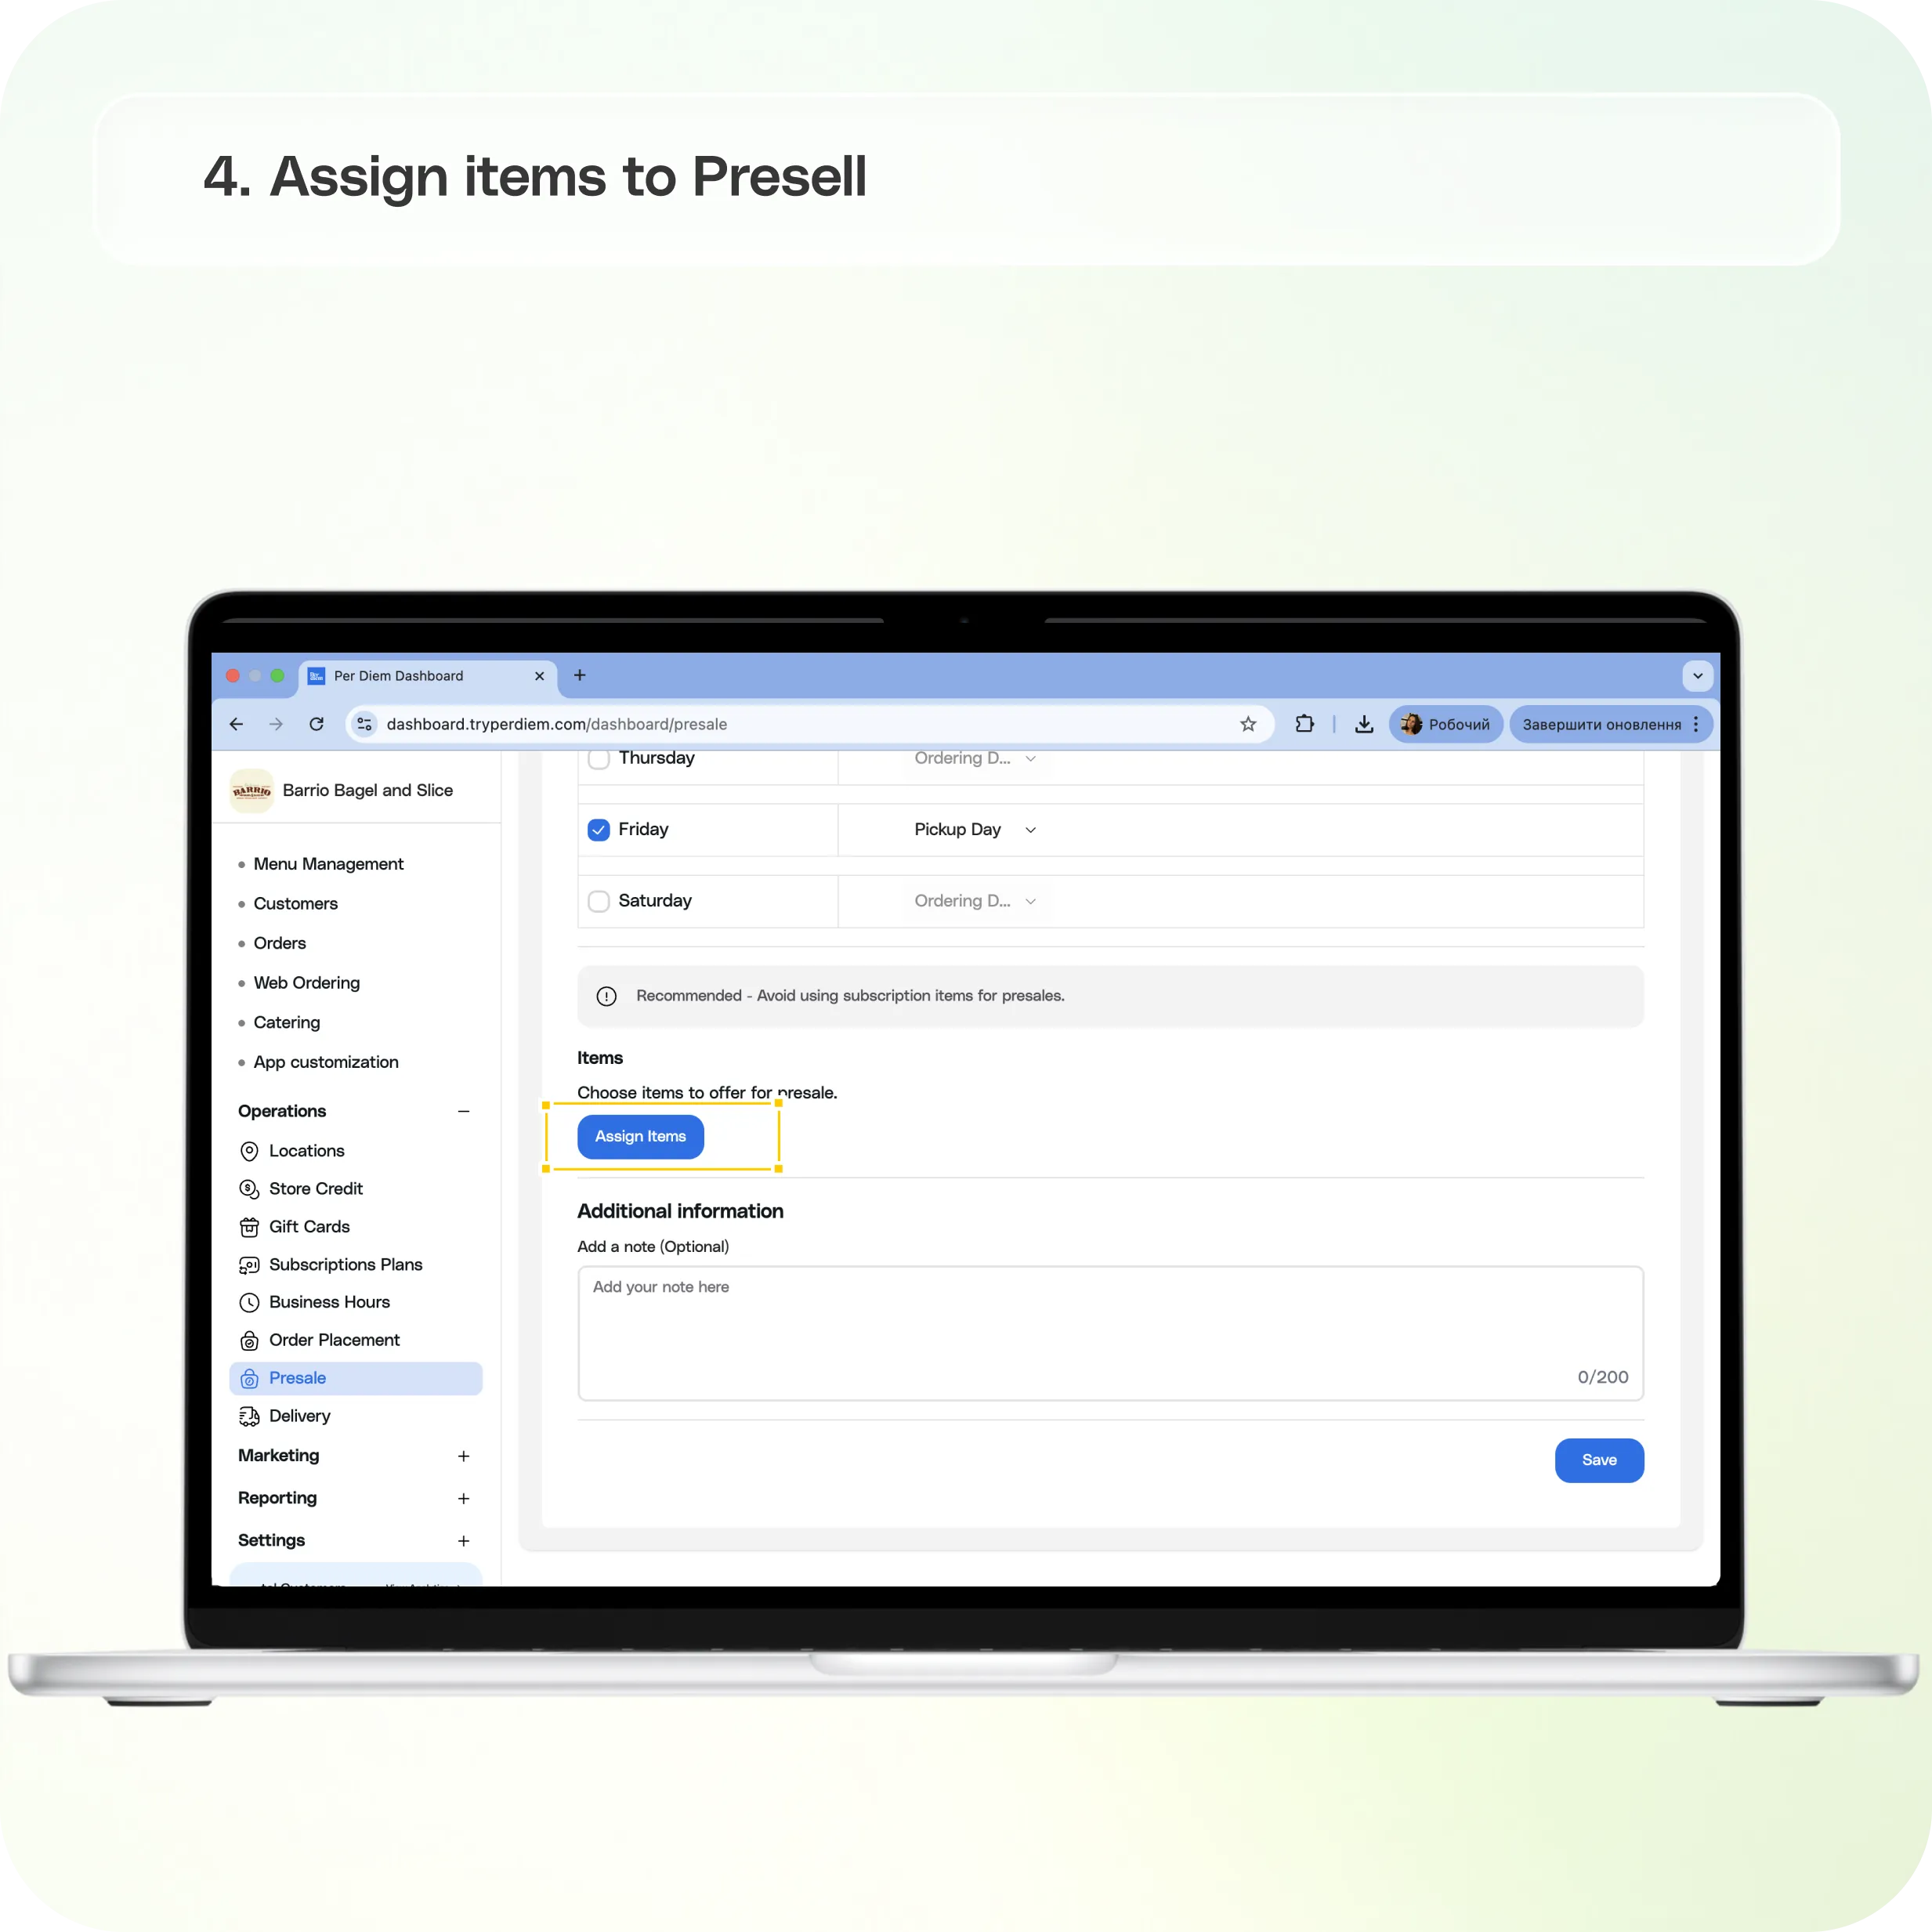
- Assign Items to Presell
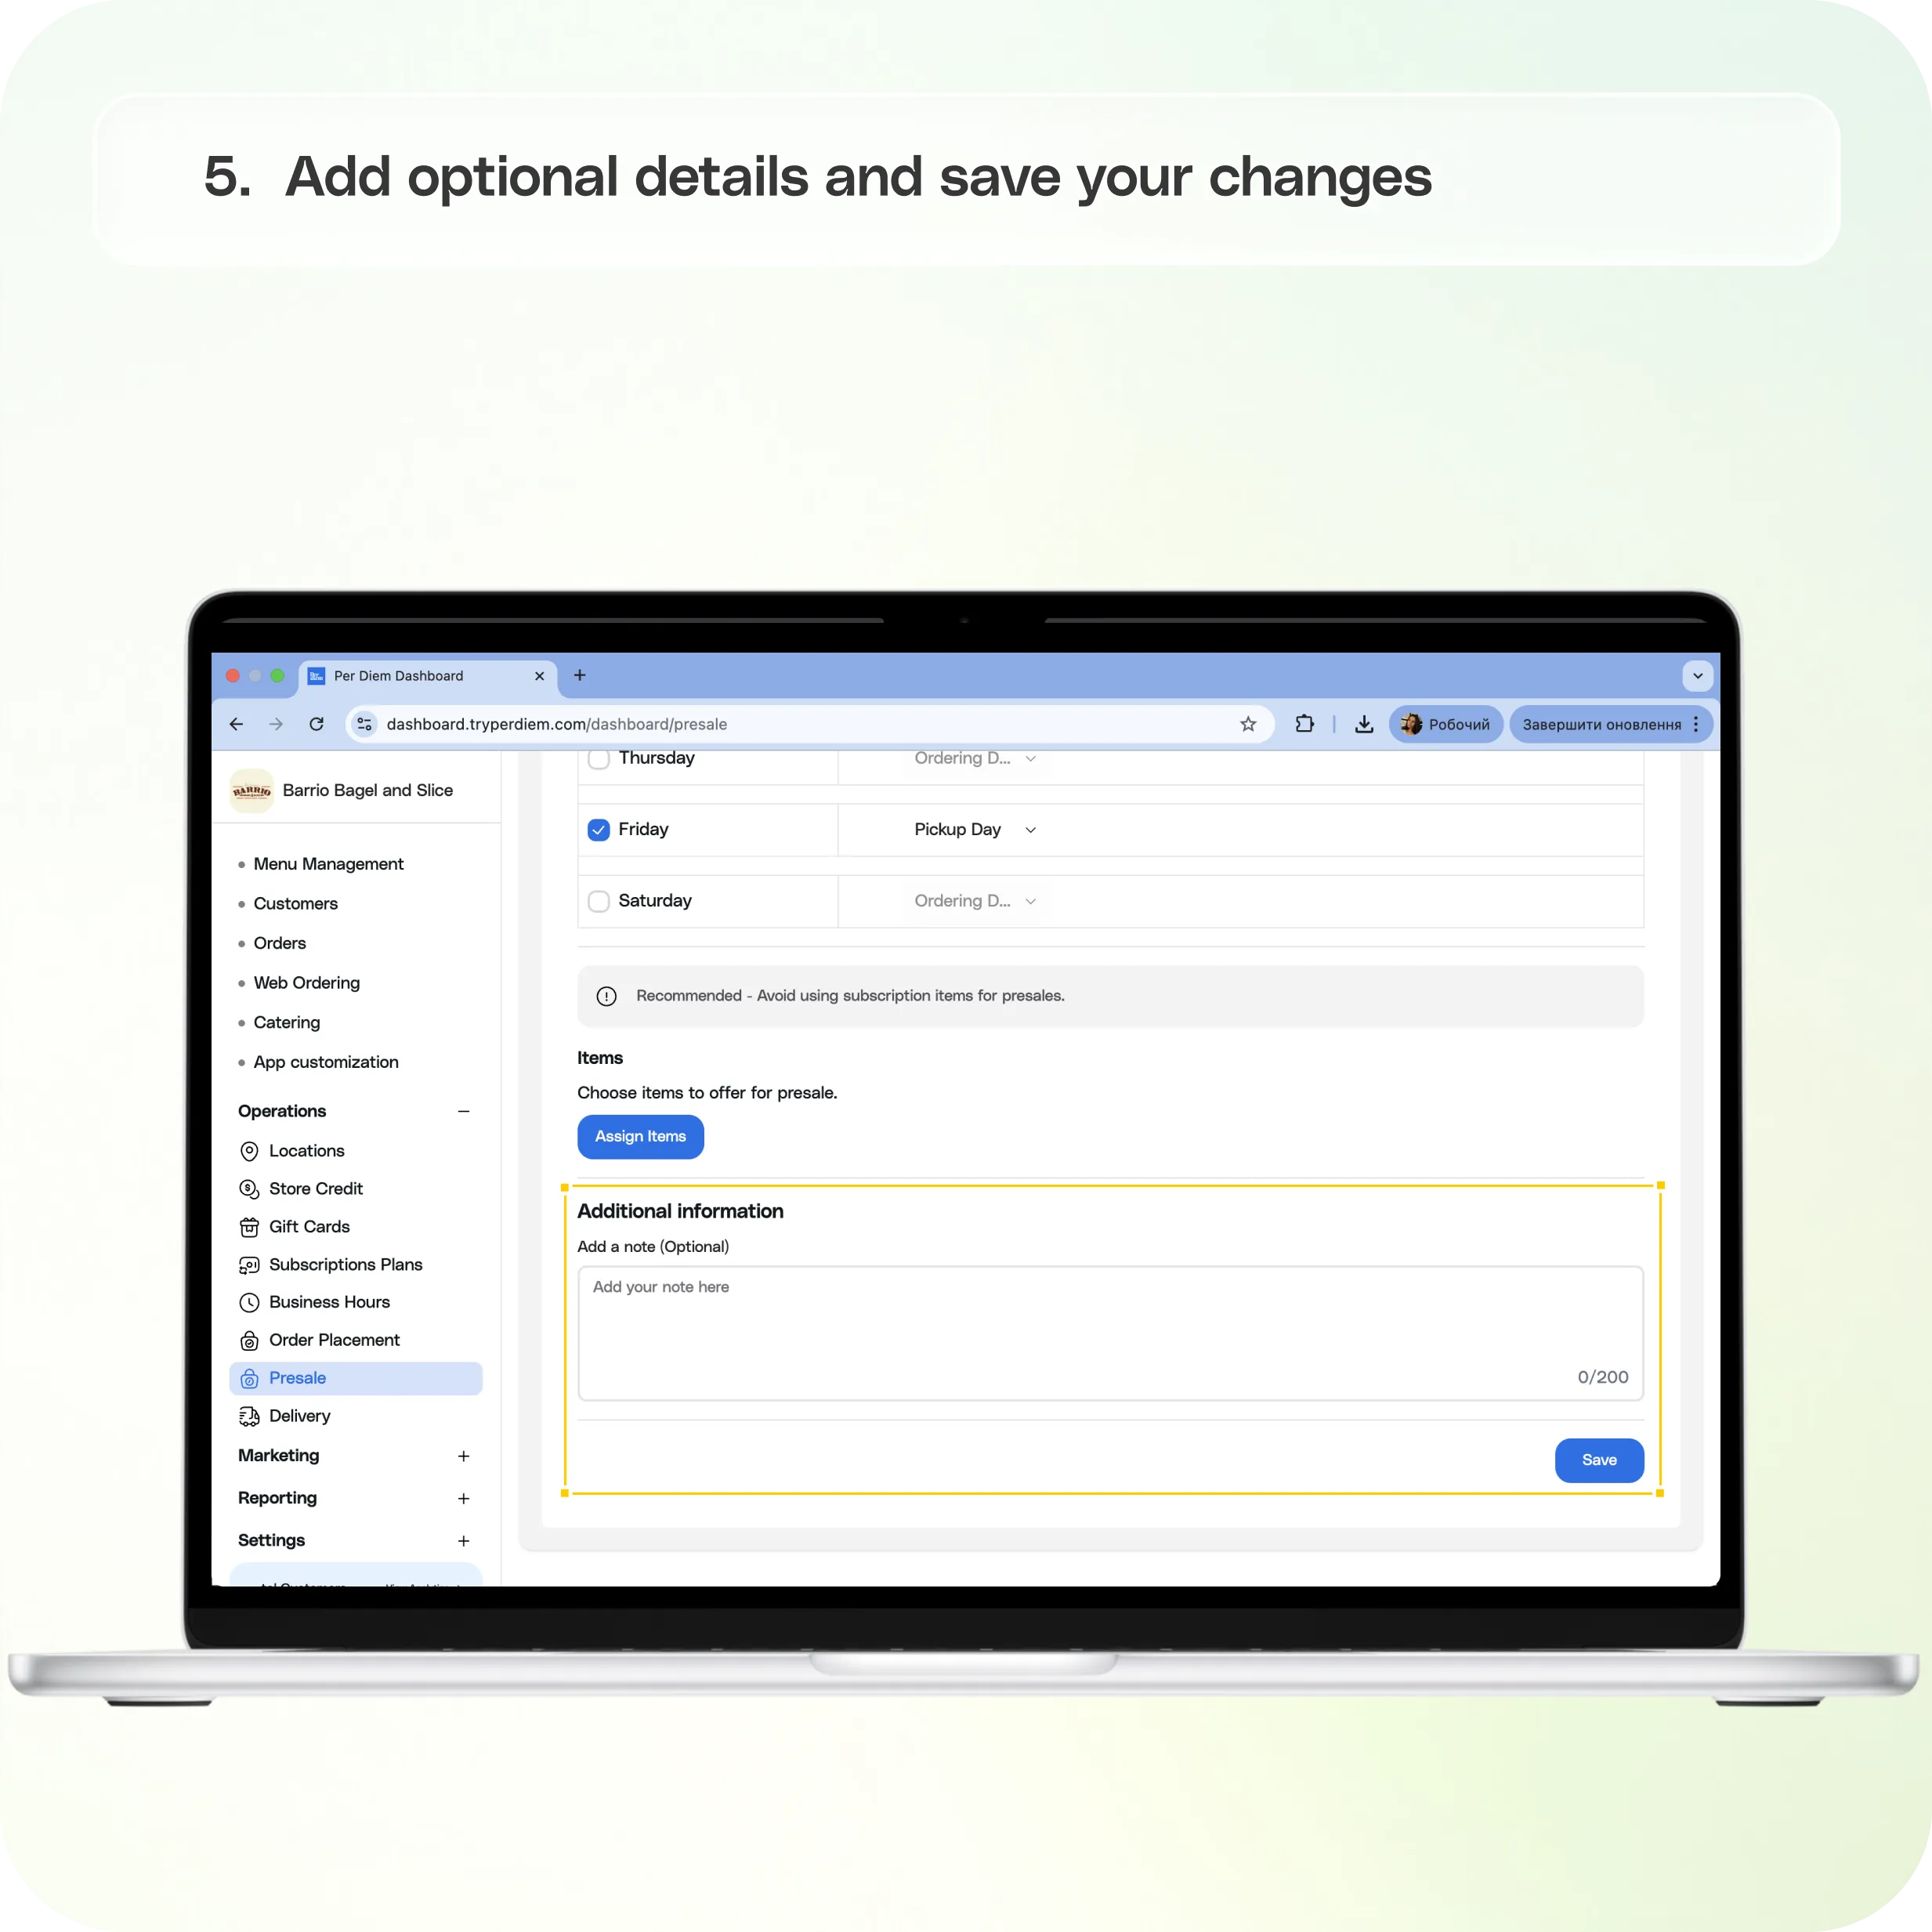
- Add Optional Details
- Save Your Changes
Still require support?
Contact support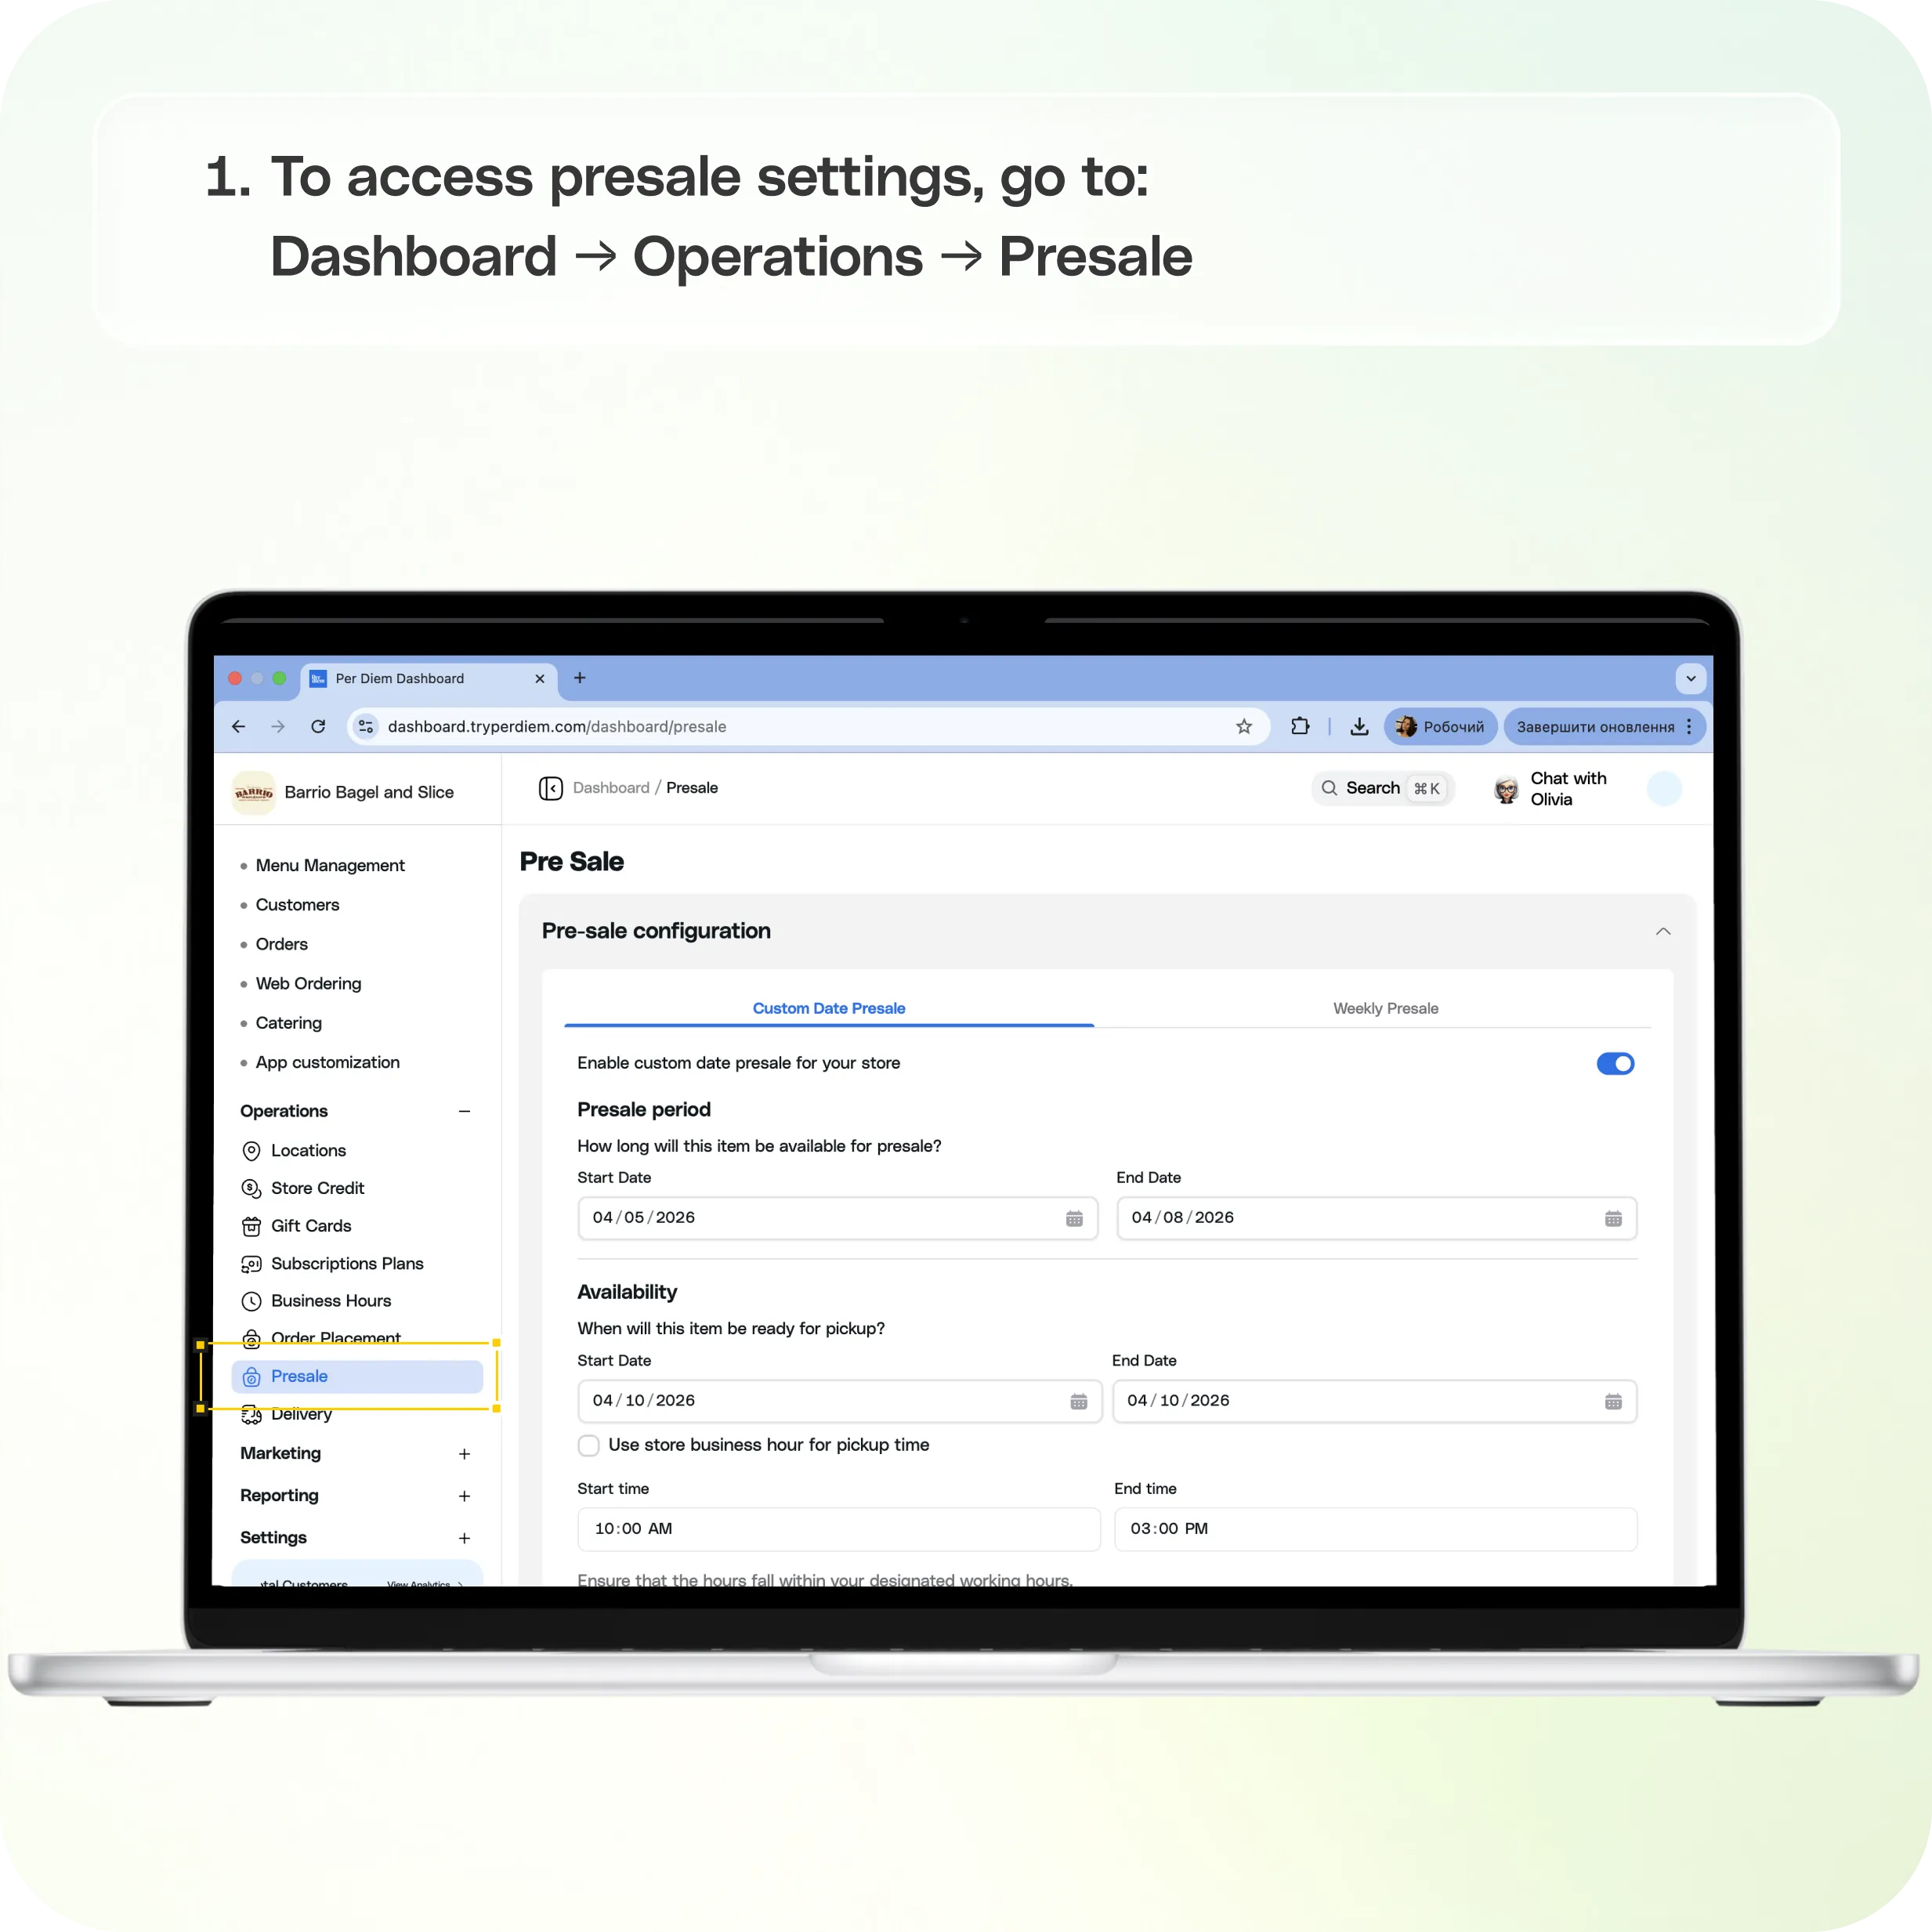
You can choose between two presale types:
- **Custom Date Presale
** - **Weekly Presale
**
Each option gives you flexibility based on how you want to collect orders and schedule fulfillment.
Where to Find Presale:
To access presale settings, go to:
Dashboard → Operations → Presale
From there, you can choose the presale type you want to configure.
Custom Date Presale
Use Custom Date Presale when you want to collect orders for one specific date.
This is helpful for:
- Holidays
- Special events
- Limited-time menu drops
- One-time preorder campaigns
With this option, you can set a single presale date and define the ordering and pickup details for that event.
Weekly Presale
Use Weekly Presale when you want presale orders to repeat on a recurring schedule each week.
This is useful for:
- Weekly specials
- Regular preorder items
- Recurring bakery or pastry pickups
- Planned menu drops on specific days
Weekly presale allows you to assign certain days as ordering days and a separate day as the pickup day.
How to Set Up a Weekly Presale
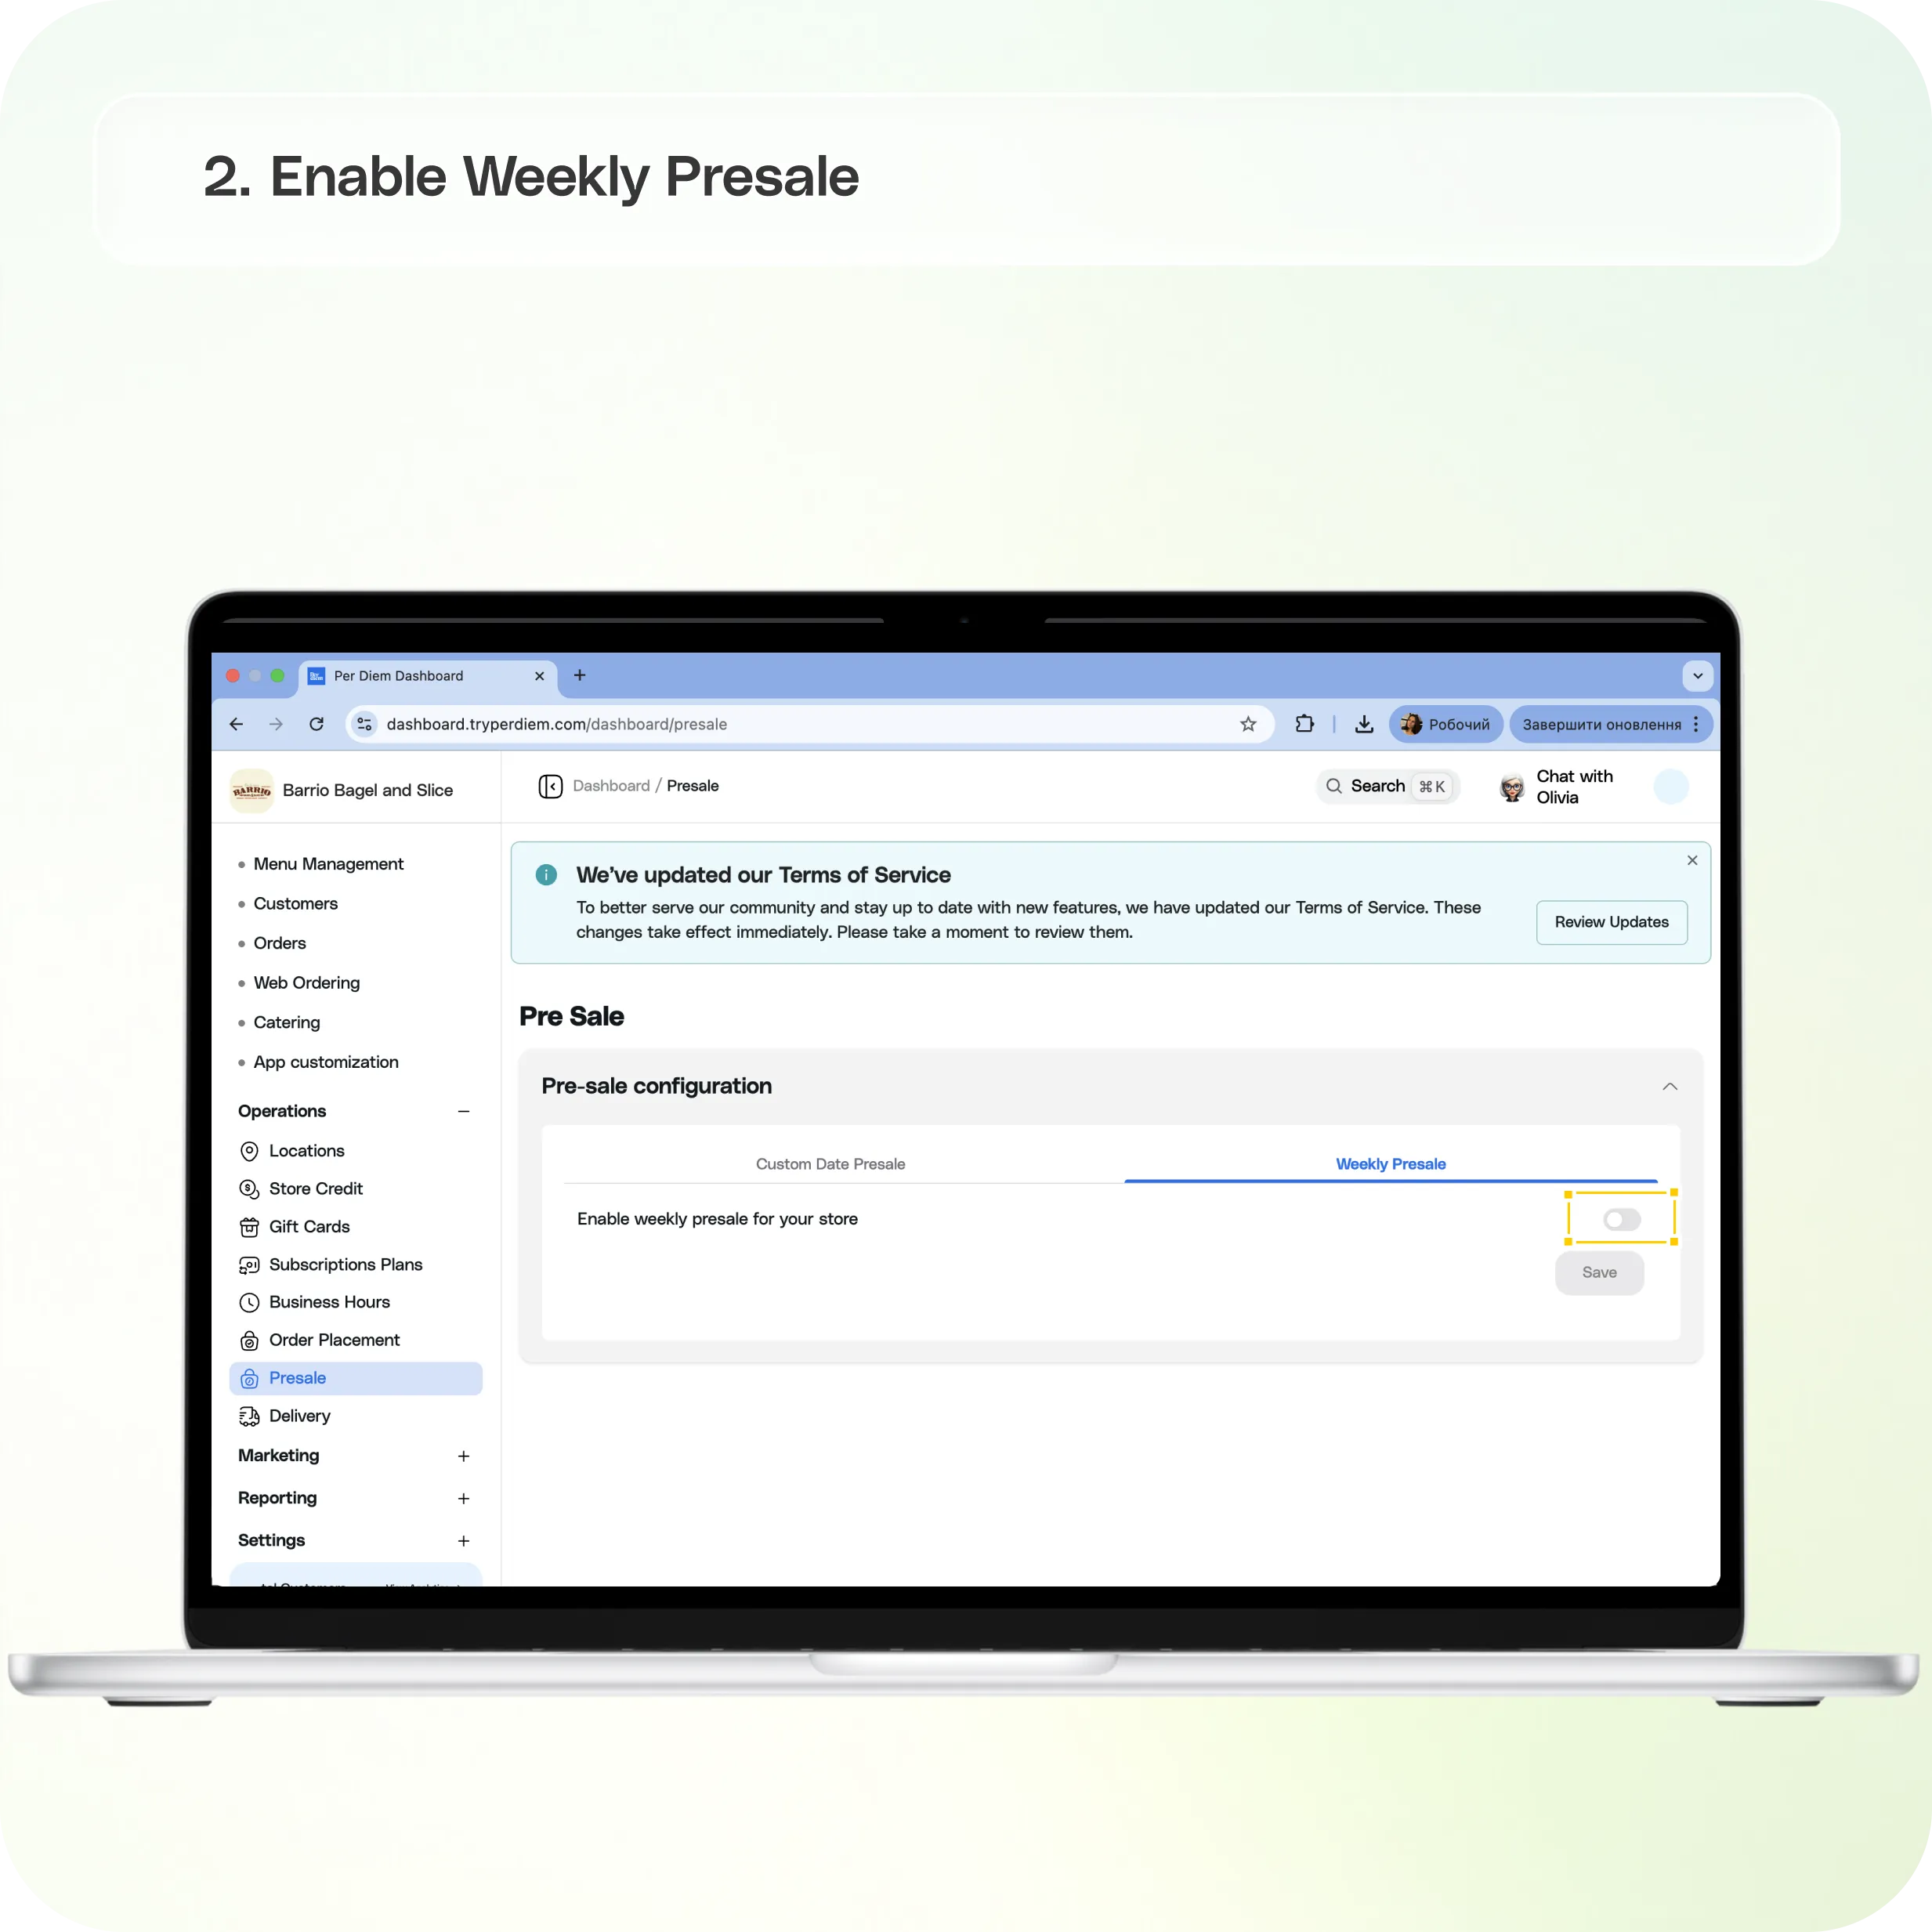
Step 1: Enable Weekly Presale
Turn on Weekly Presale for your store.
Once enabled, you will be able to configure the ordering and pickup schedule for each day of the week.
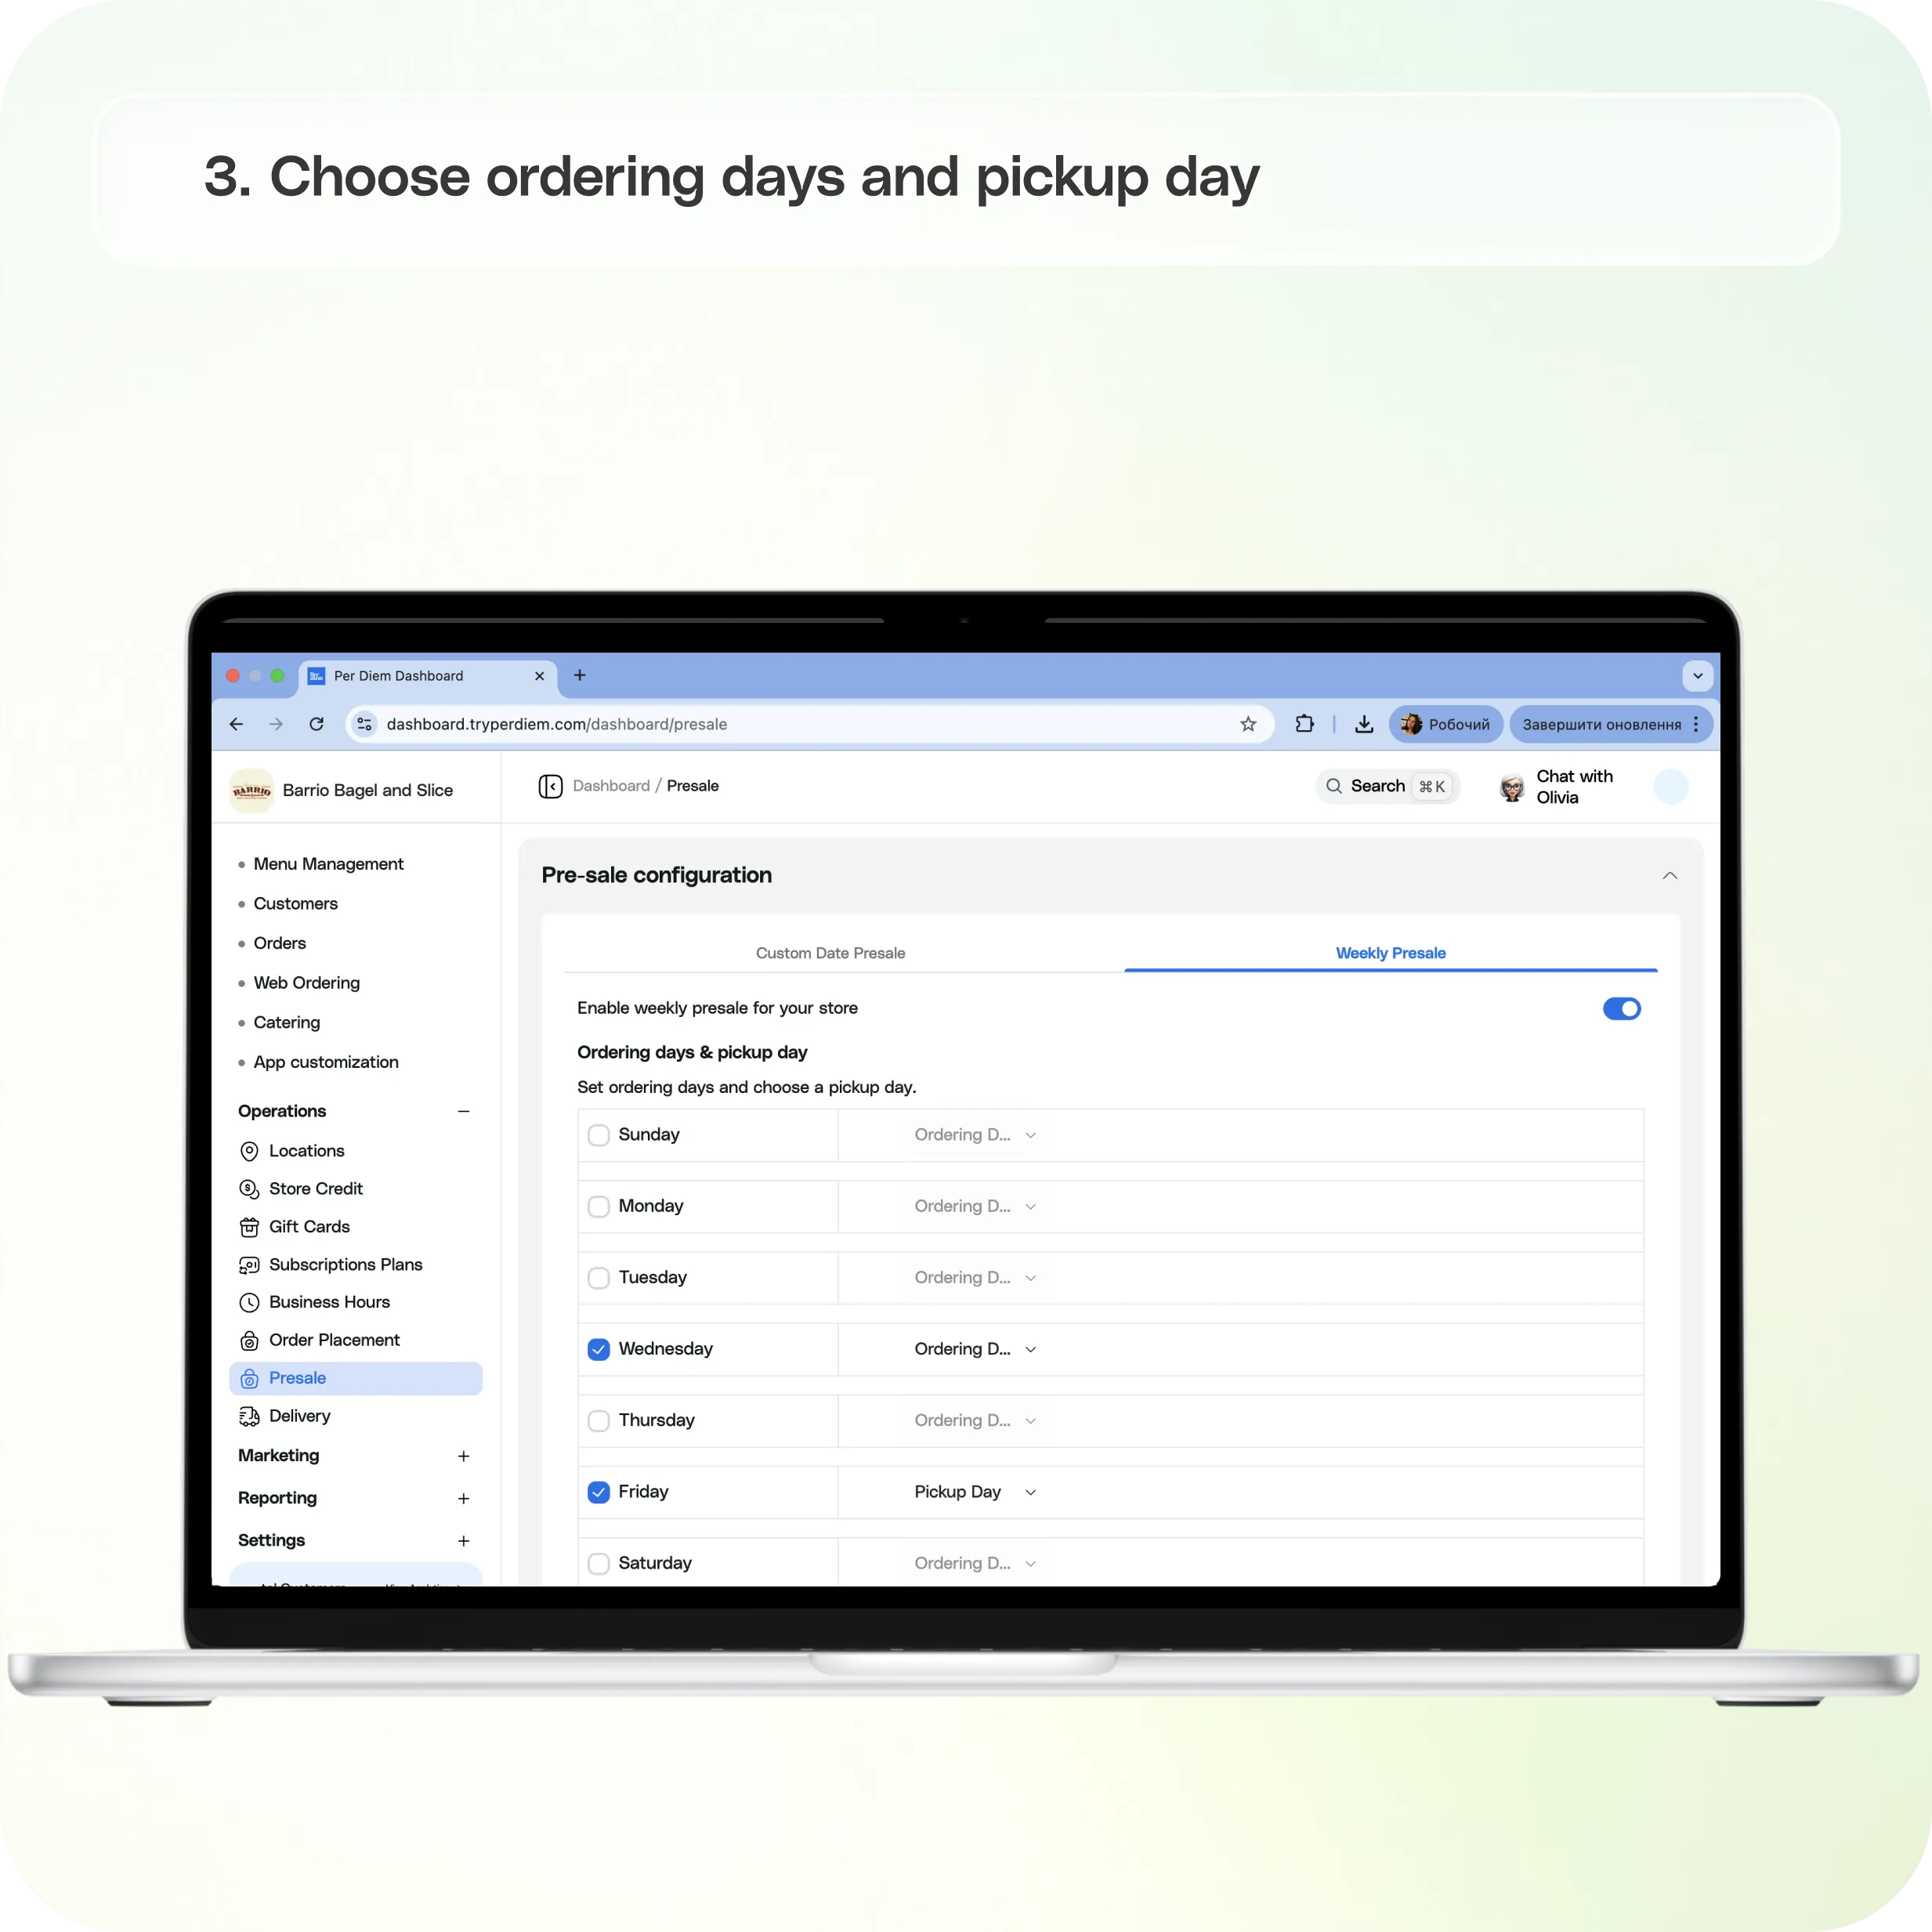
Step 2: Choose Ordering Days and Pickup Day
For each day of the week, select whether that day is:
- An **Ordering Day
** - A **Pickup Day
**
For example, you may allow customers to place orders from Sunday through Friday and choose Saturday as the pickup day.
Step 3: Assign Items to Presell
After setting your schedule, assign the items you want to make available for presale.
This lets you control which products customers can order in advance.
Step 4: Add Optional Details
You can add any extra details needed for the presale, such as:
- Order instructions
- Pickup notes
- Product limitations
- Other relevant information for customers
Step 5: Save Your Changes
Once everything is configured, click Save to apply the presale settings.
After saving, the presale will be active based on the schedule you selected.
Still have questions?Contact us
Ask anything or just say hi