
















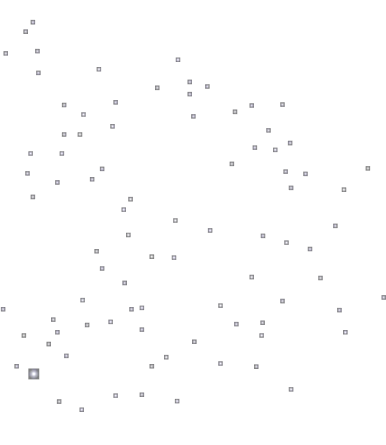

Push notifications in Per Diem: Setup & automation guide
Push notifications let you keep customers engaged automatically, without having to send a message by hand every time. From the dashboard you can send one-off announcements or set up messages your app sends on its own, triggered by a schedule, a holiday, or customer behavior.
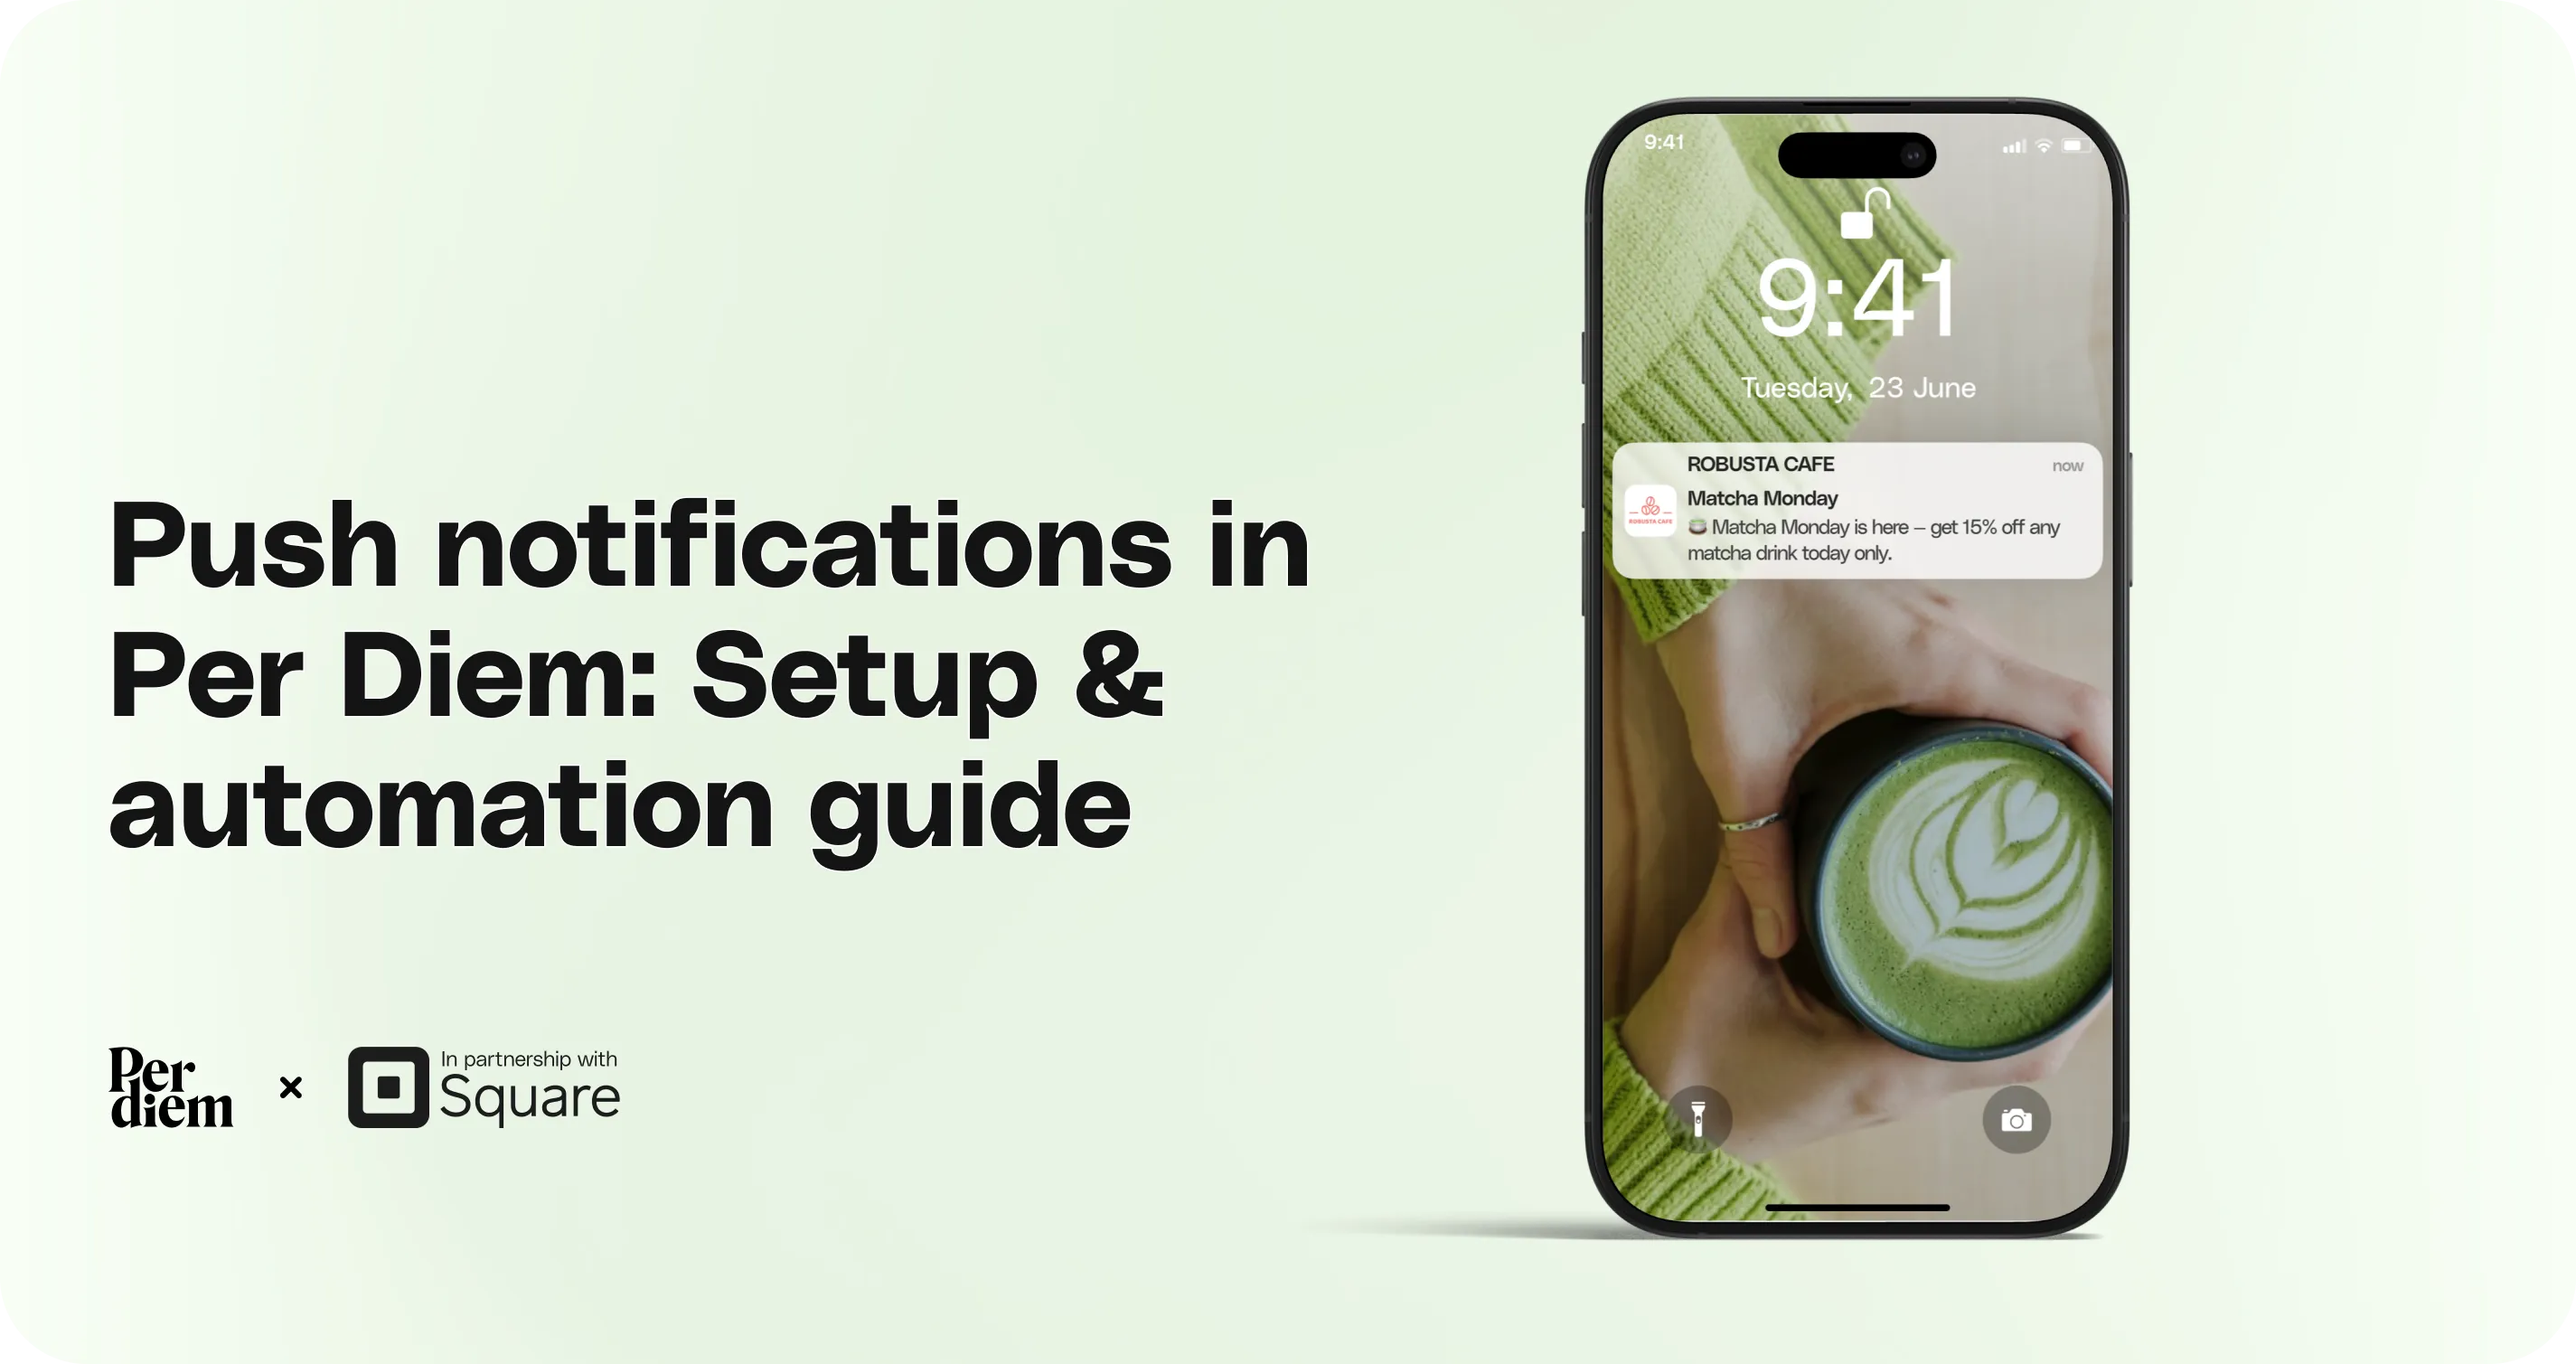
- Click Create a Notification
- Send to: All Customers, Customer Groups (your manually defined segments), or Smart Groups (dynamic, behavior-based segments like regulars, lapsed users, or new customers).
- Date and Time: schedule delivery for later, or leave it blank/in the past to send immediately.
- Message: a Subject (48 characters) and a Notification body (100 characters).
- Where should this message link to? Optionally deep-link the notification to an Item, Category, Store Credit, Subscription Plan, or App Page.
Still require support?
Contact support
Where to find it
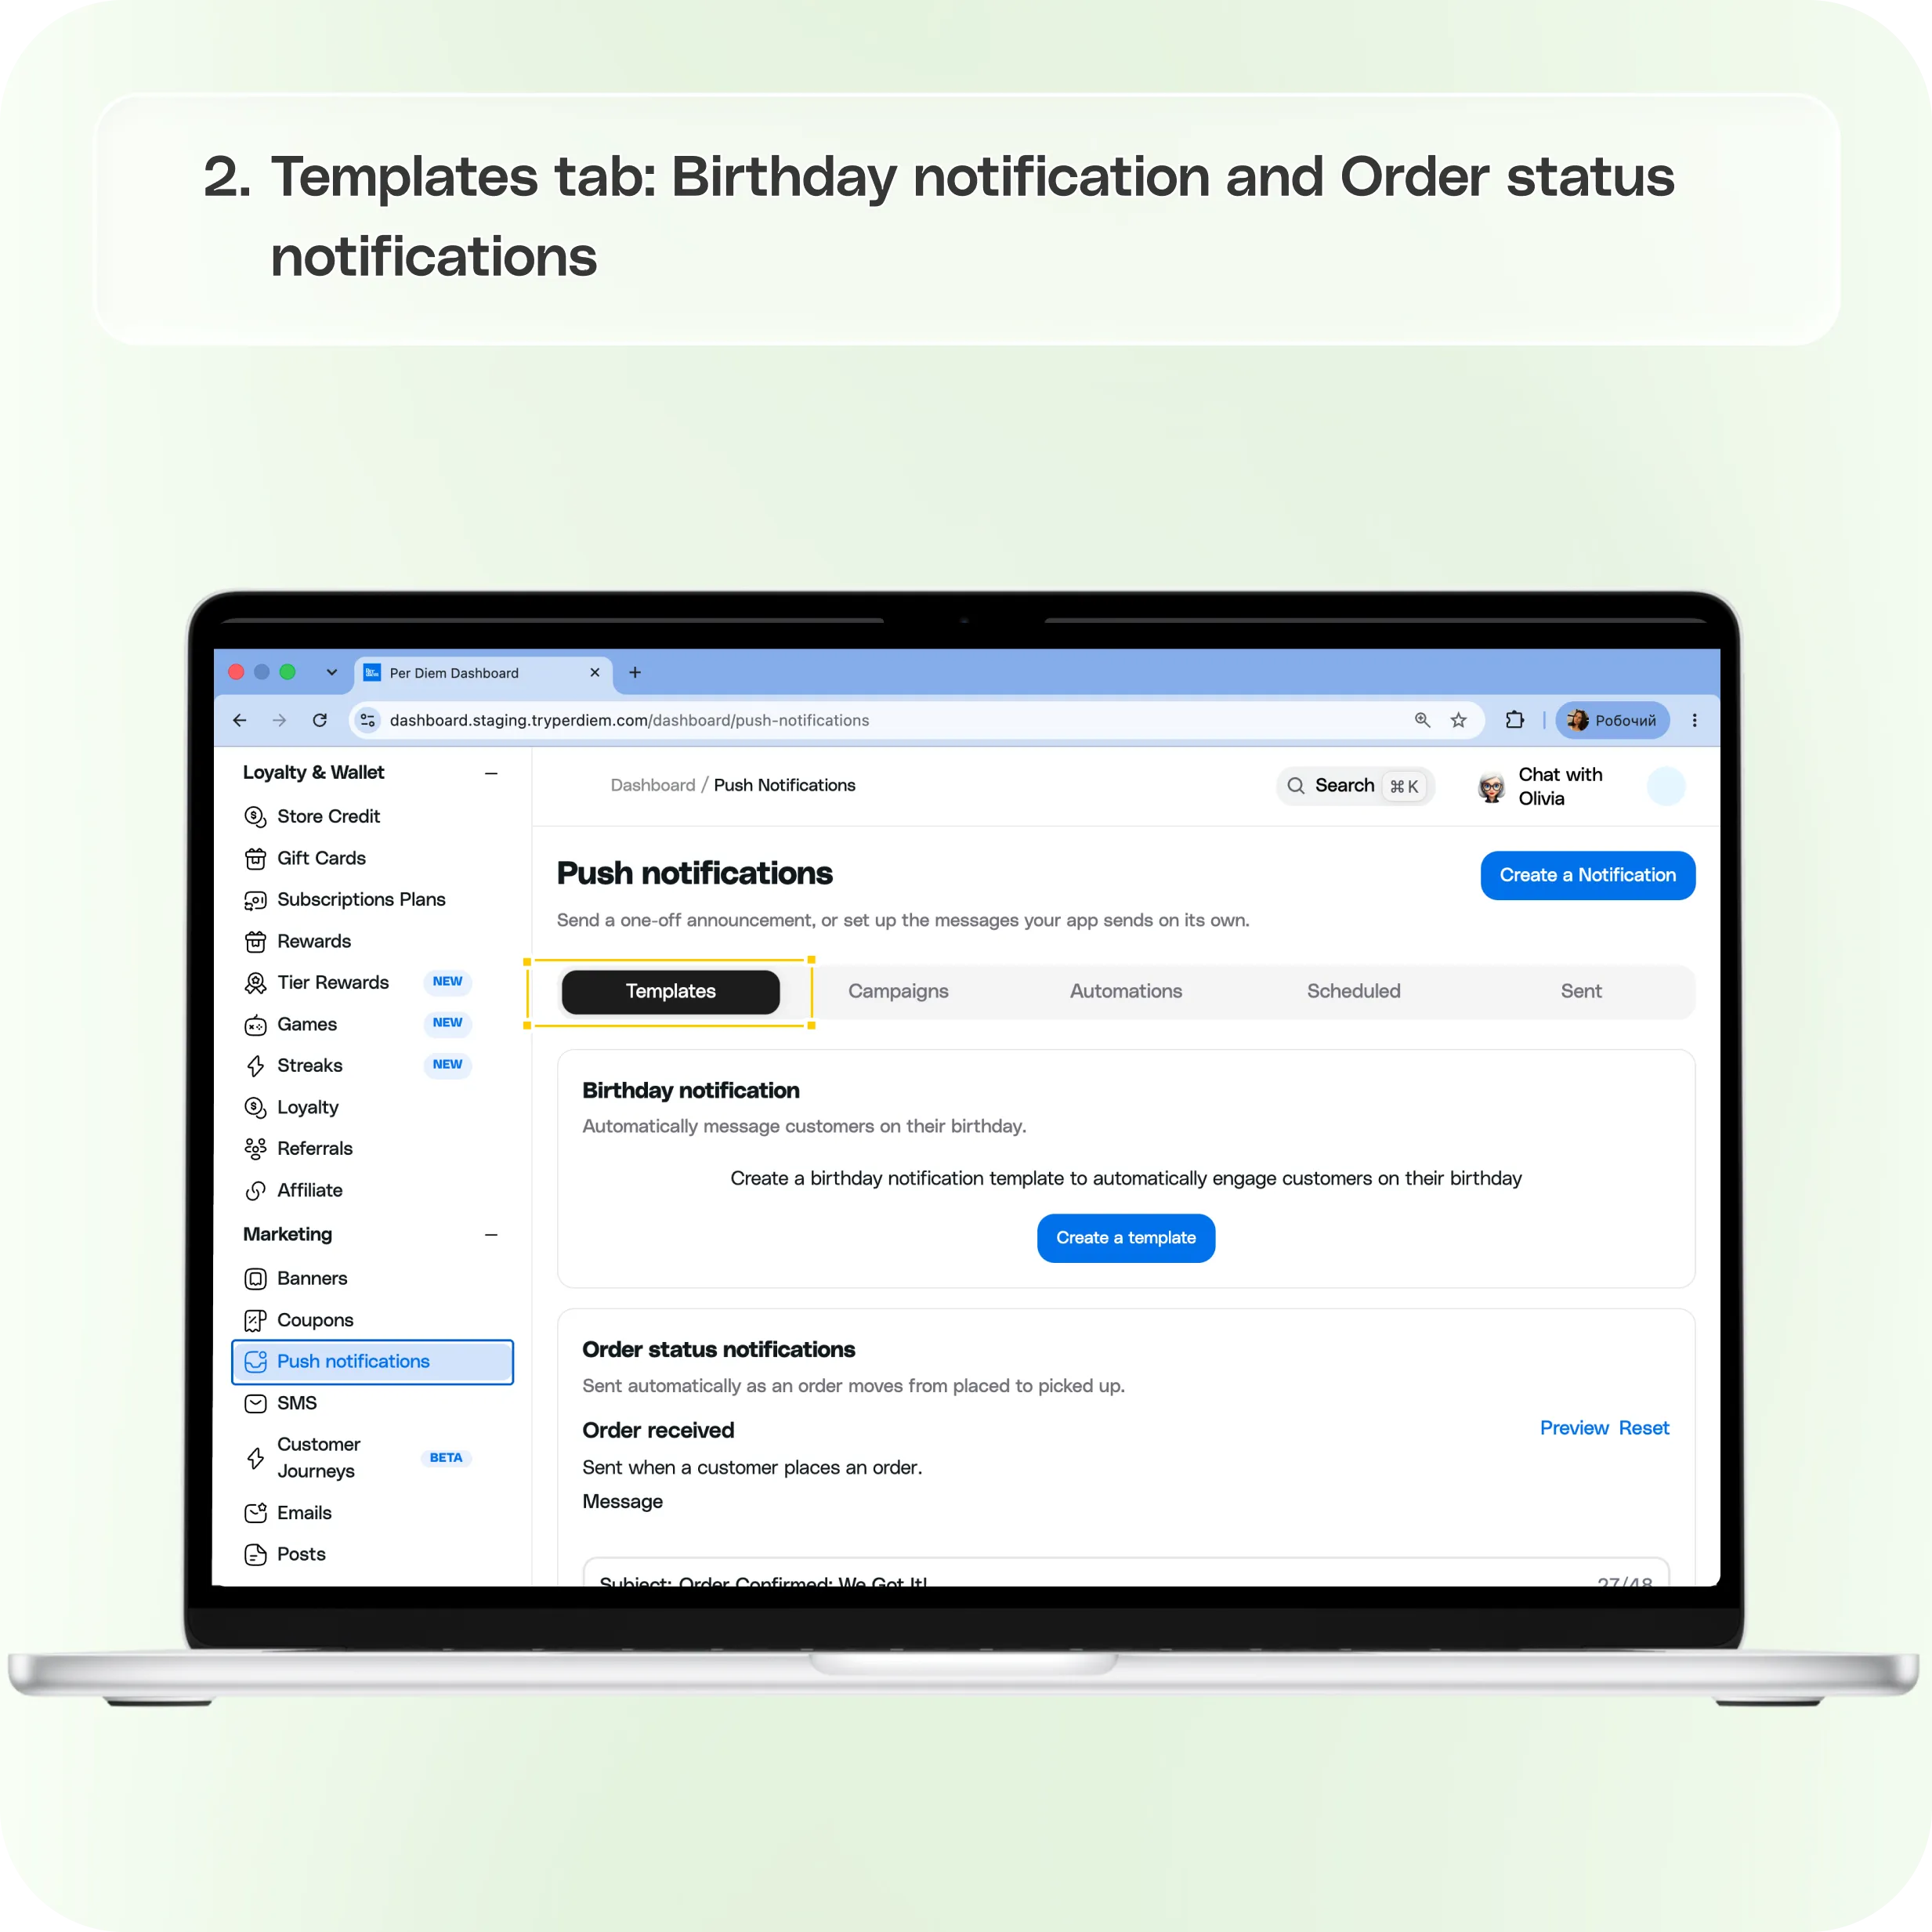
In the merchant dashboard, open Marketing in the left sidebar, then click Push notifications. The page is organized into five tabs: Templates, Campaigns, Automations, Scheduled, and Sent.
Sending a one-off notification
Click Create a Notification (top right of the page) to open the send flow:
- Send to: All Customers, Customer Groups (your manually defined segments), or Smart Groups (dynamic, behavior-based segments like regulars, lapsed users, or new customers).
- Date and Time: schedule delivery for later, or leave it blank/in the past to send immediately.
- Message: a Subject (48 characters) and a Notification body (100 characters).
- Where should this message link to? Optionally deep-link the notification to an Item, Category, Store Credit, Subscription Plan, or App Page.
- You can also start from an existing message template instead of writing from scratch, and preview the notification before sending.
Templates tab
Built-in, editable message templates:
- Birthday notification: automatically message customers on their birthday (create the template to activate it).
- Order status notifications: four stages sent automatically as an order moves through its lifecycle: Order received, Order in progress, Order ready, and Order completed. Each has an editable subject/body. Order completed also lets you set a number of minutes after prep time ends to auto-mark the order as picked up.
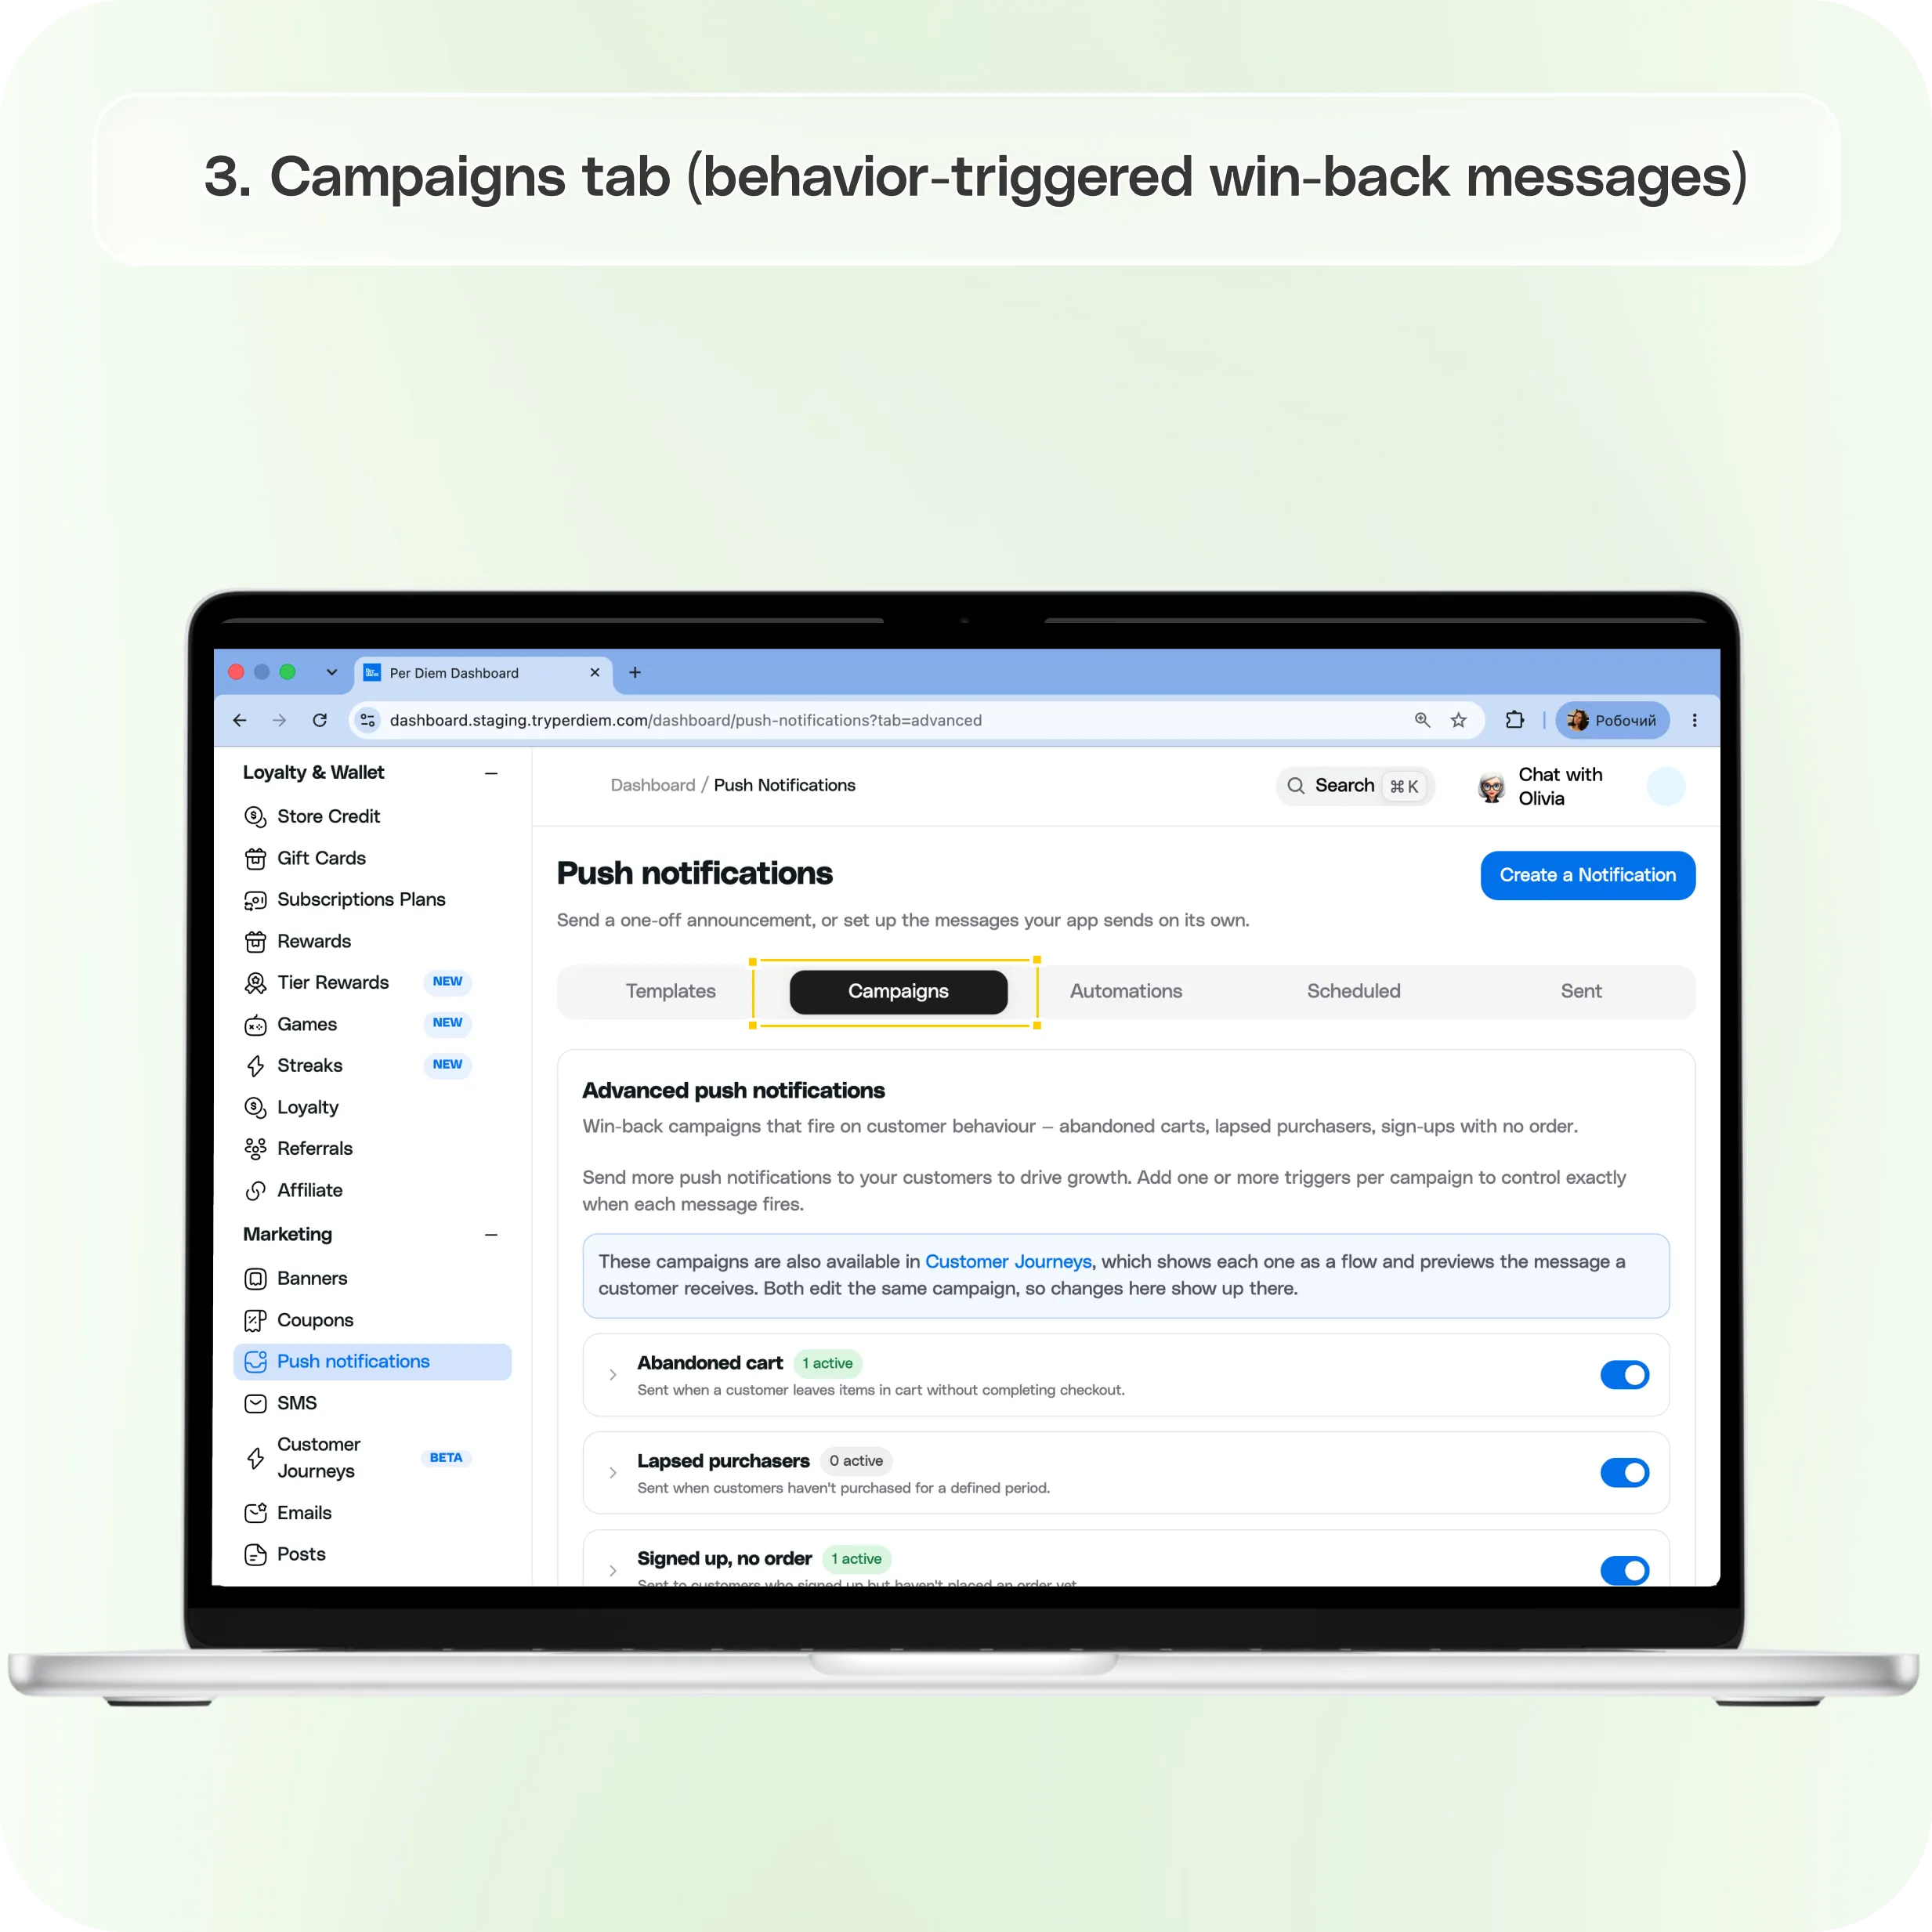
Campaigns tab (behavior-triggered win-back messages)
This is where lifecycle automation lives now. Four campaigns fire based on customer behavior:
- Abandoned cart: customer left items in cart without checking out.
- Lapsed purchasers: customer hasn't purchased in a defined period.
- Signed up, no order: customer signed up but hasn't ordered yet.
- New customer: customer just signed up.
Each campaign can be enabled/disabled, has a default message used by any trigger set to inherit it, and supports one or more custom triggers, each with its own timing (e.g., "1 hour after cart abandoned"), subject, and status (Draft/Active). Use Add Trigger to layer additional messages onto a single campaign.
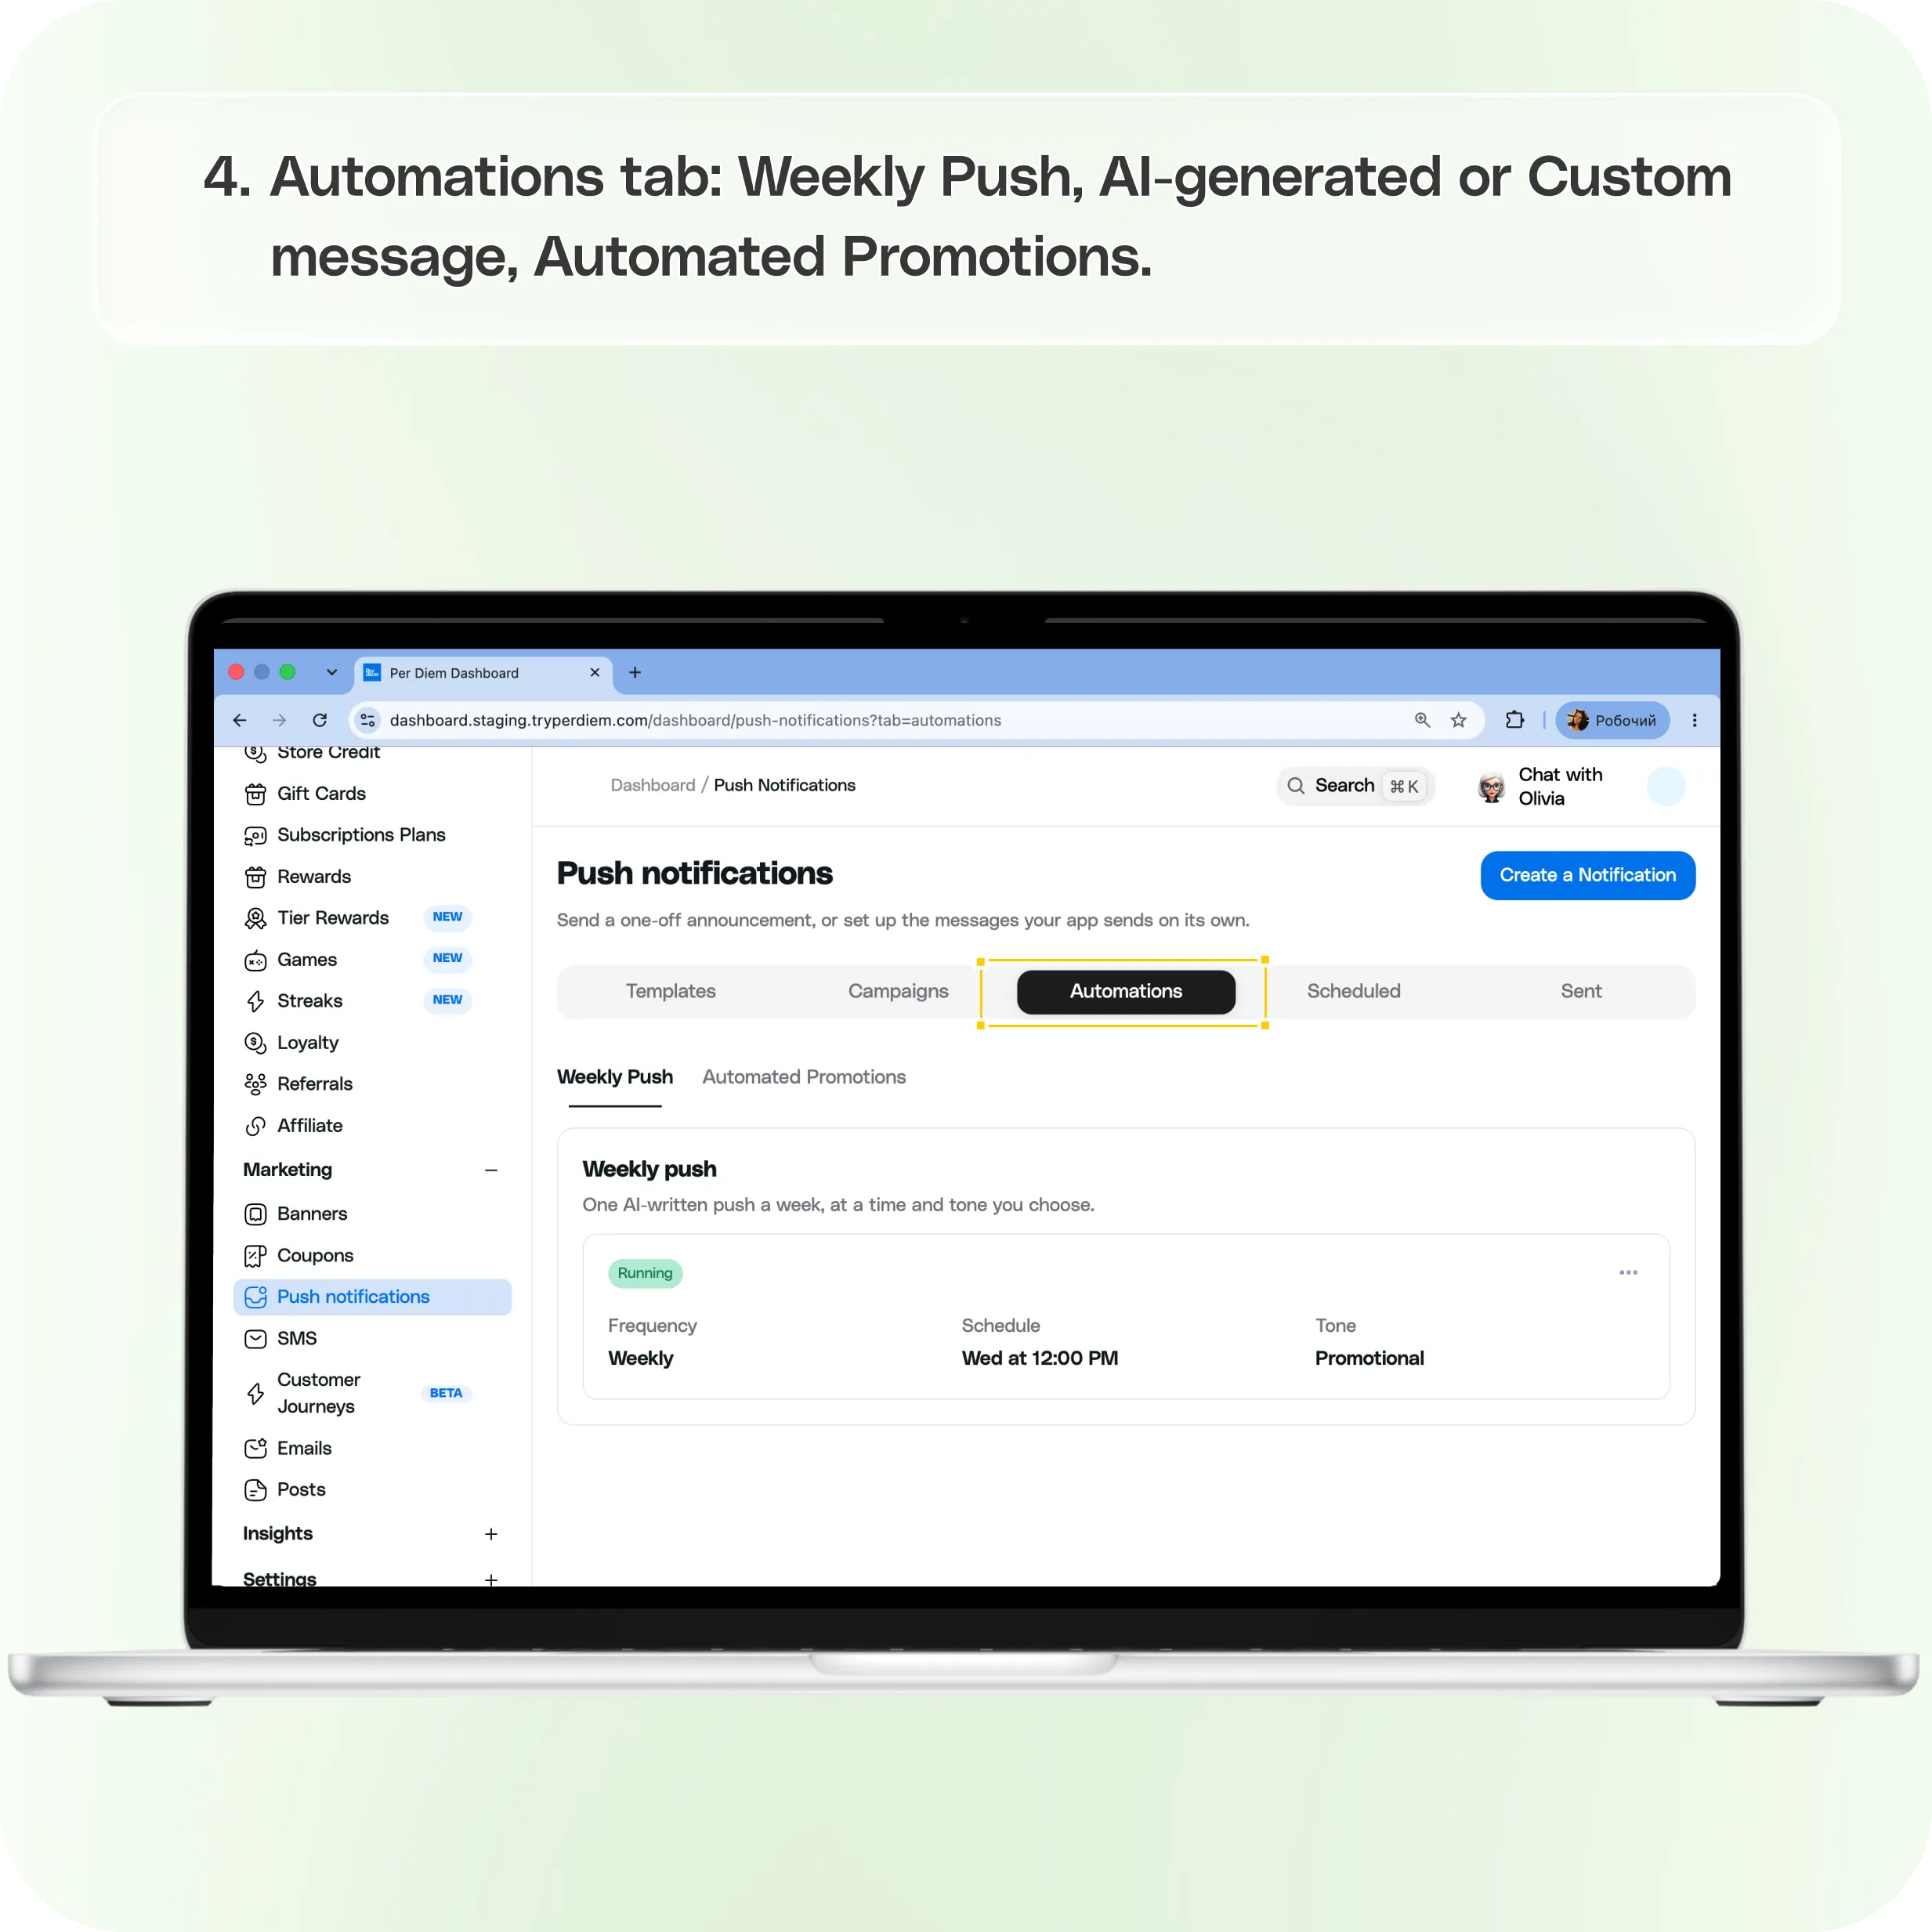
Automations tab
Two sub-sections:
- Weekly Push: one push notification a week, at a day and time you choose. Choose AI-generated (pick a tone: Friendly, Professional, Casual, Urgent, or Promotional, and optionally give the AI assistant a custom prompt, up to 500 characters, to steer what it writes) or Custom message (write the body yourself).
- Automated Promotions: AI-written promotions tied to a built-in calendar of holidays and observances (New Year's Day, Valentine's Day, Black Friday, and dozens more). Toggle any of them on and edit their message, or create a fully Custom automated promotion with your own schedule (frequency and weekday), push notification title/body/send time, and an optional in-app banner shown alongside the push.
Scheduled tab
Shows upcoming one-off notifications that haven't gone out yet.
Sent tab
Shows notifications that have already been delivered.
Still have questions?Contact us
Ask anything or just say hi