


















Set up and manage banners in Per Diem
Banners help you grab customers' attention, highlight promotions, announce new products, or share important updates across your mobile app and web ordering experience. You can create either an announcement banner or a full-screen pop-up, choose where it appears, and even target it to specific customer groups.
- Go to the Banners dashboard
- IChoose your banner type and where it appears
- Write your banner message
- Choose who will see the banner
- Schedule when the banner appears
- Choose your banner style
- Add a button or destination (optional)
- Set how often pop-up banners appear
- Preview and save
Still require support?
Contact support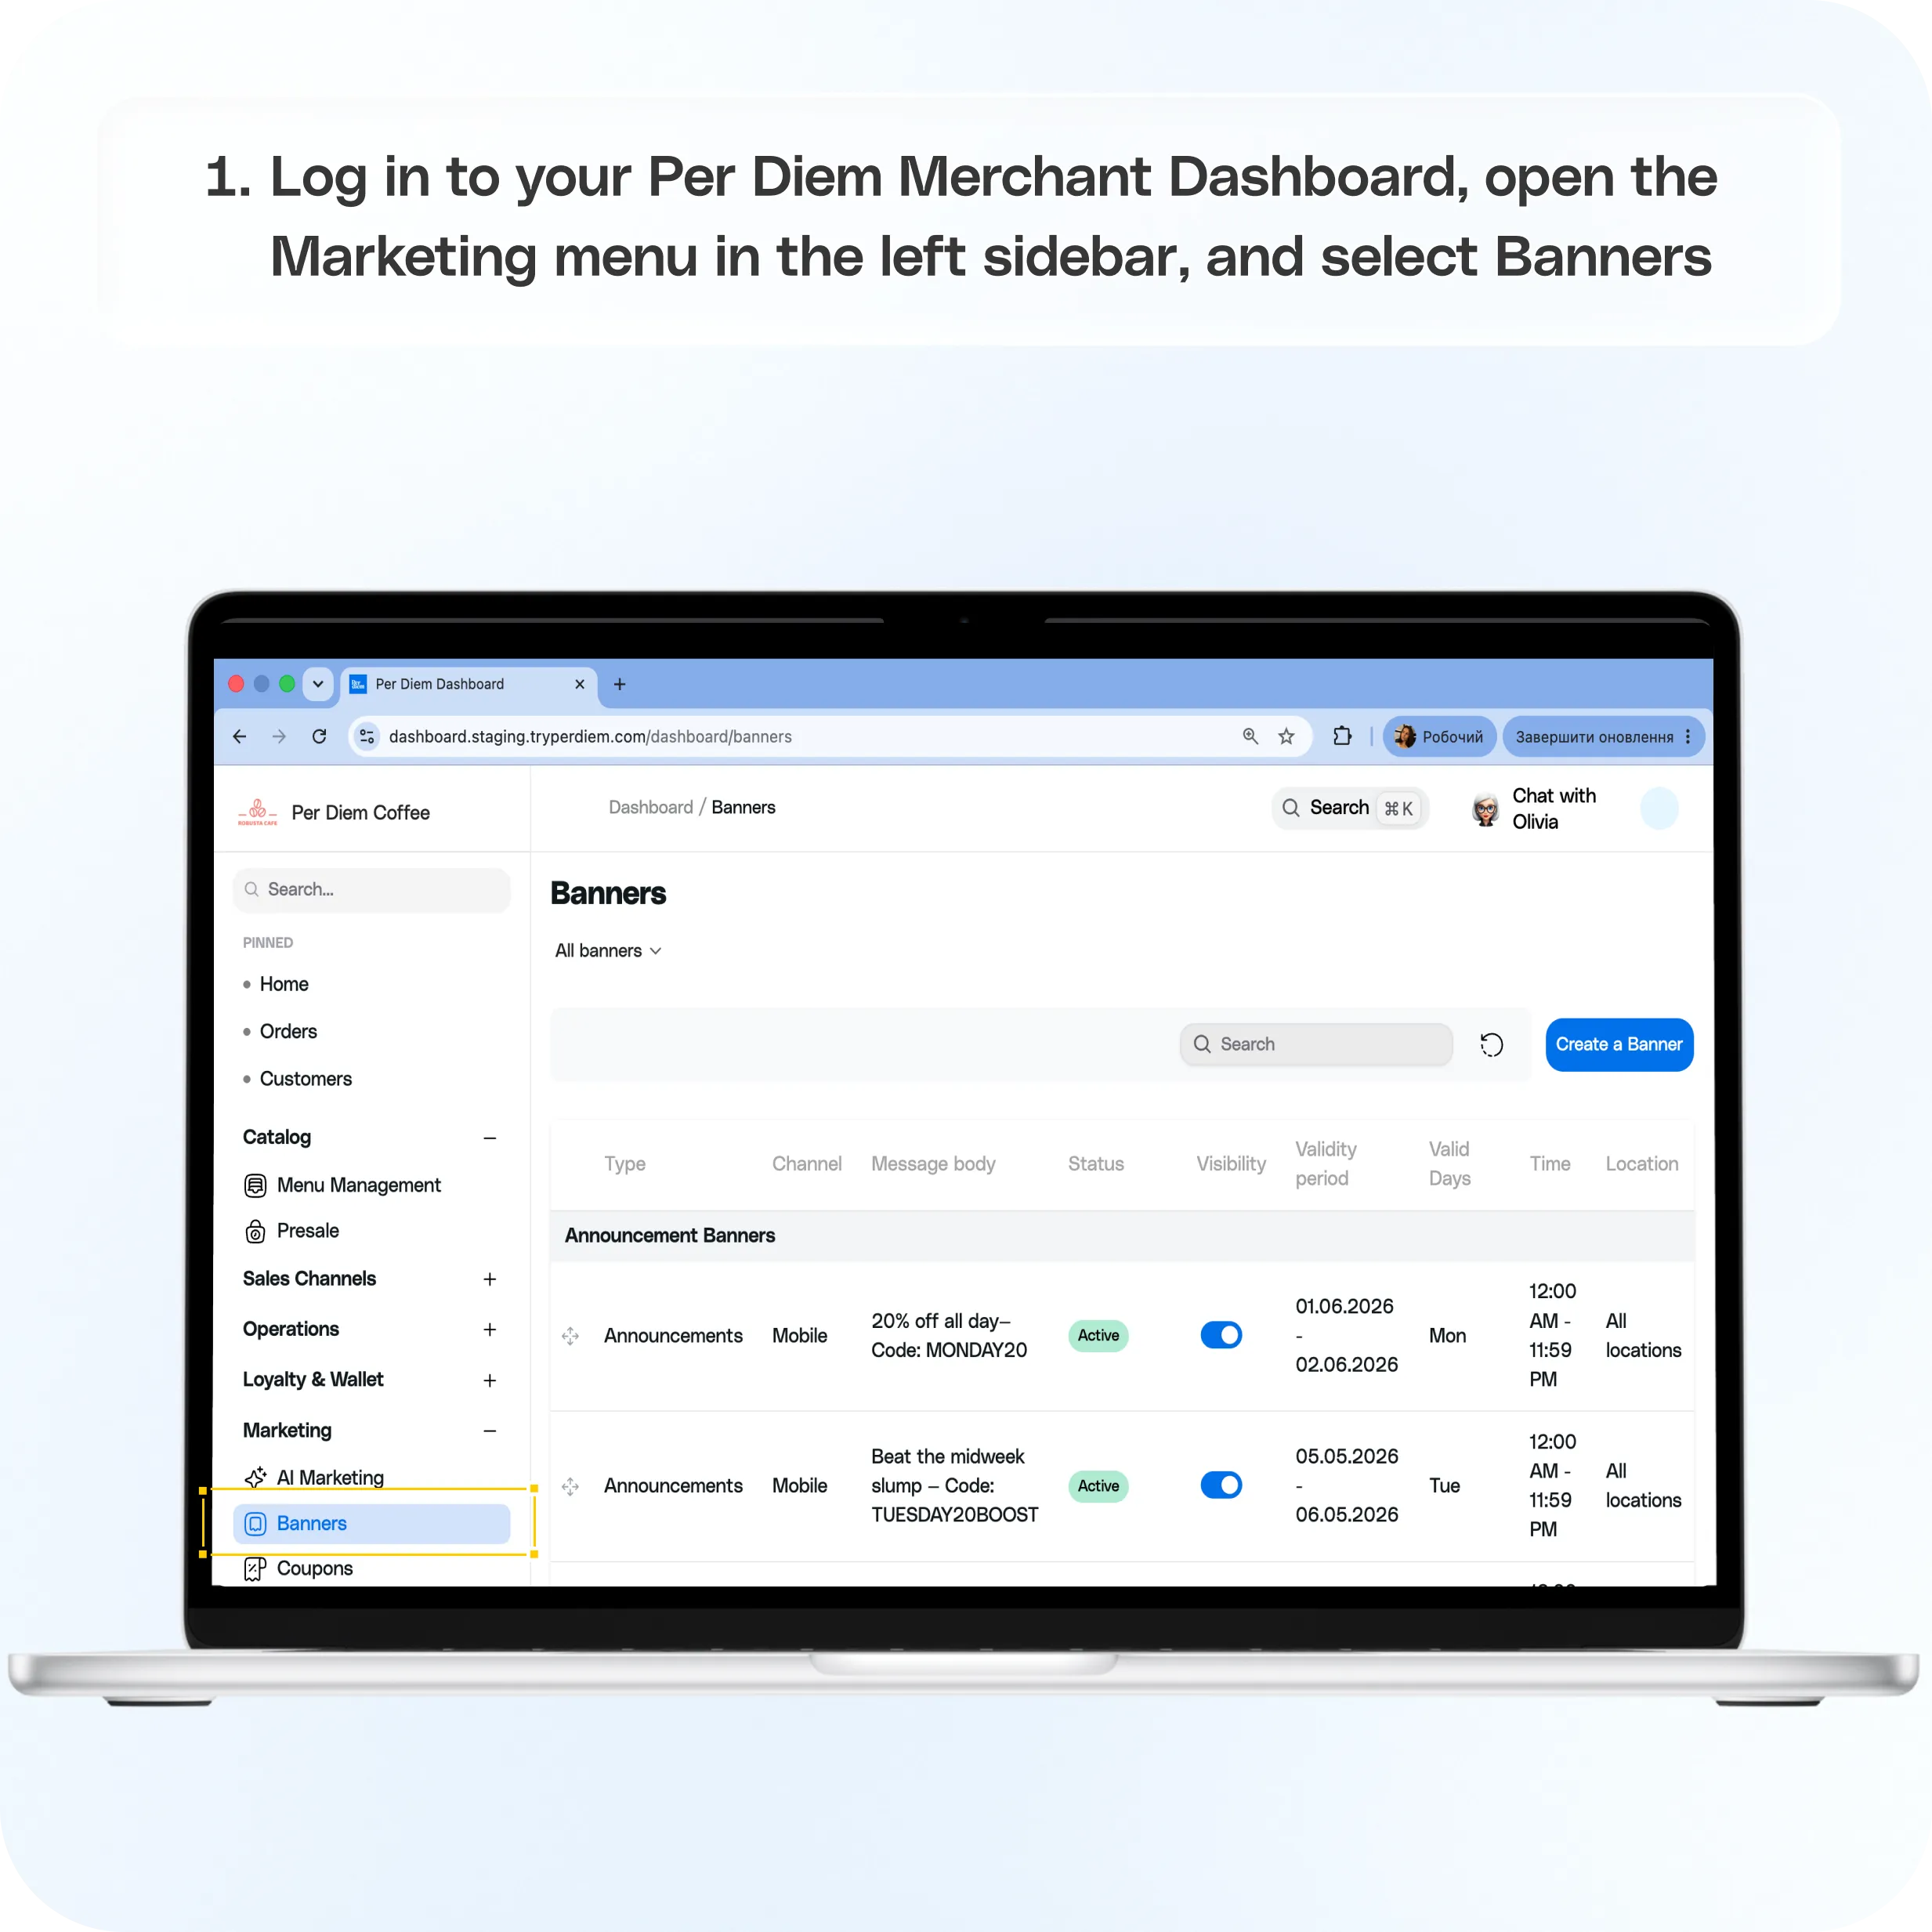
1. Go to the Banners dashboard
Log in to your Per Diem Merchant Dashboard, open the Marketing menu in the left sidebar, and select Banners.
Click Create a Banner to get started.
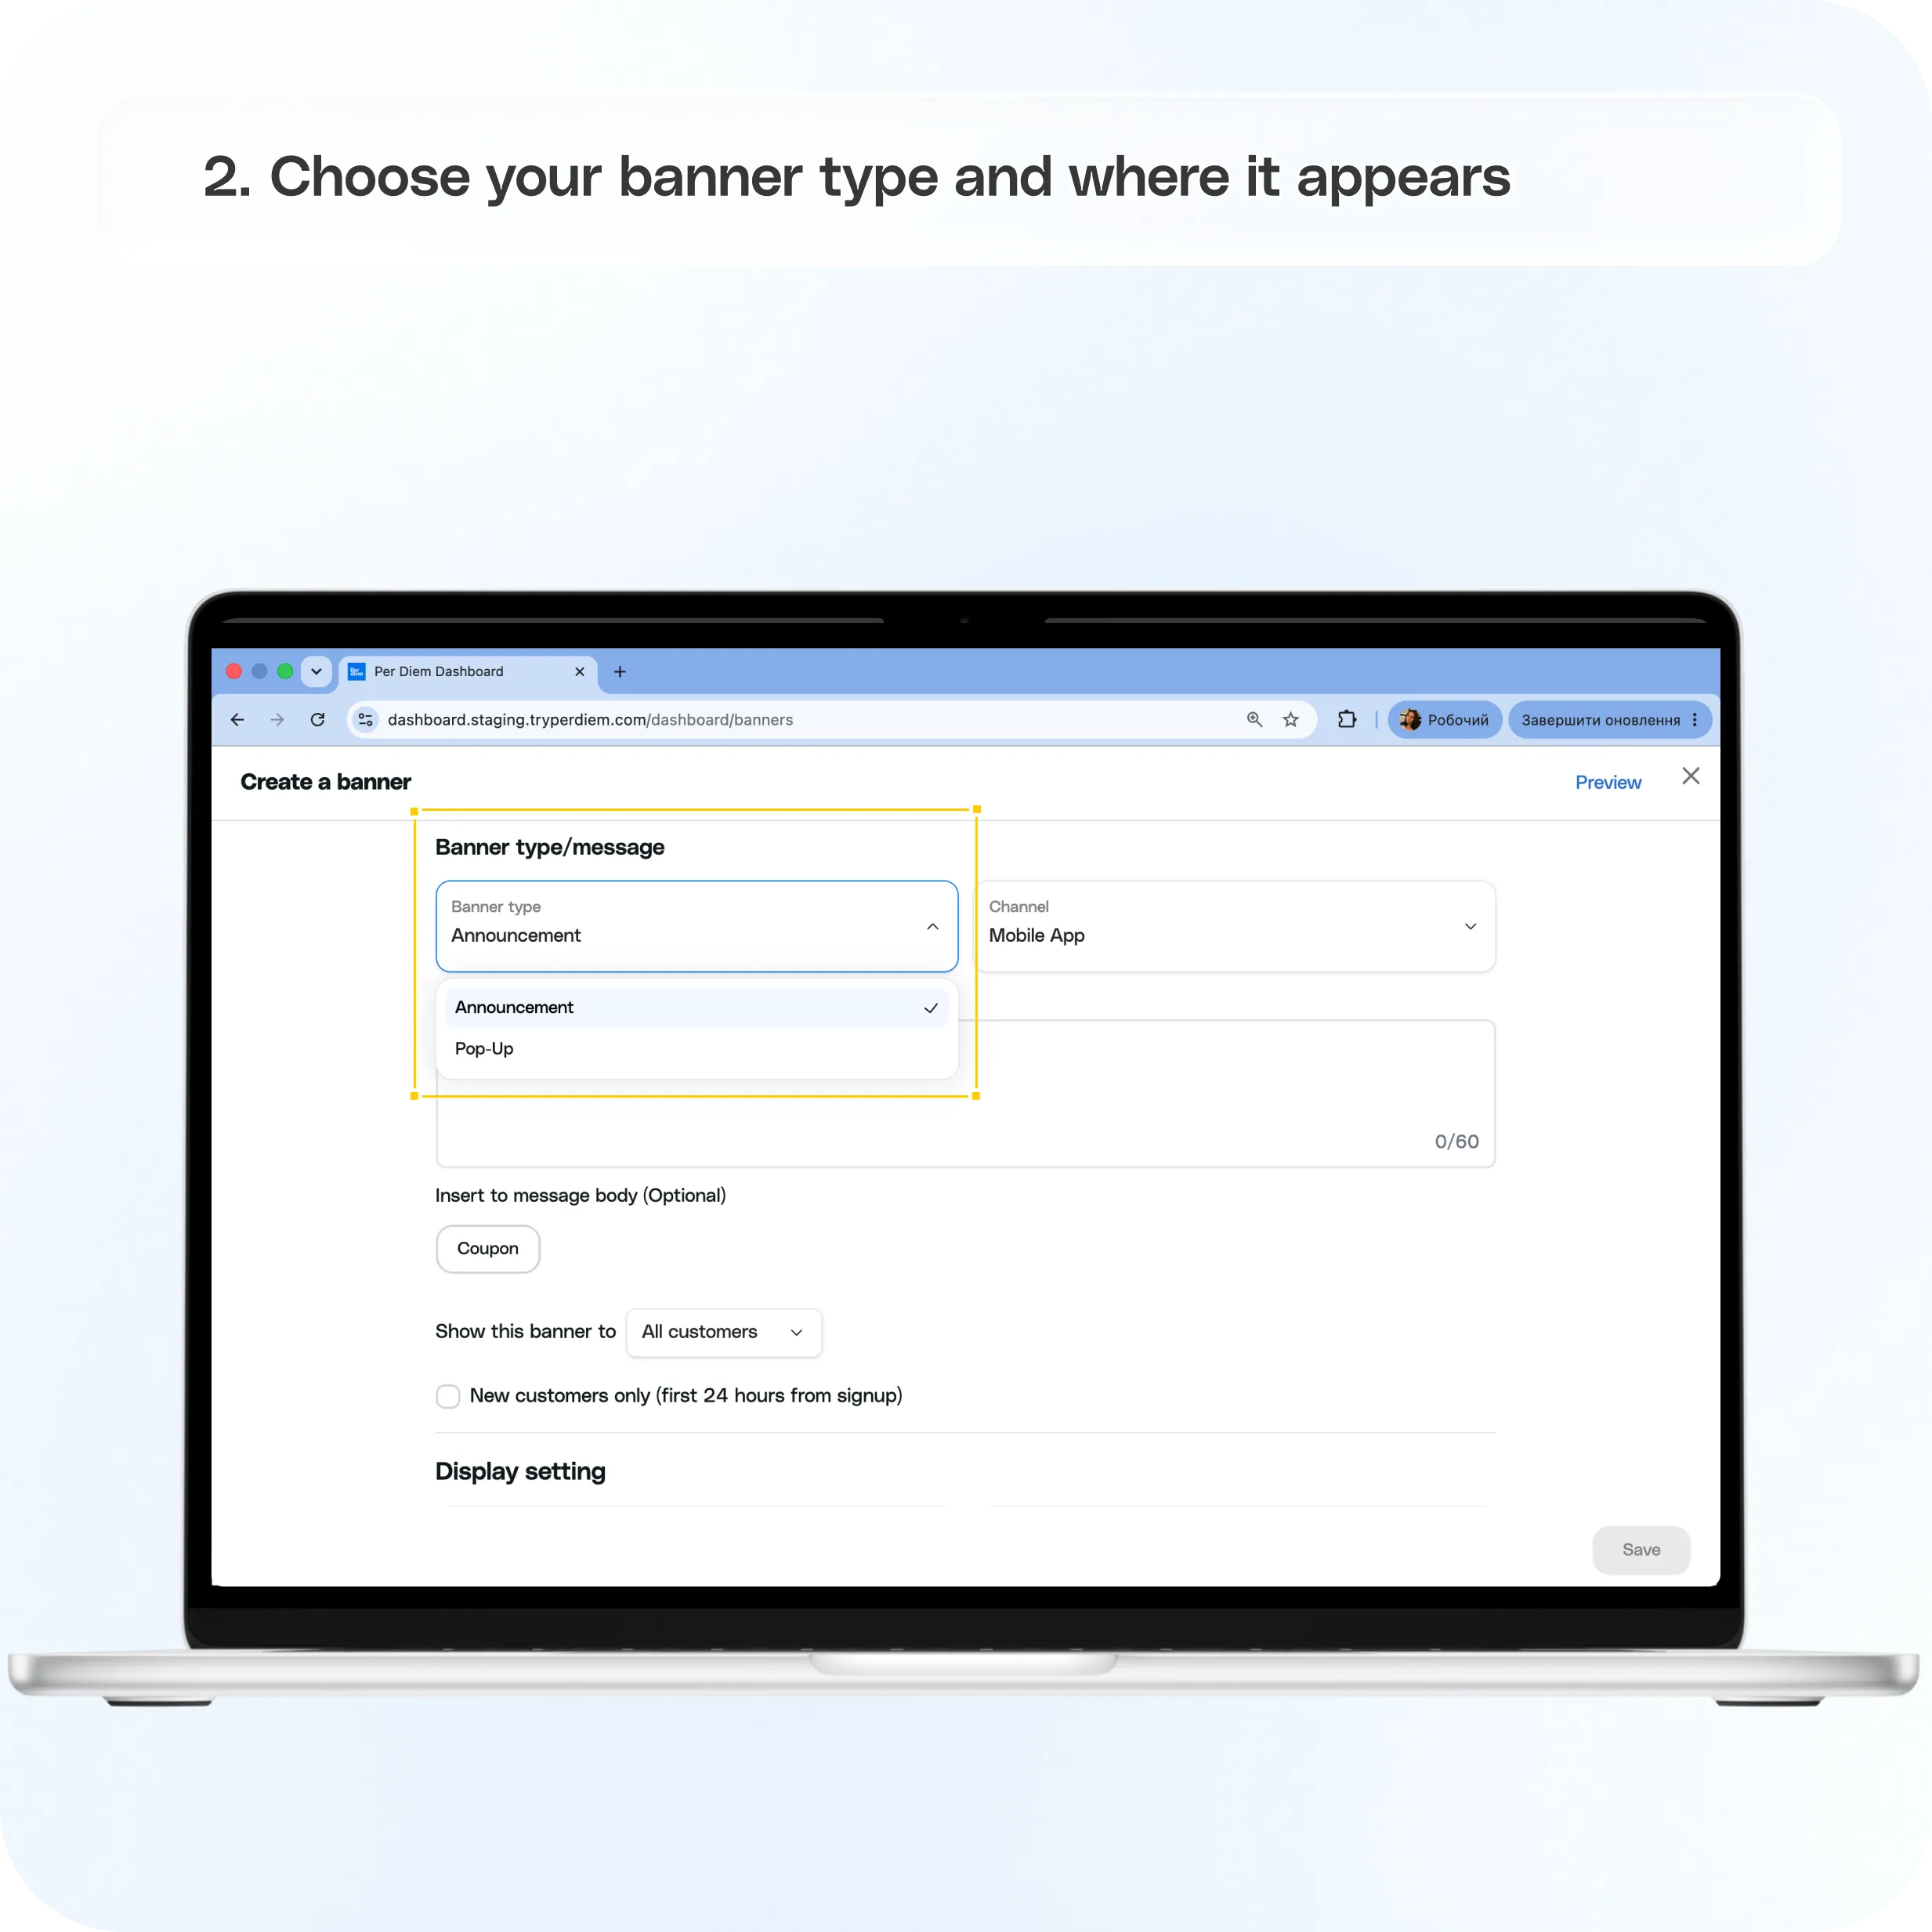
2. Choose your banner type and where it appears
First, choose the type of banner you want to create:
Banner type
- Announcement (a standard banner)
- Pop-up (a full-screen banner)
Next, choose where you'd like it to appear:
Channel
- Mobile App
- Web
This setting determines whether your banner appears on your app's home screen or your web ordering homepage.
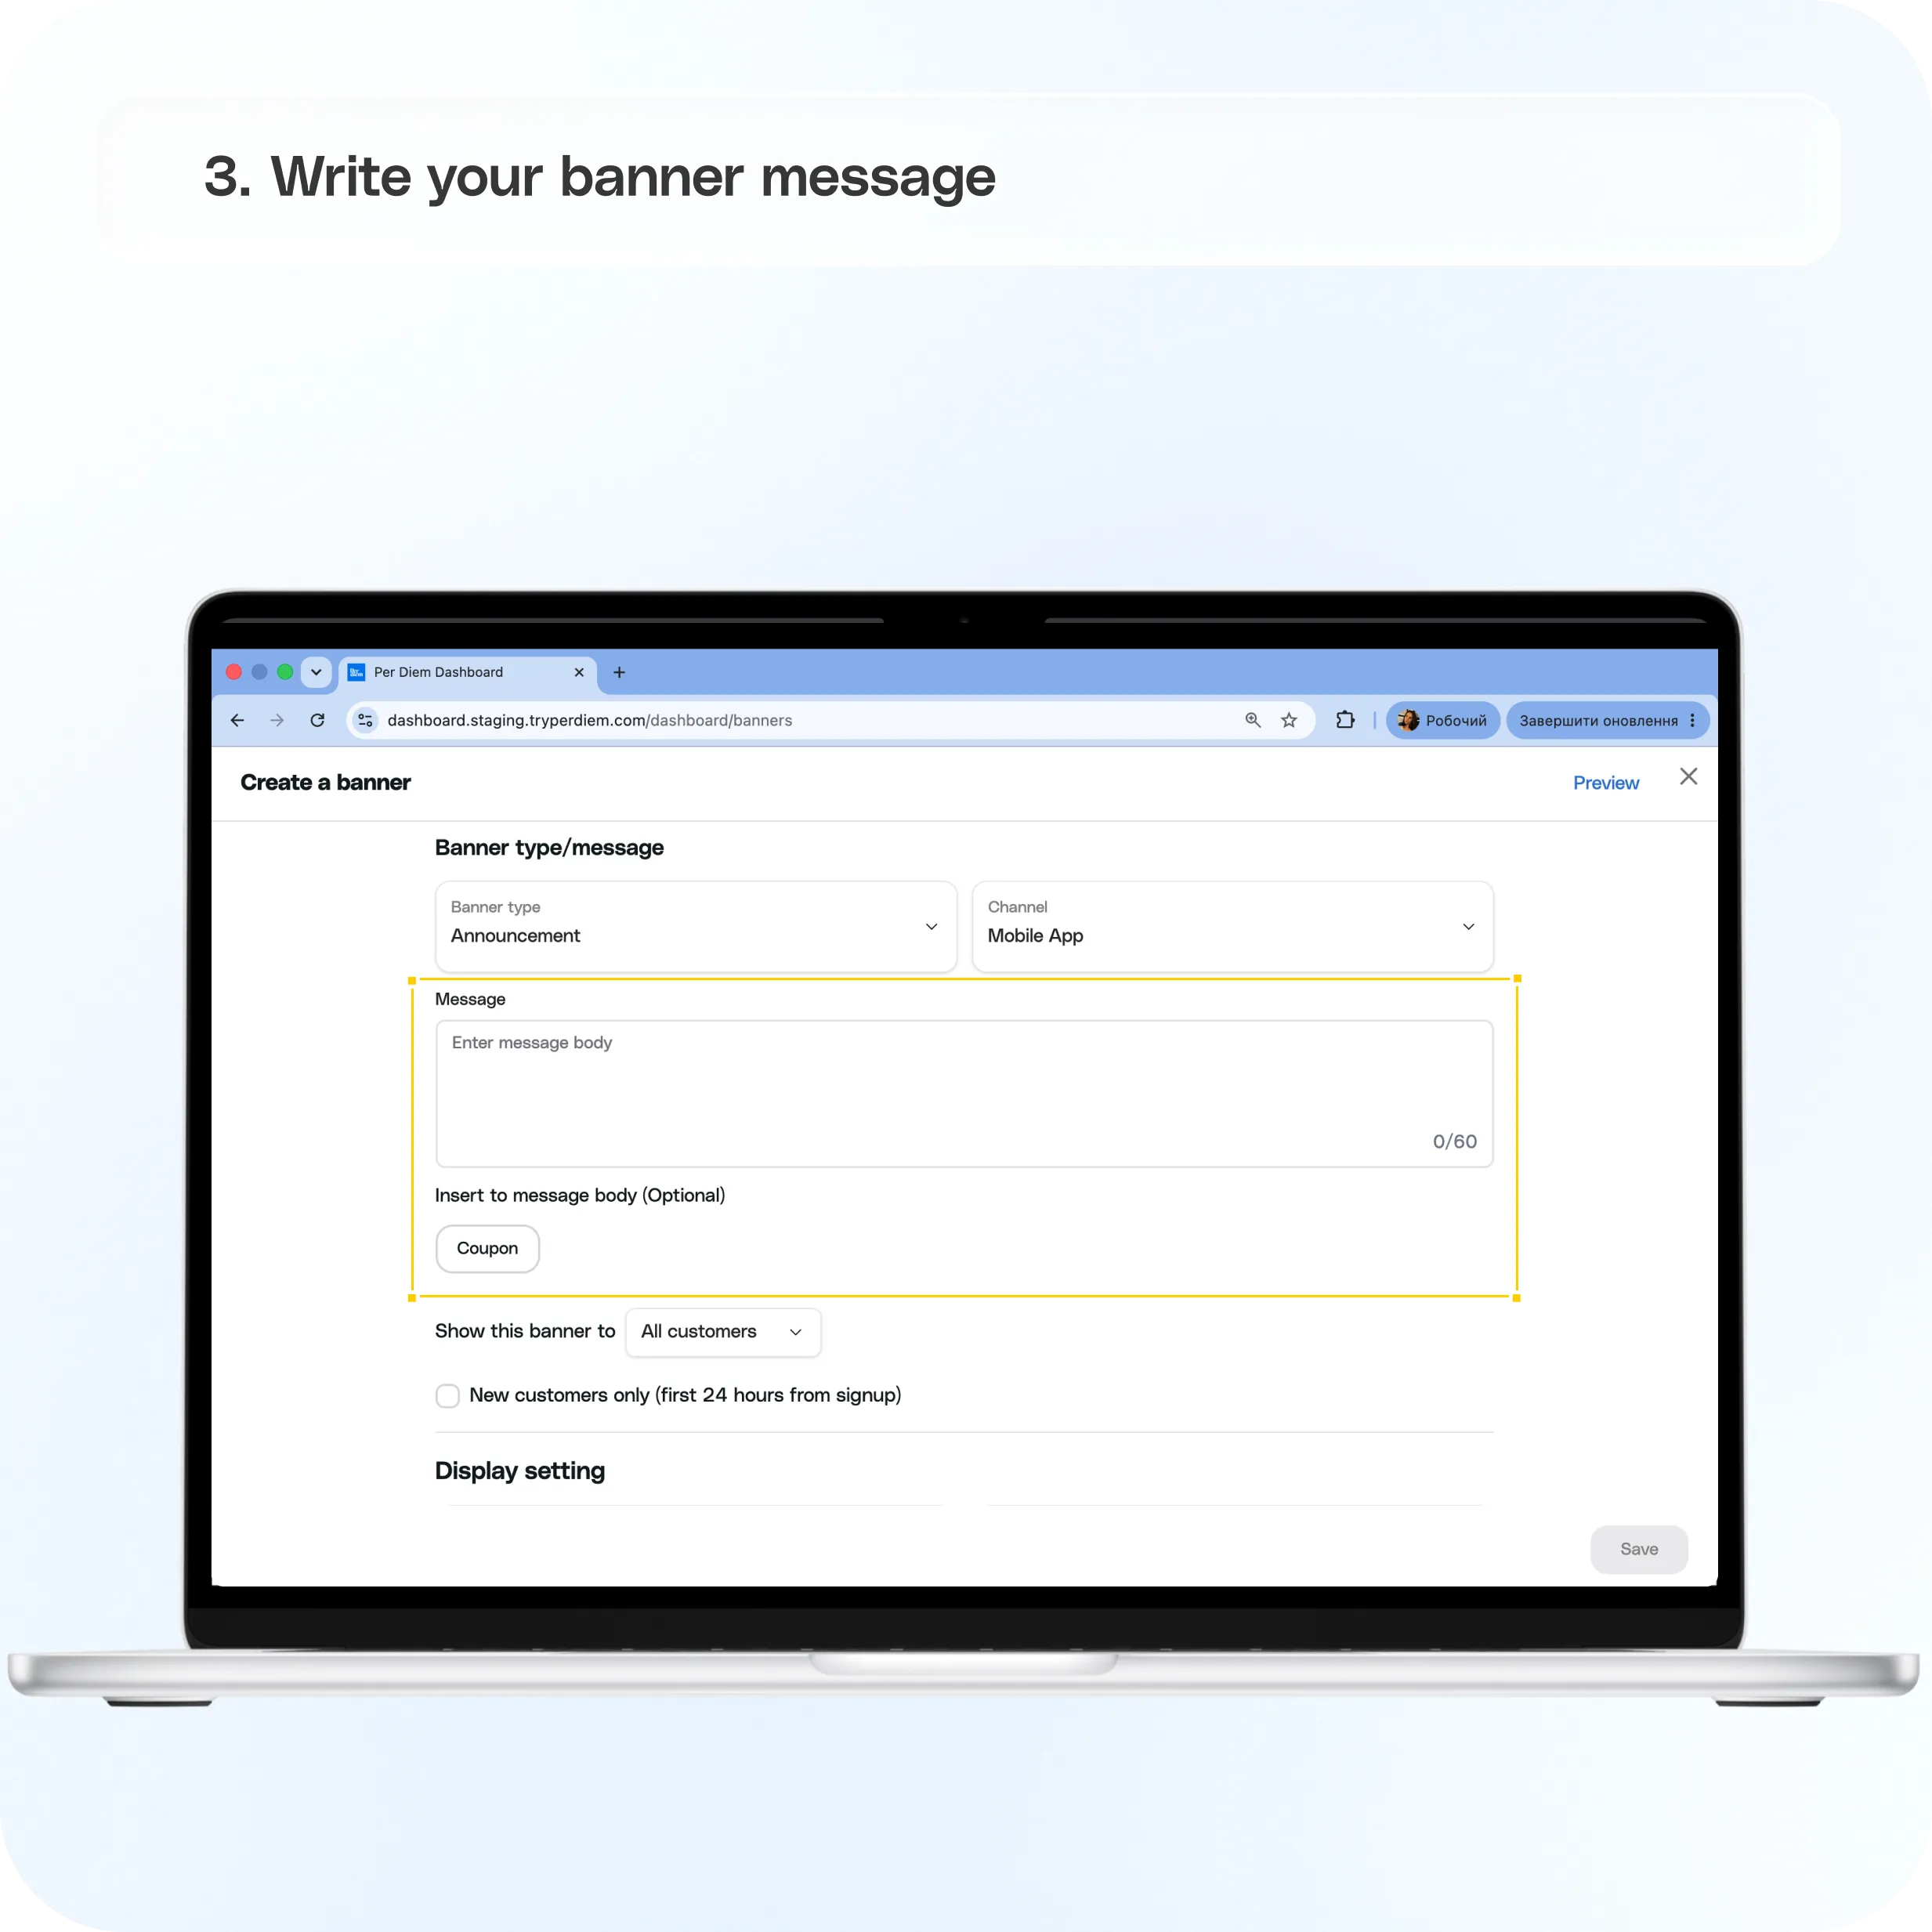
3. Write your banner message
Add the message you'd like customers to see (up to 60 characters).
You can also insert a Coupon into the banner message to promote an offer or special deal.
Keep your message short, clear, and action-oriented for the best results.
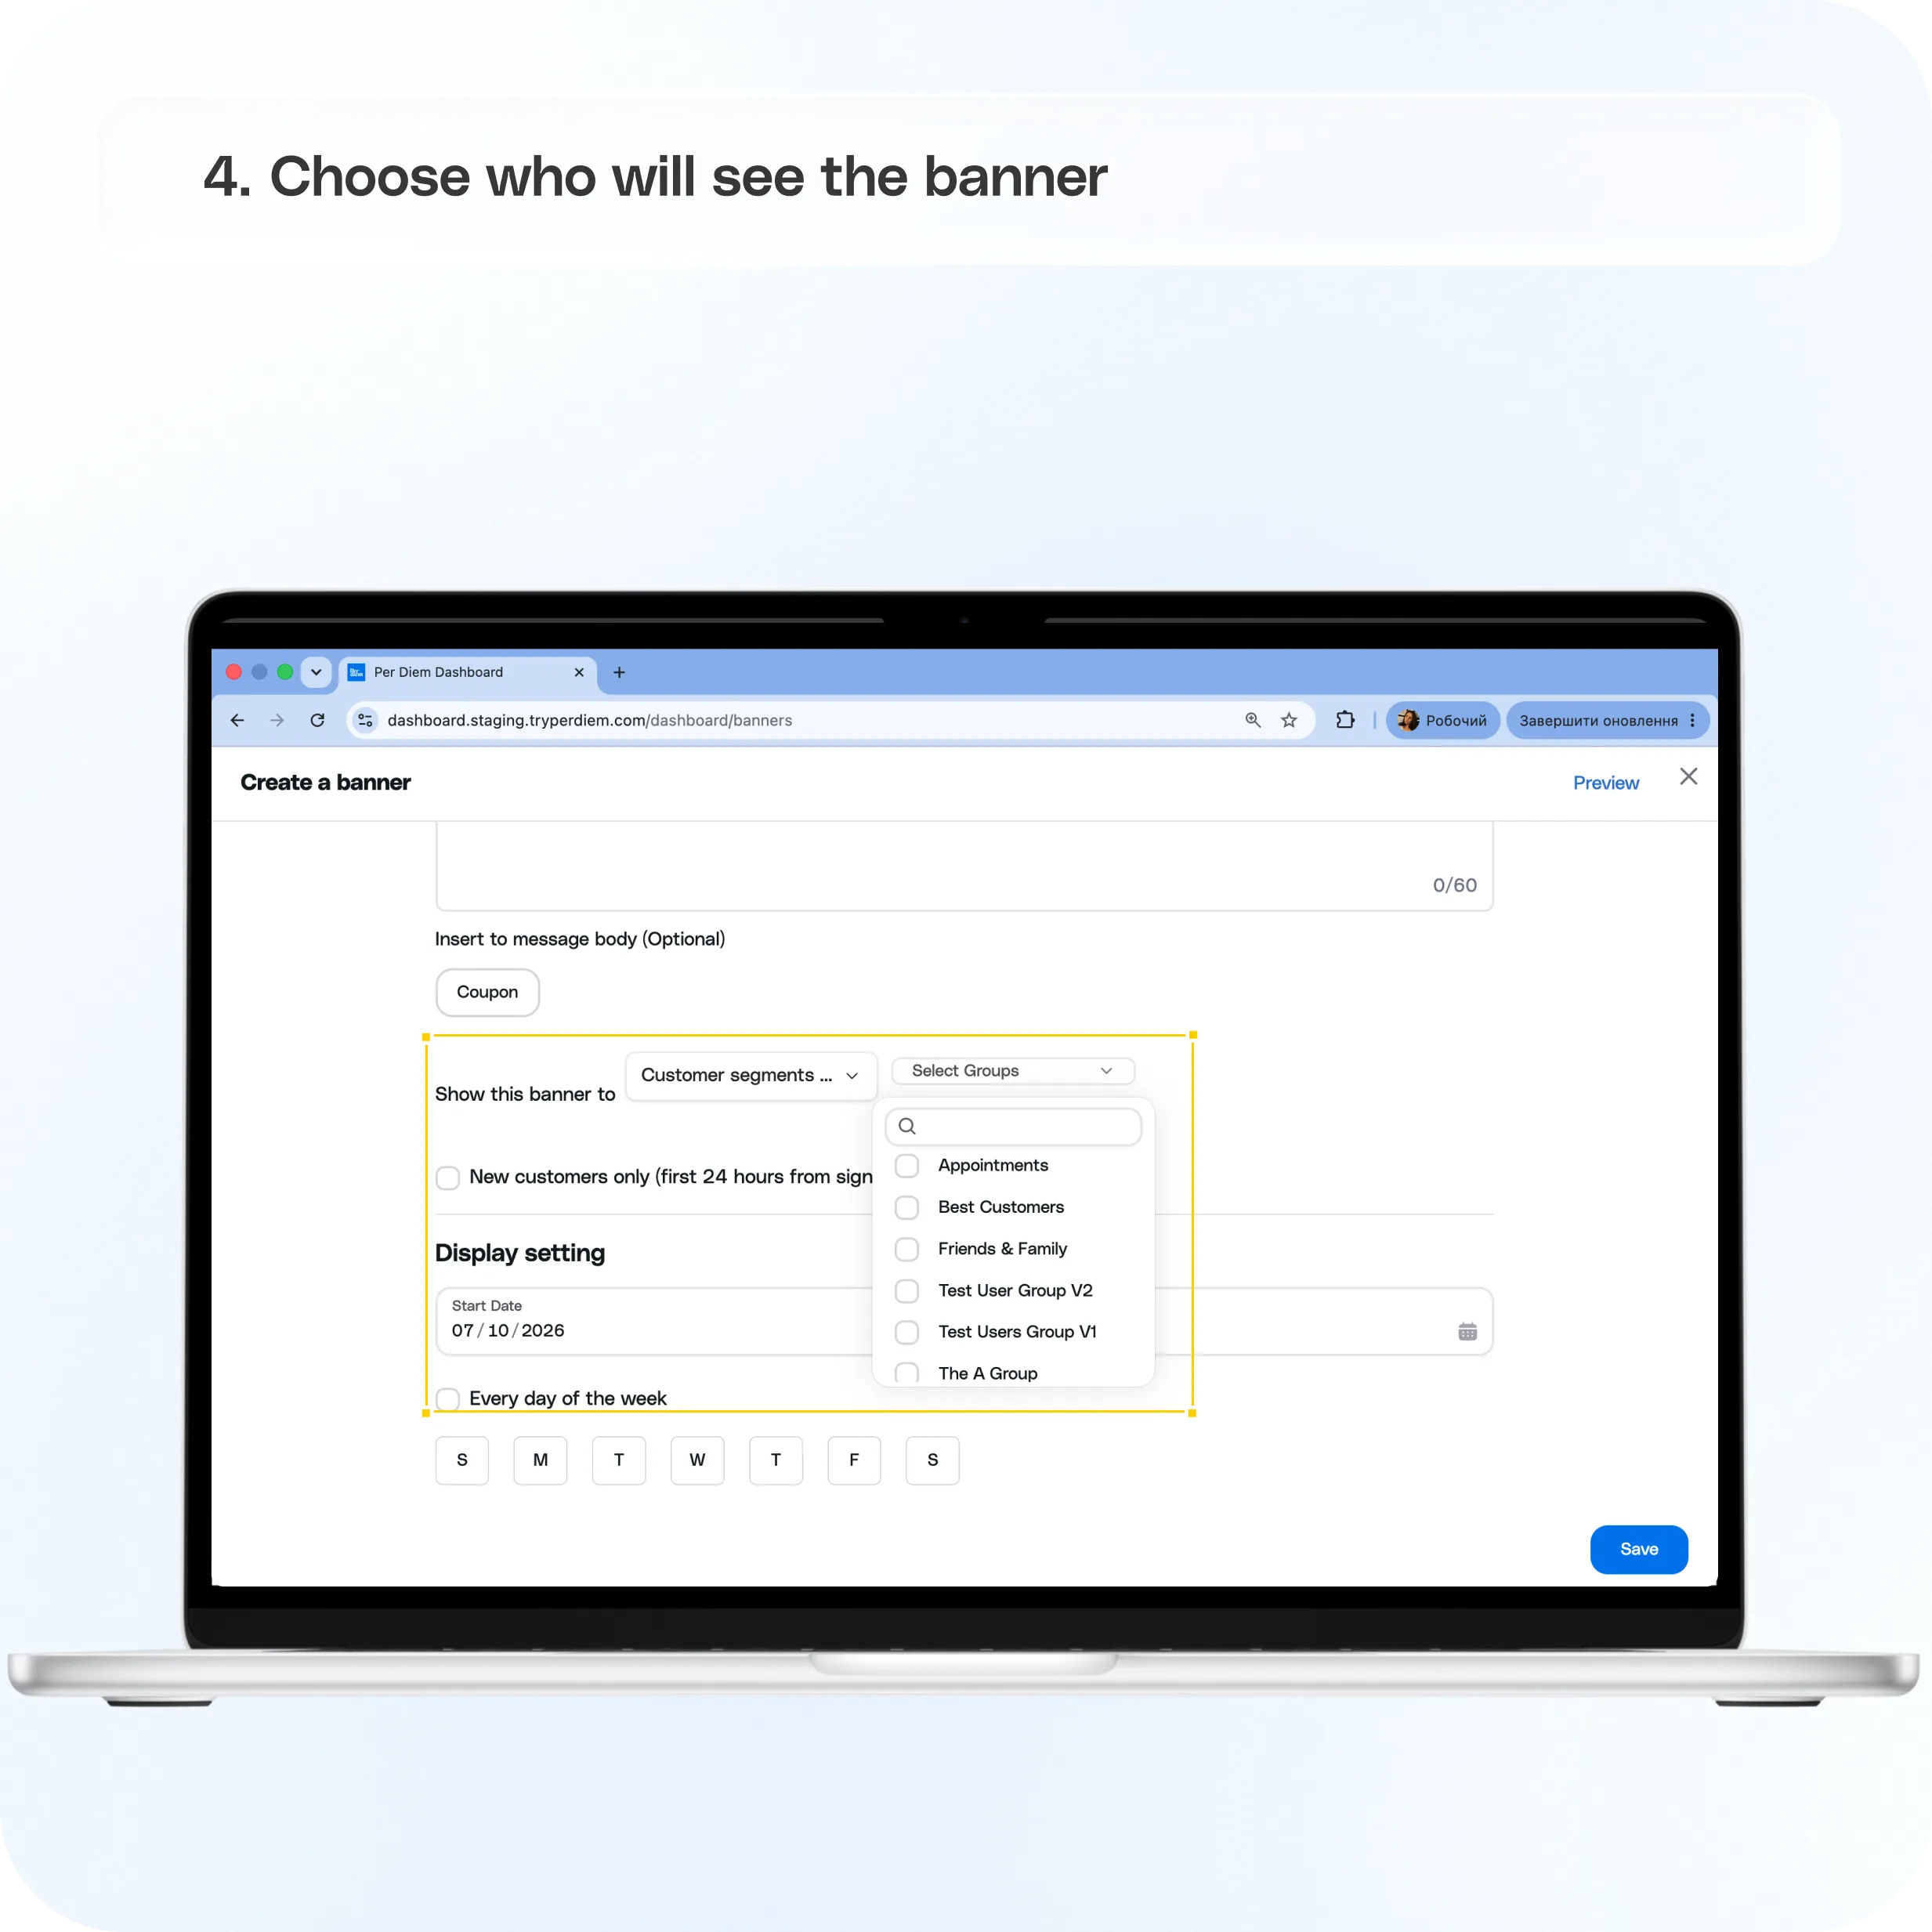
4. Choose who will see the banner
Under Show this banner to, choose one of the following:
- All Customers
- Customer segments
If you select Customer segments, you'll be able to choose from Select Groups and Select Segments, which are synced from your Square account.
(If you haven’t created customer groups yet, check out this Square guide to create them first.)
You can also enable New customers only (first 24 hours from signup) to show the banner exclusively to customers who have recently signed up.
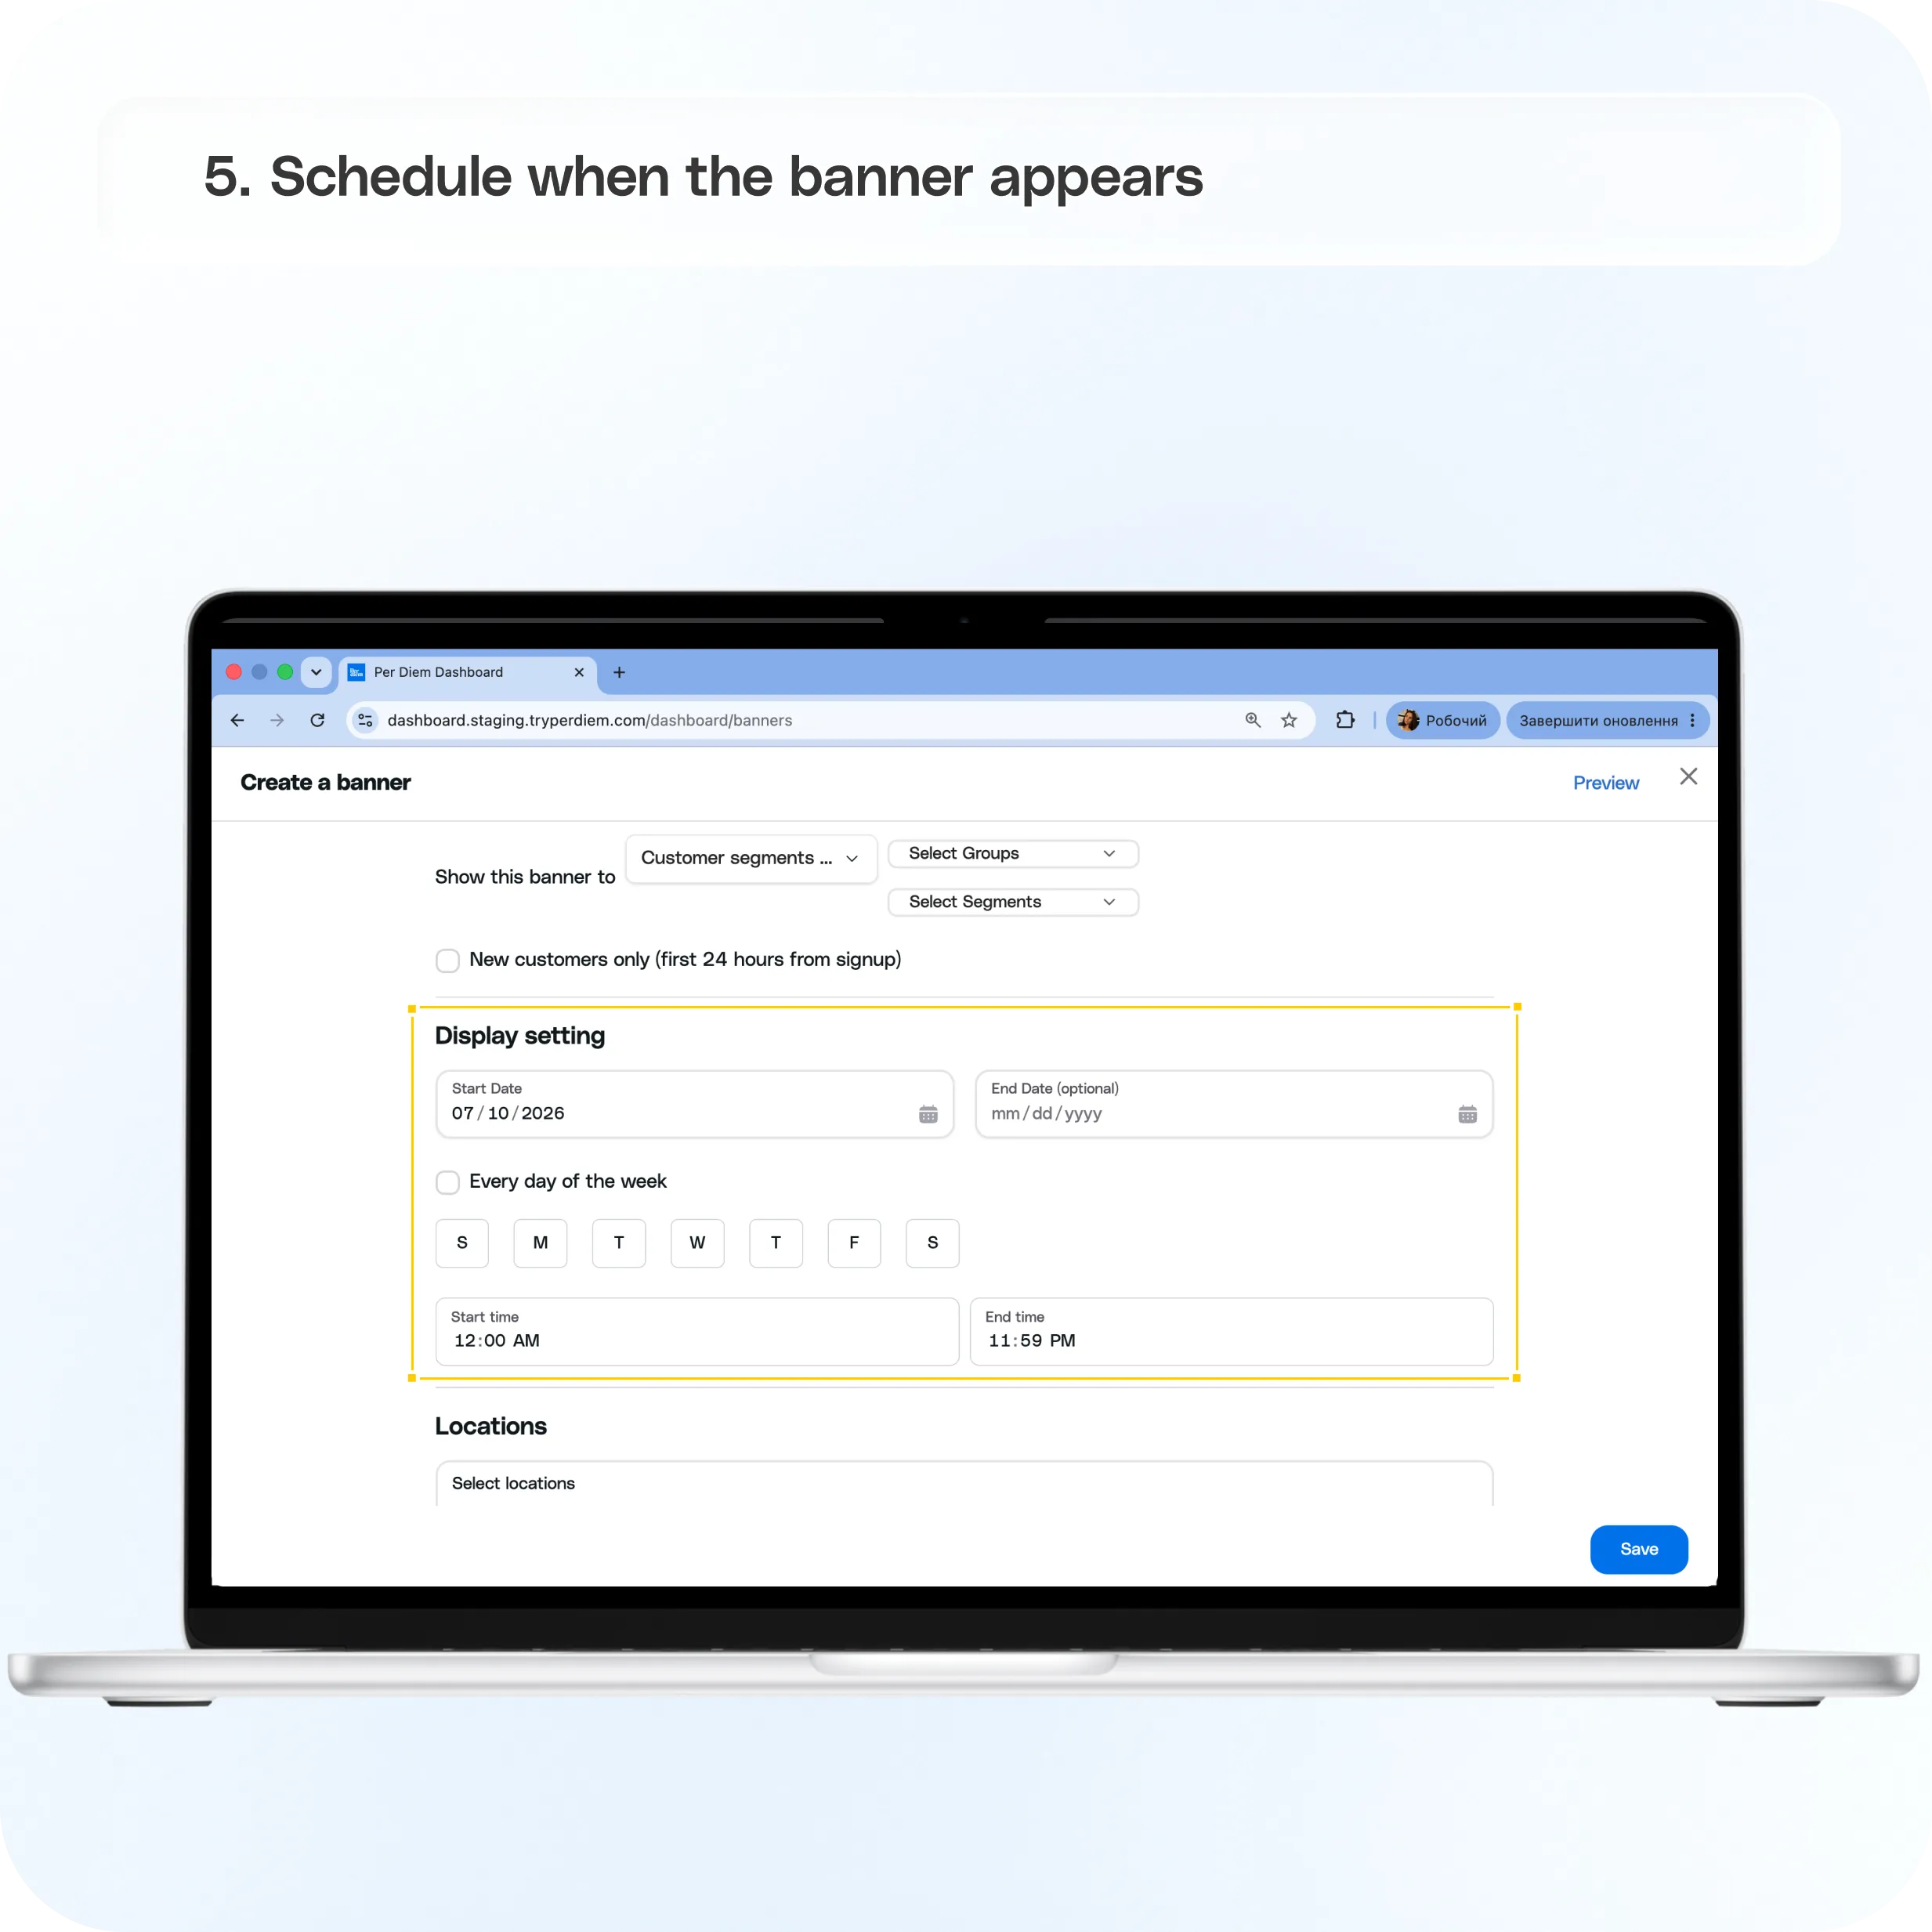
5. Schedule when the banner appears
Choose when your banner should be visible by setting:
- Start Date
- Optional End Date
- Days of the week (or select Every day of the week)
- Start Time and End Time
Finally, select which Locations should display the banner, or choose All locations.
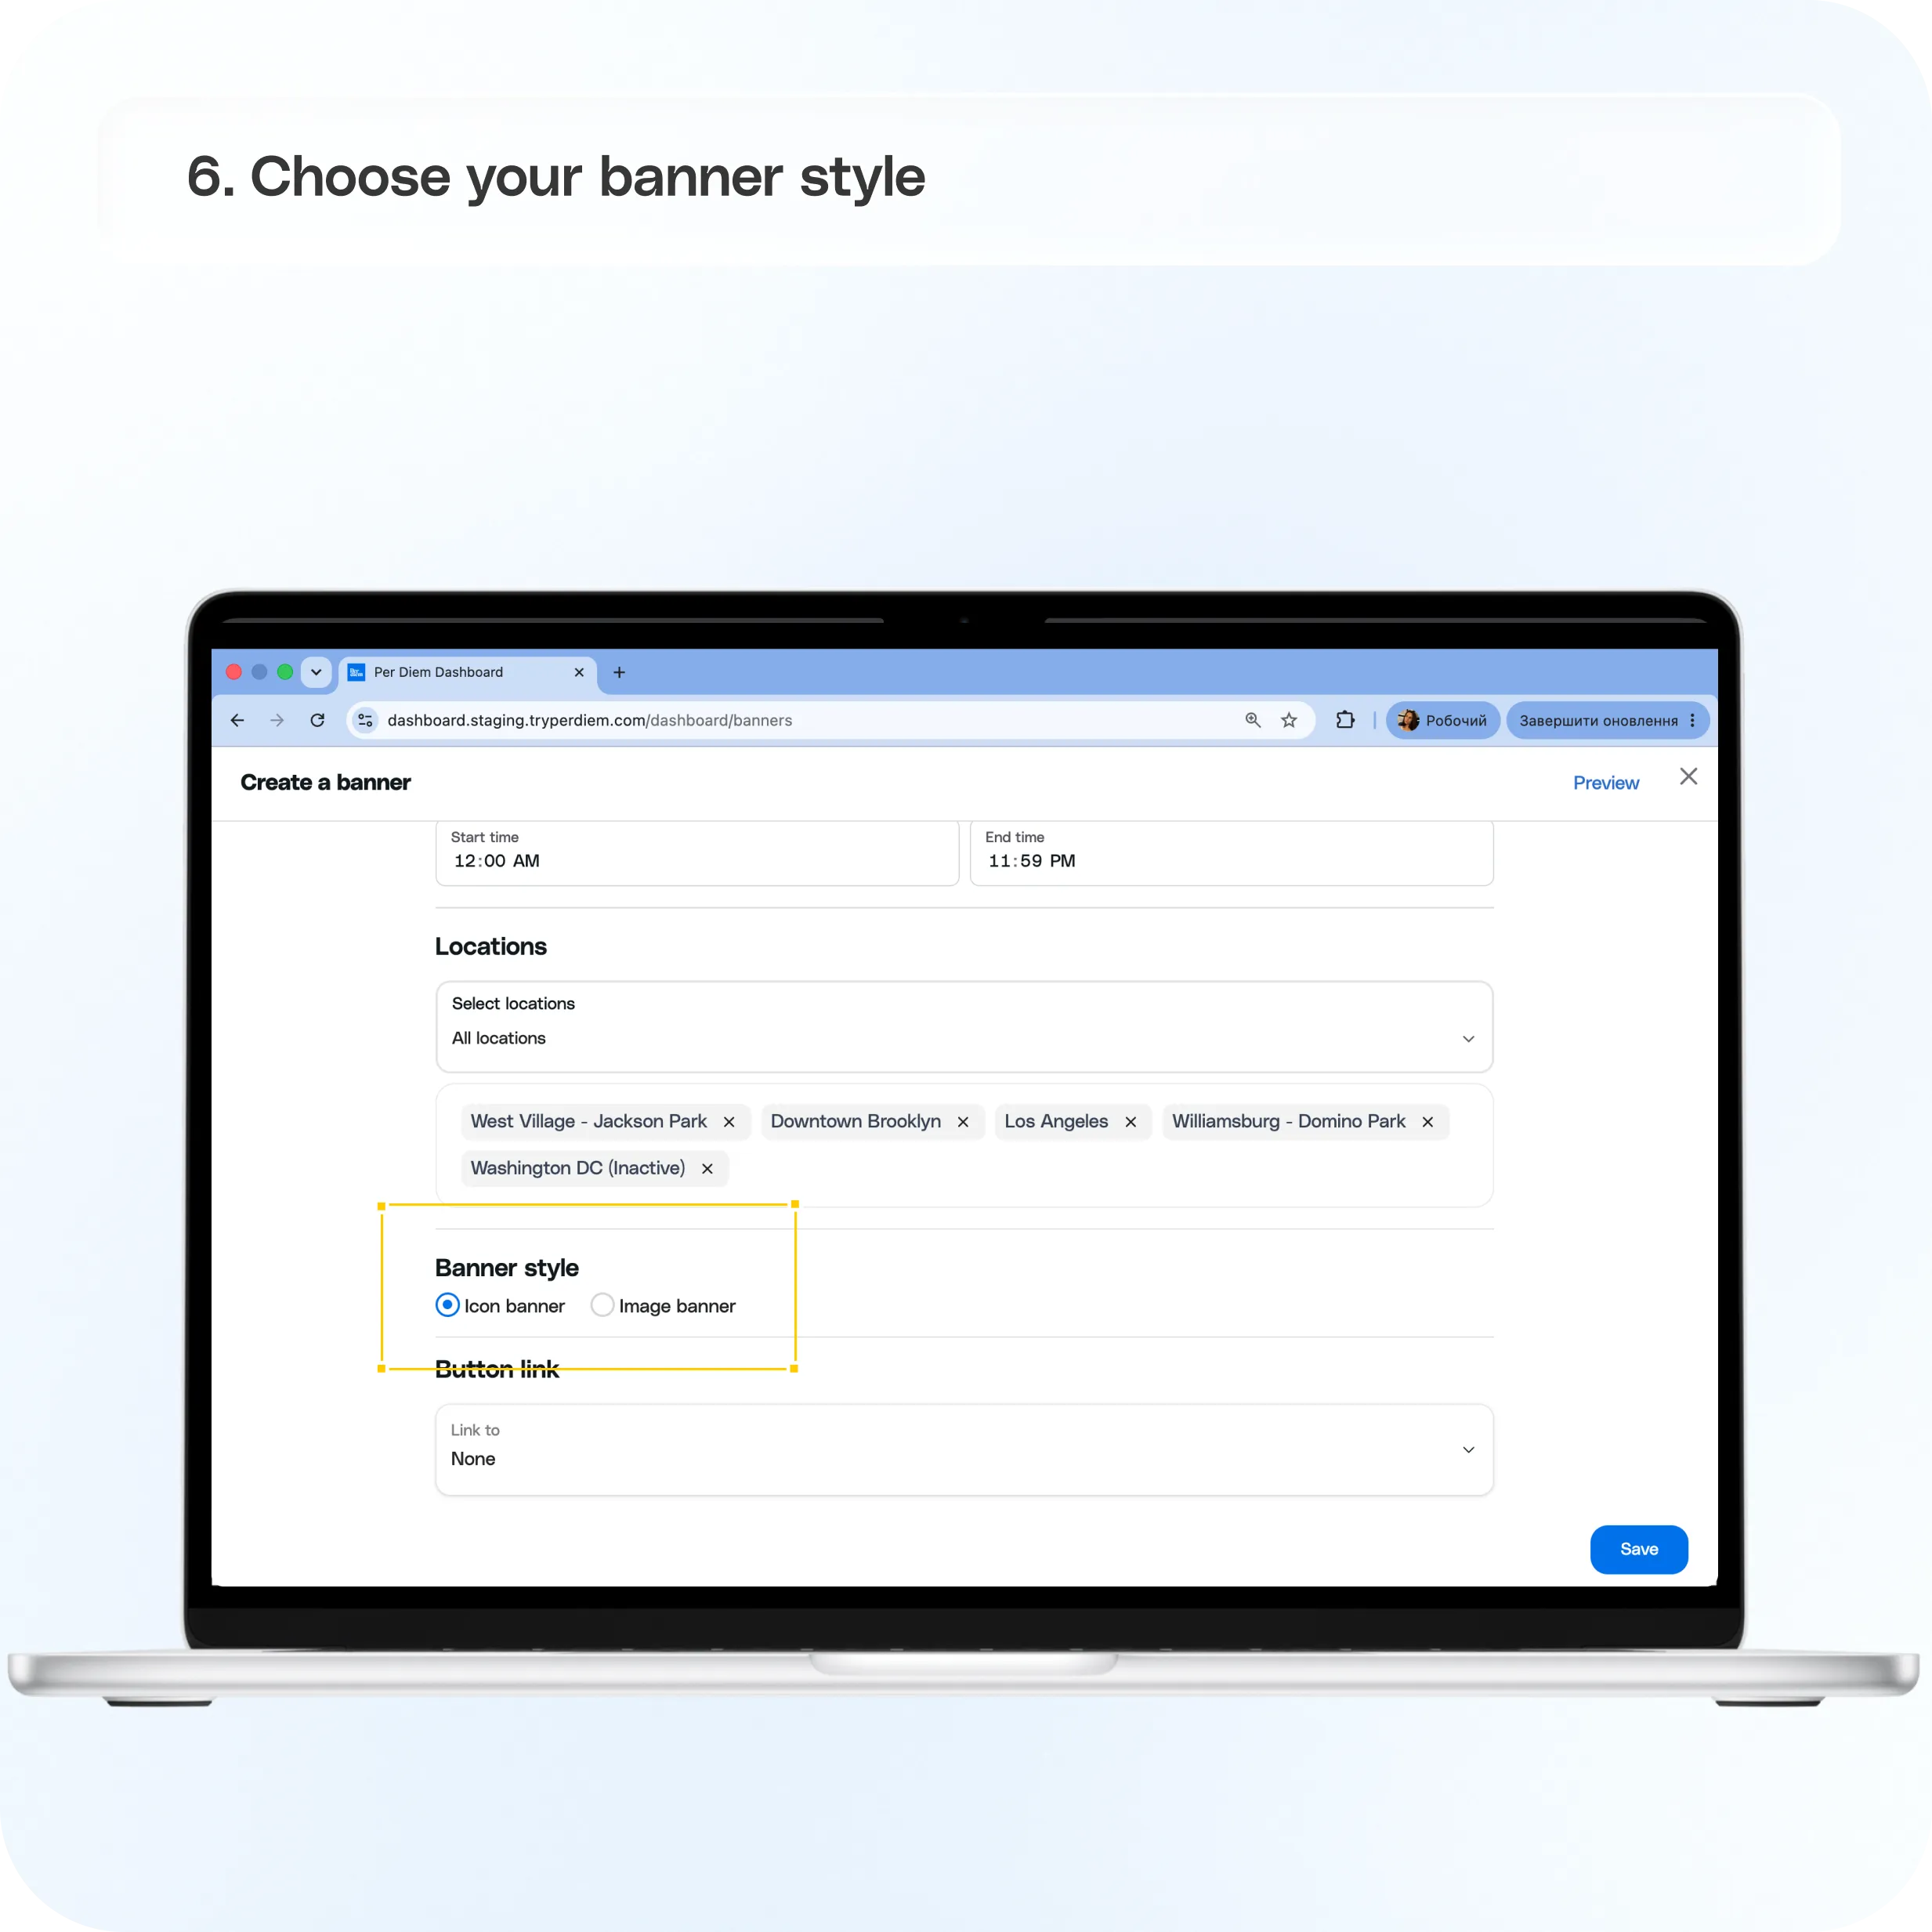
6. Choose your banner style
The available design options depend on the banner type you selected.
Announcement banners
Choose between:
- Icon banner
- Image banner
For image banners, upload a JPG, PNG, or SVG file (up to 1.5 MB, recommended size 512 × 512 px).
Pop-up banners
Choose between:
- Without image
- With image
- With video
Video is available only for pop-up banners.
If multiple banners are active at the same time, the most recently created banner is displayed first.
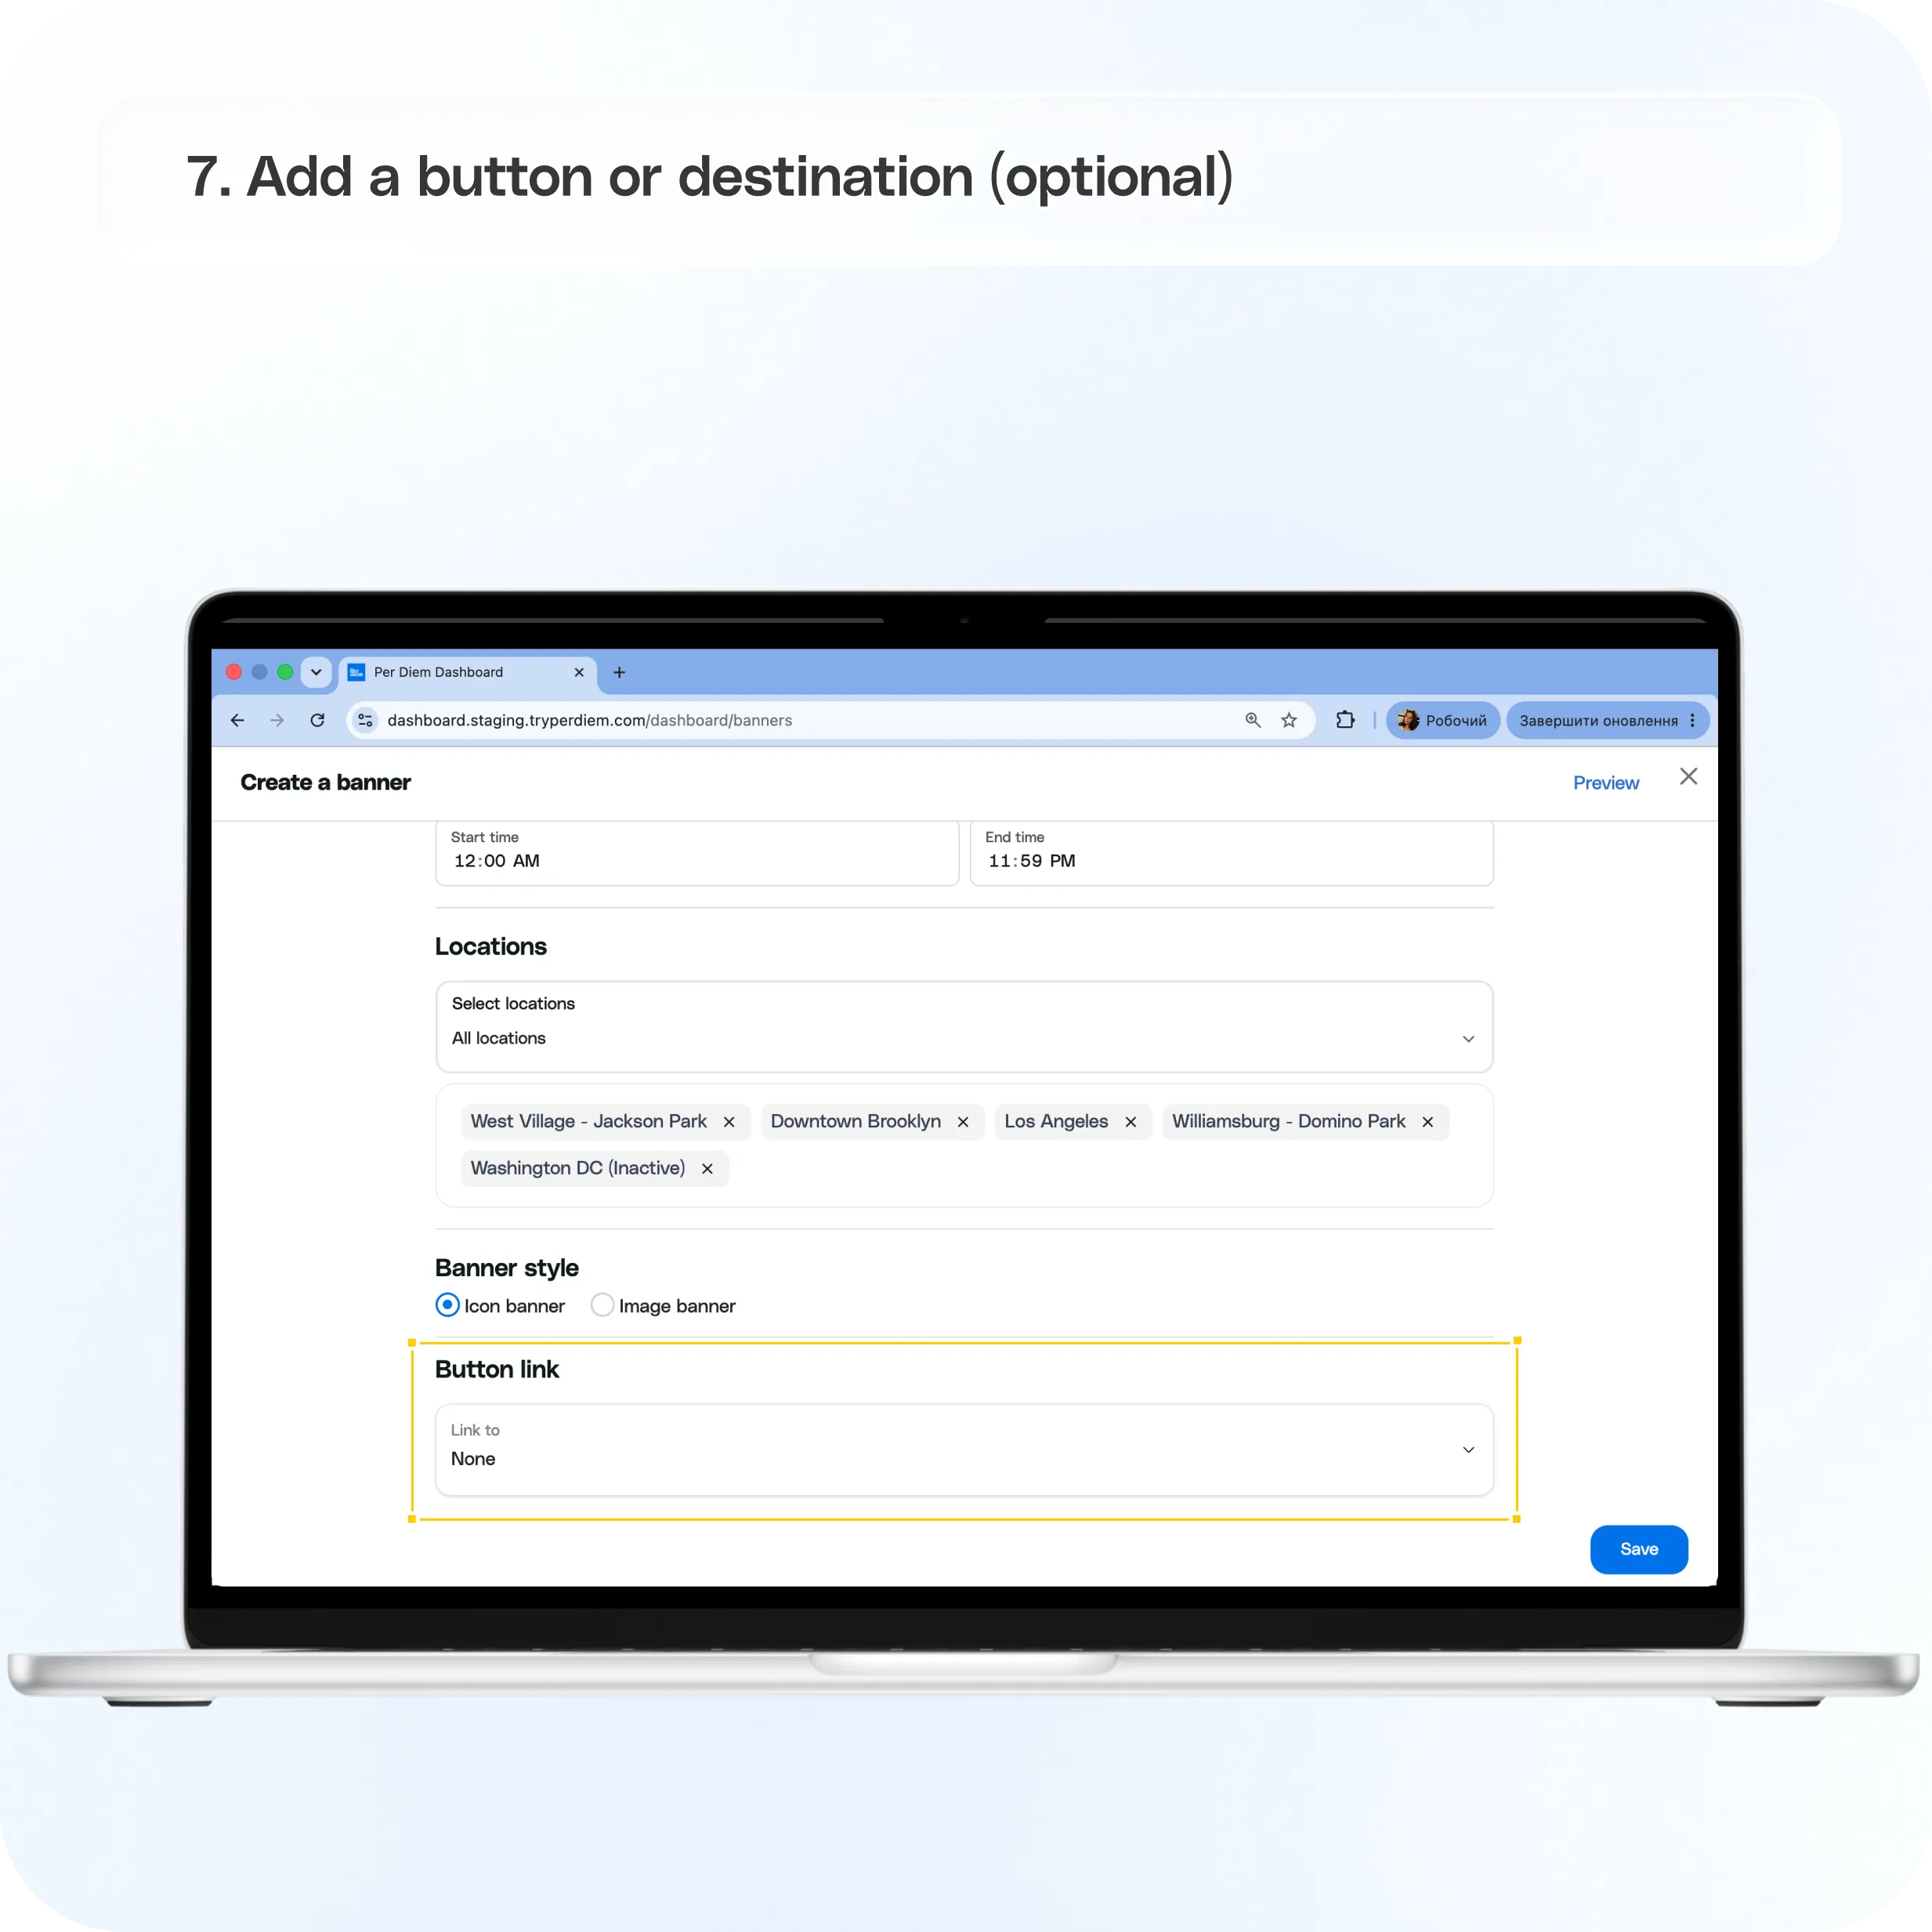
7. Add a button or destination (optional)
You can make your banner interactive by linking it to:
- None
- External URL
- Item
- Category
- Store Credit
- Subscription Plan
- App Page
This makes it easy for customers to go directly to the content you want to promote.
8. Set how often pop-up banners appear
This option is available only for Pop-up banners.
Choose how frequently the pop-up should be shown to each customer during its display period:
- Show all the time
- Show once per day
- Show once only
9. Preview and save
Use the Preview option to see exactly how your banner will look before it goes live.
When you're happy with it, click Save.
Still have questions?Contact us
Ask anything or just say hi