
.svg)

Create category schedules
Instructions

- Log in to your Per Diem merchant dashboard.
- From the left sidebar of your merchant dashboard, choose "Operations."
- Choose "Category Schedule."
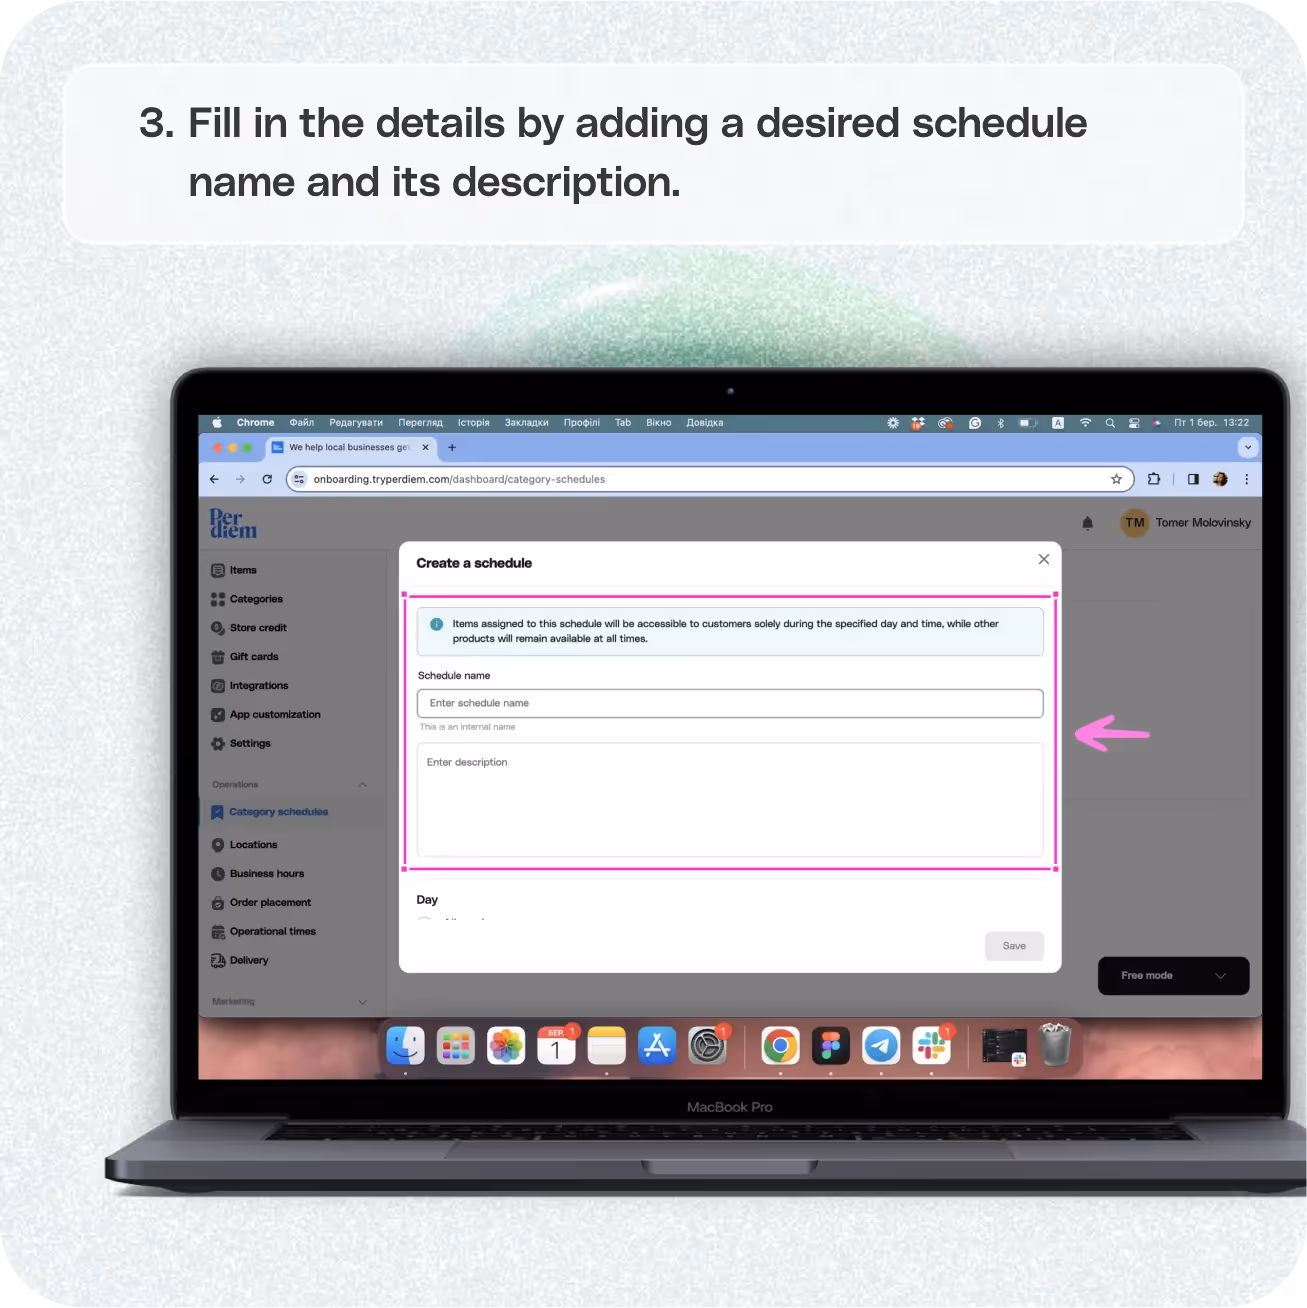
- Fill in the details by adding a desired schedule name and its description.
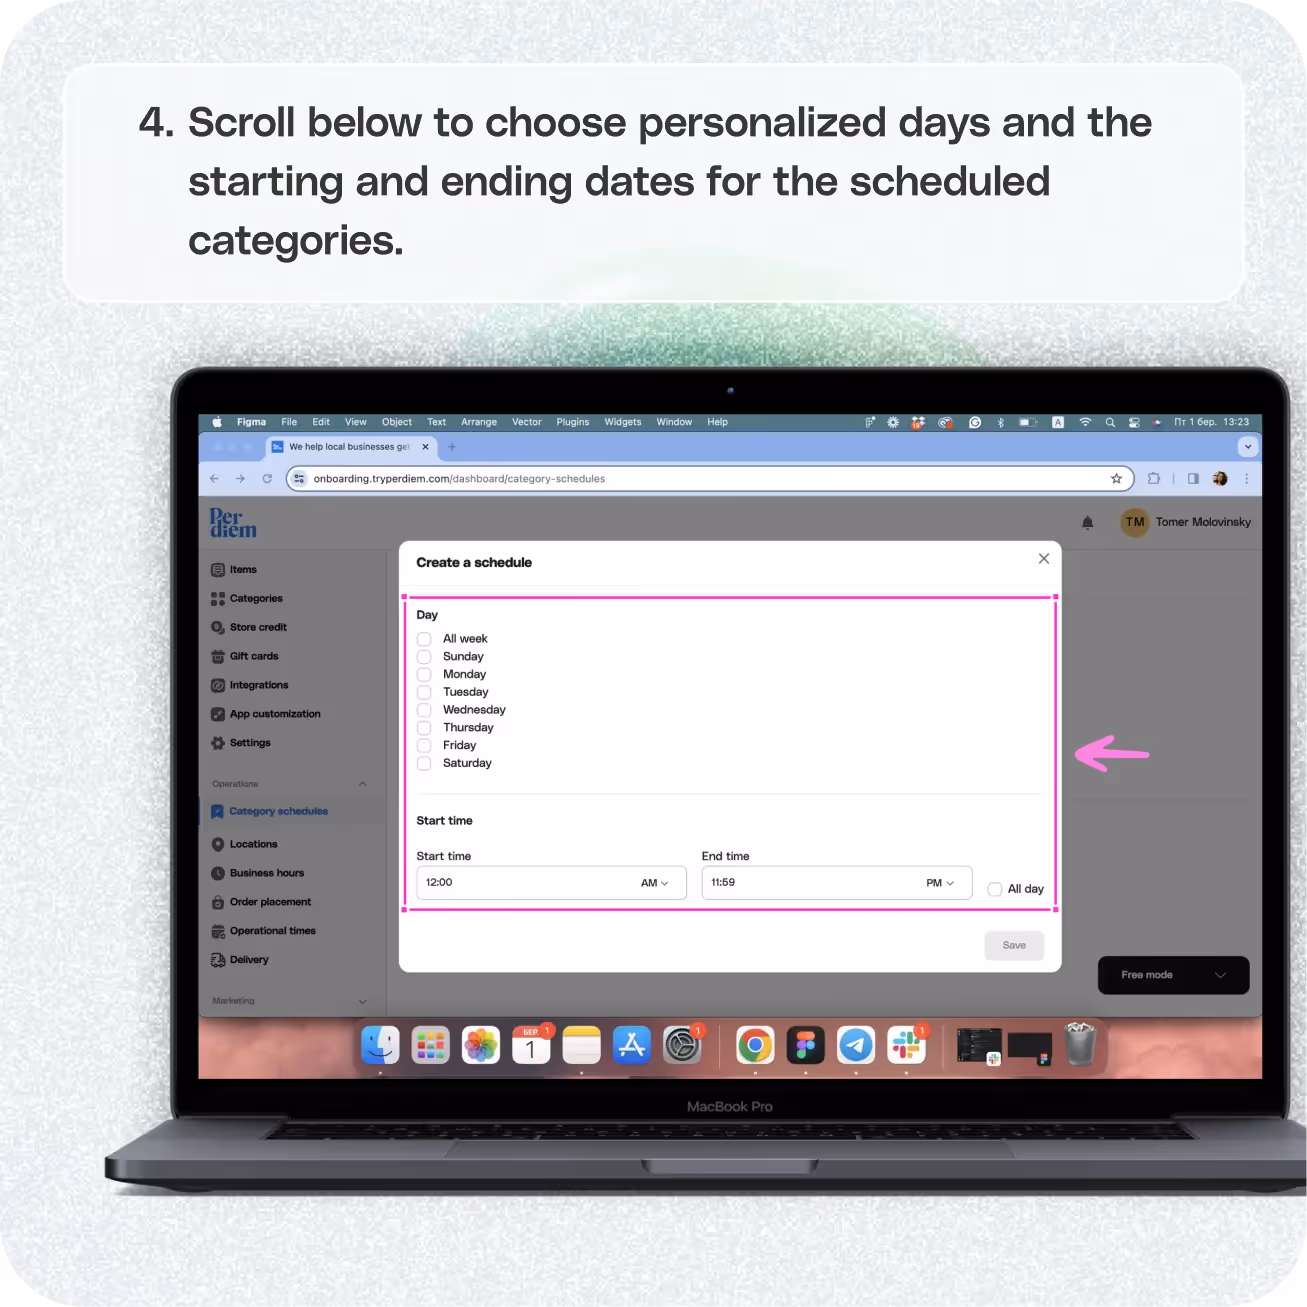
- Scroll below to choose personalized days and the starting and ending dates for the scheduled categories.
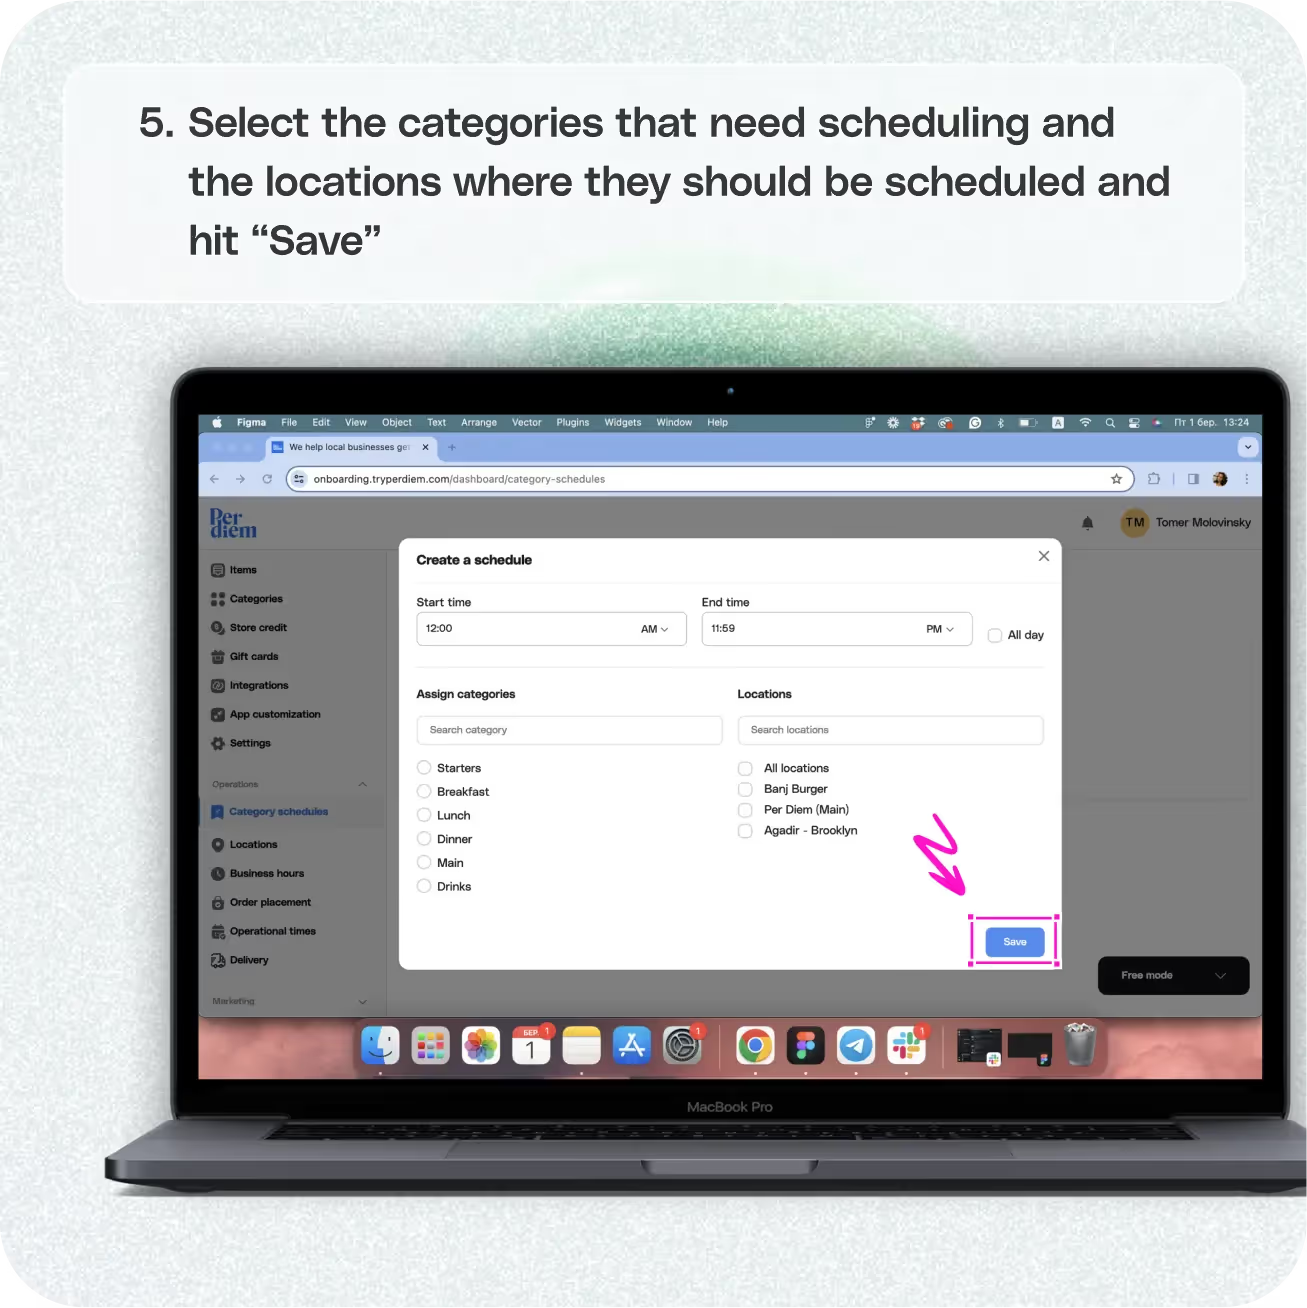
- Select the categories that need scheduling and the locations where they should be scheduled.
- Hit "Save" to preserve all the updates.
Still require support?
Contact support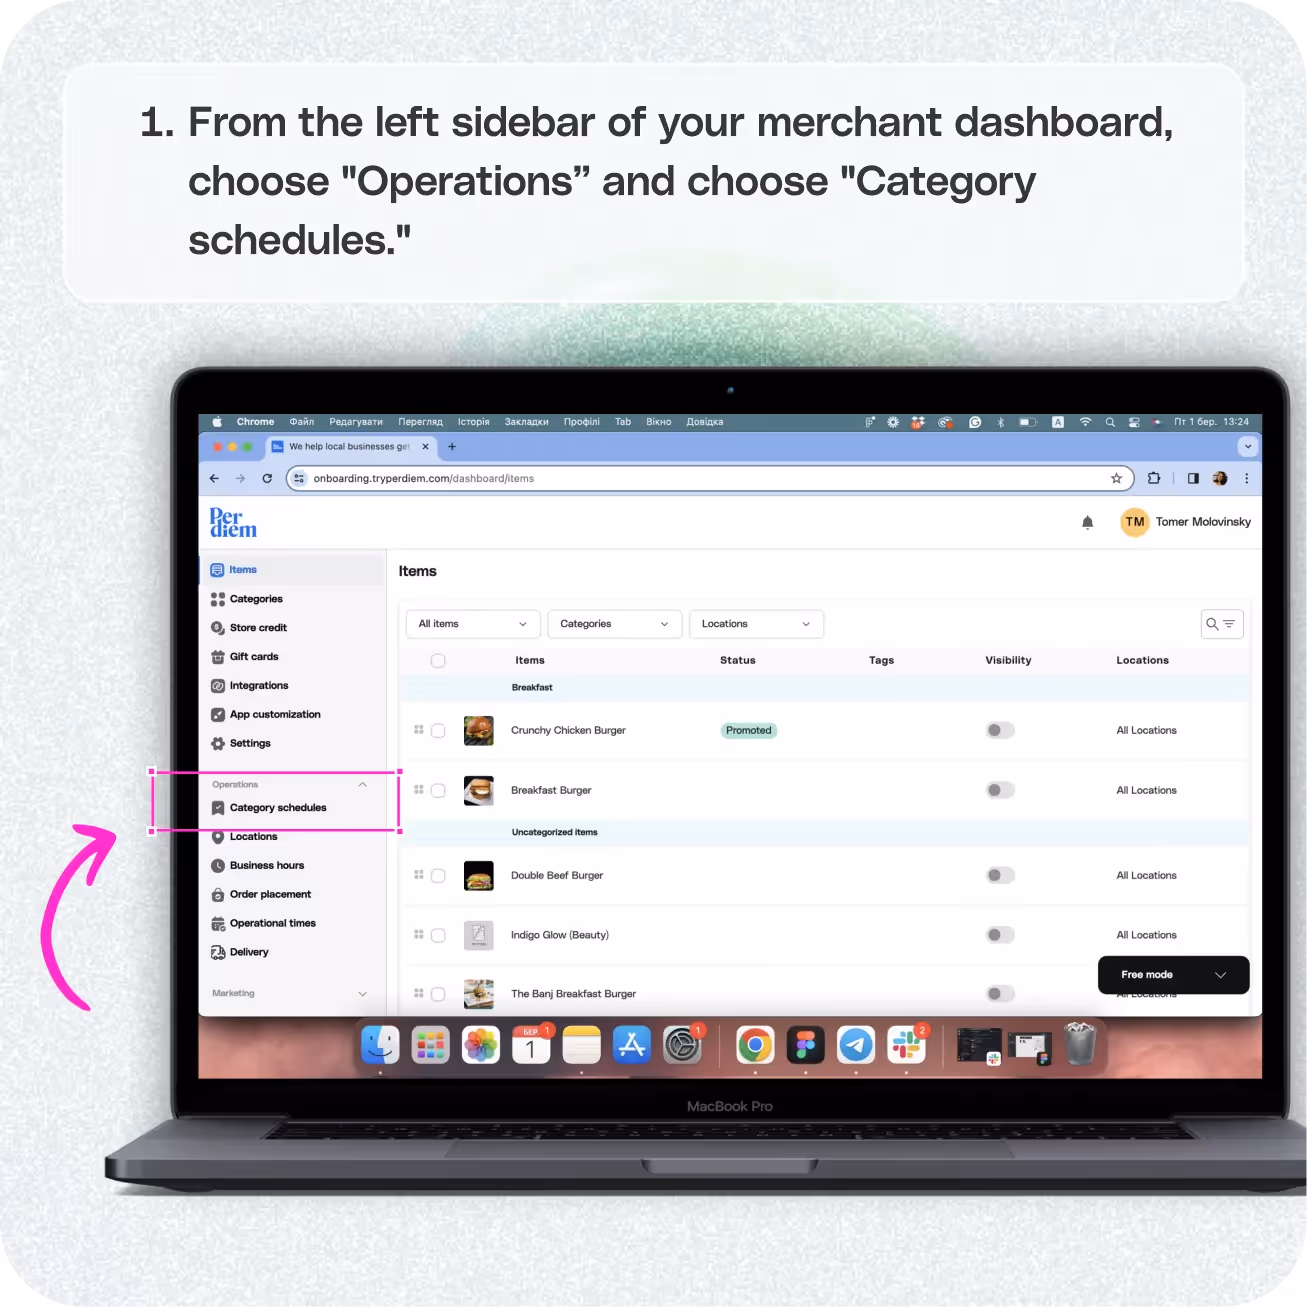
Log in to Your Merchant Dashboard
Create personalized schedules for categories not available at the moment:
Step 1
Log in to your Per Diem merchant dashboard.
Go to Operations
Navigate to the operations section for tailored scheduling:
Step 1
From the left sidebar of your merchant dashboard, choose "Operations."
Select Category Schedule
To create a schedule for specific items, opt for category schedules:
Step 1
Choose "Category Schedule."
Join the Per Diem Local Partner Program
Submit updates to your business details for review by Per Diem’s moderation team before they go live.
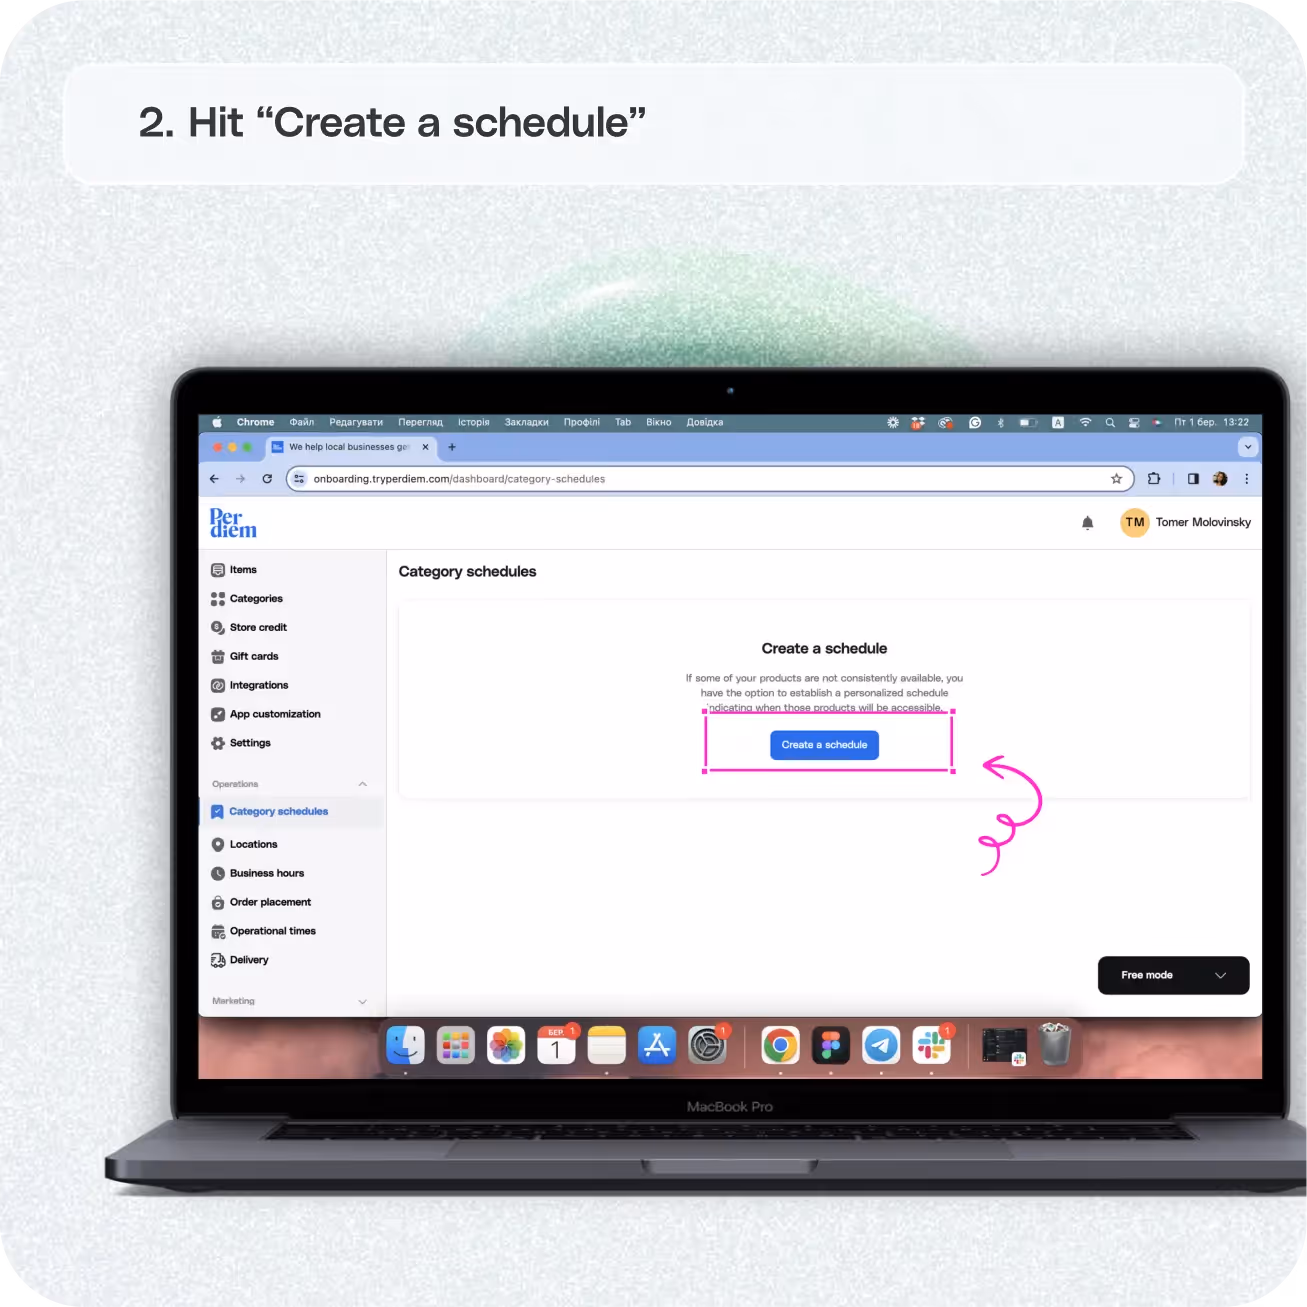
Click Create a Schedule
Add a touch of customization by naming your schedule and providing a brief description:
Step 1
Fill in the details by adding a desired schedule name and its description.
Select Day and Date
Specify the days and dates for your personalized schedule:
Step 1
Scroll below to choose personalized days and the starting and ending dates for the scheduled categories.
Assign Categories and Locations
Designate categories and locations for your scheduled items:
Step 1
Select the categories that need scheduling and the locations where they should be scheduled.
Step 2
Hit "Save" to preserve all the updates.
With the category scheduling feature, you have the flexibility to personalize availability, ensuring your products are accessible precisely when you want them to be.


.svg)


Still have questions?Contact us
Ask anything or just say hi

