
.svg)

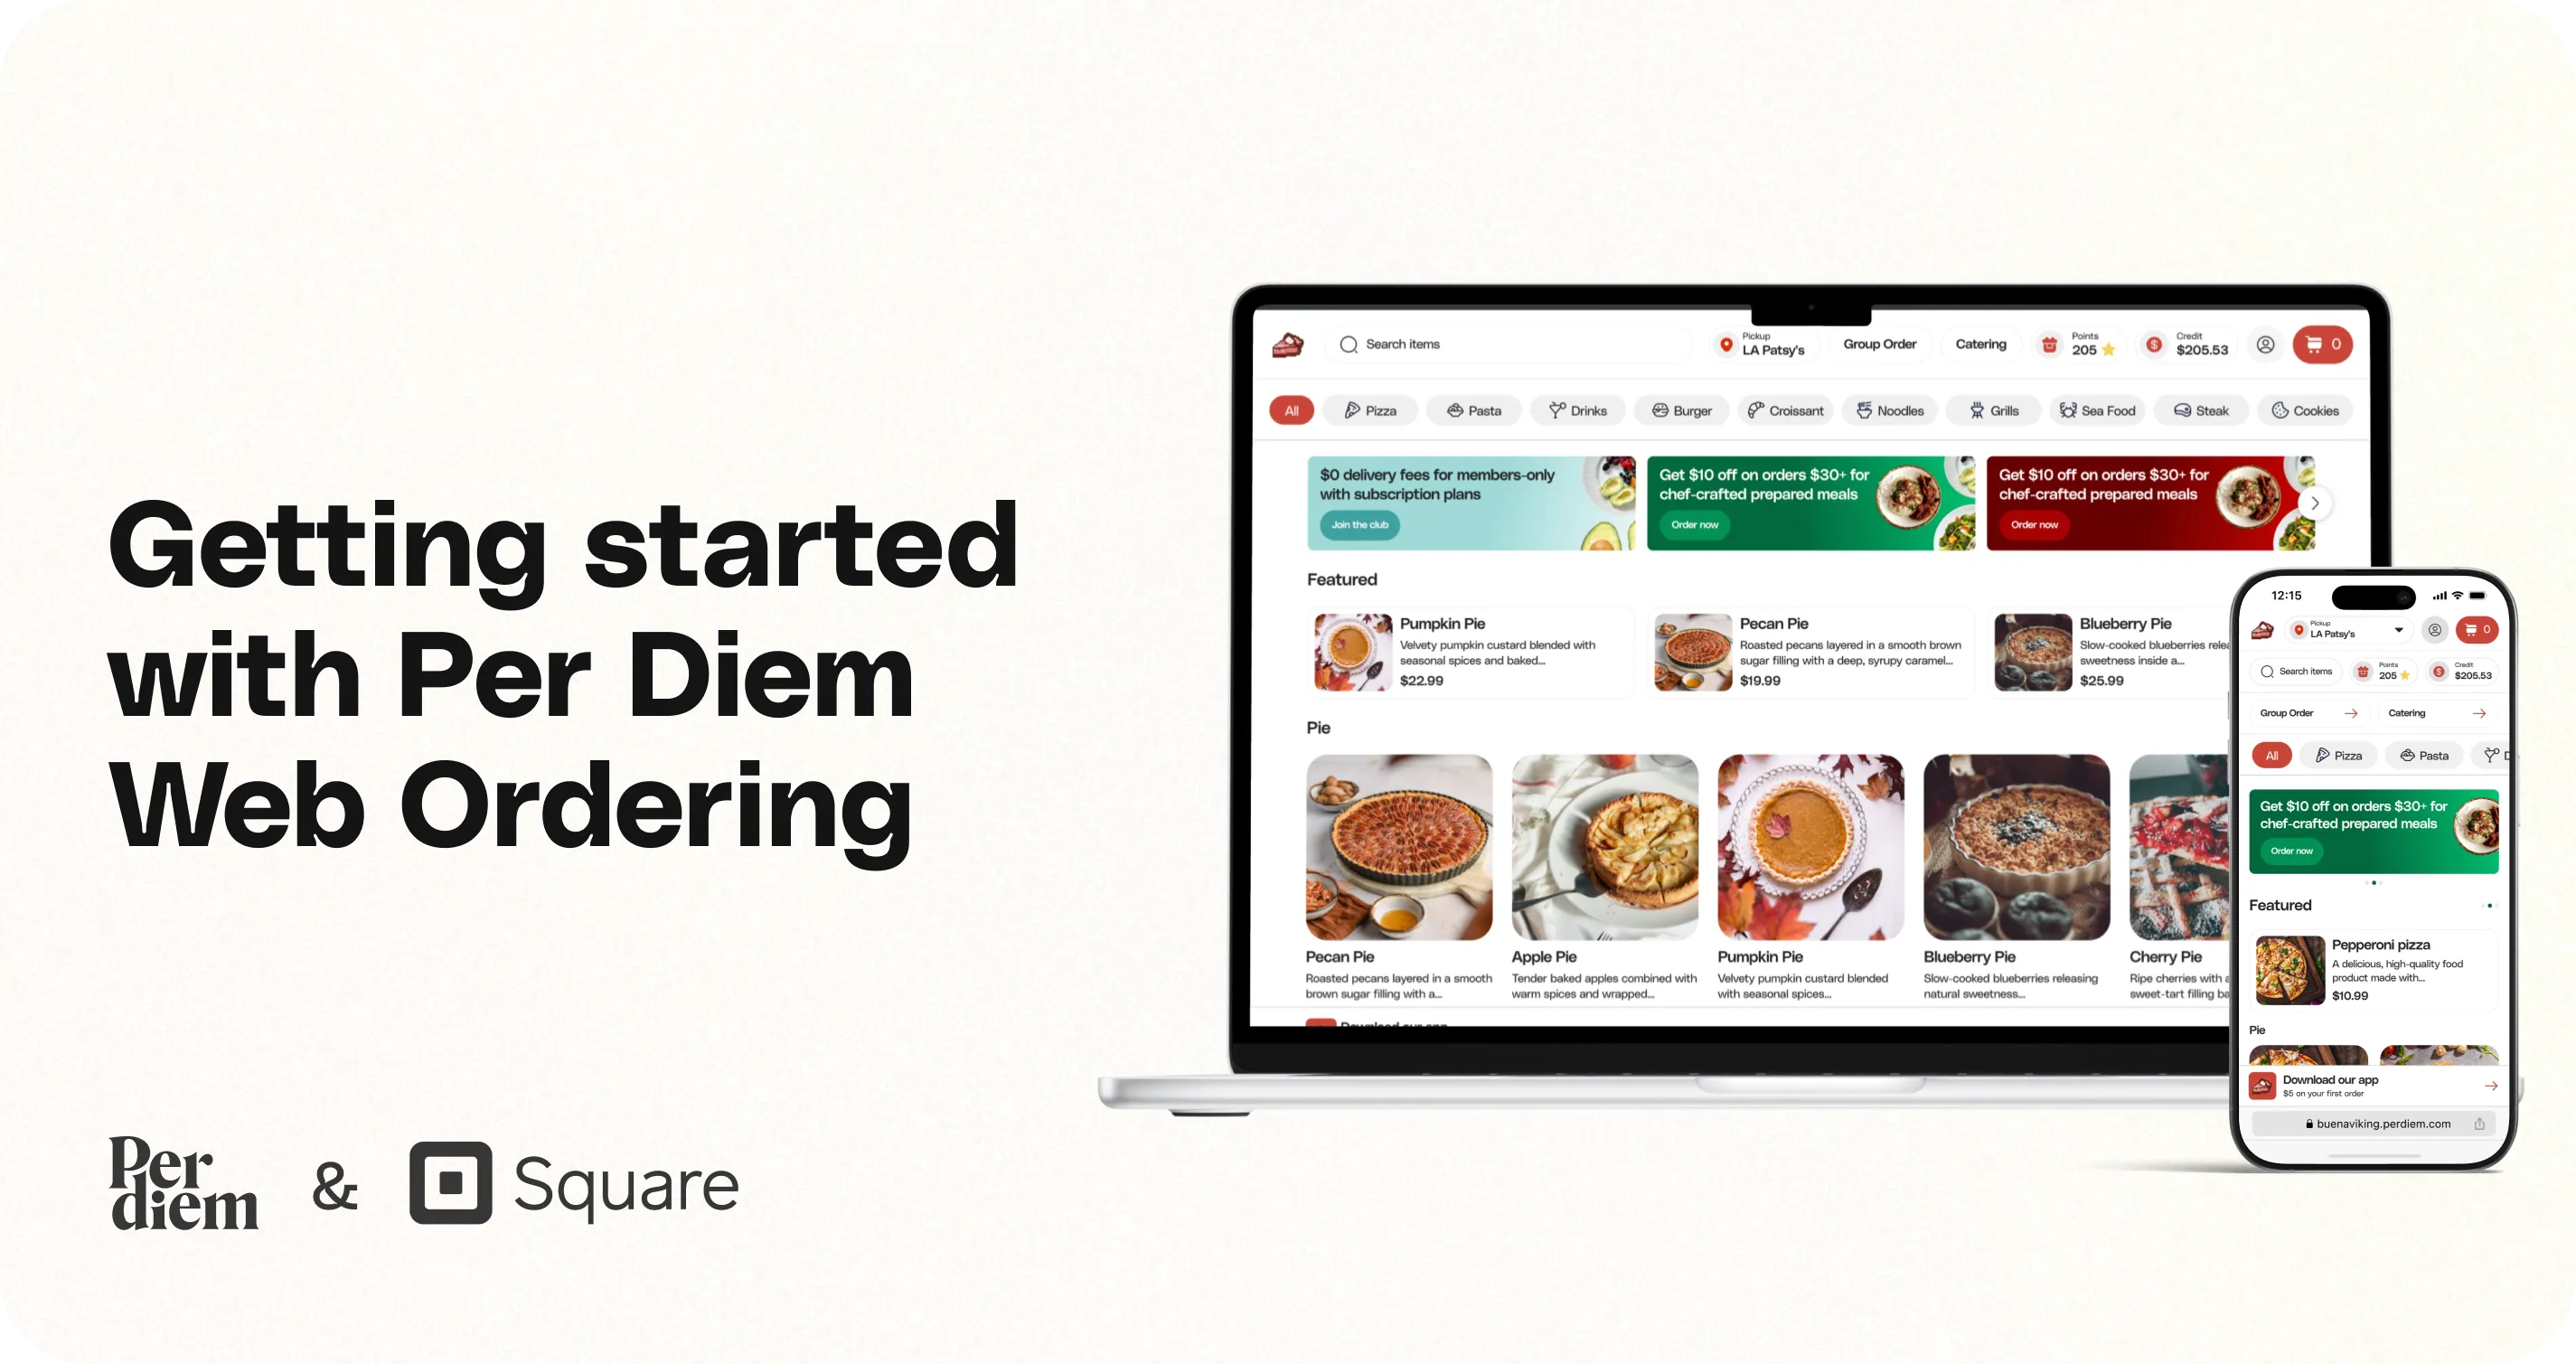
Getting started with Per Diem Web ordering
Once you’ve signed up and enabled the Web Ordering feature for your store, you’ll need to complete a quick setup before customers can start placing orders online. Follow these steps to get your menu, locations, and settings ready.
Instructions
- Log in to your Per Diem merchant dashboard.
- From the dashboard, click Sync POS.
- Follow the prompts to connect your Square account so Per Diem can import your locations, items, categories, and other POS-enabled features.
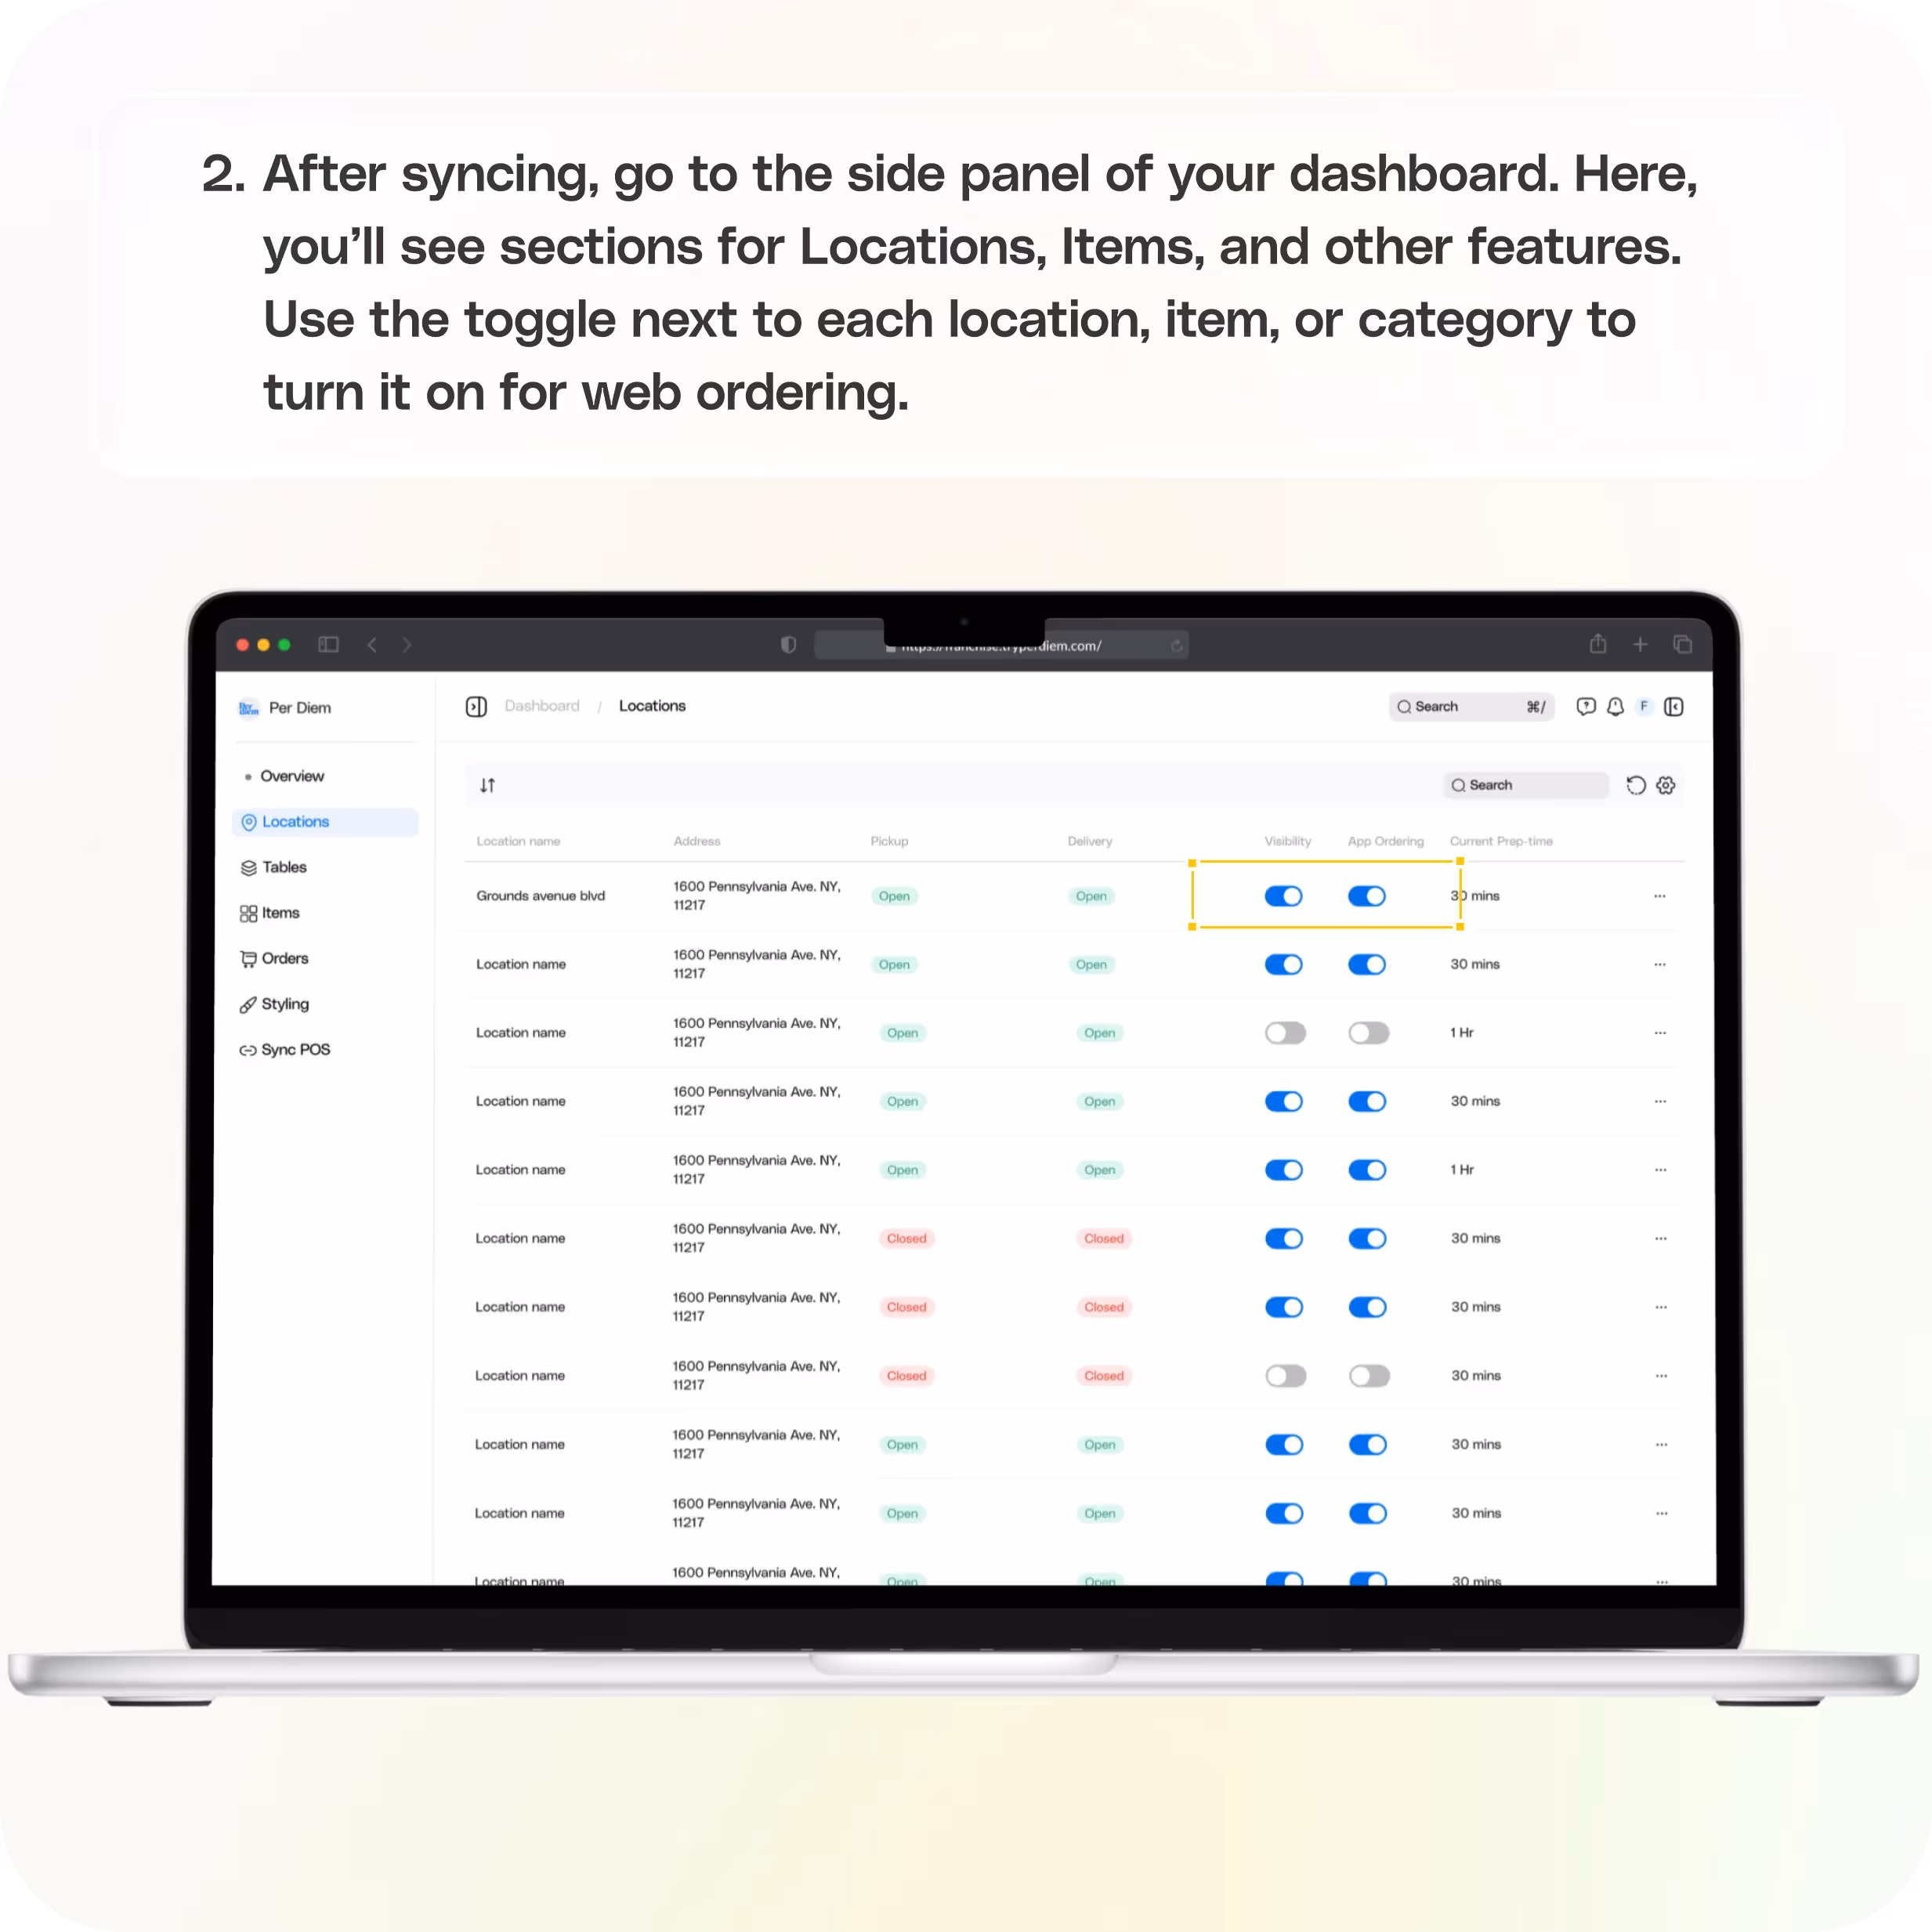
- Use the toggle next to each location, item, or category to turn it on for web ordering.
- After syncing, go to the side panel of your dashboard.
- Here, you’ll see sections for Locations, Items, and other features.
- Adjust Business Hours and Fulfillment Instructions.
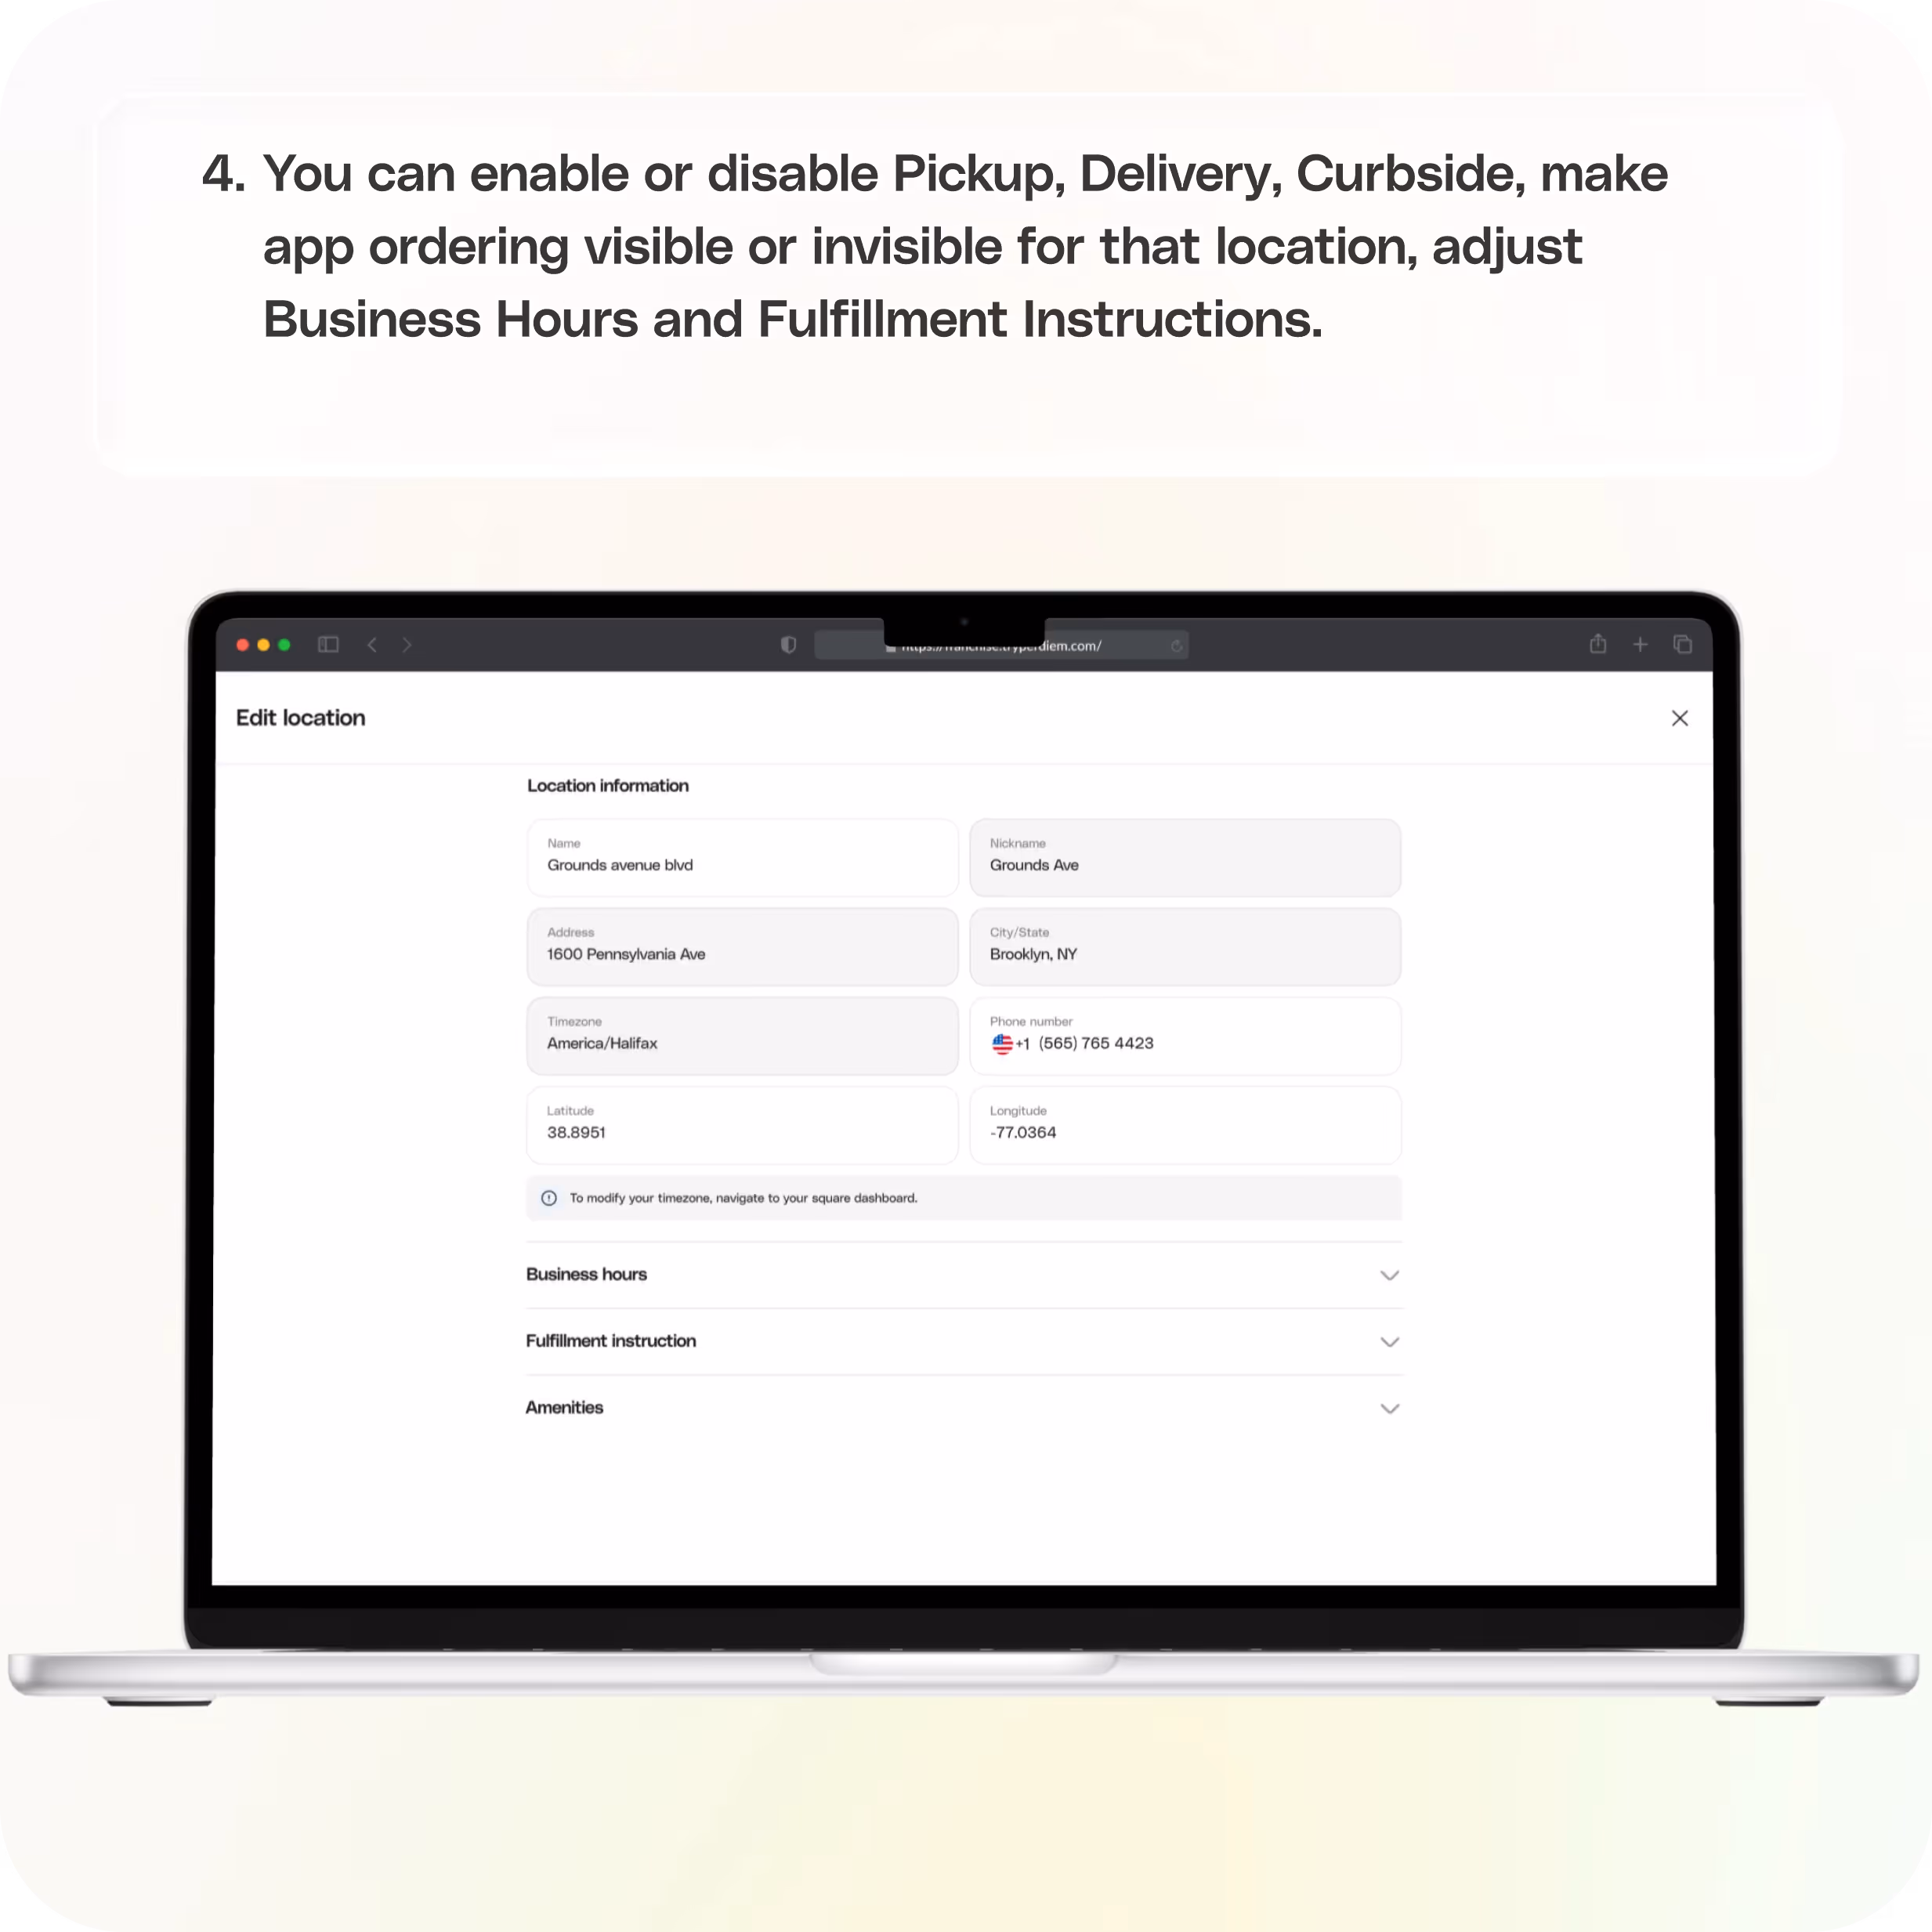
- Once a location is turned on, click on the dots beside it to adjust its settings.
- You can:
- Enable or disable Pickup
- Enable or disable Delivery
- Enable or disable Curbside
- Make App Ordering visible or invisible for that location
- Enable or disable Pickup
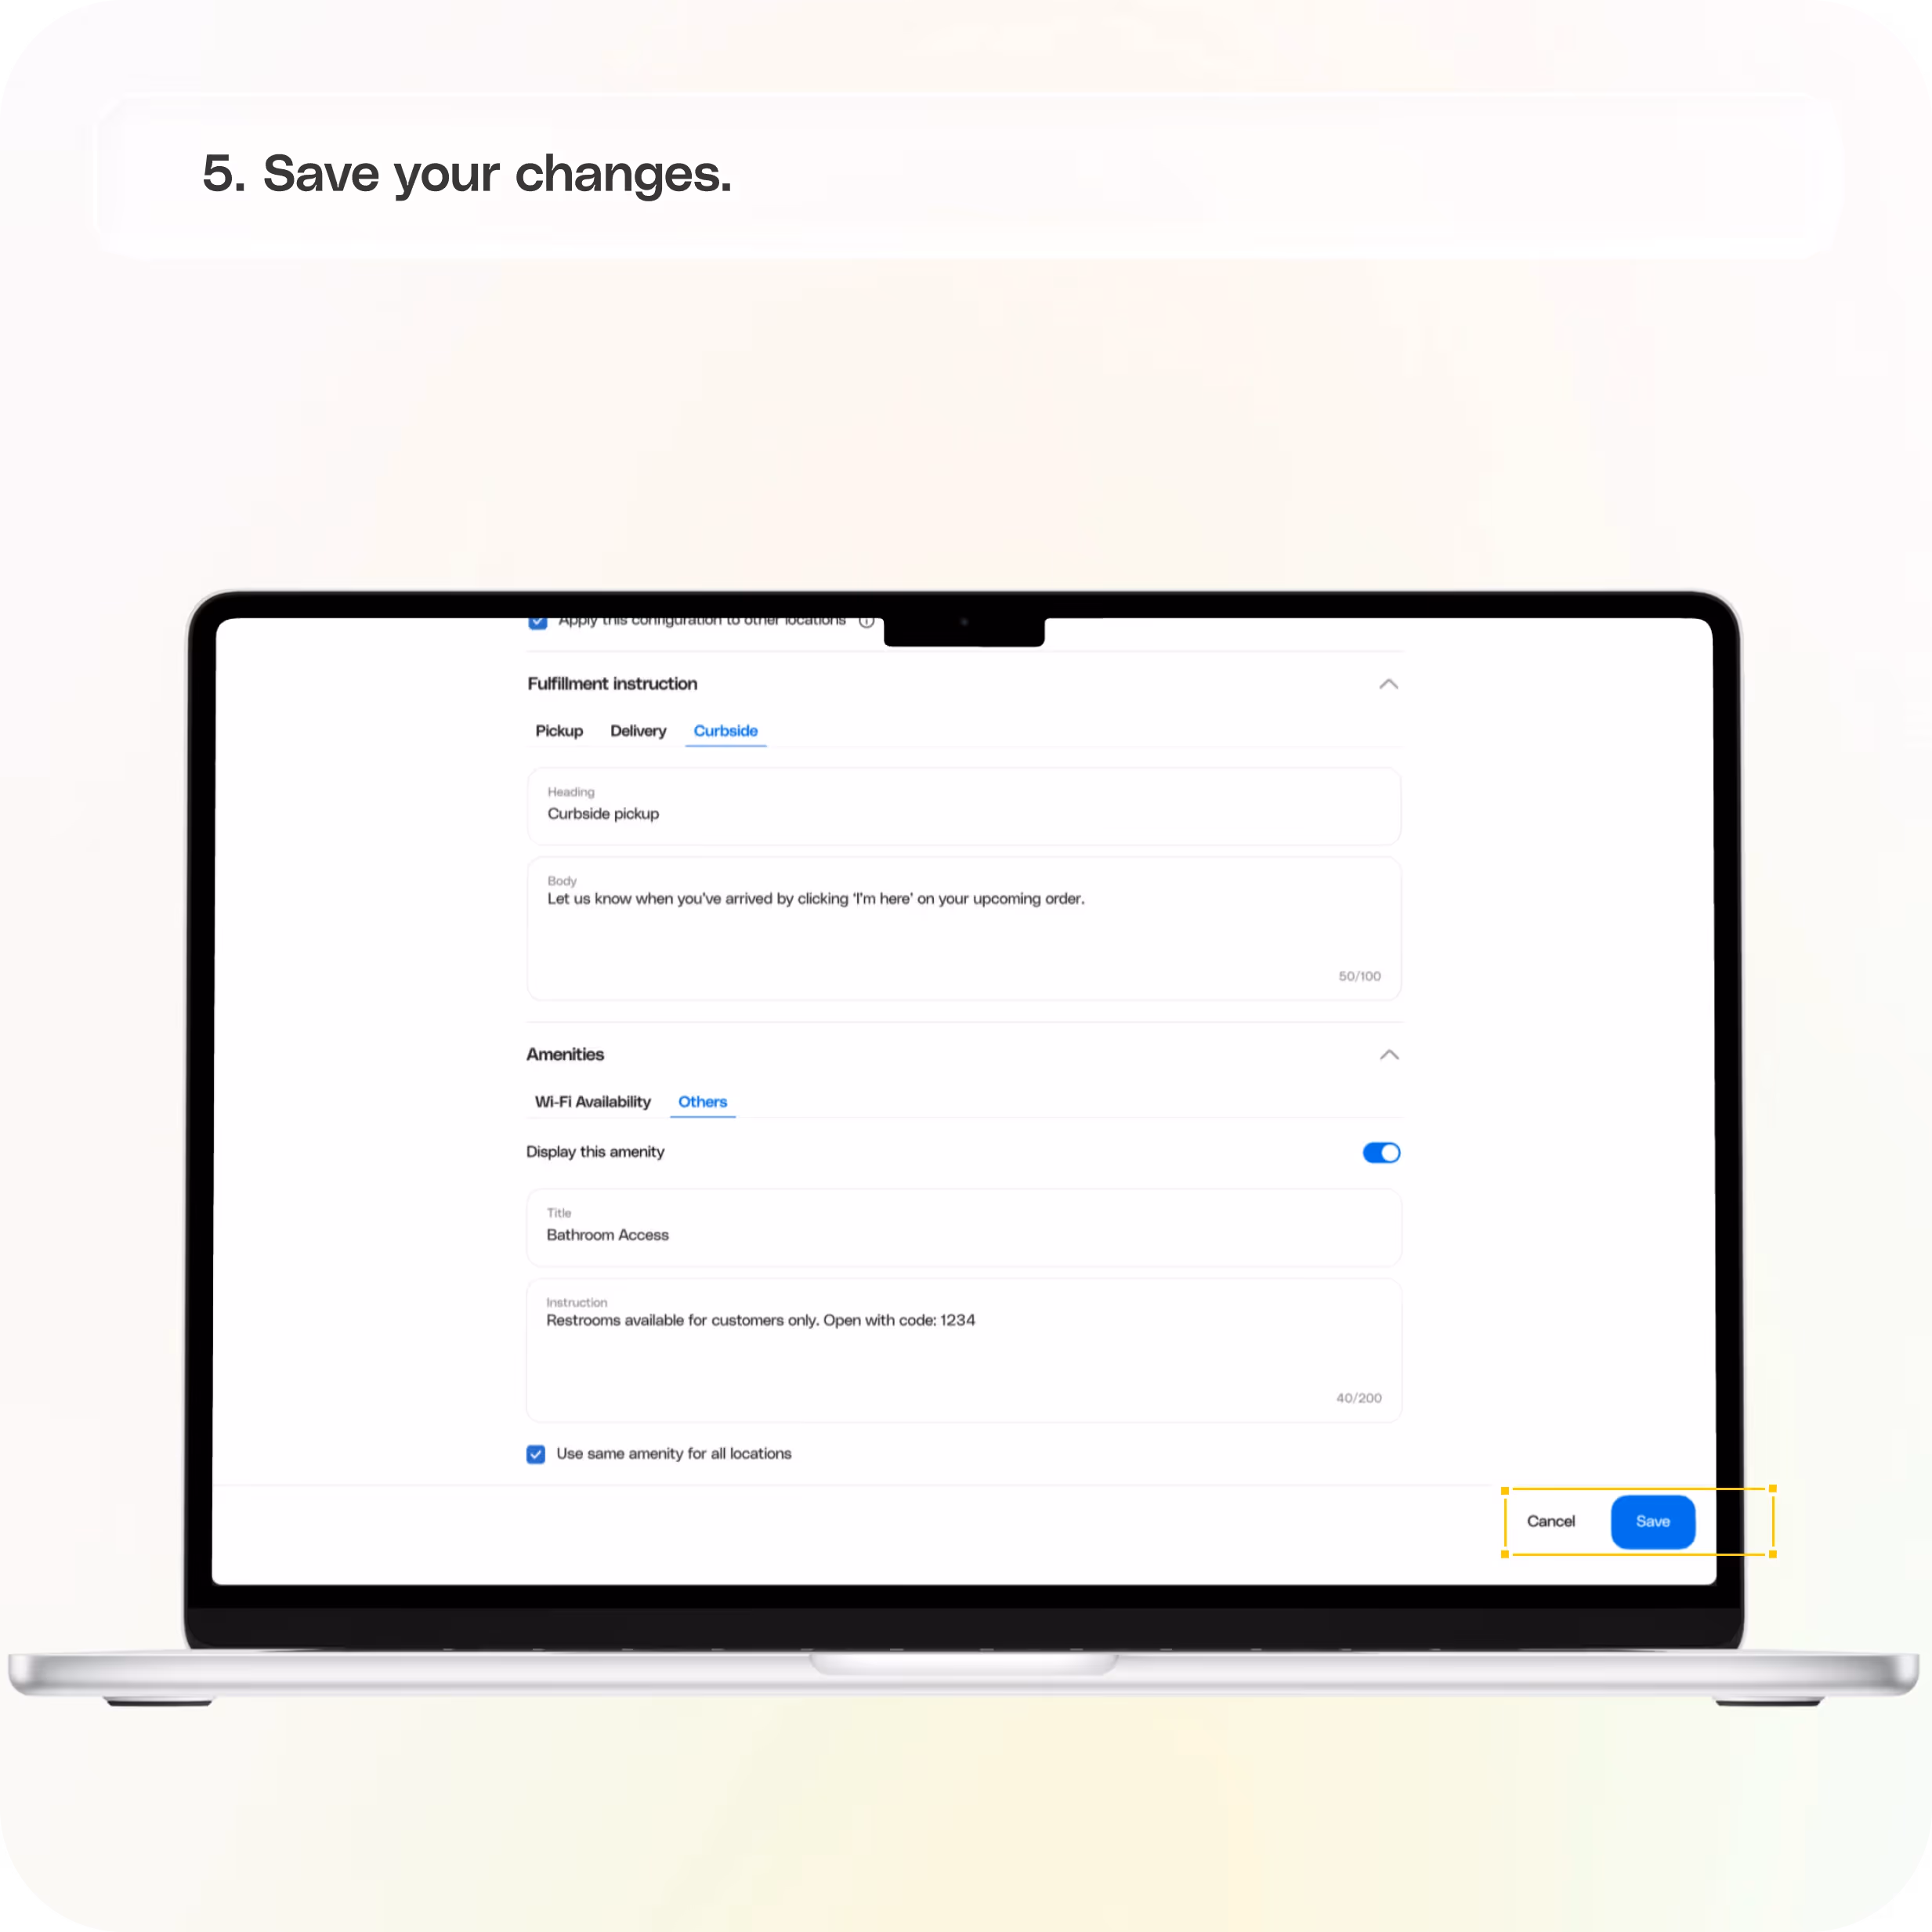
- Save your changes.
Still require support?
Contact support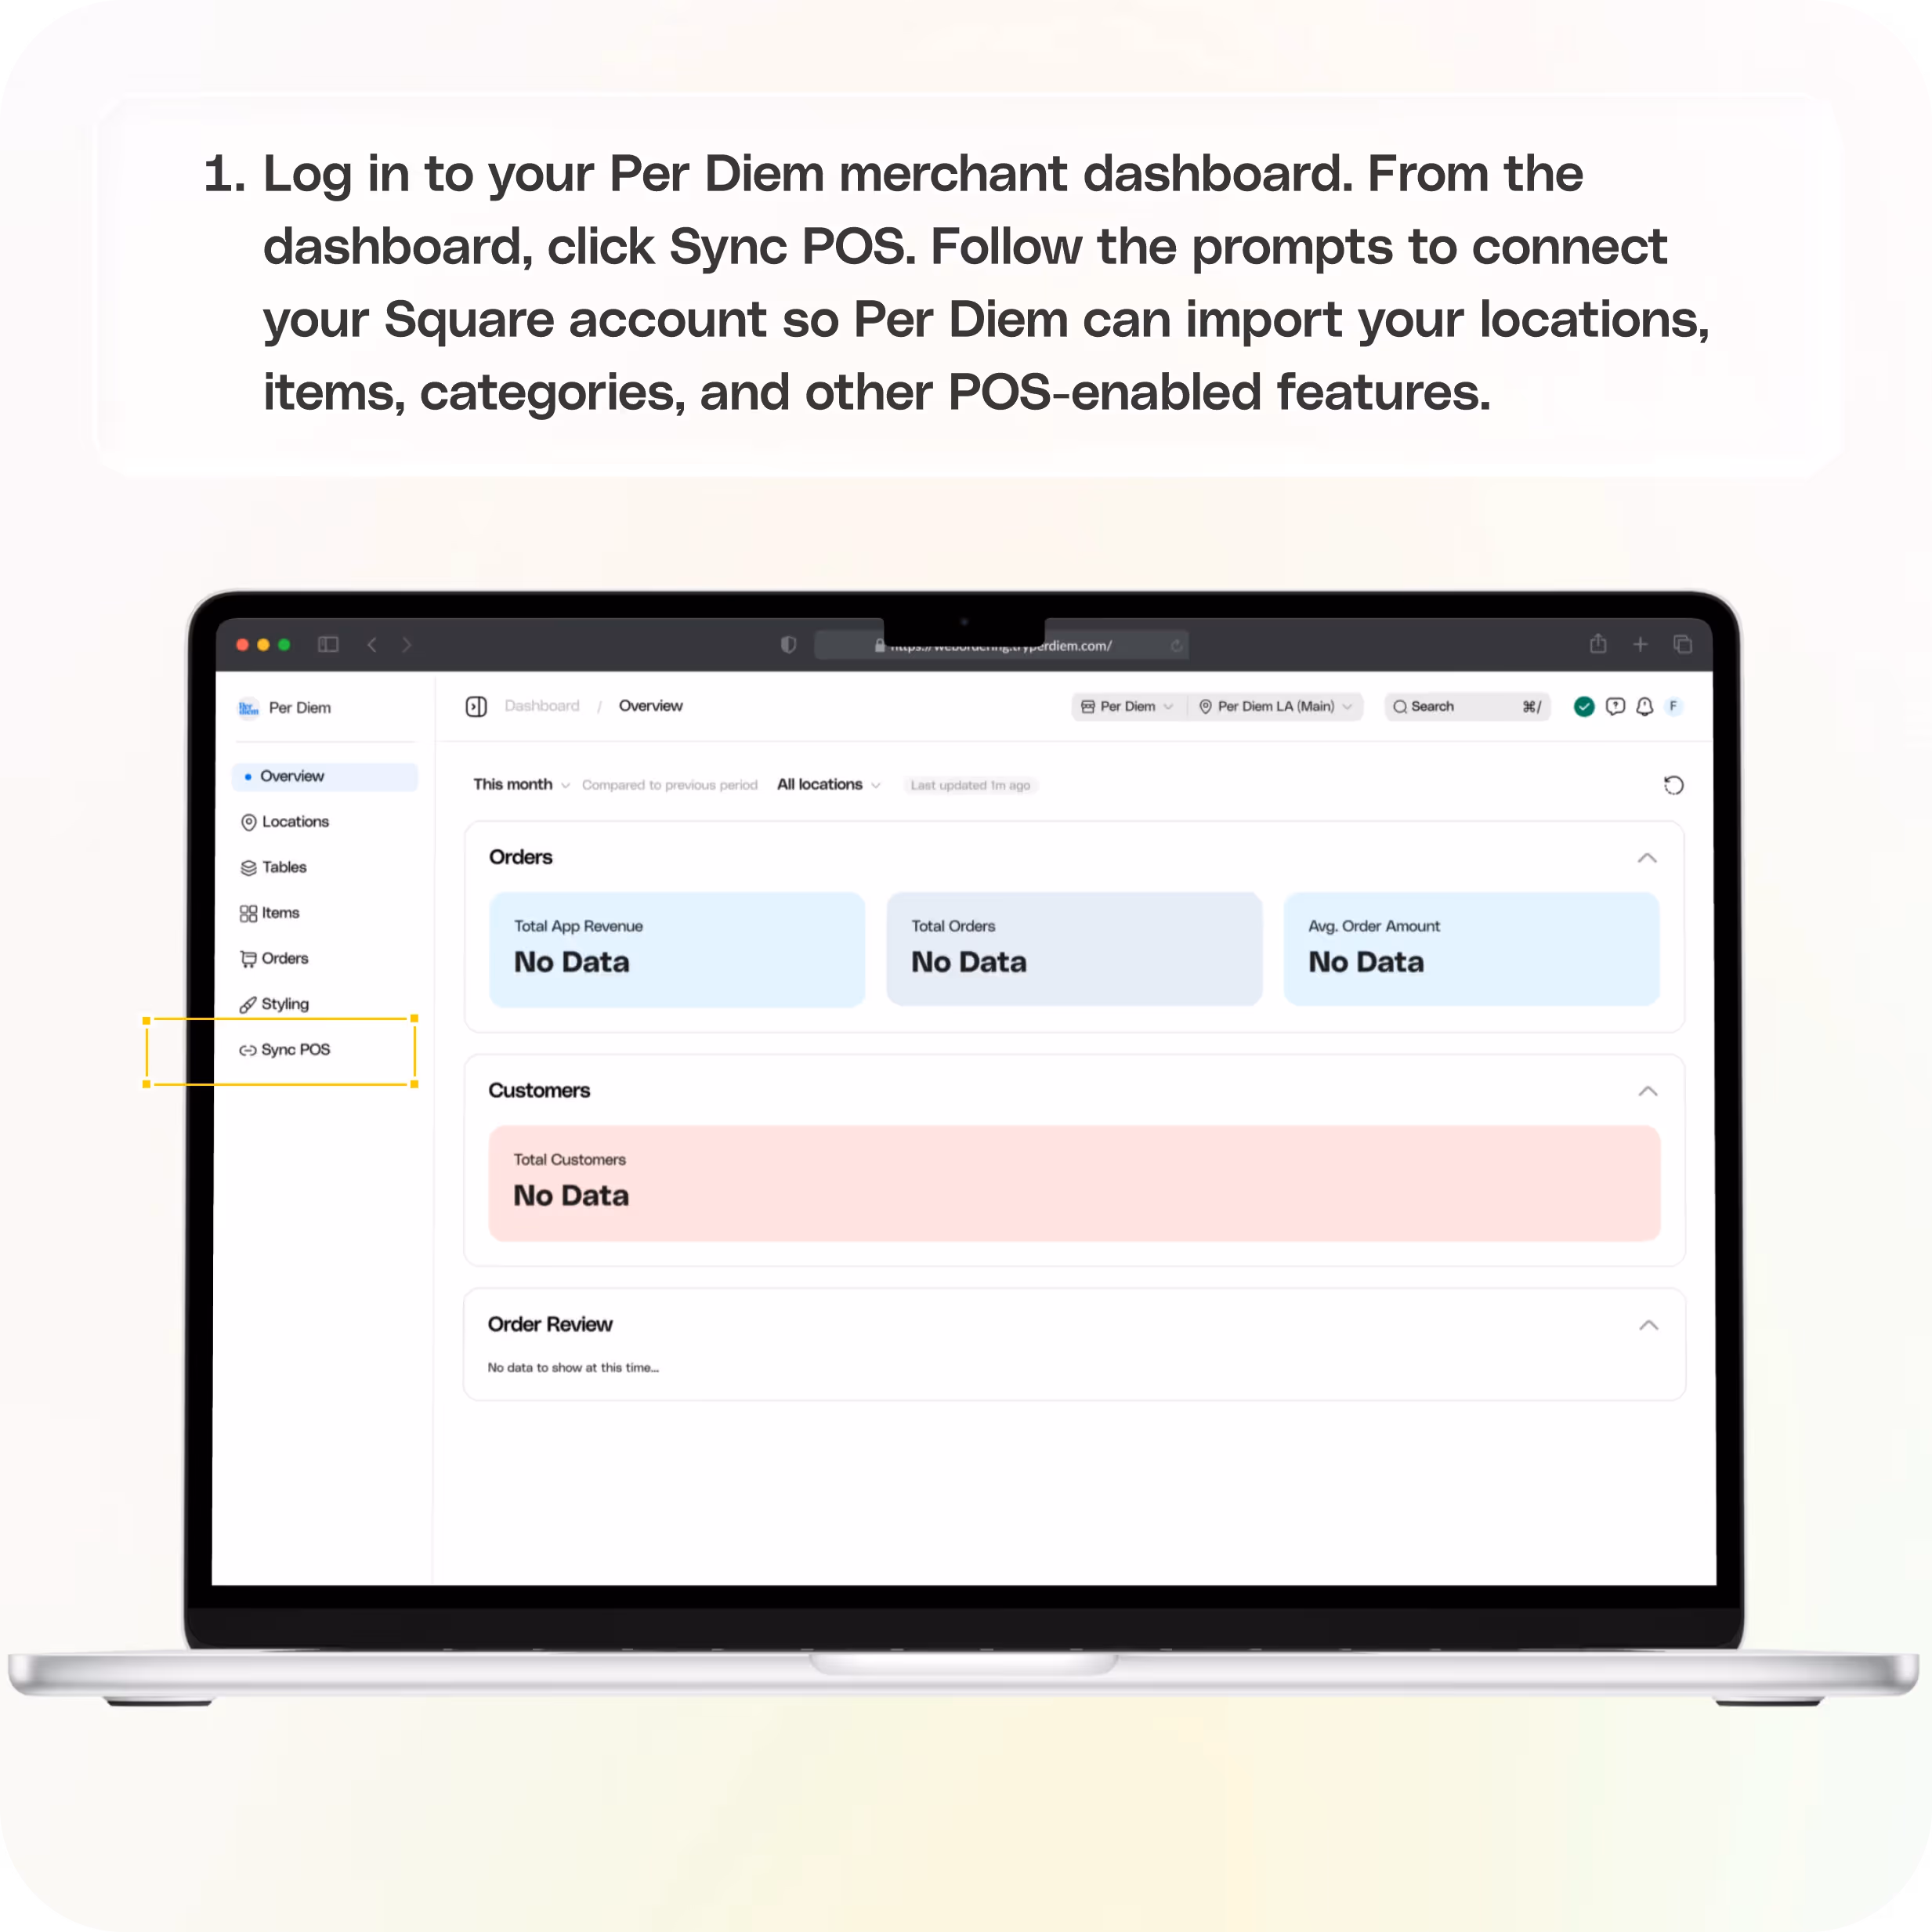

No items found.
Step 1: Sync Your Dashboard with Square
- Log in to your Per Diem merchant dashboard.
- From the dashboard, click Sync POS.
- Follow the prompts to connect your Square account so Per Diem can import your locations, items, categories, and other POS-enabled features.
This step ensures that everything in your POS is available in your Web Ordering dashboard.
Step 2: Turn On Locations, Items, and Features
- After syncing, go to the side panel of your dashboard.
- Here, you’ll see sections for Locations, Items, and other features.
Use the toggle next to each location, item, or category to turn it on for web ordering.
Step 3: Customize Each Location
- Once a location is turned on, click on the dots beside it to adjust its settings.
- You can:
- Enable or disable Pickup
- Enable or disable Delivery
- Enable or disable Curbside
- Make App Ordering visible or invisible for that location
- Adjust Business Hours and Fulfillment Instructions.
- Enable or disable Pickup
- Save your changes.
That’s It!
Once everything is turned on (just like you would for your app), your store is ready to start taking web orders. Customers will now see your live menu and location options online.
Join the Per Diem Local Partner Program
Submit updates to your business details for review by Per Diem’s moderation team before they go live.
Thank you! Your submission has been received!
Oops! Something went wrong while submitting the form.


.svg)


Still have questions?Contact us
Ask anything or just say hi
Thank you! Your submission has been received!
Oops! Something went wrong while submitting the form.
Thank you! Your submission has been received!
Oops! Something went wrong while submitting the form.

