






















Create Instagram feed in your mobile app
Create Instagram-style linkable posts in your app to promote deals, items, or external links from your Per Diem dashboard.
Instructions
- Log in to your Per Diem merchant dashboard.
- In the left-side column of your dashboard, select "Posts."
- Click on the "Create a Post" button.
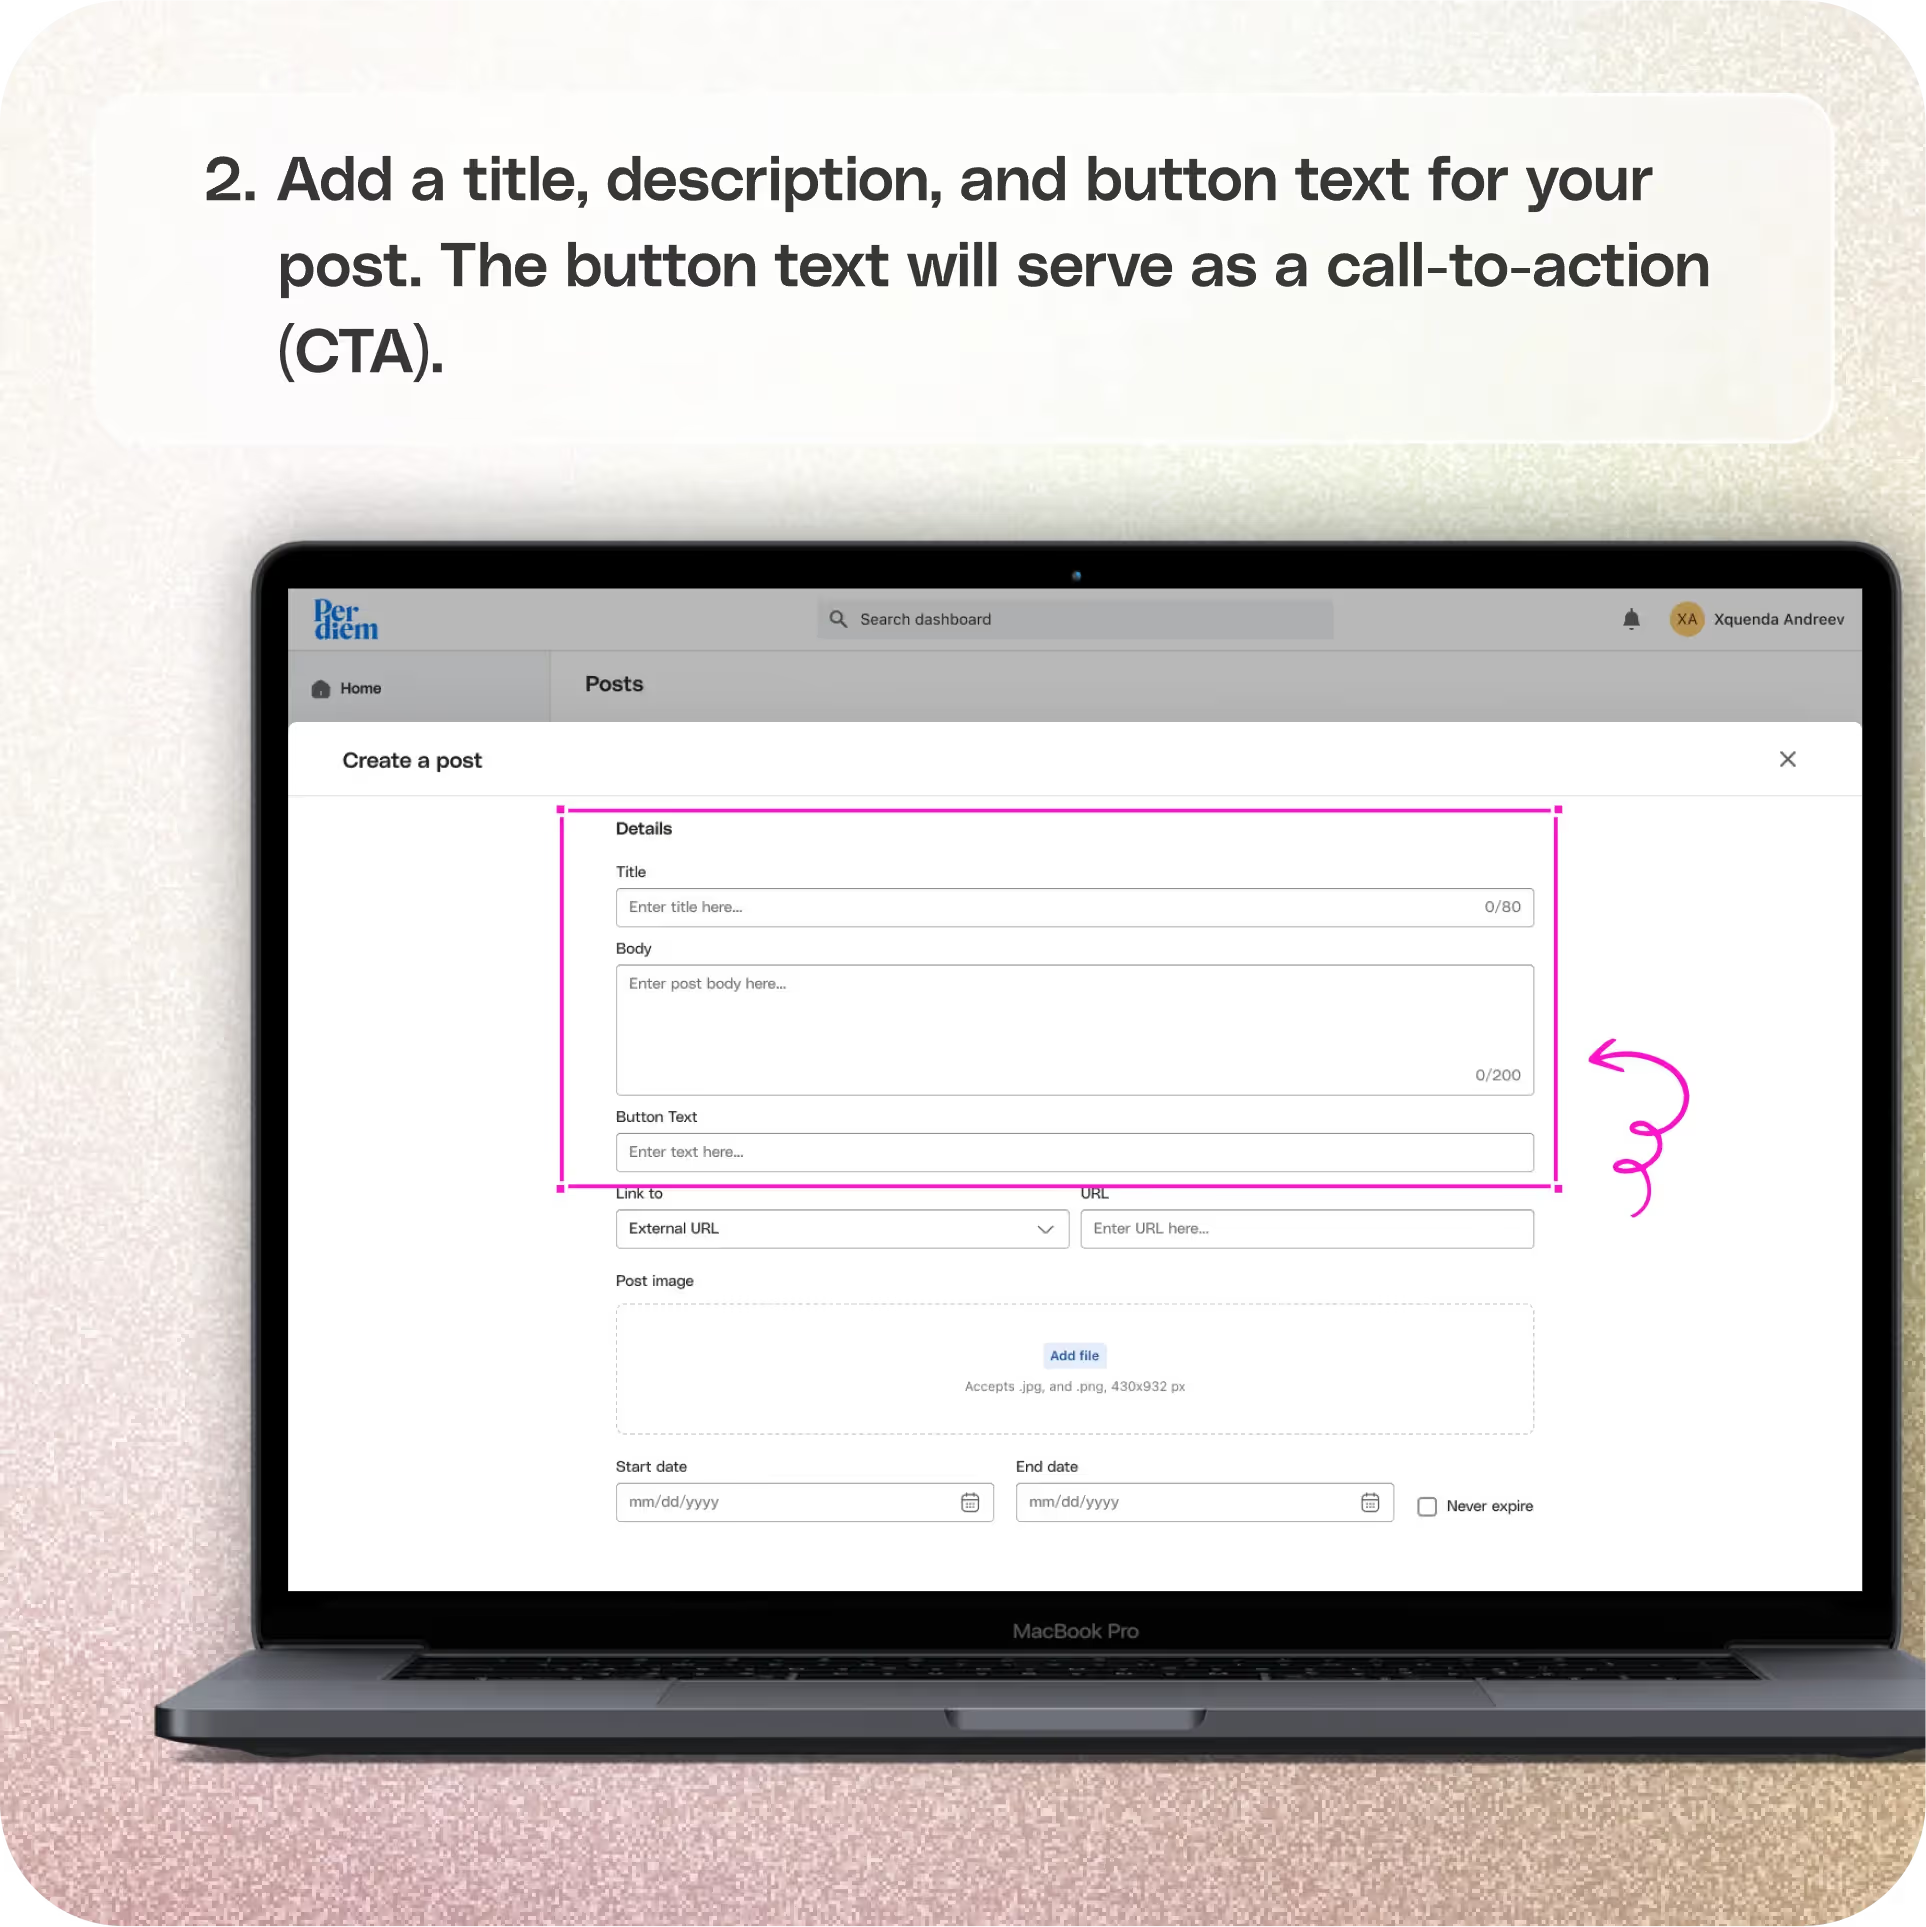
- Add a title, description, and button text for your post. The button text will serve as a call-to-action (CTA).
To link an external URL:
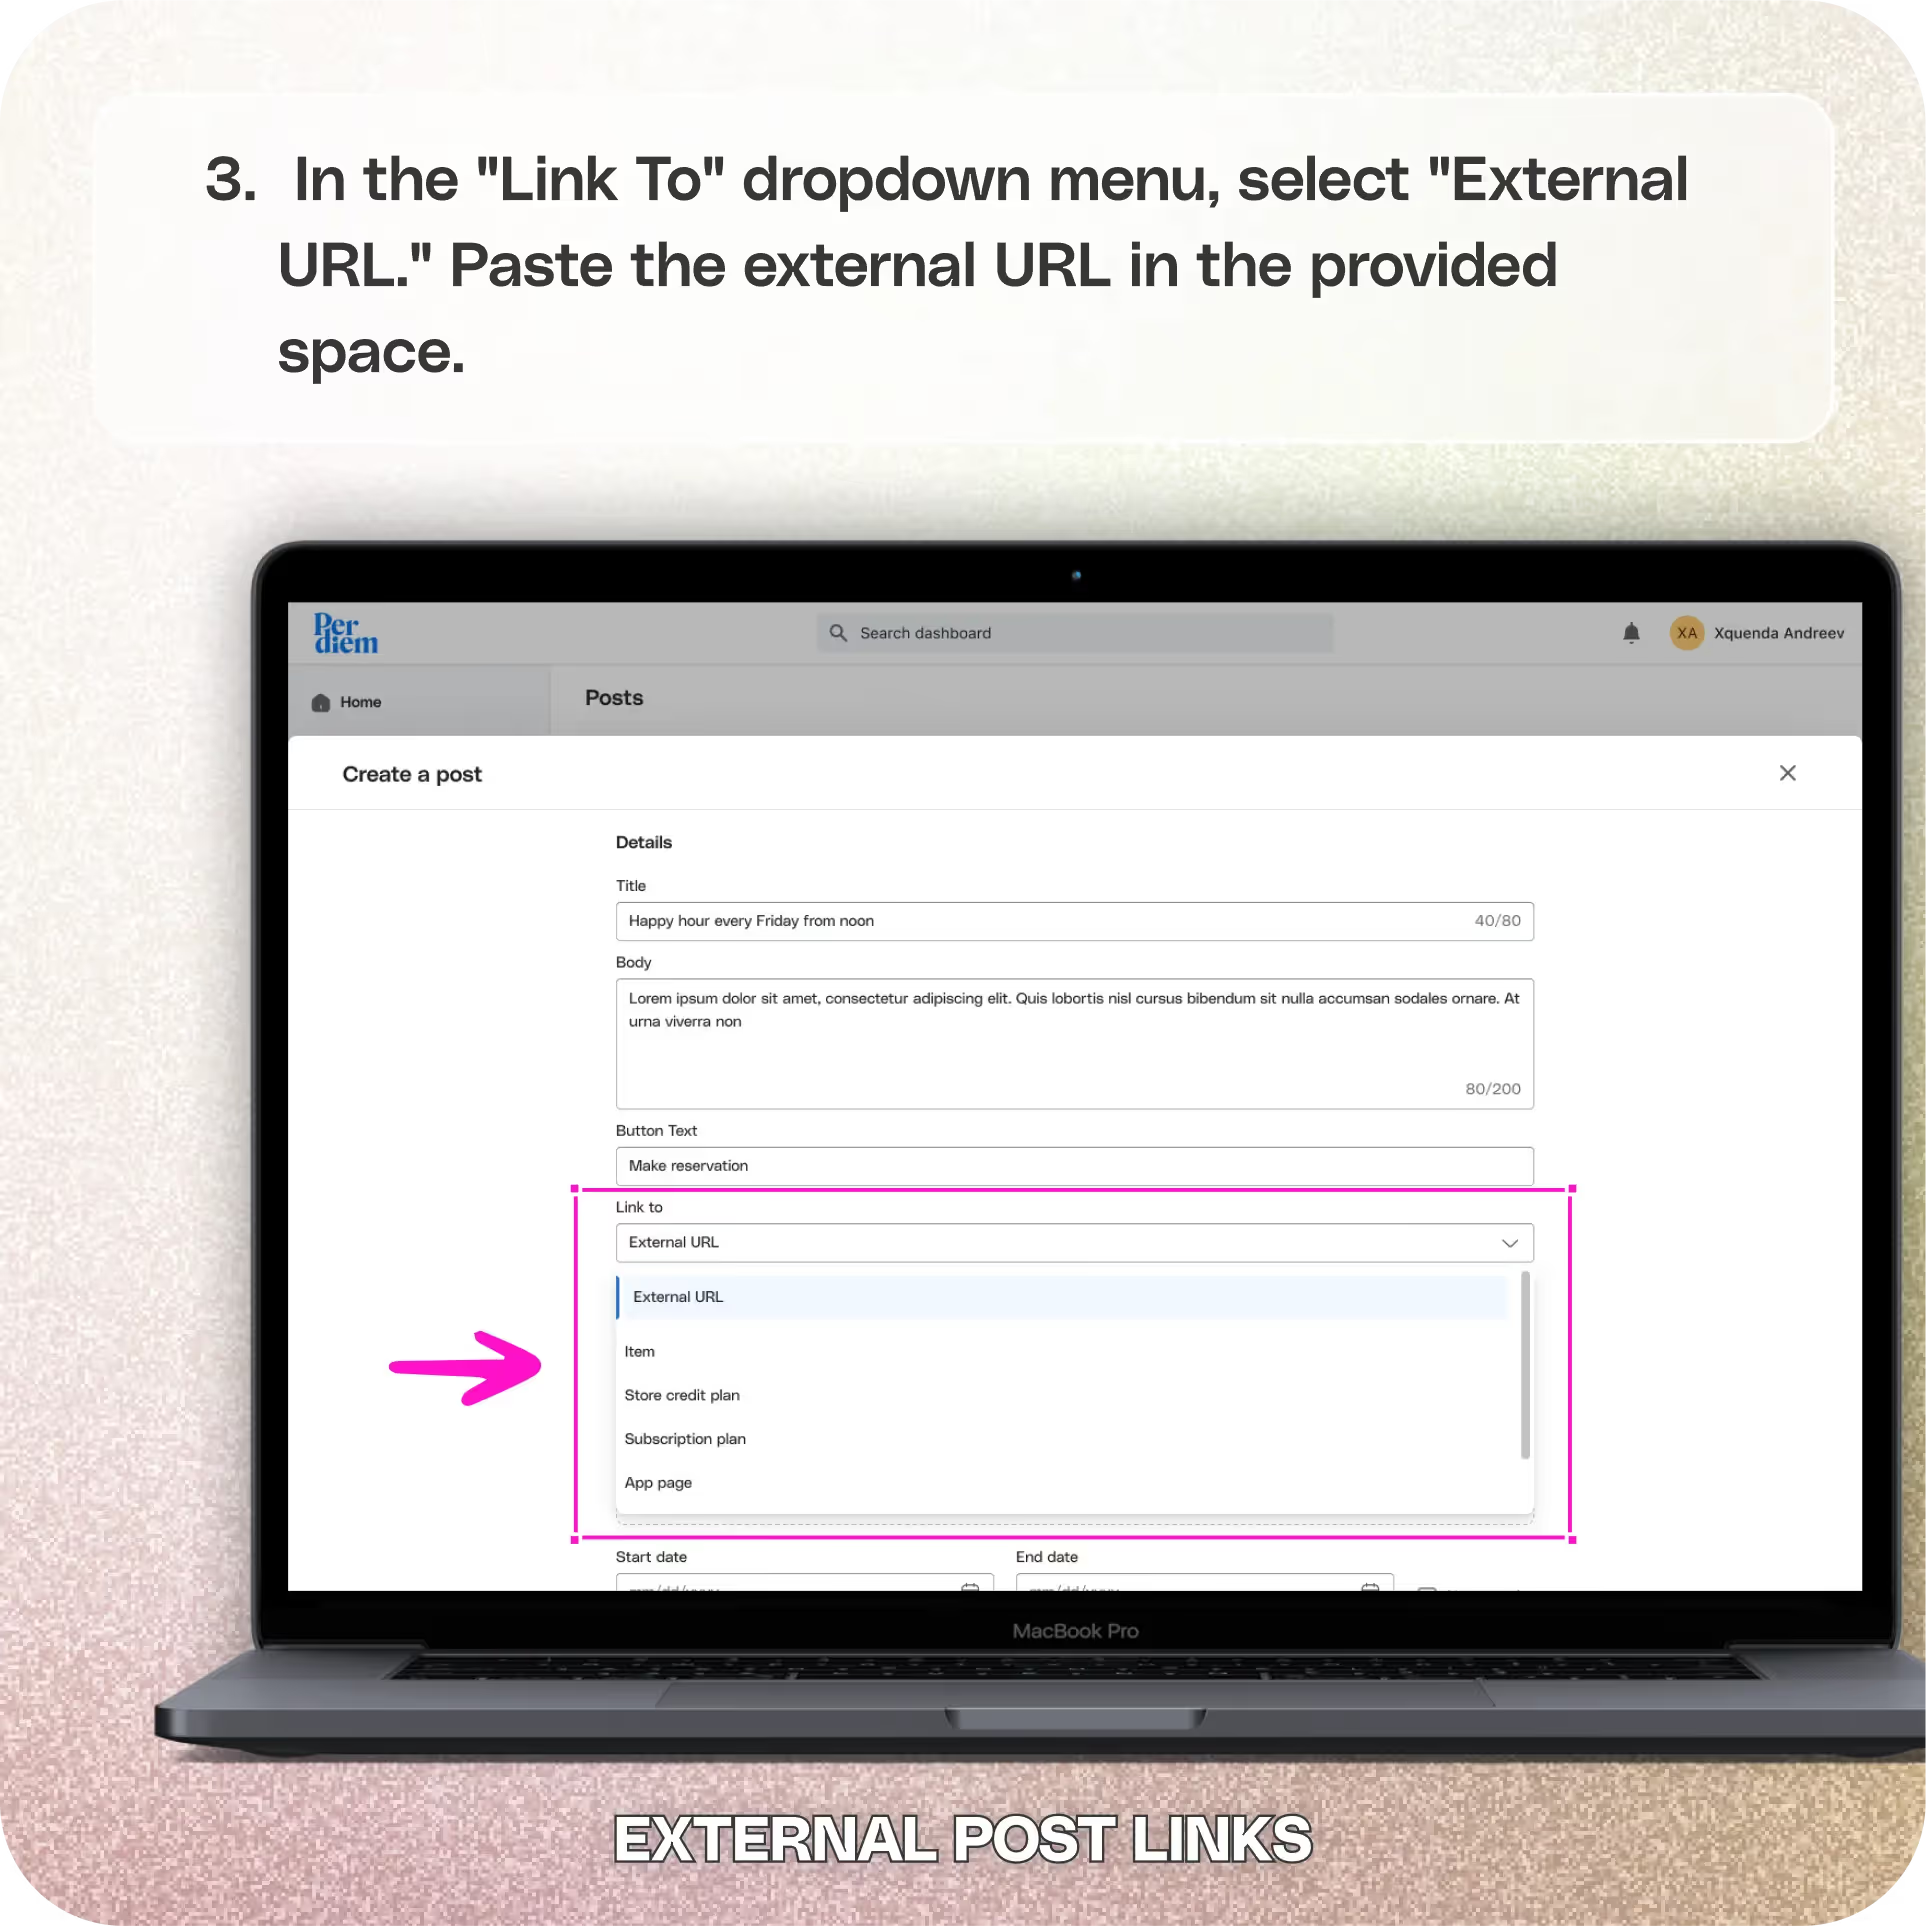
- In the "Link To" dropdown menu, select "External URL."
- Paste the external URL in the provided space.
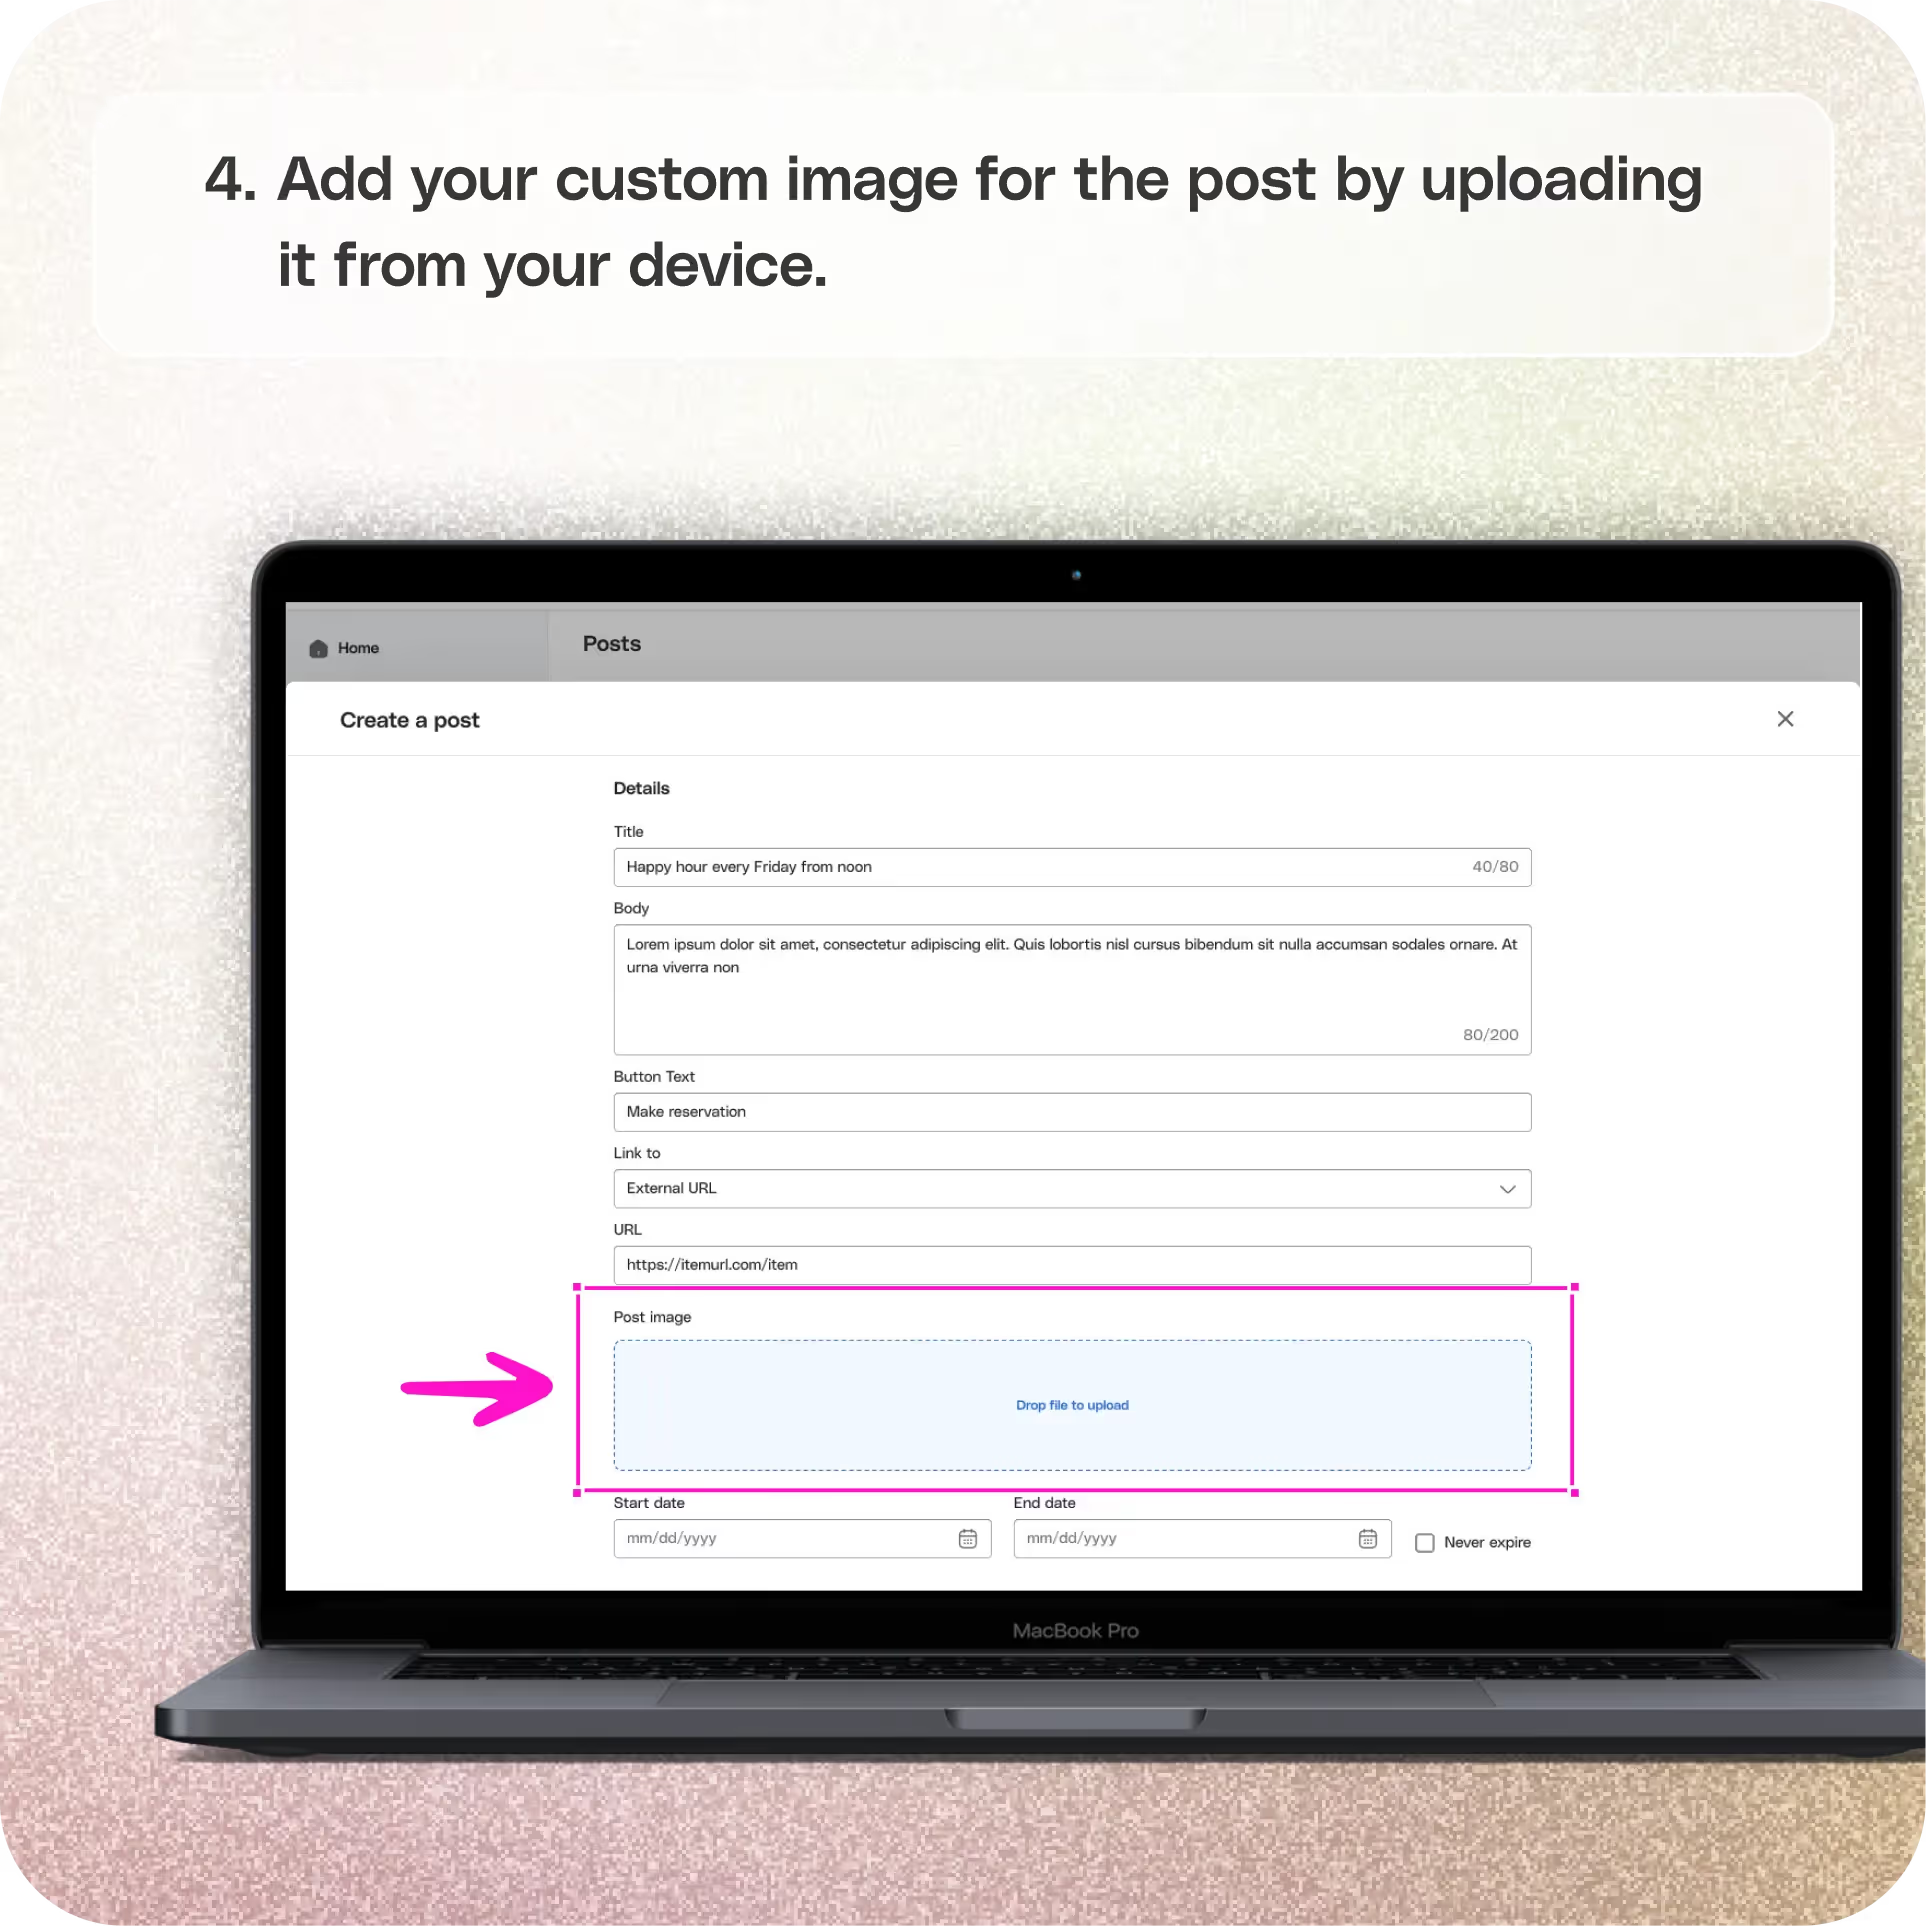
- Add your custom image for the post by uploading it from your device.
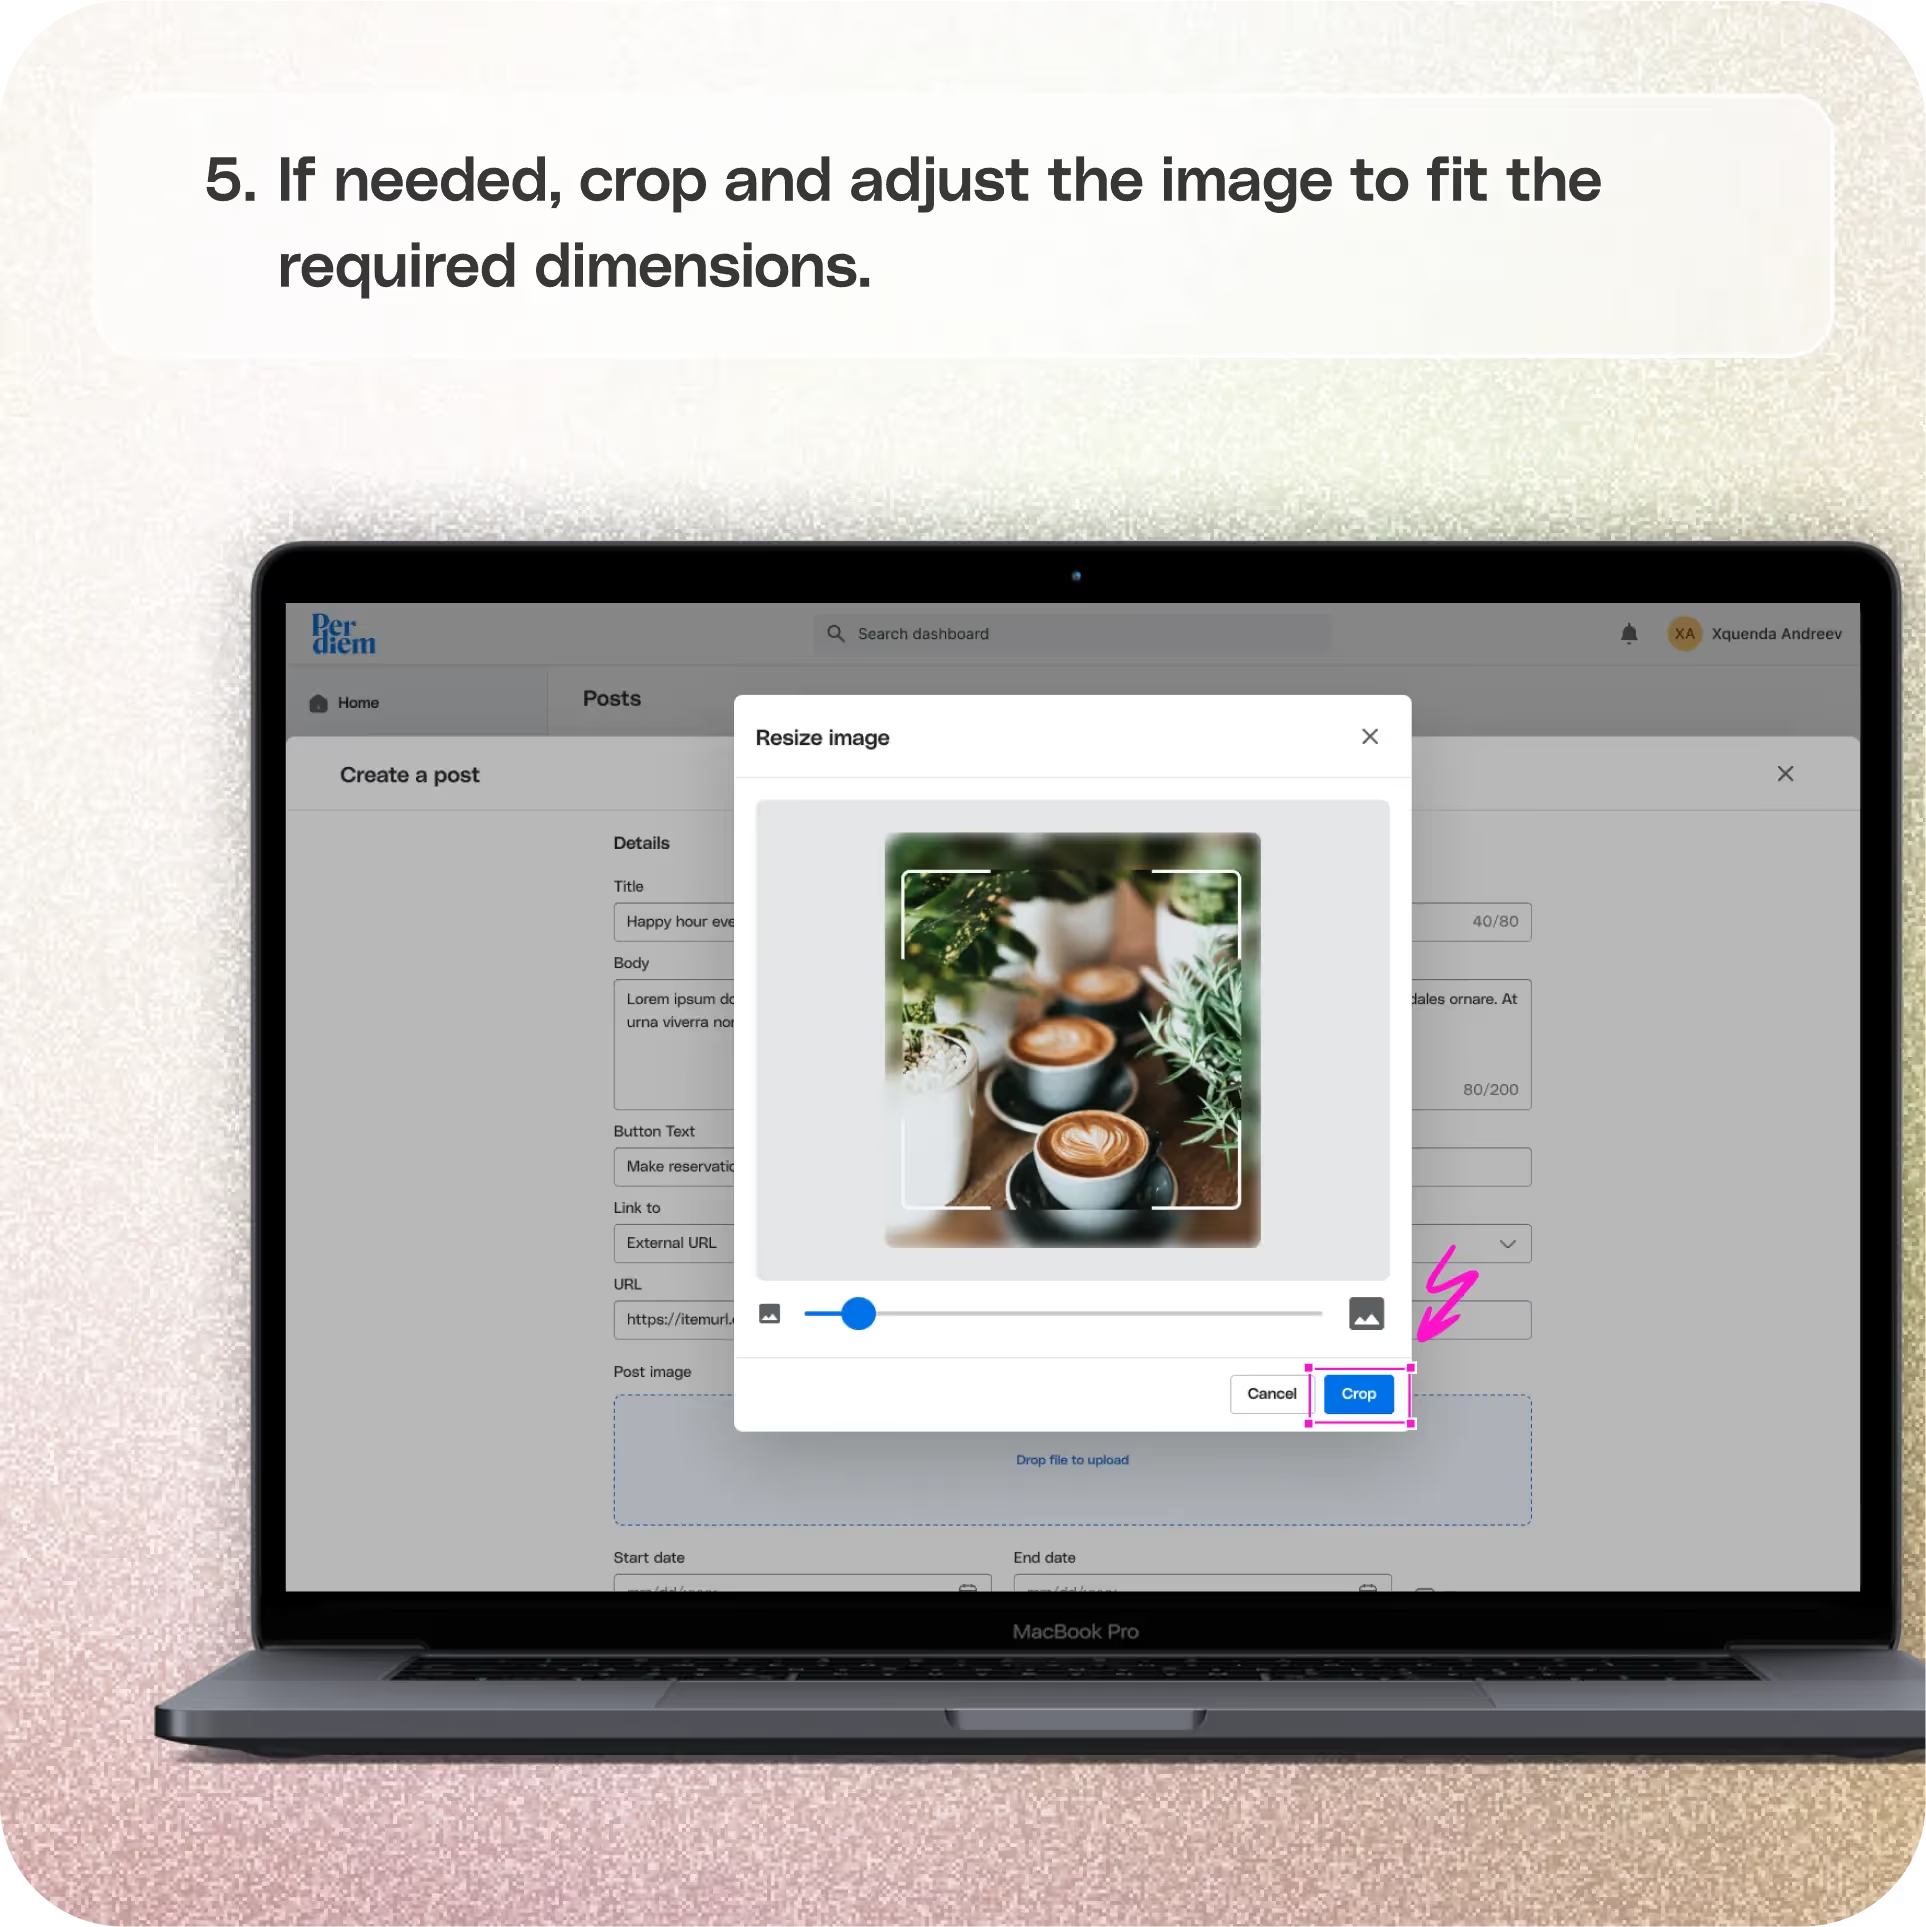
- If needed, crop and adjust the image to fit the required dimensions.
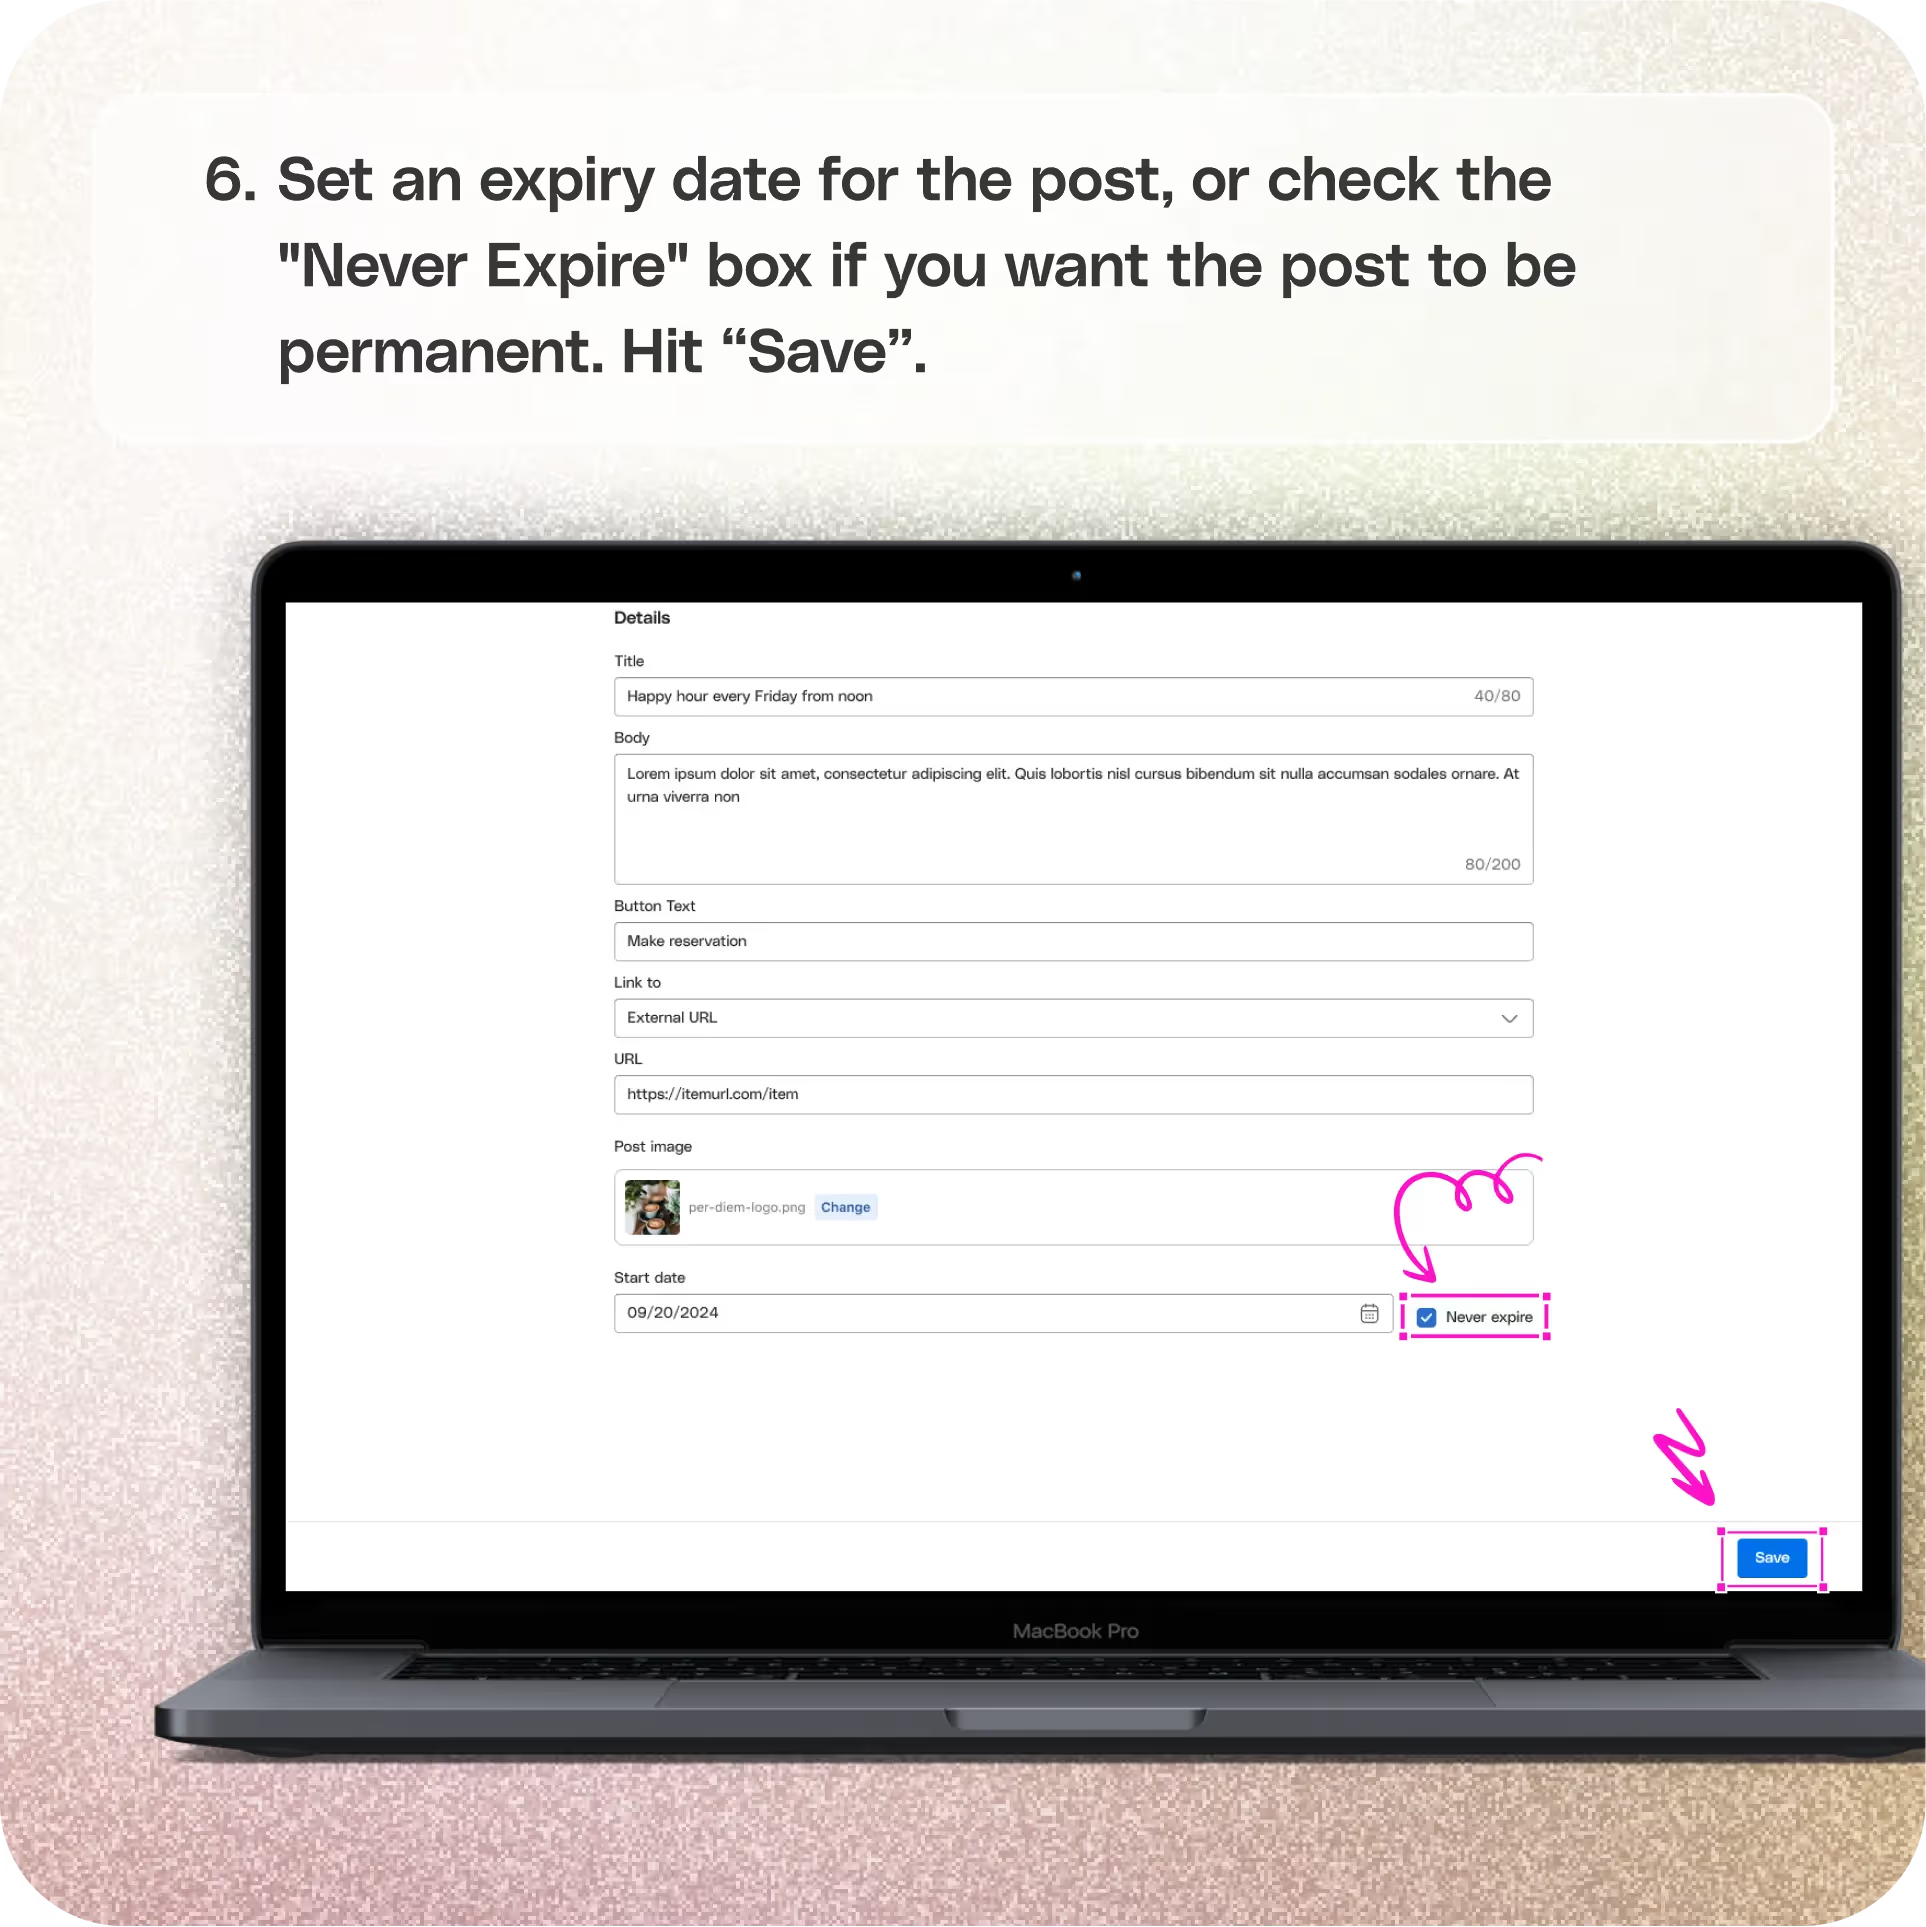
- Set an expiry date for the post, or check the "Never Expire" box if you want the post to be permanent.
- Hit "Save."
Edit/Delete Post:
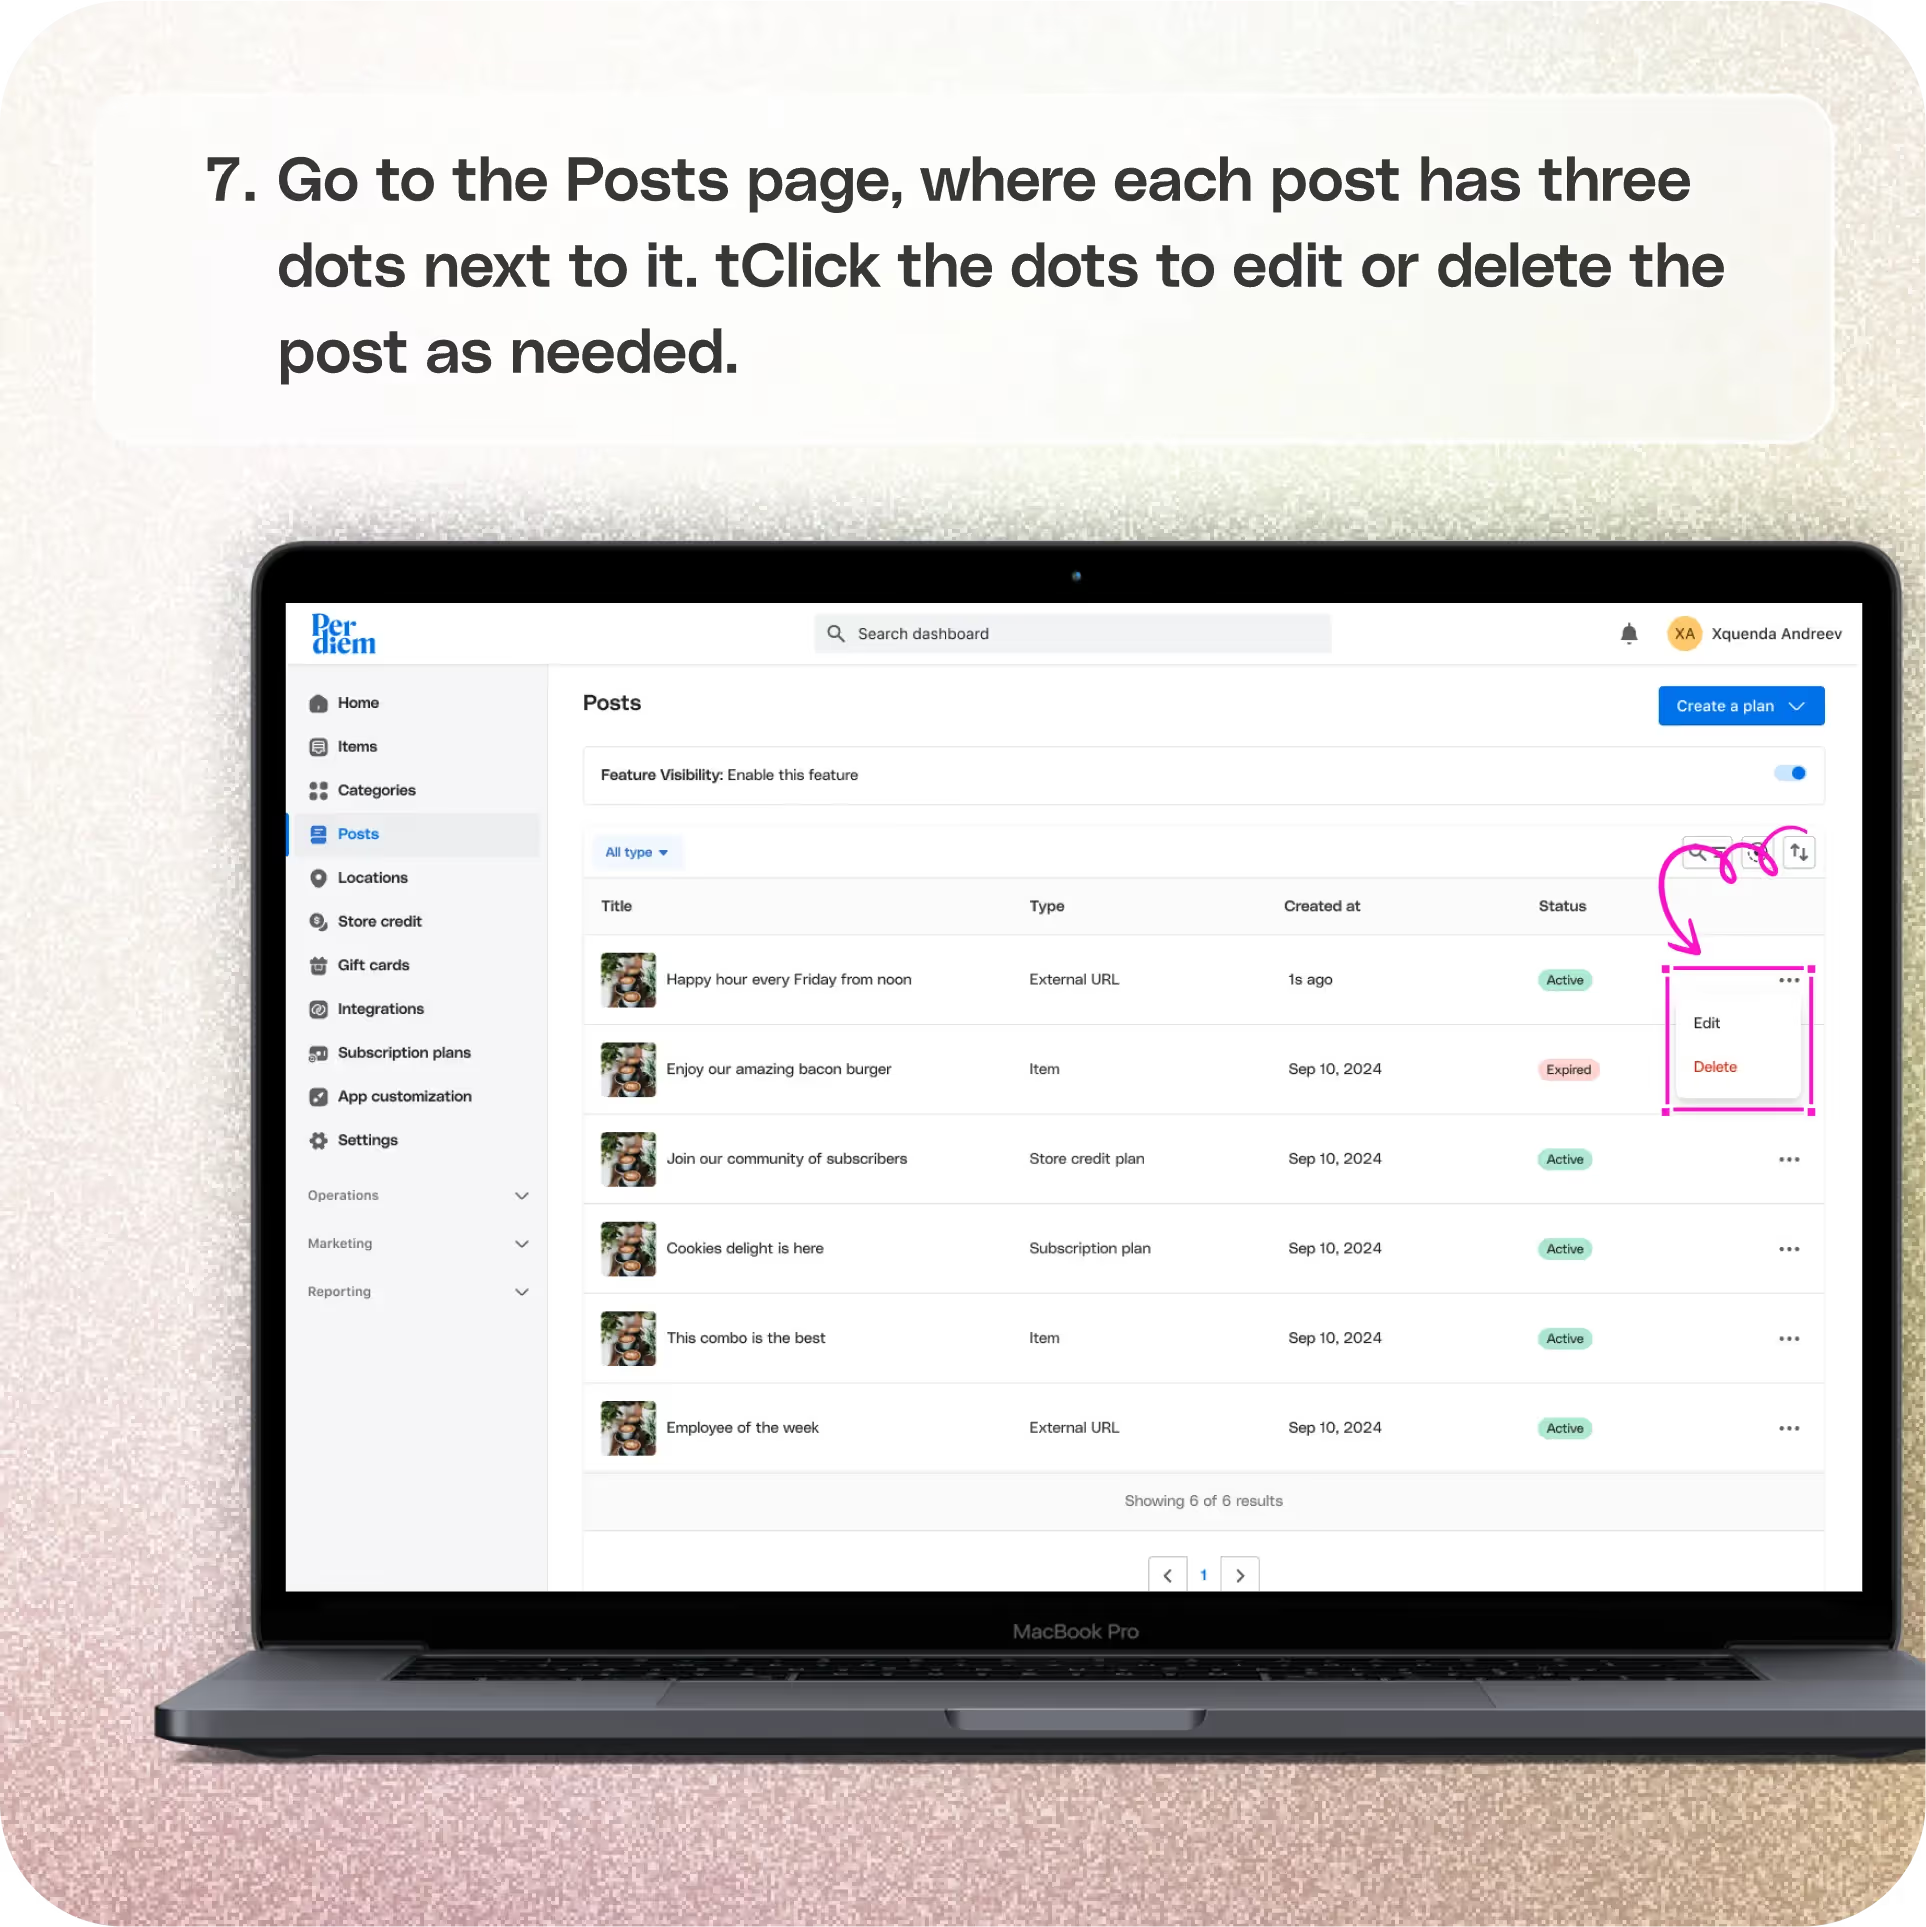
- Go to the Posts page, where each post has three dots next to it.
- Click the dots to edit or delete the post as needed.
Link an Item Within the App:
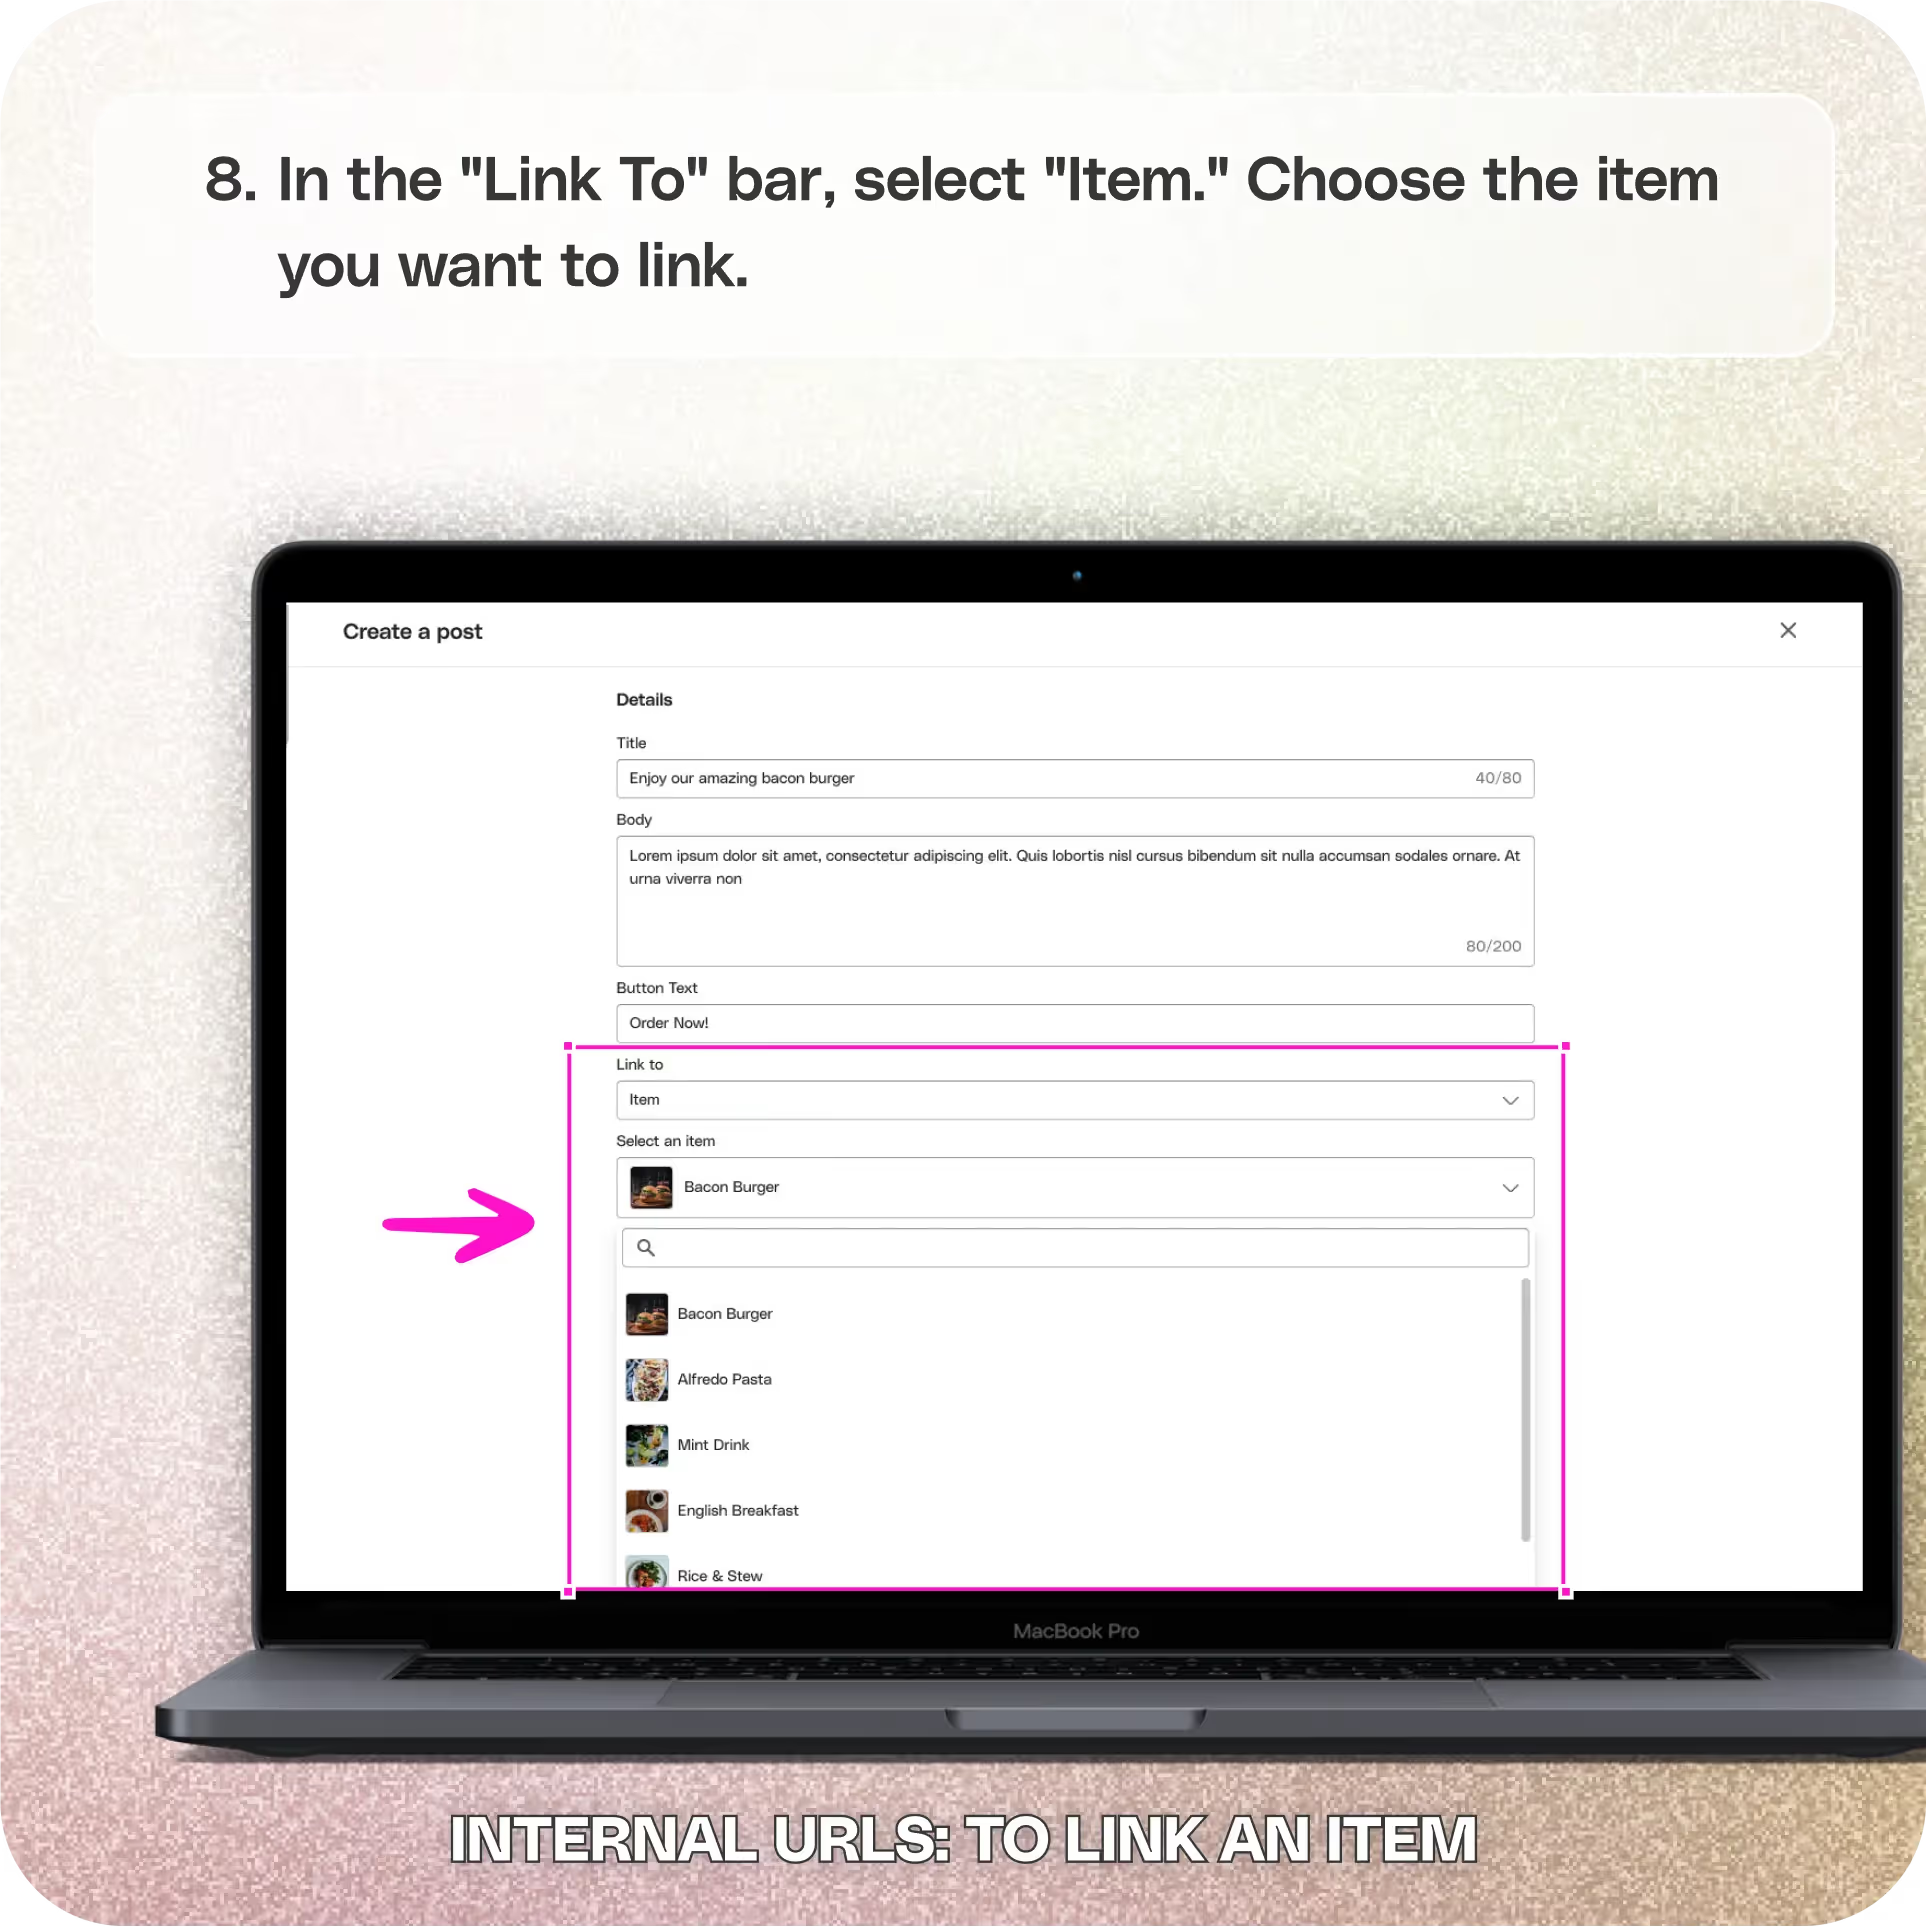
- In the "Link To" bar, select "Item."
- Choose the item you want to link.
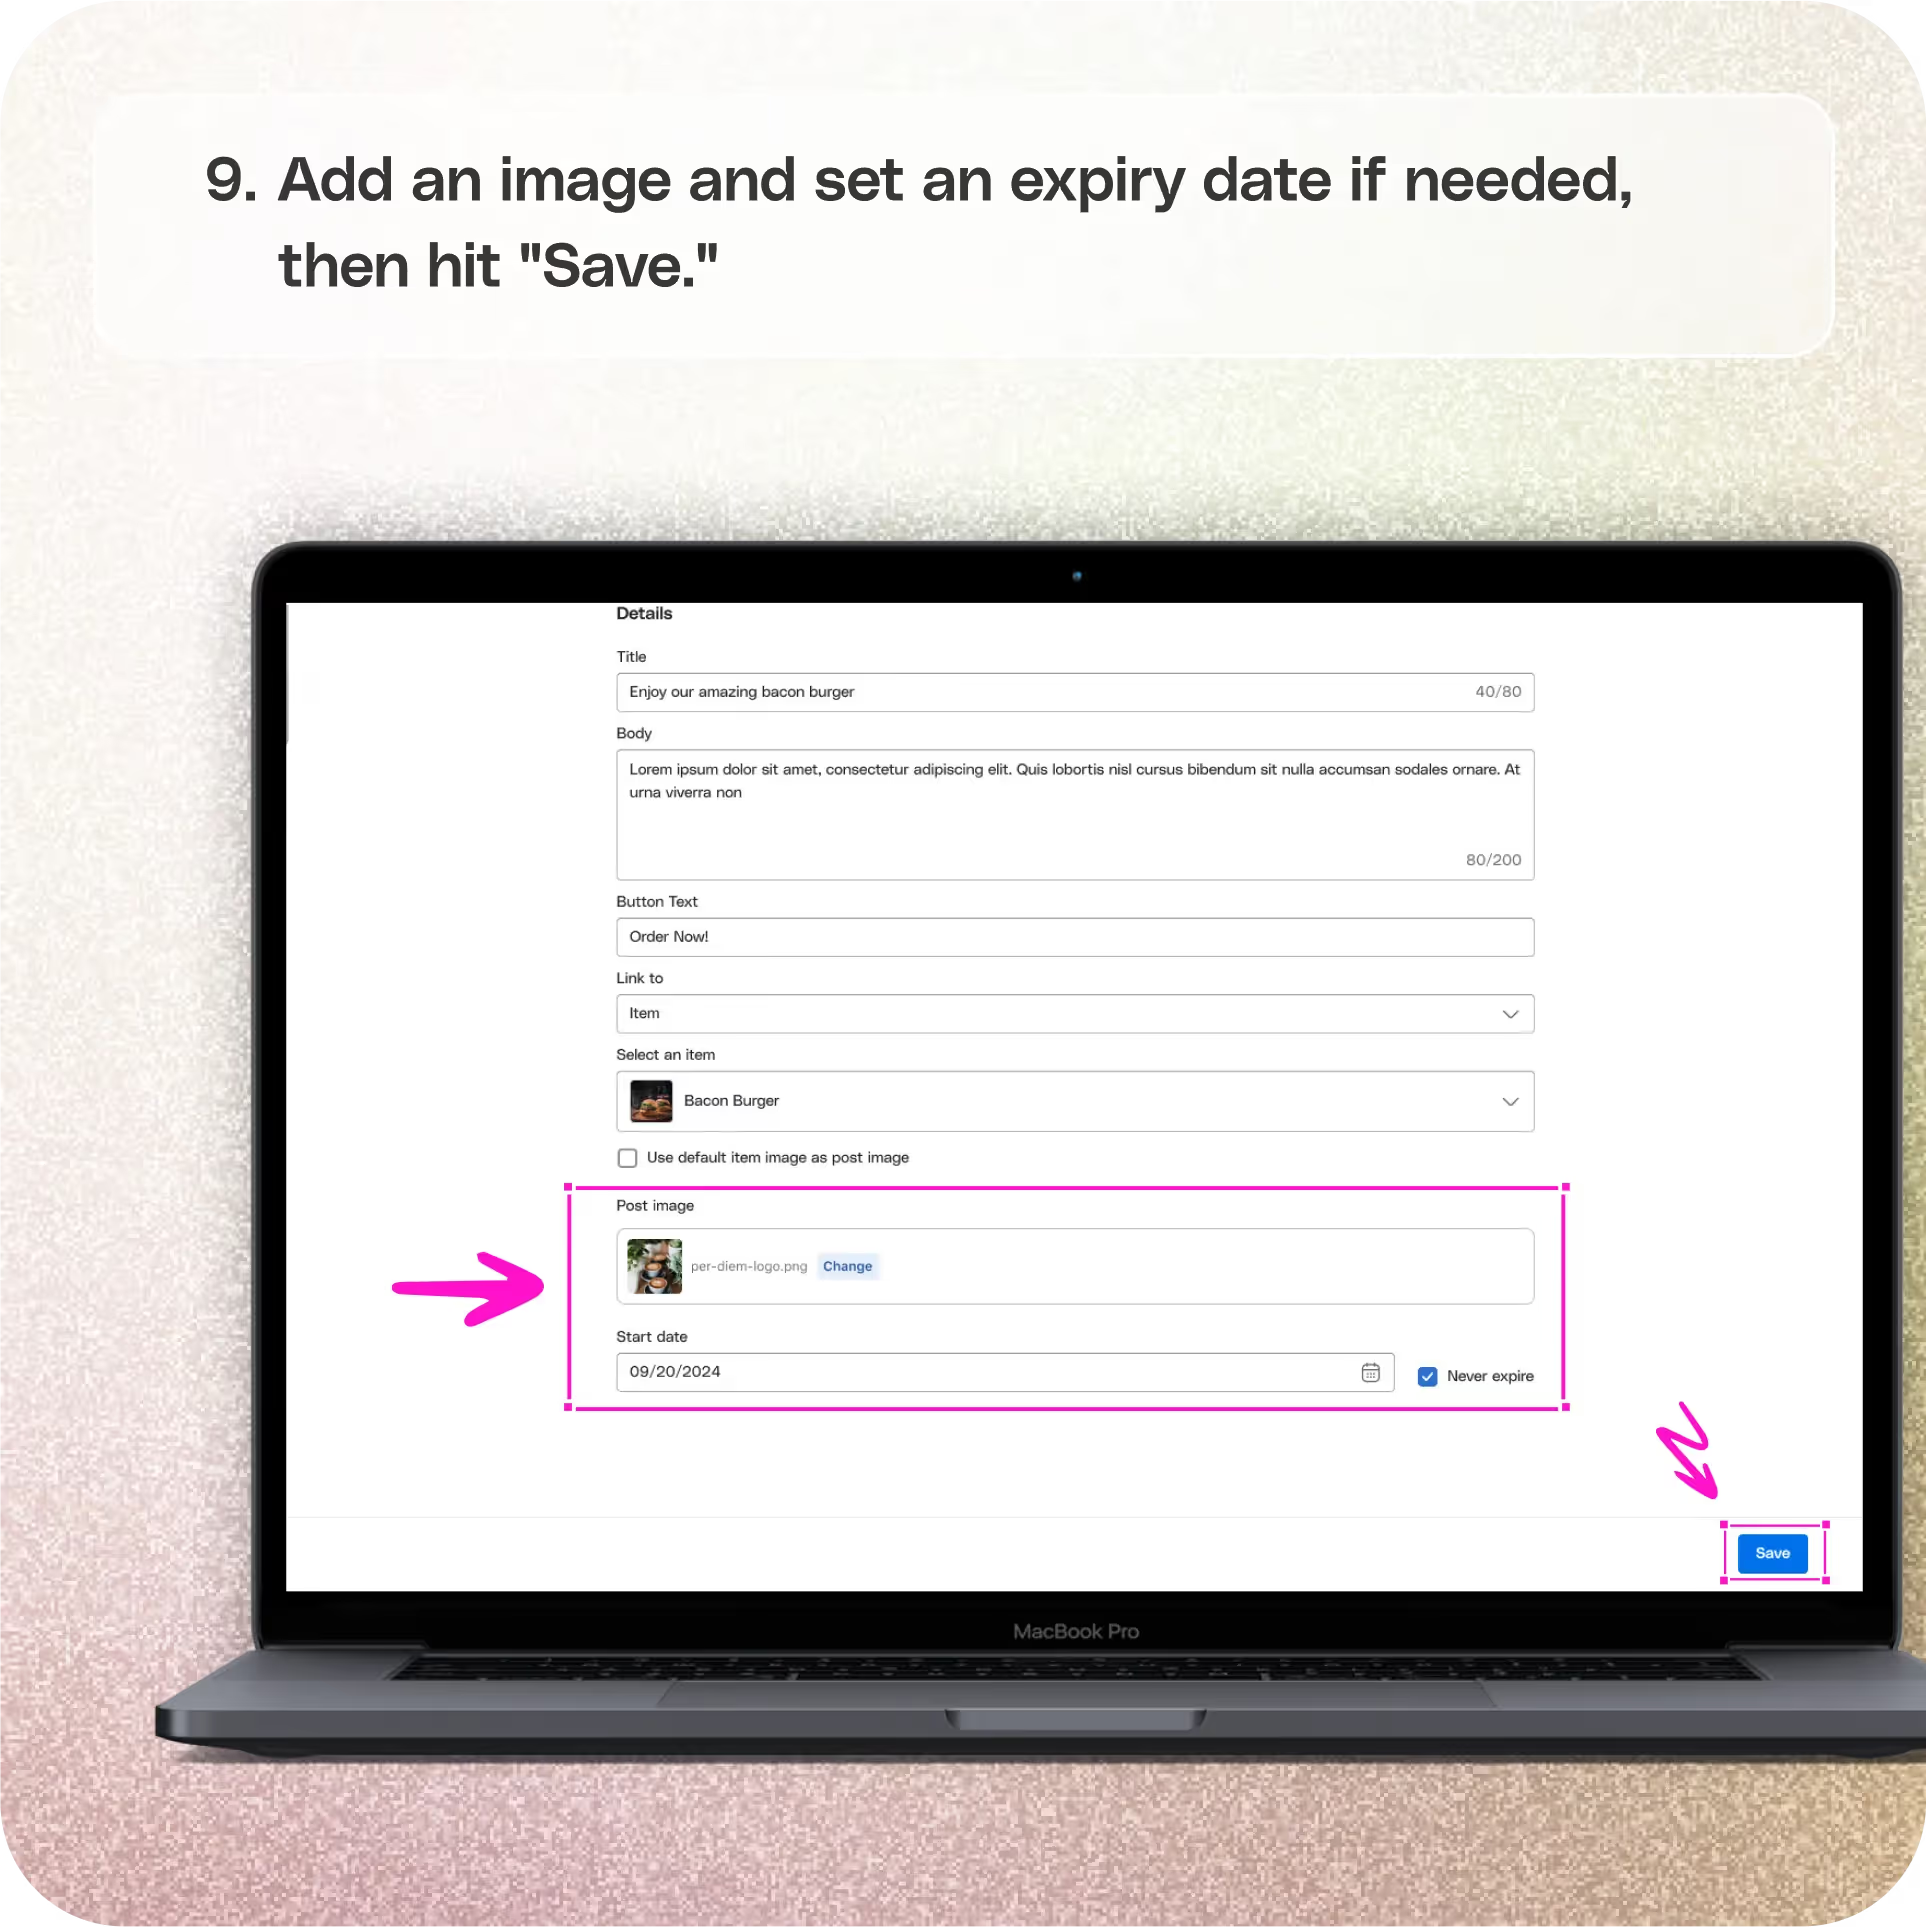
- Add an image and set an expiry date if needed, then hit "Save."
- Repeat the same steps as you did for the external post image to upload and save it.
To Link Store Credit:
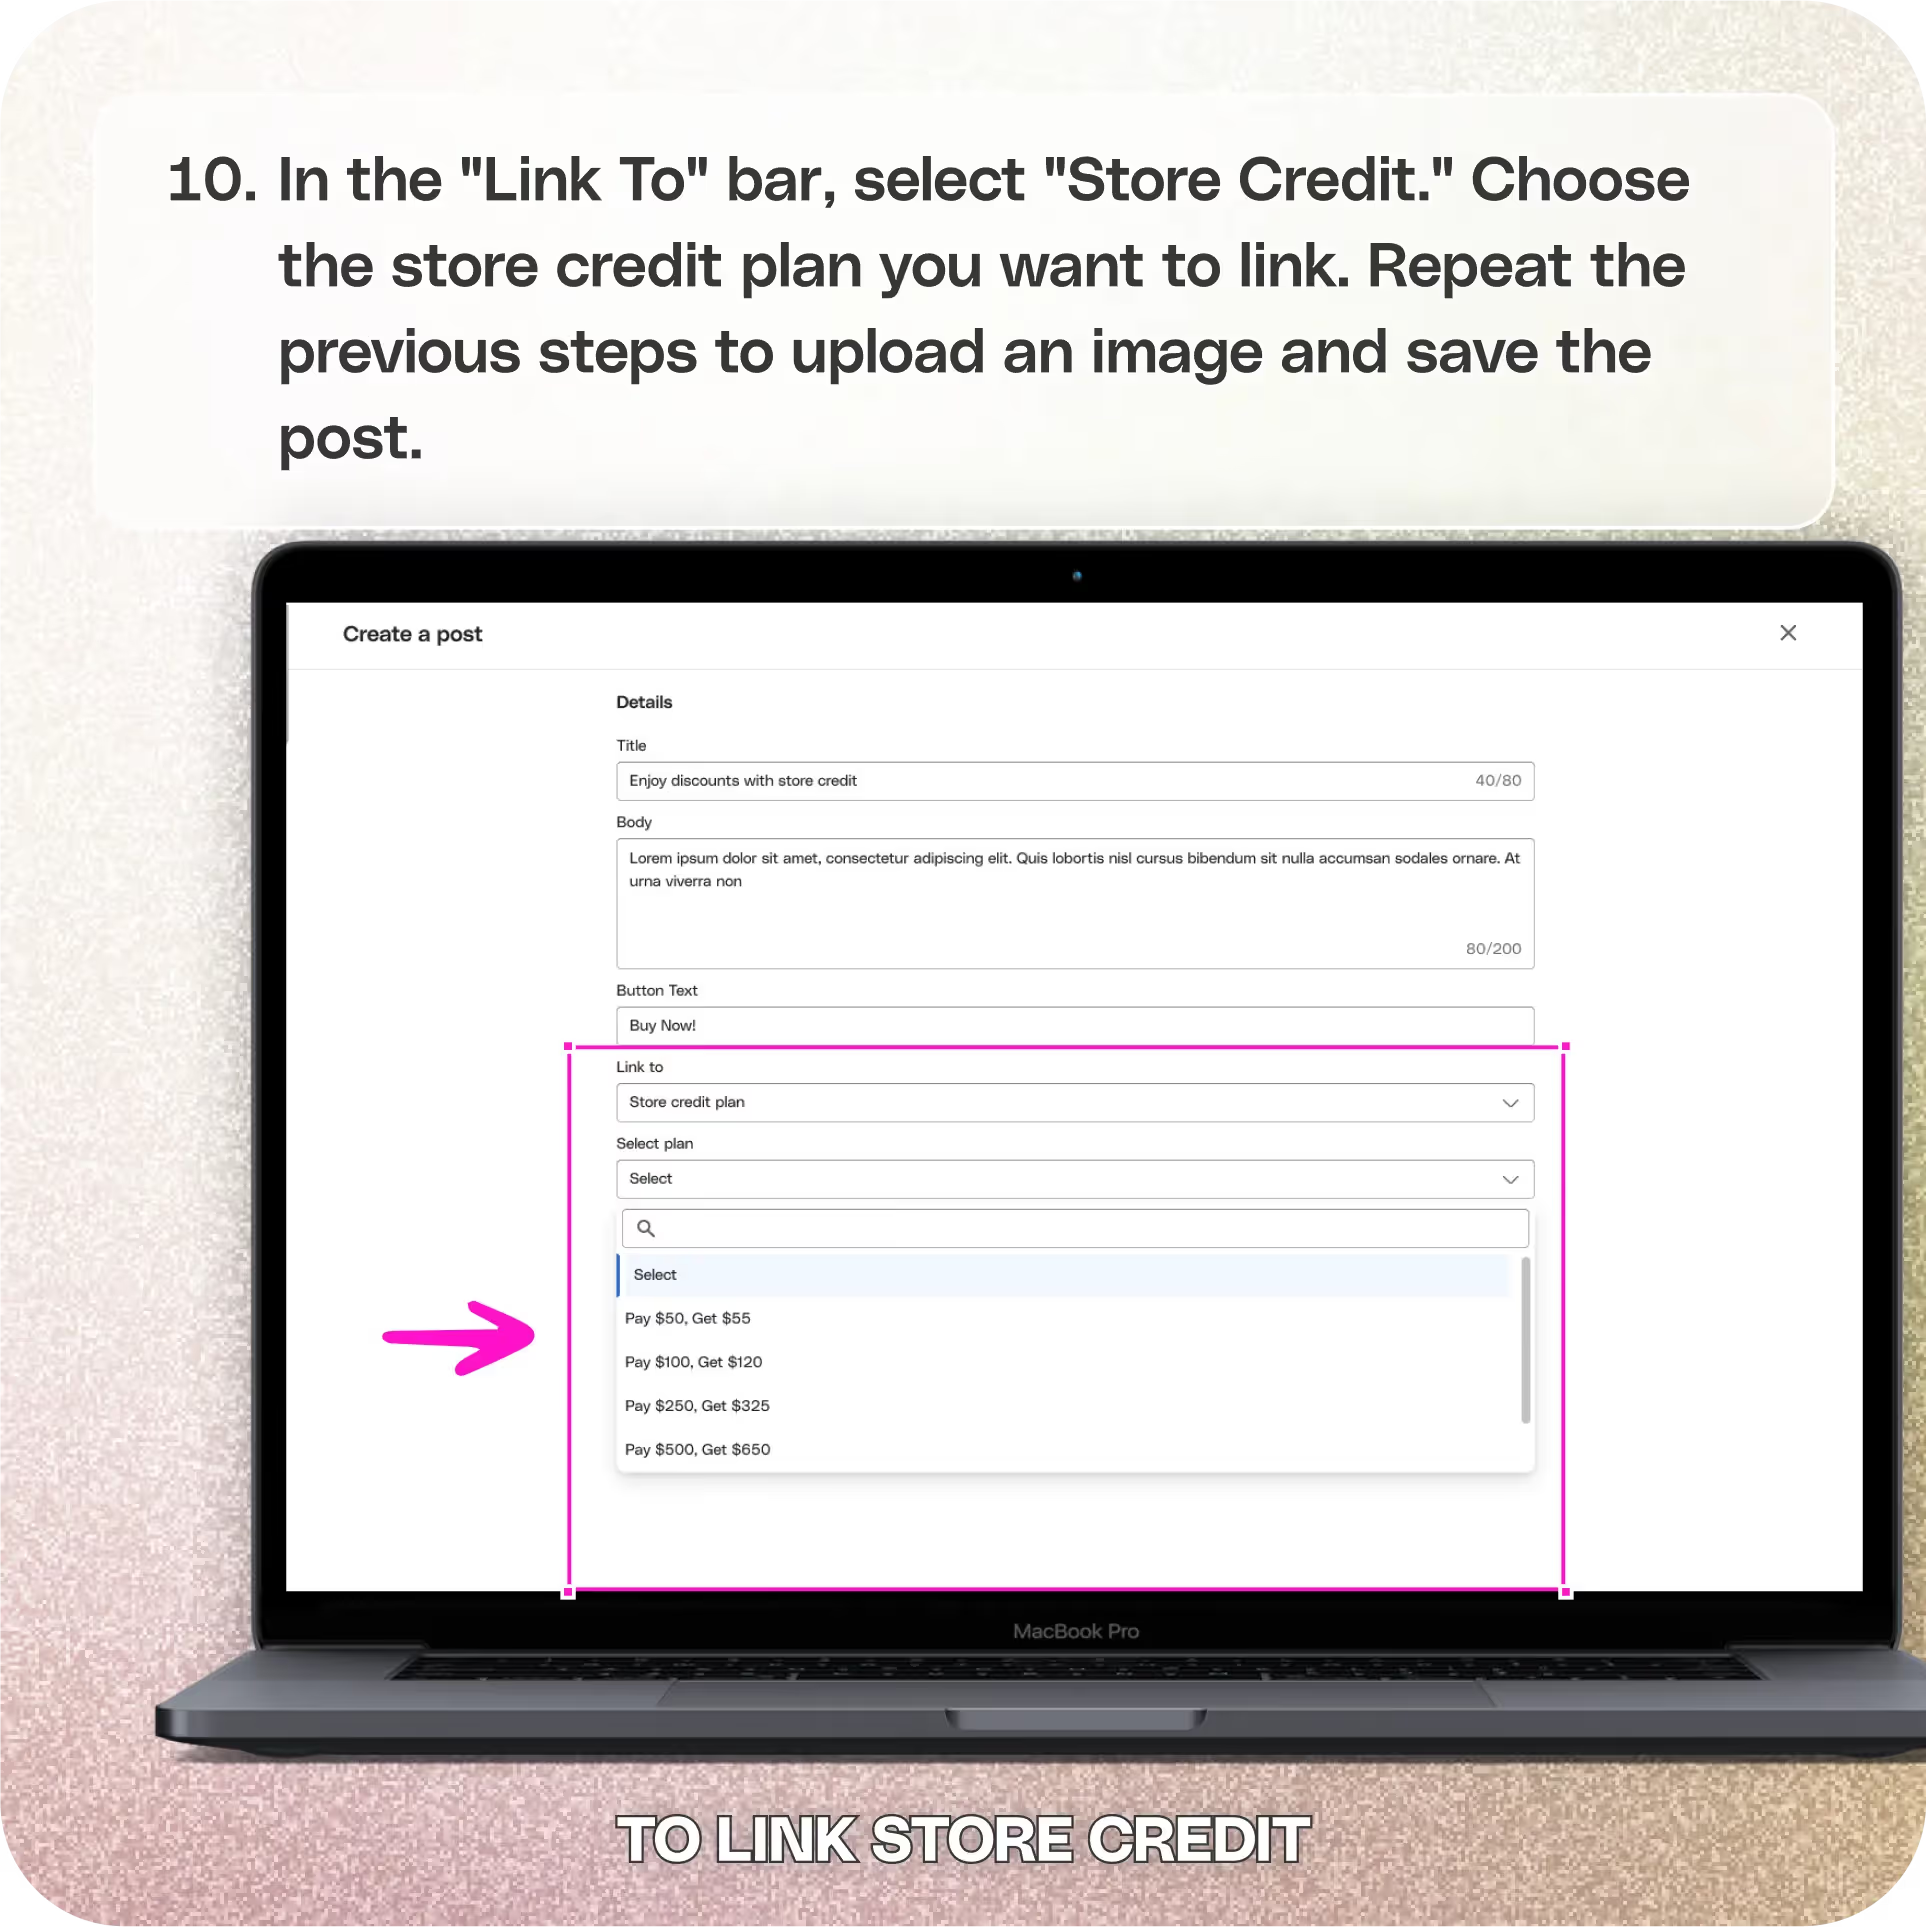
- In the "Link To" bar, select "Store Credit."
- Choose the store credit plan you want to link.
- Repeat the previous steps to upload an image and save the post.
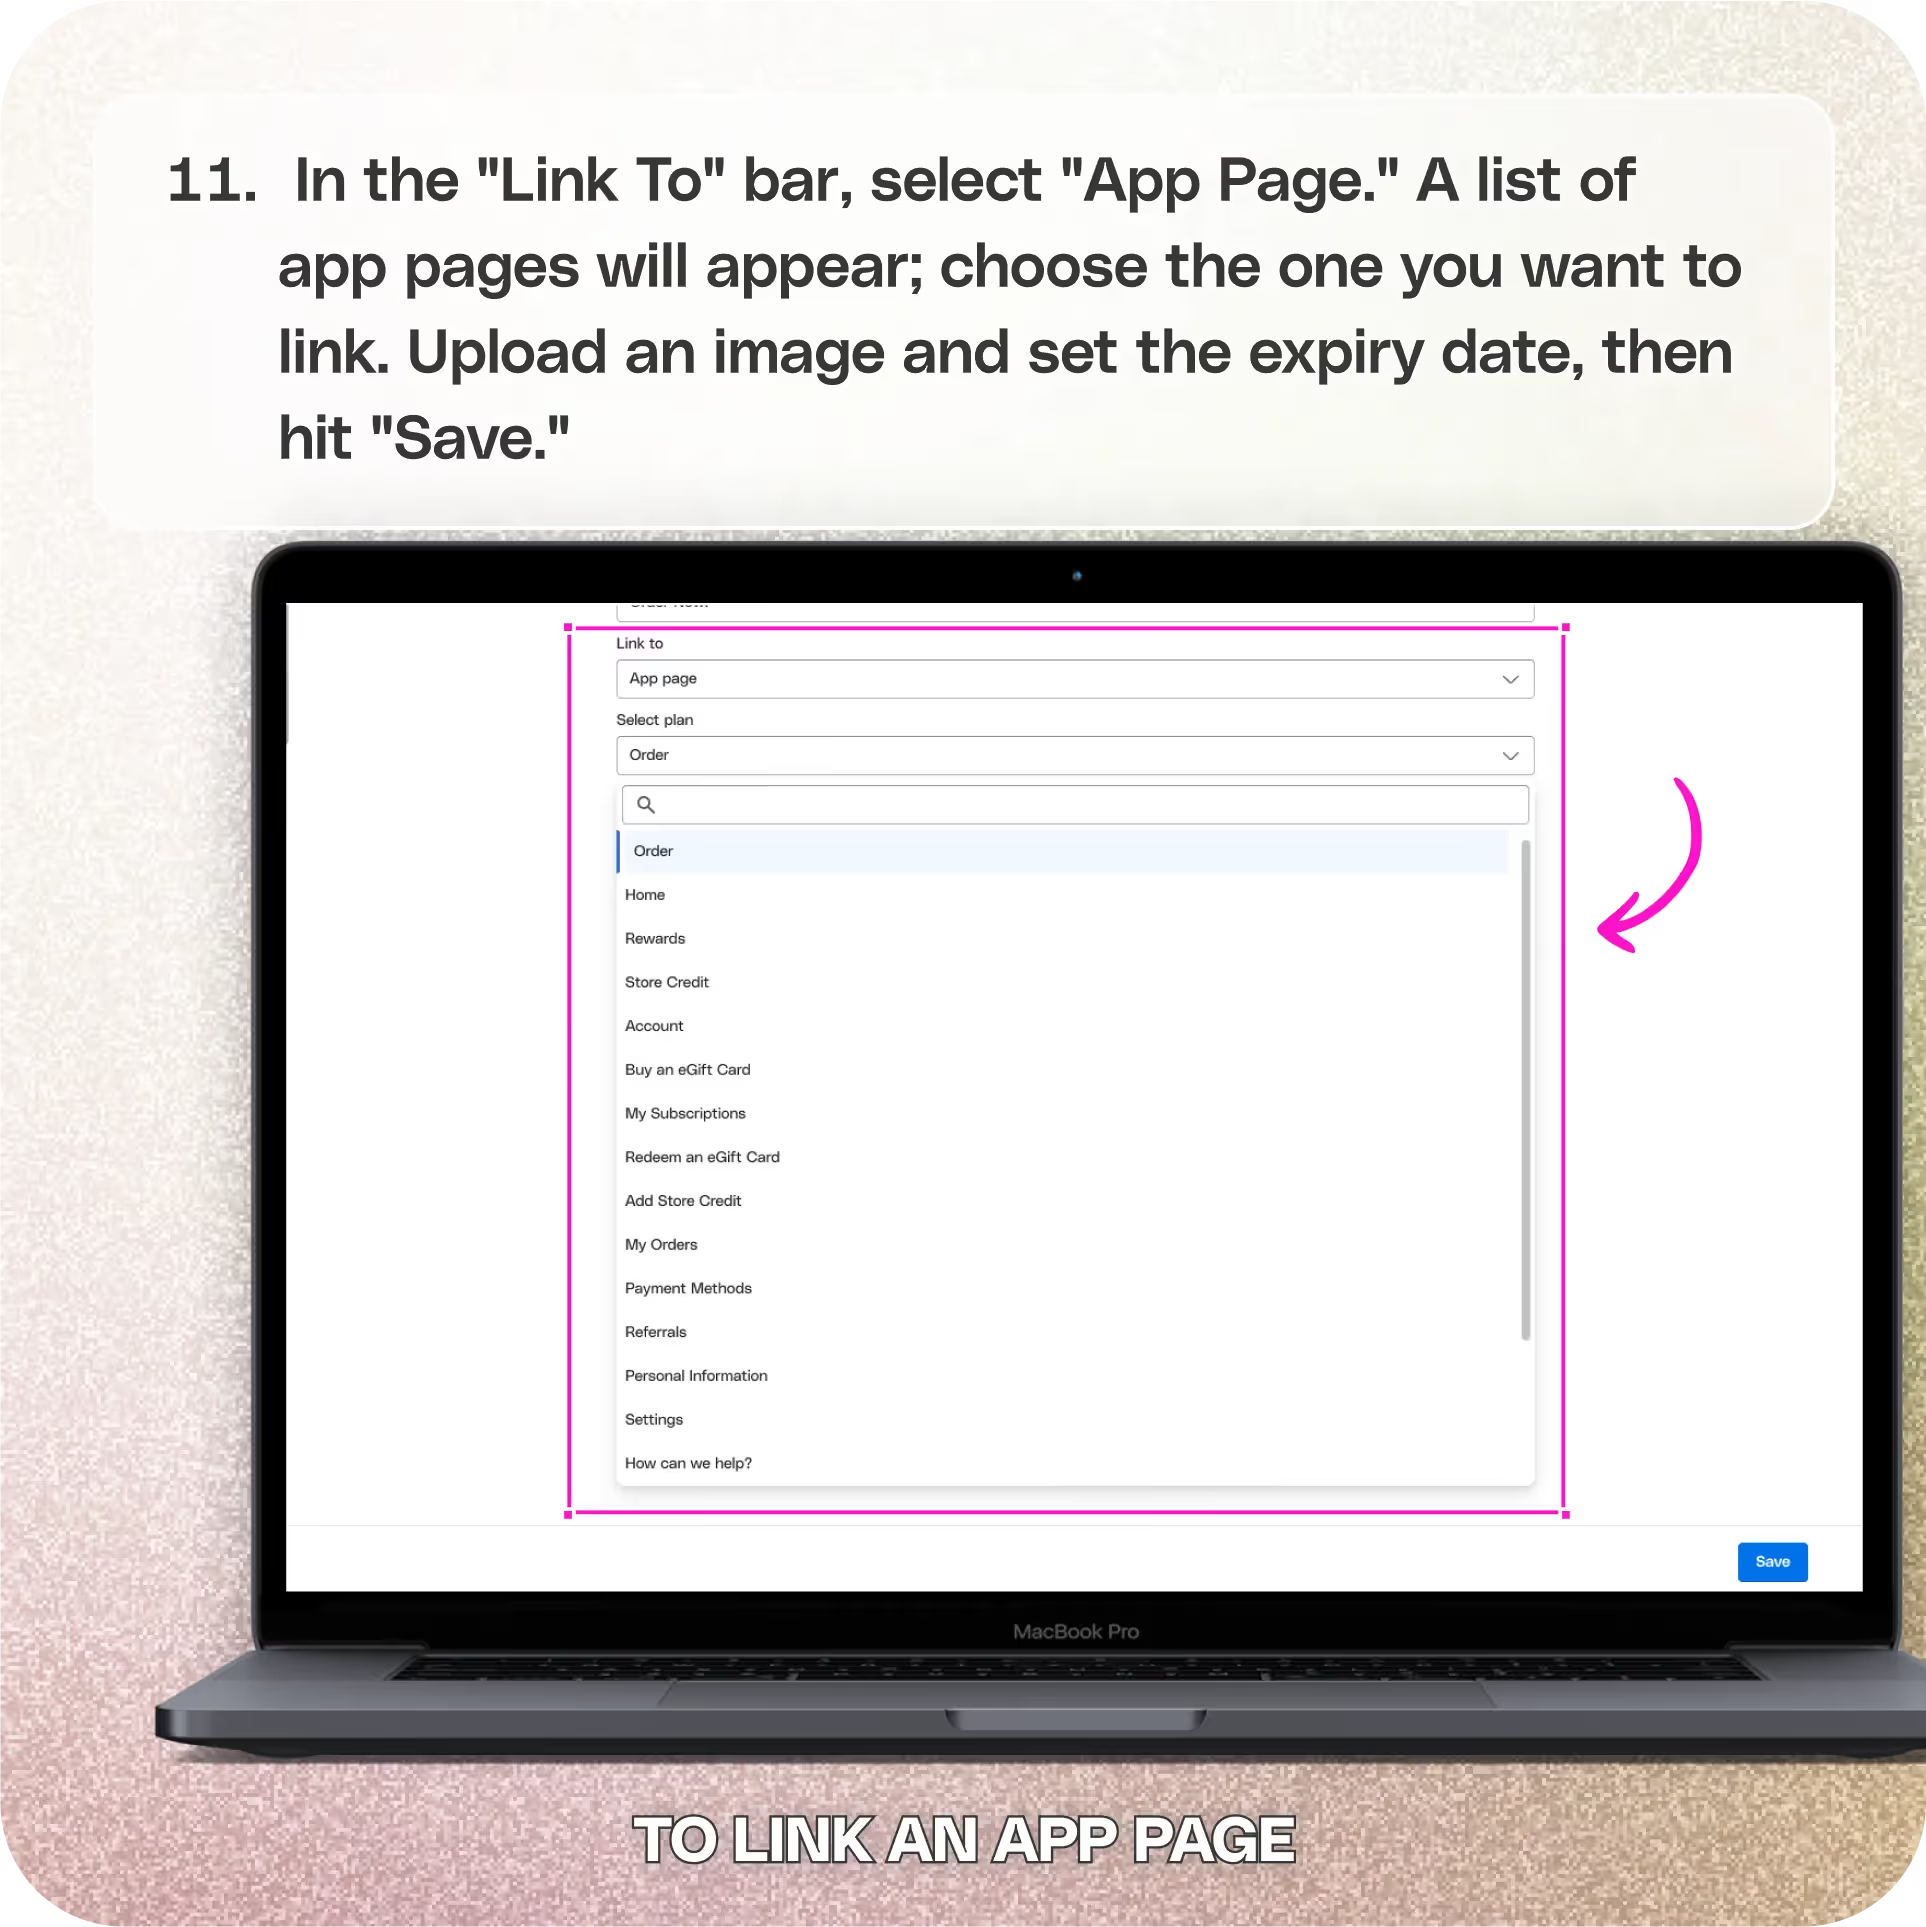
To Link an App Page:
- In the "Link To" bar, select "App Page."
- A list of app pages will appear; choose the one you want to link.
- Upload an image and set the expiry date, then hit "Save."
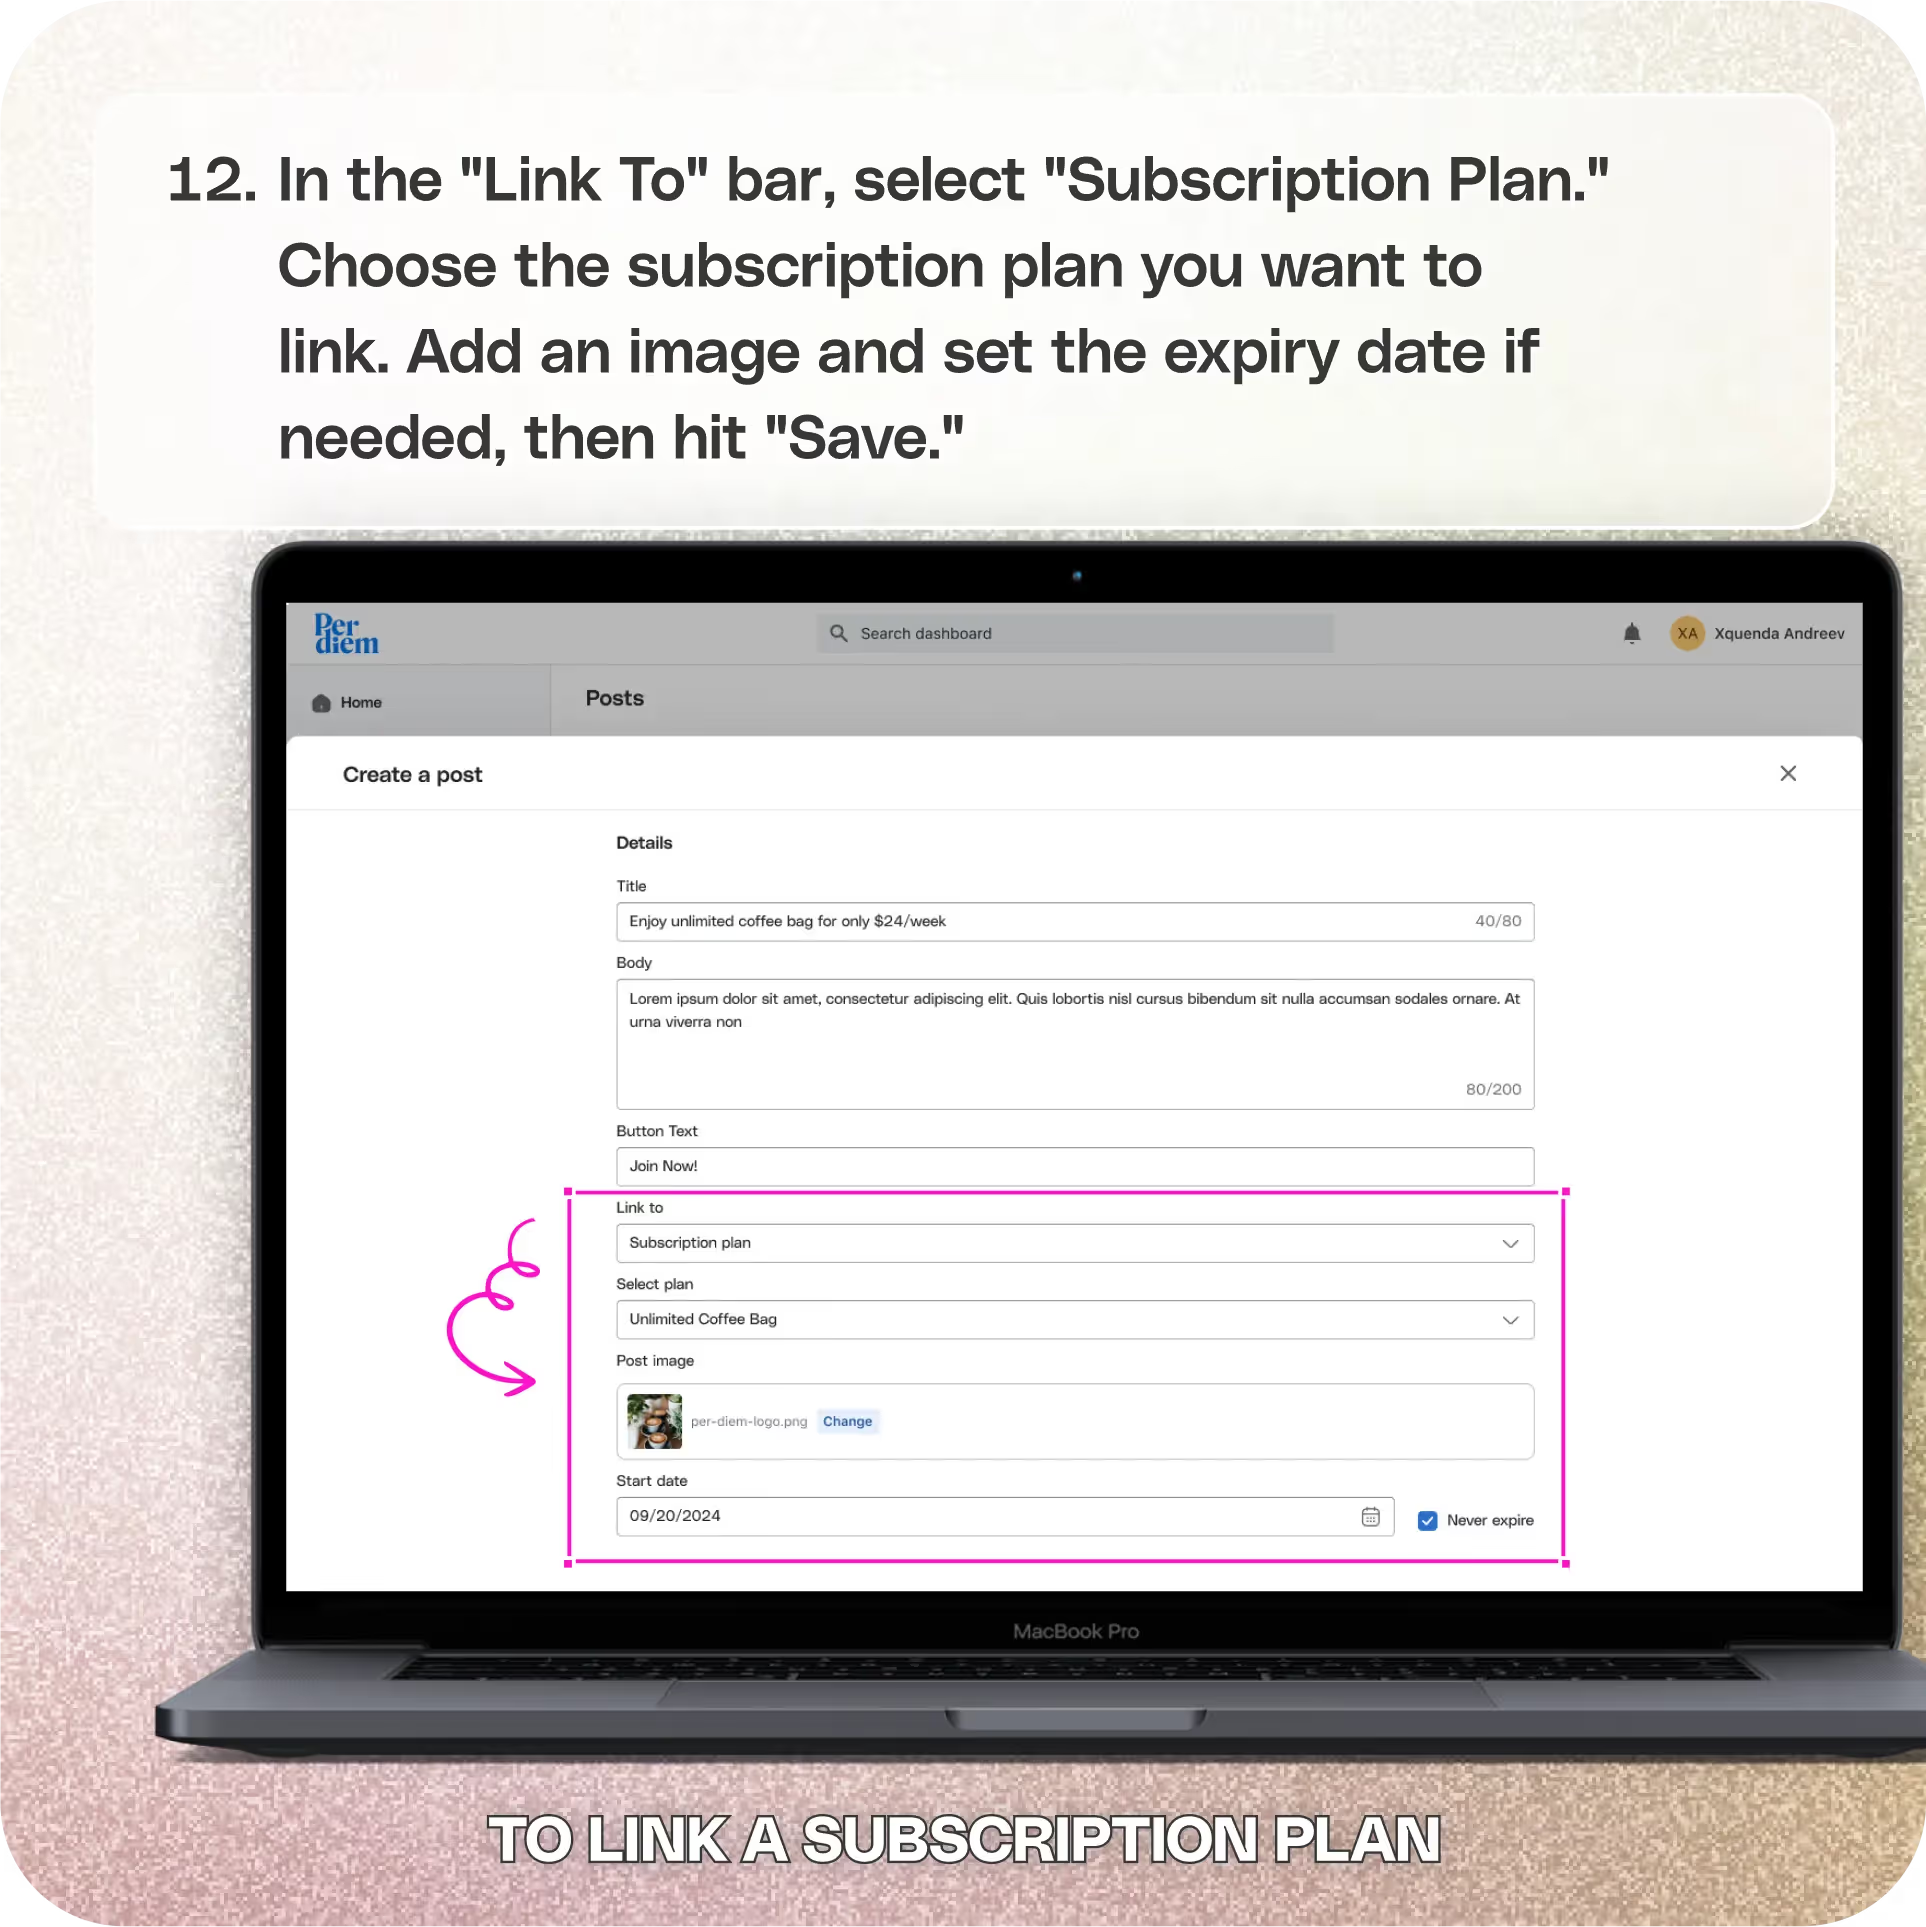
To Link a Subscription Plan:
- In the "Link To" bar, select "Subscription Plan."
- Choose the subscription plan you want to link.
- Add an image and set the expiry date if needed, then hit "Save."
Still require support?
Contact support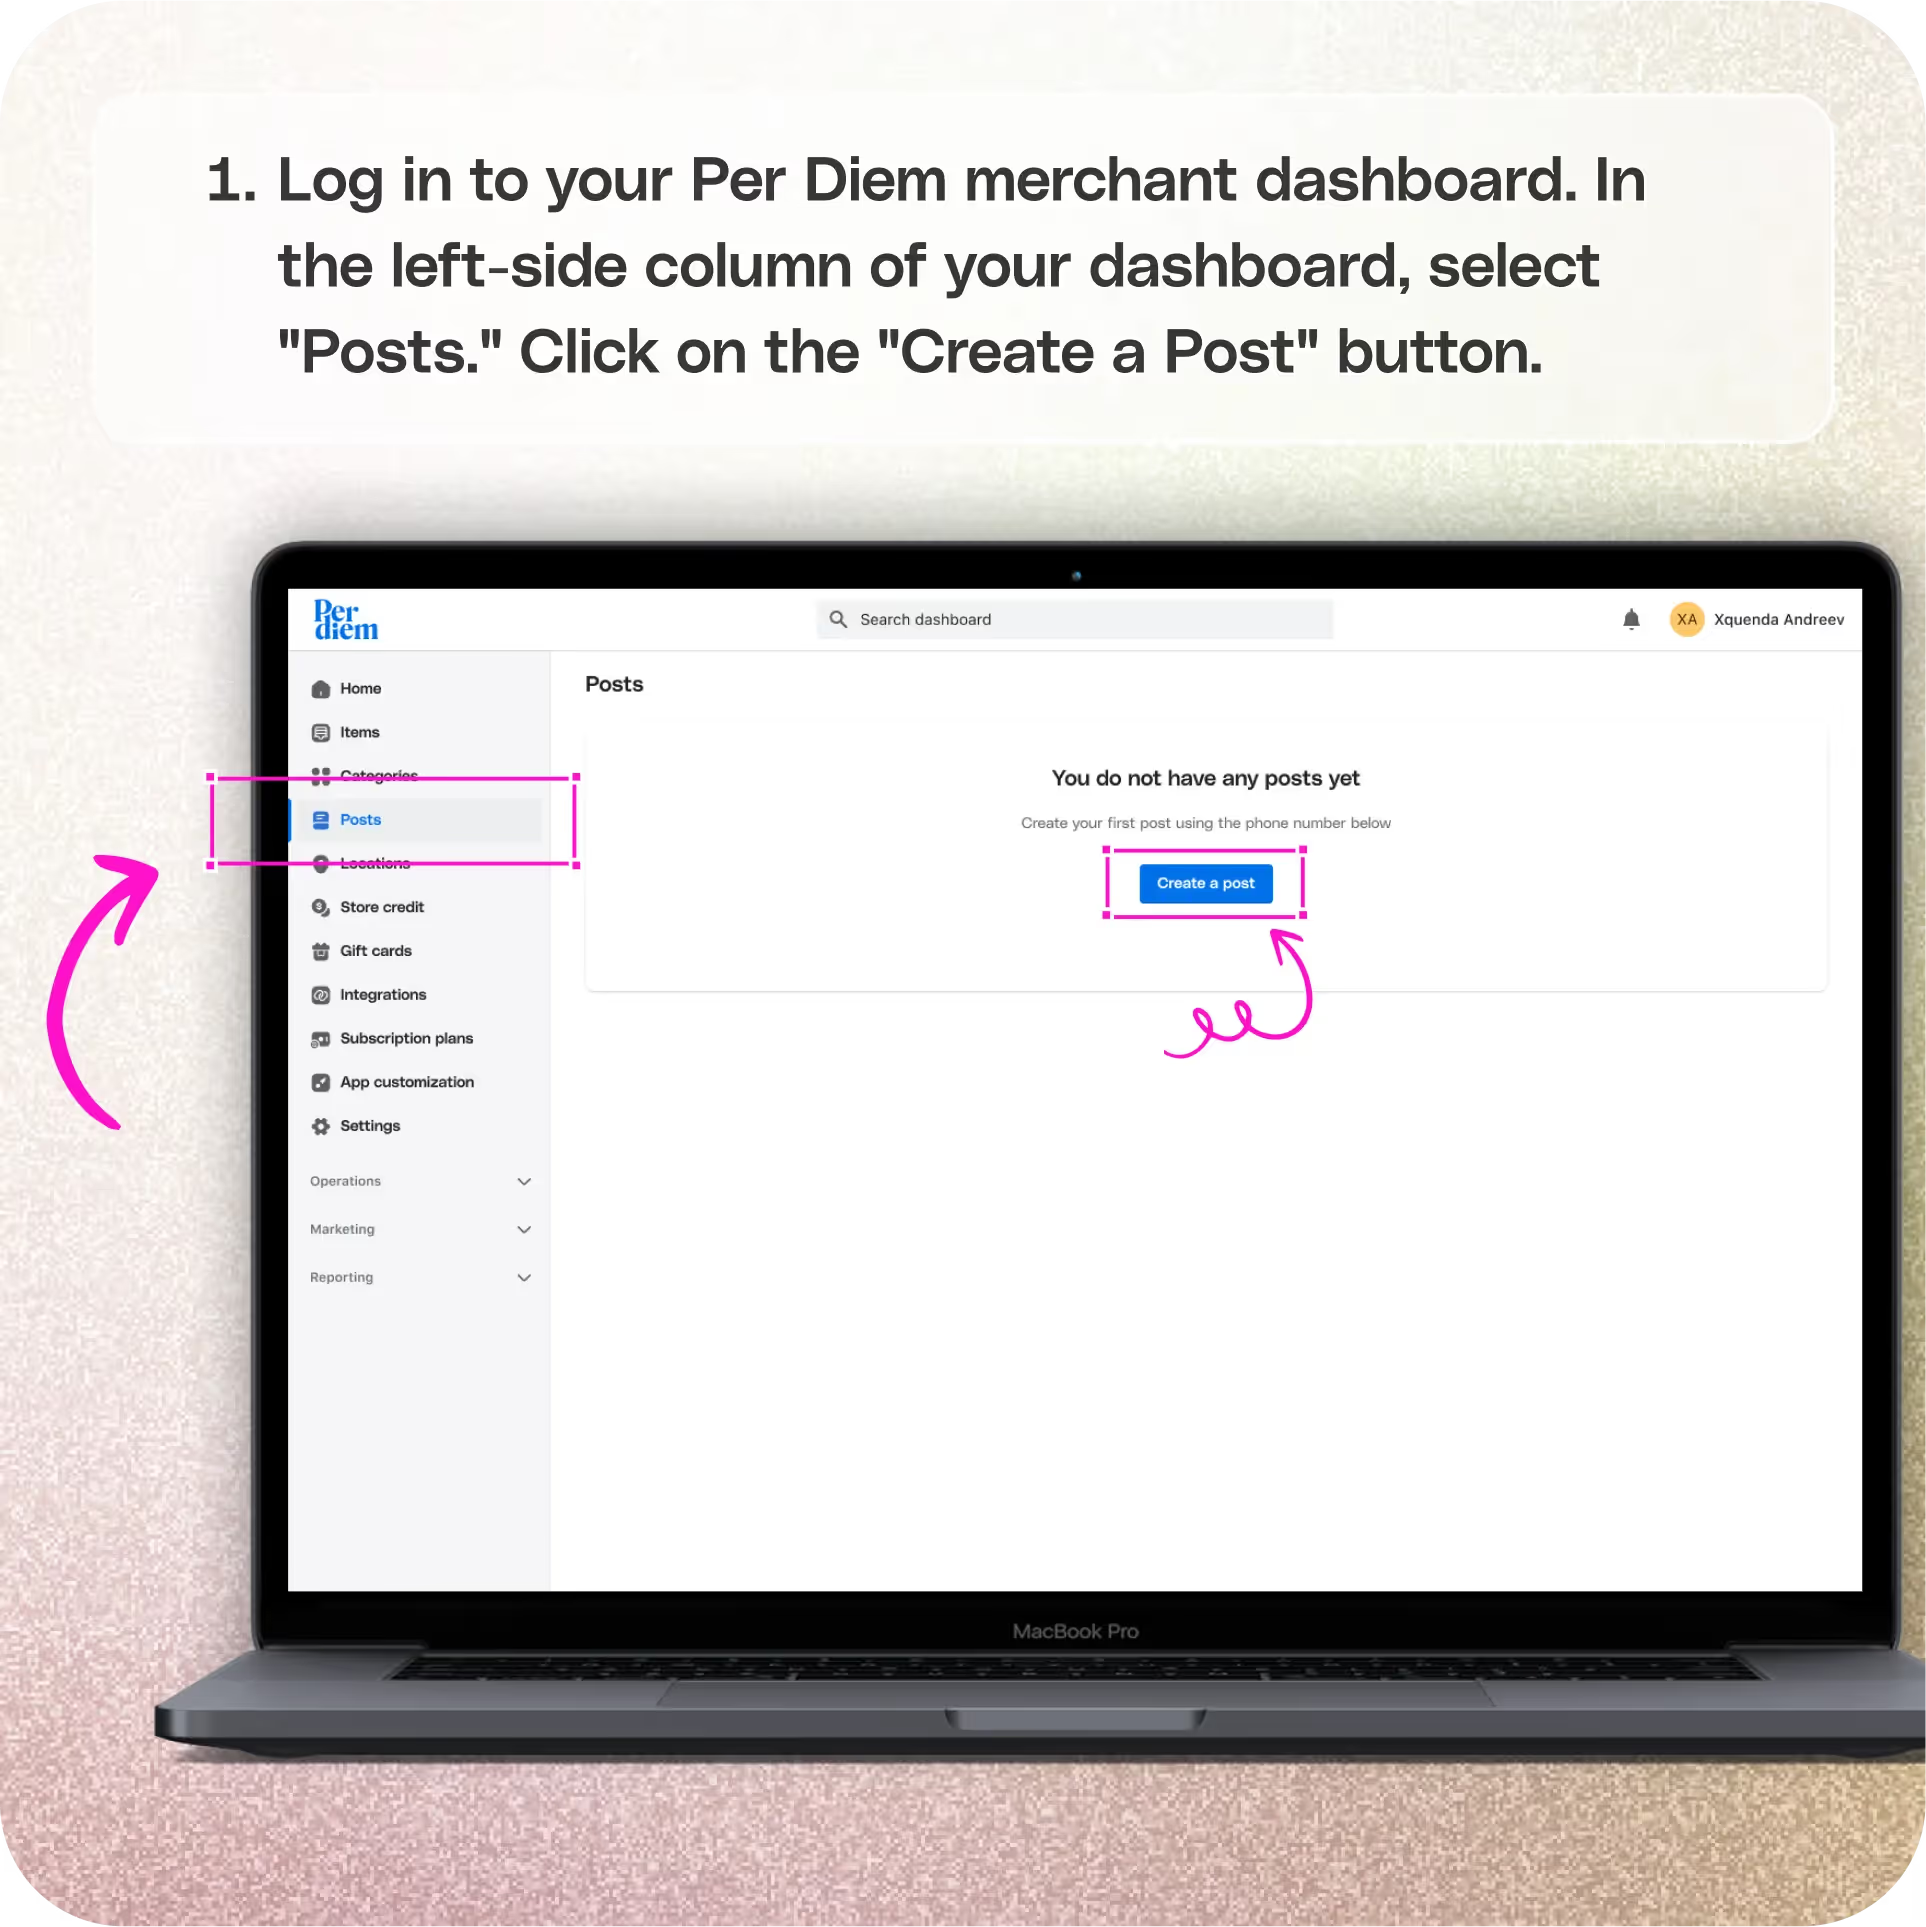
Log in to Your Merchant Dashboard
To get started, first:
Step 1
__Log in to your Per Diem merchant dashboard.
Go to Posts
Step 1
__In the left-side column of your dashboard, select "Posts."
Step 2
__Click on the "Create a Post" button.
Add Post Details
Step 1
__Add a title, description, and button text for your post. The button text will serve as a call-to-action (CTA).
External Post Links
To link an external URL:
Step 1
__In the "Link To" dropdown menu, select "External URL."
Step 2
__Paste the external URL in the provided space.
Upload Post Image
Step 1
__Add your custom image for the post by uploading it from your device.
Edit the Image
Step 1
__If needed, crop and adjust the image to fit the required dimensions.
Add Expiry Date
Step 1
__Set an expiry date for the post, or check the "Never Expire" box if you want the post to be permanent.
Edit/Delete Post
Once the post is created, you can:
Step 1
__Go to the Posts page, where each post has three dots next to it.
Step 2
__Click the dots to edit or delete the post as needed.
Internal URLs
Link an Item Within the App
Step 1
__In the "Link To" bar, select "Item."
Step 2
__Choose the item you want to link.
Step 3
__Add an image and set an expiry date if needed, then hit "Save."
Add Post Image
Step 1
__Repeat the same steps as you did for the external post image to upload and save it.
To Link Store Credit
Step 1
__In the "Link To" bar, select "Store Credit."
Step 2
__Choose the store credit plan you want to link.
Step 3
__Repeat the previous steps to upload an image and save the post.
To Link an App Page
Step 1
__In the "Link To" bar, select "App Page."
Step 2
__A list of app pages will appear; choose the one you want to link.
Step 3
__Upload an image and set the expiry date, then hit "Save."
To Link a Subscription Plan
Step 1
__In the "Link To" bar, select "Subscription Plan."
Step 2
__Choose the subscription plan you want to link.
Step 3
__Add an image and set the expiry date if needed, then hit "Save."
Still have questions?Contact us
Ask anything or just say hi