
.svg)

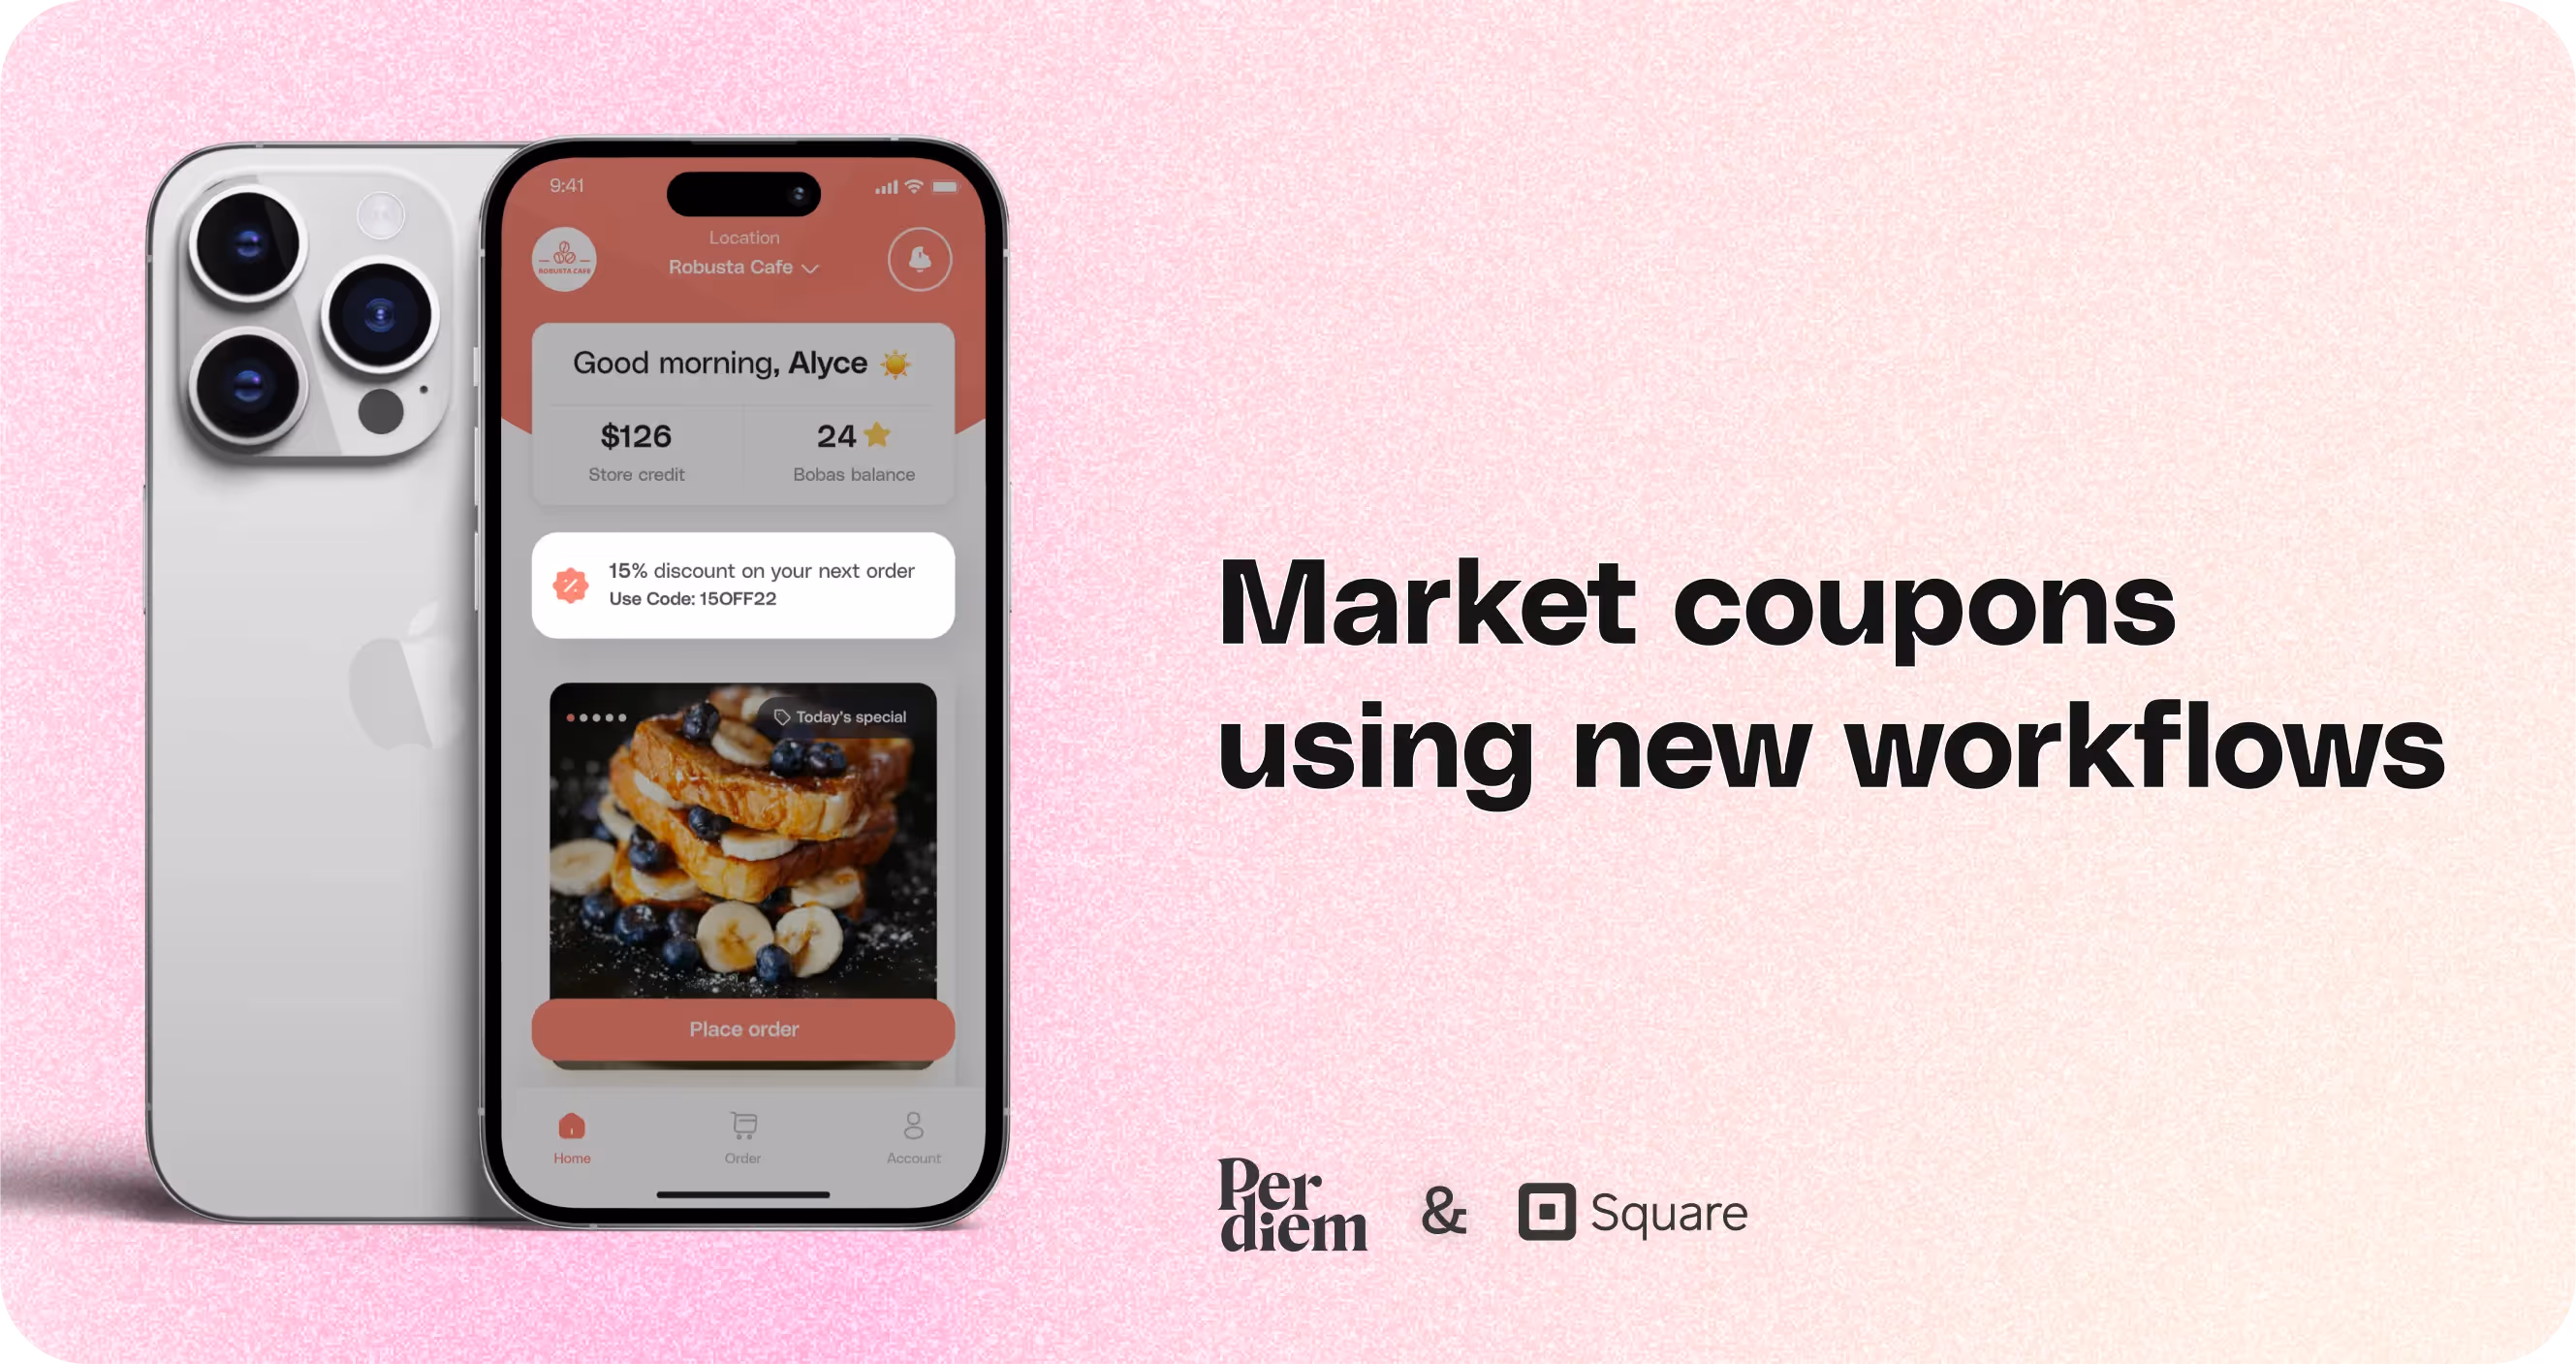
Market coupons using new workflows
Create, promote, and schedule coupons using Per Diem's streamlined workflow feature from your merchant dashboard.
Instructions
- Log in to your Per Diem merchant dashboard.
- From the left menu bar, select Marketing.
- In the dropdown, choose Coupons.
- On the Coupons page, click the Create a Coupon button.
- This will start the process of setting up your new offer.
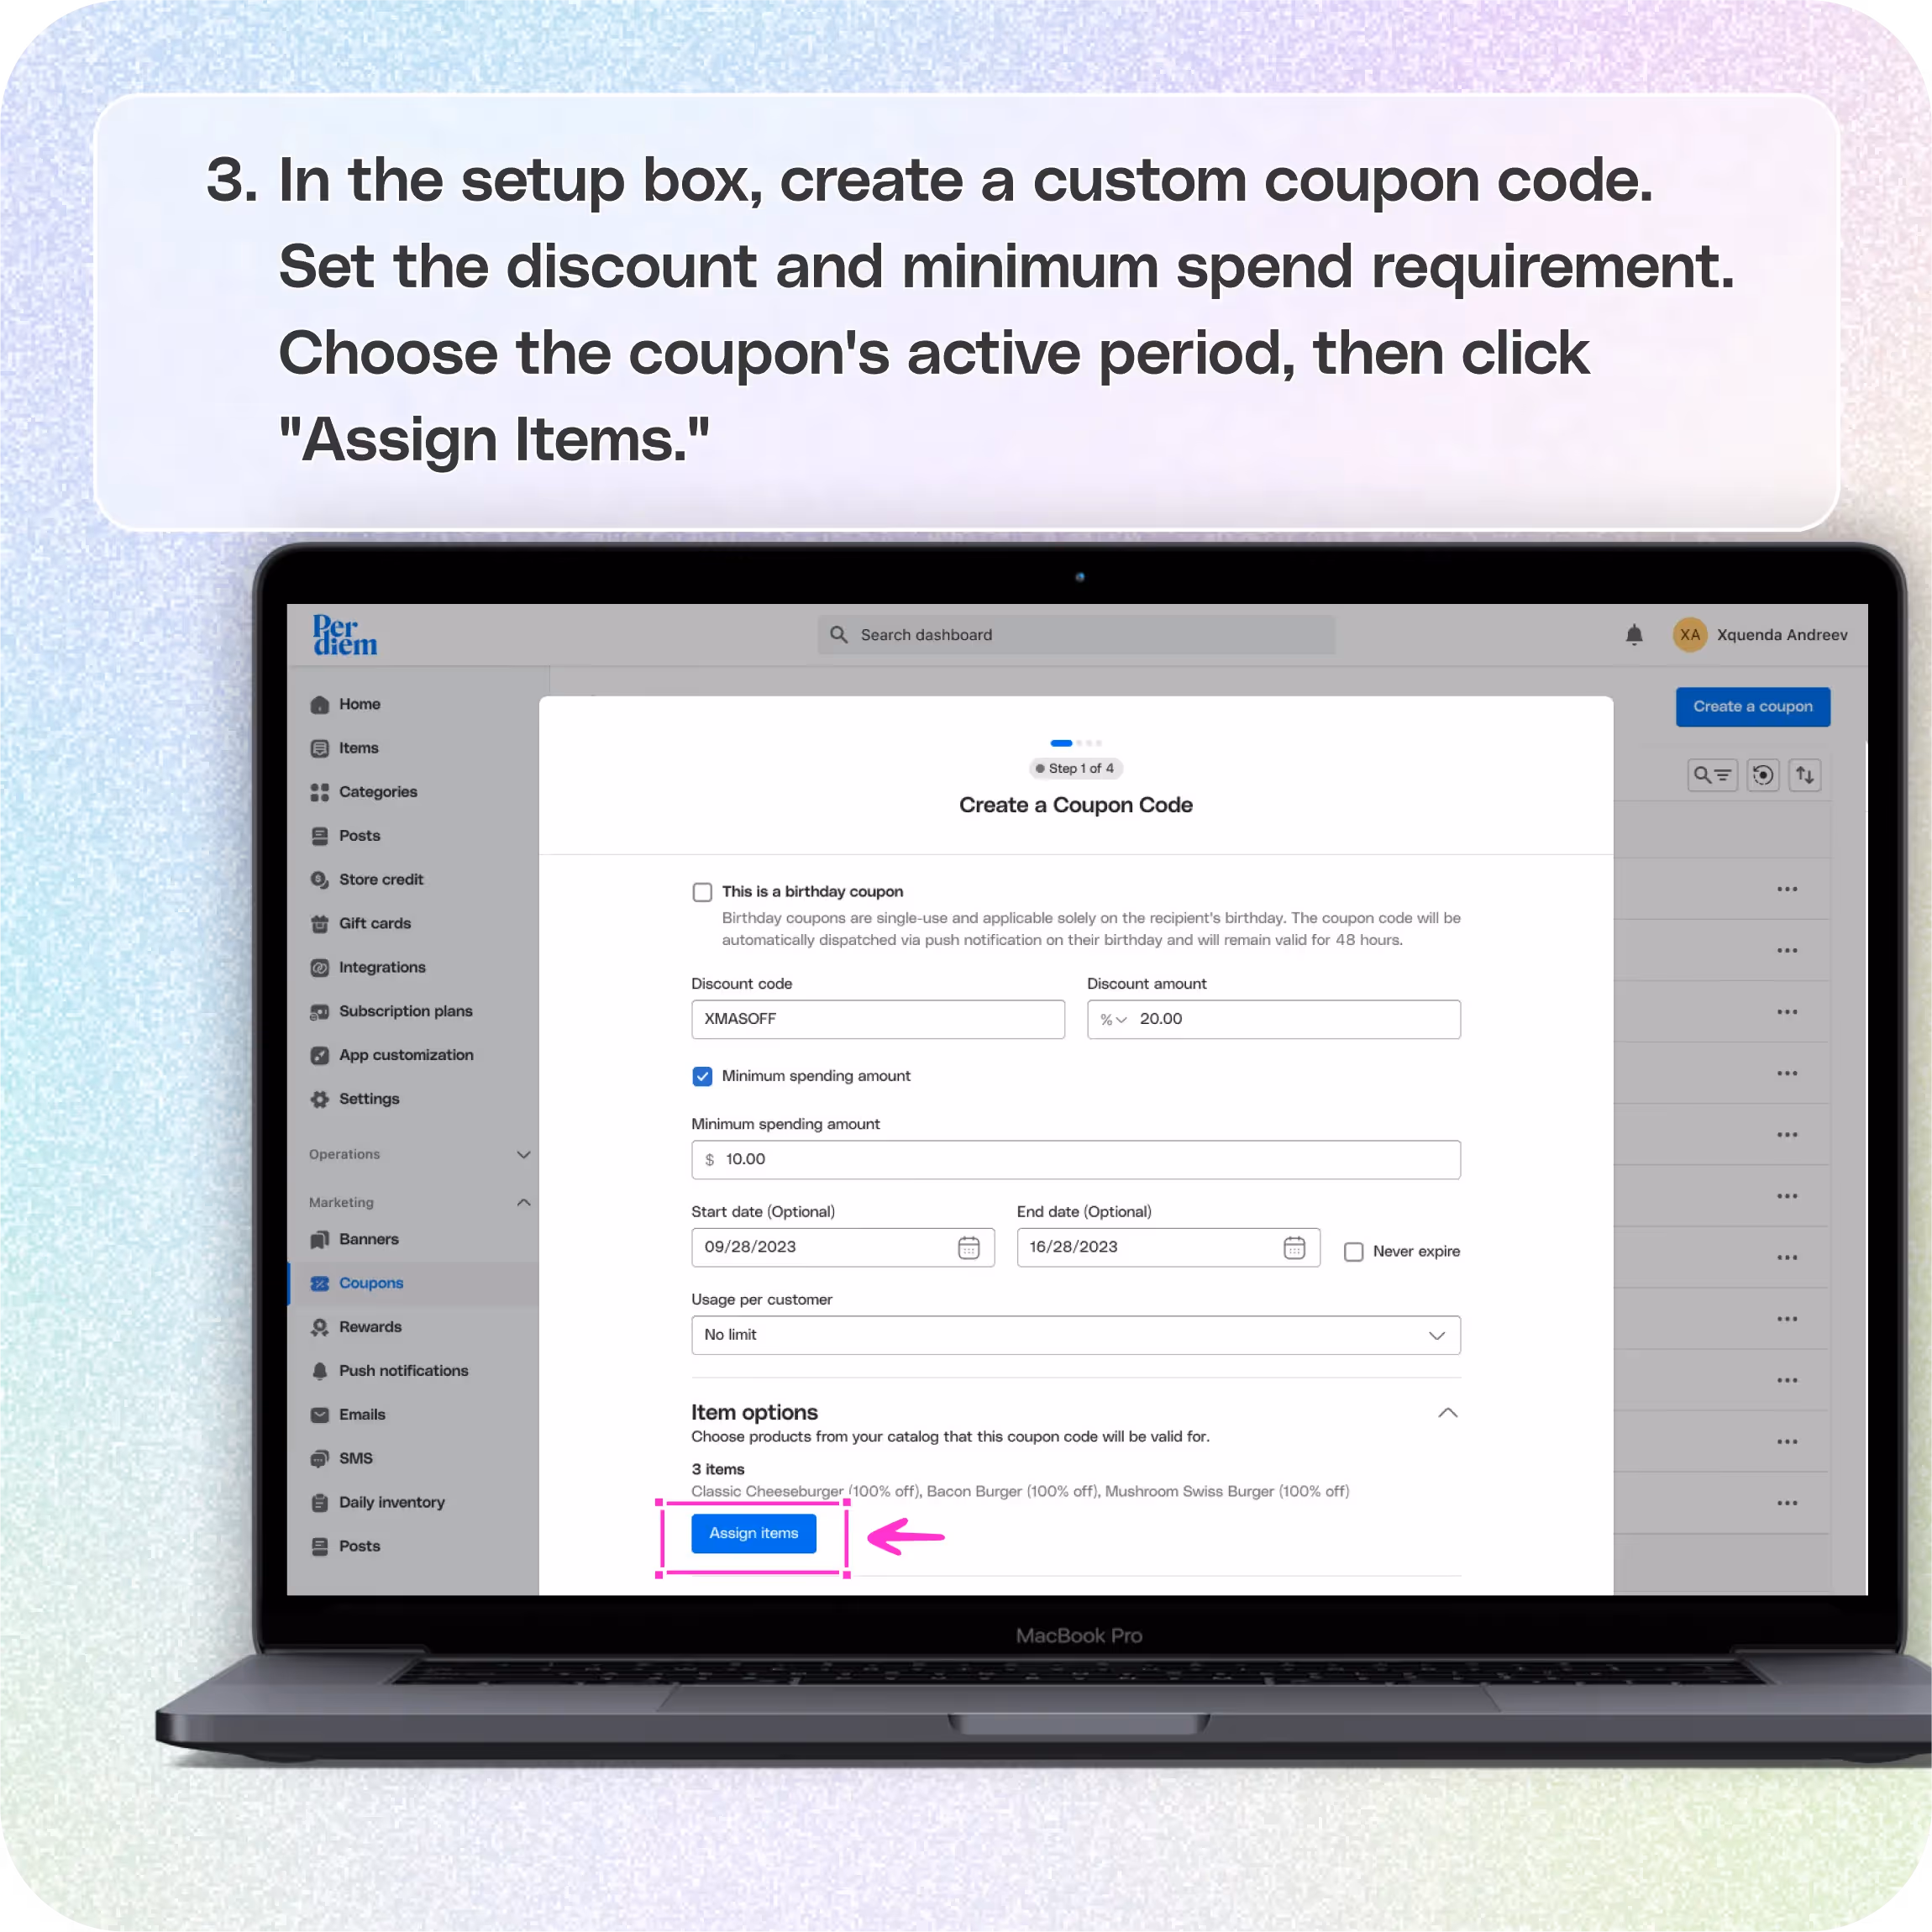
- In the setup box, create a custom coupon code.
- Set the discount amount and the minimum spend requirement for the coupon to be valid.
- Choose the period during which the coupon is active.
- Click the Assign Items button.
- Select the items to which the coupon will apply.
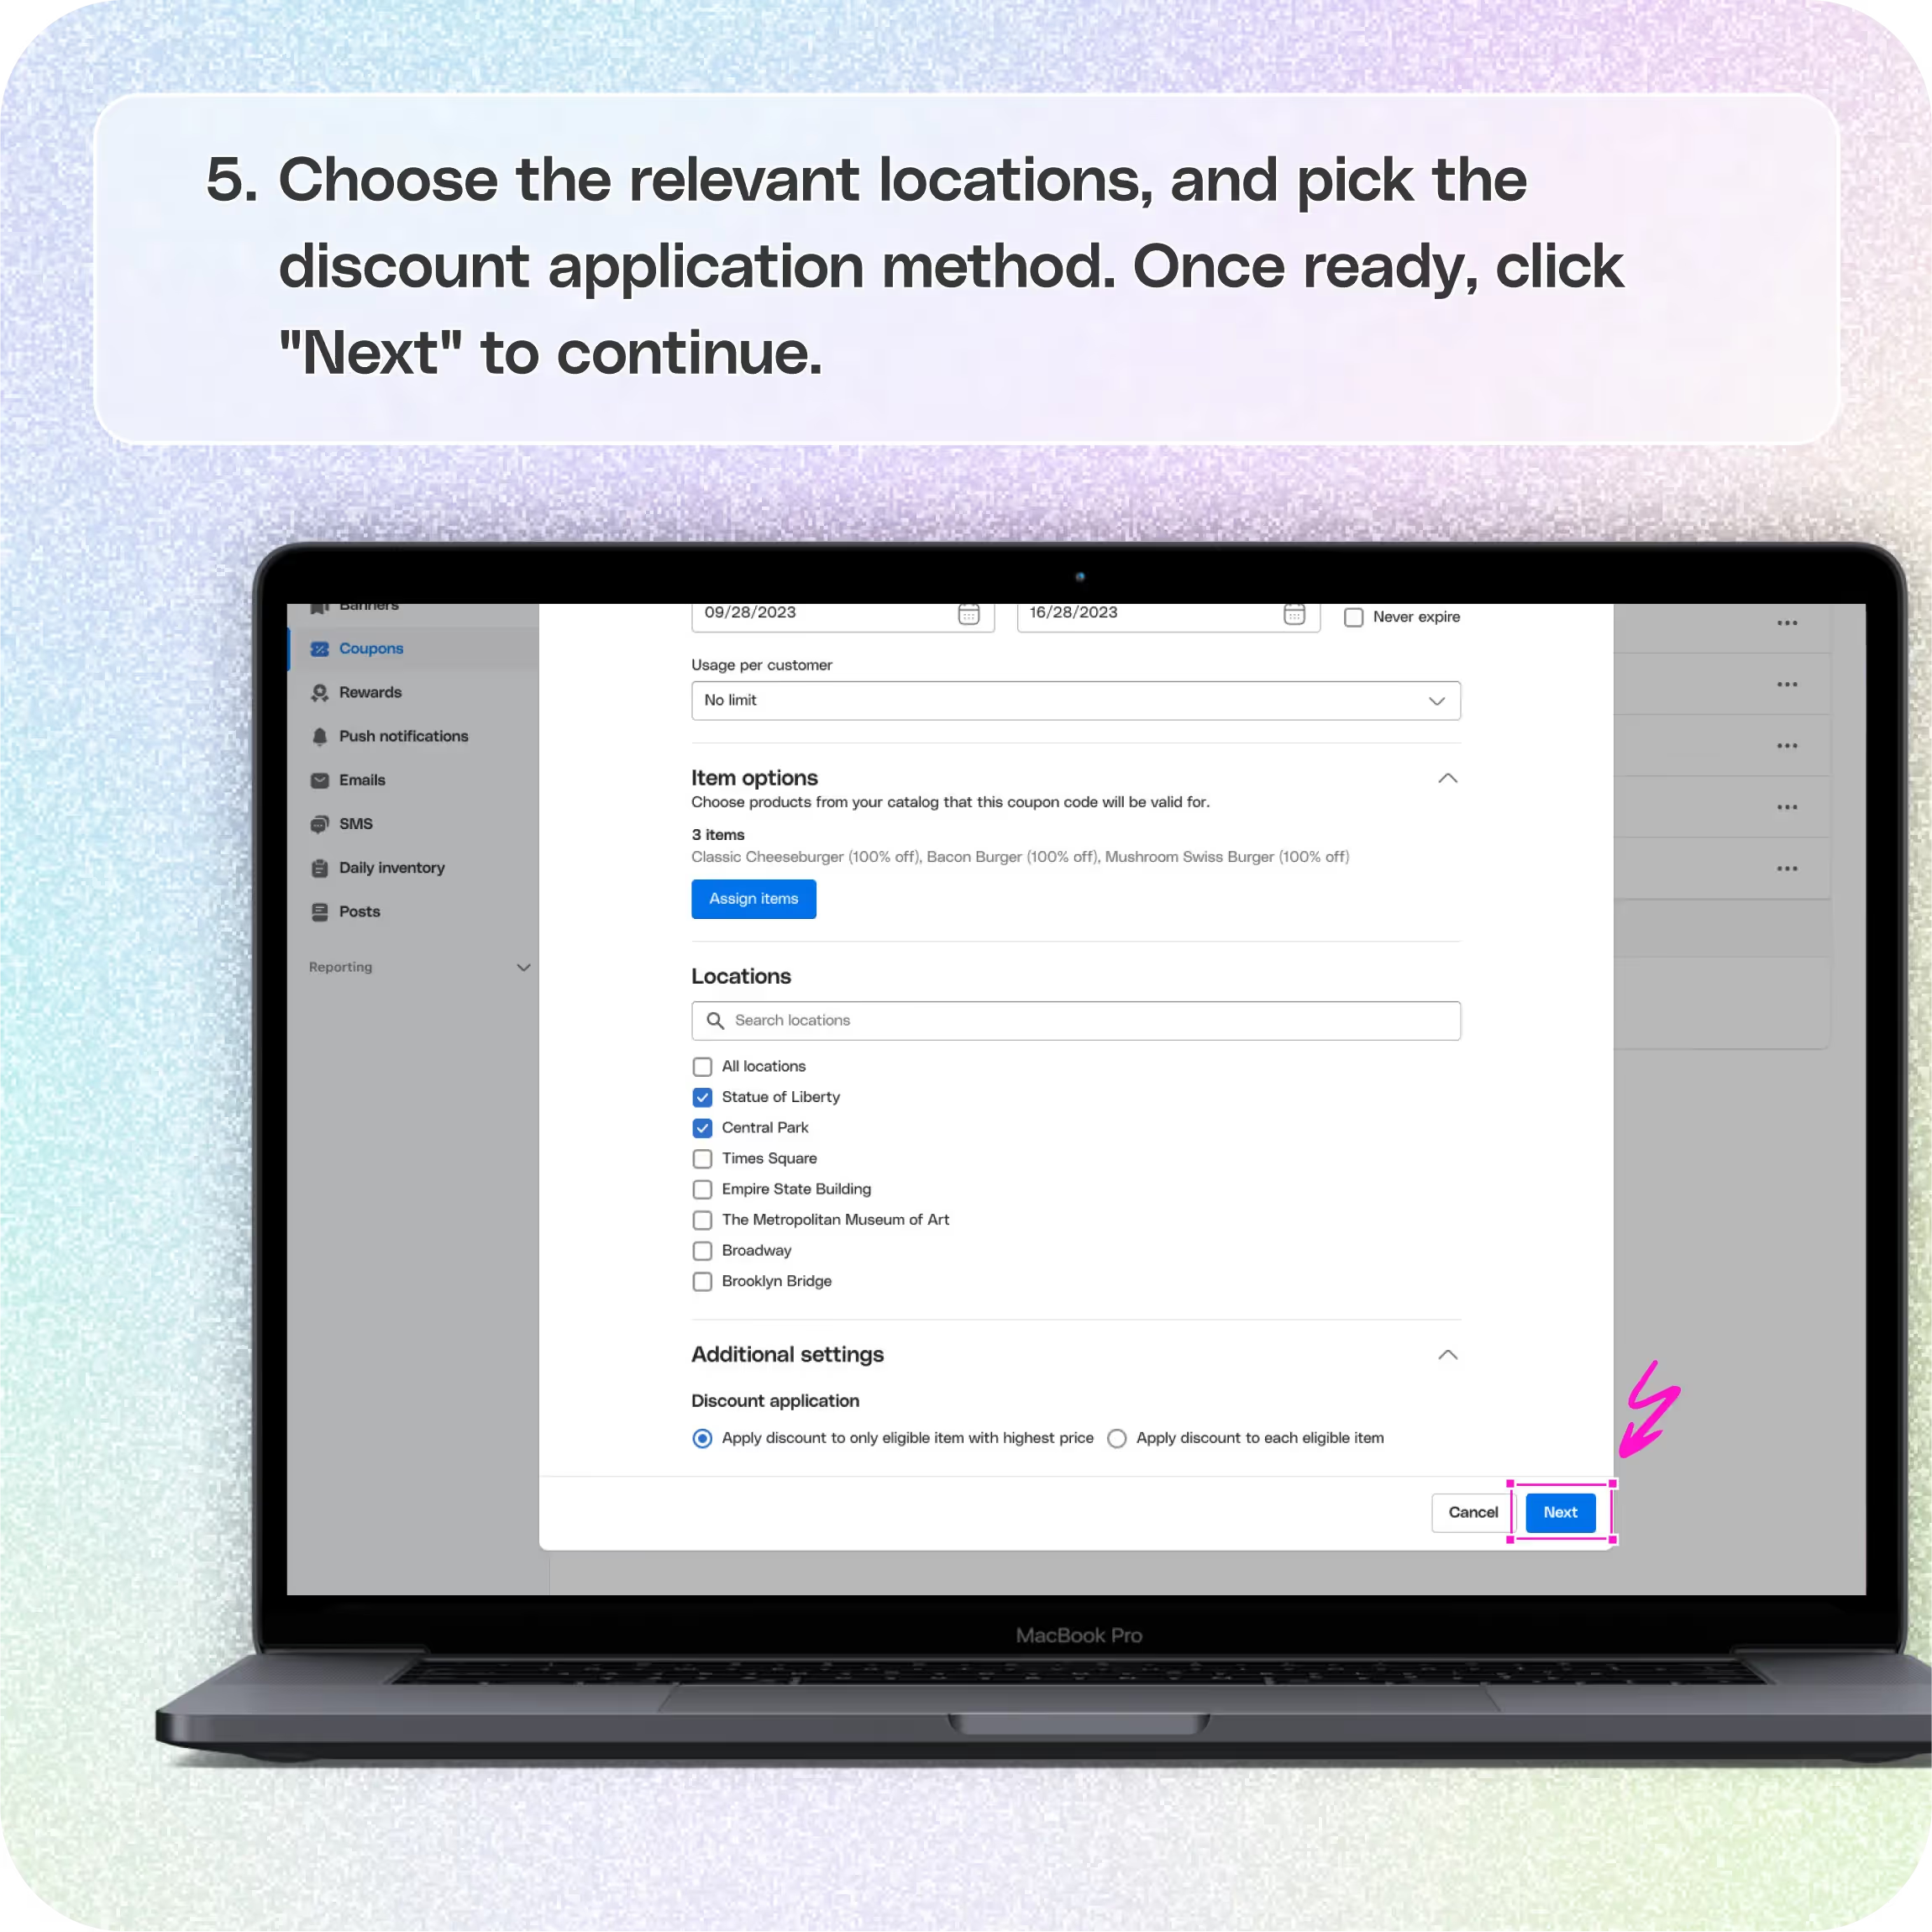
- Choose the relevant locations and the discount application method.
- Once done, click Next to proceed to the next step.
- Add a title and a short description of the coupon.
- Add the button text that will serve as the call to action.
- Choose the link to that specific item or coupon, and add an image.
- Set the display date and hit Next to continue.
- Write a short promotional copy for the homepage banner about the coupon.
- Choose the locations where the banner will be displayed.
- Set the start and end date for the banner to be shown.
- You can upload an image to accompany the banner or proceed without an image.
- Click Next to proceed to the next step.
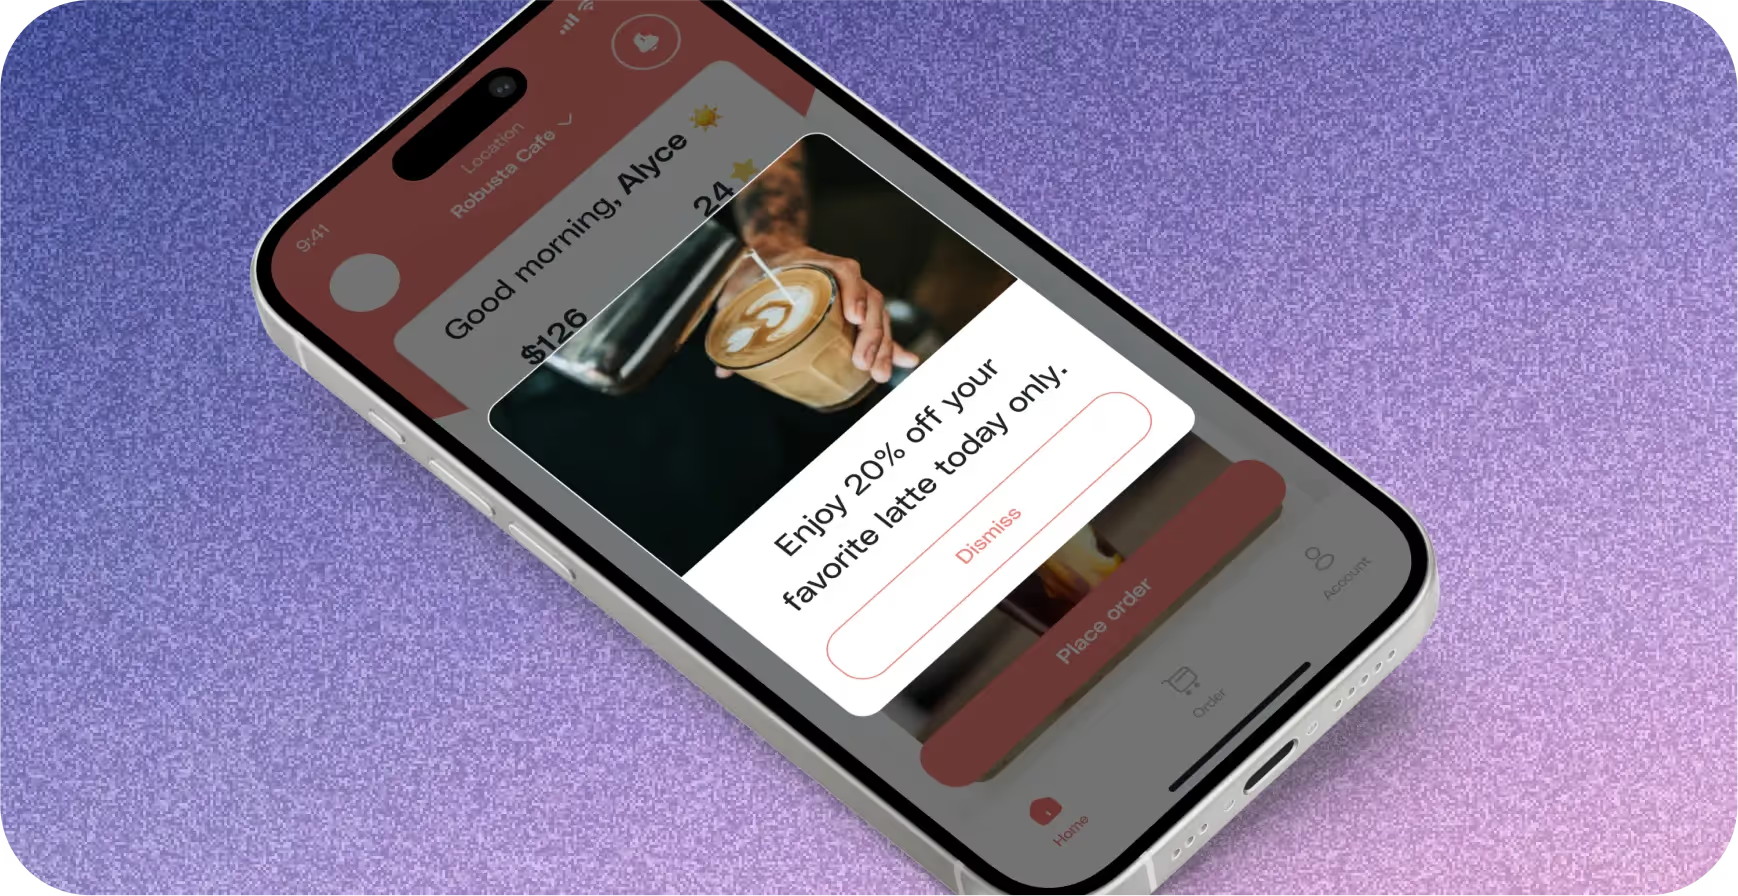
- Write a message promoting the coupon to be sent via push notification.
- Choose the target audience for this notification.
- Set the send time and finalize the message.
- Click Save to complete the setup.
Still require support?
Contact support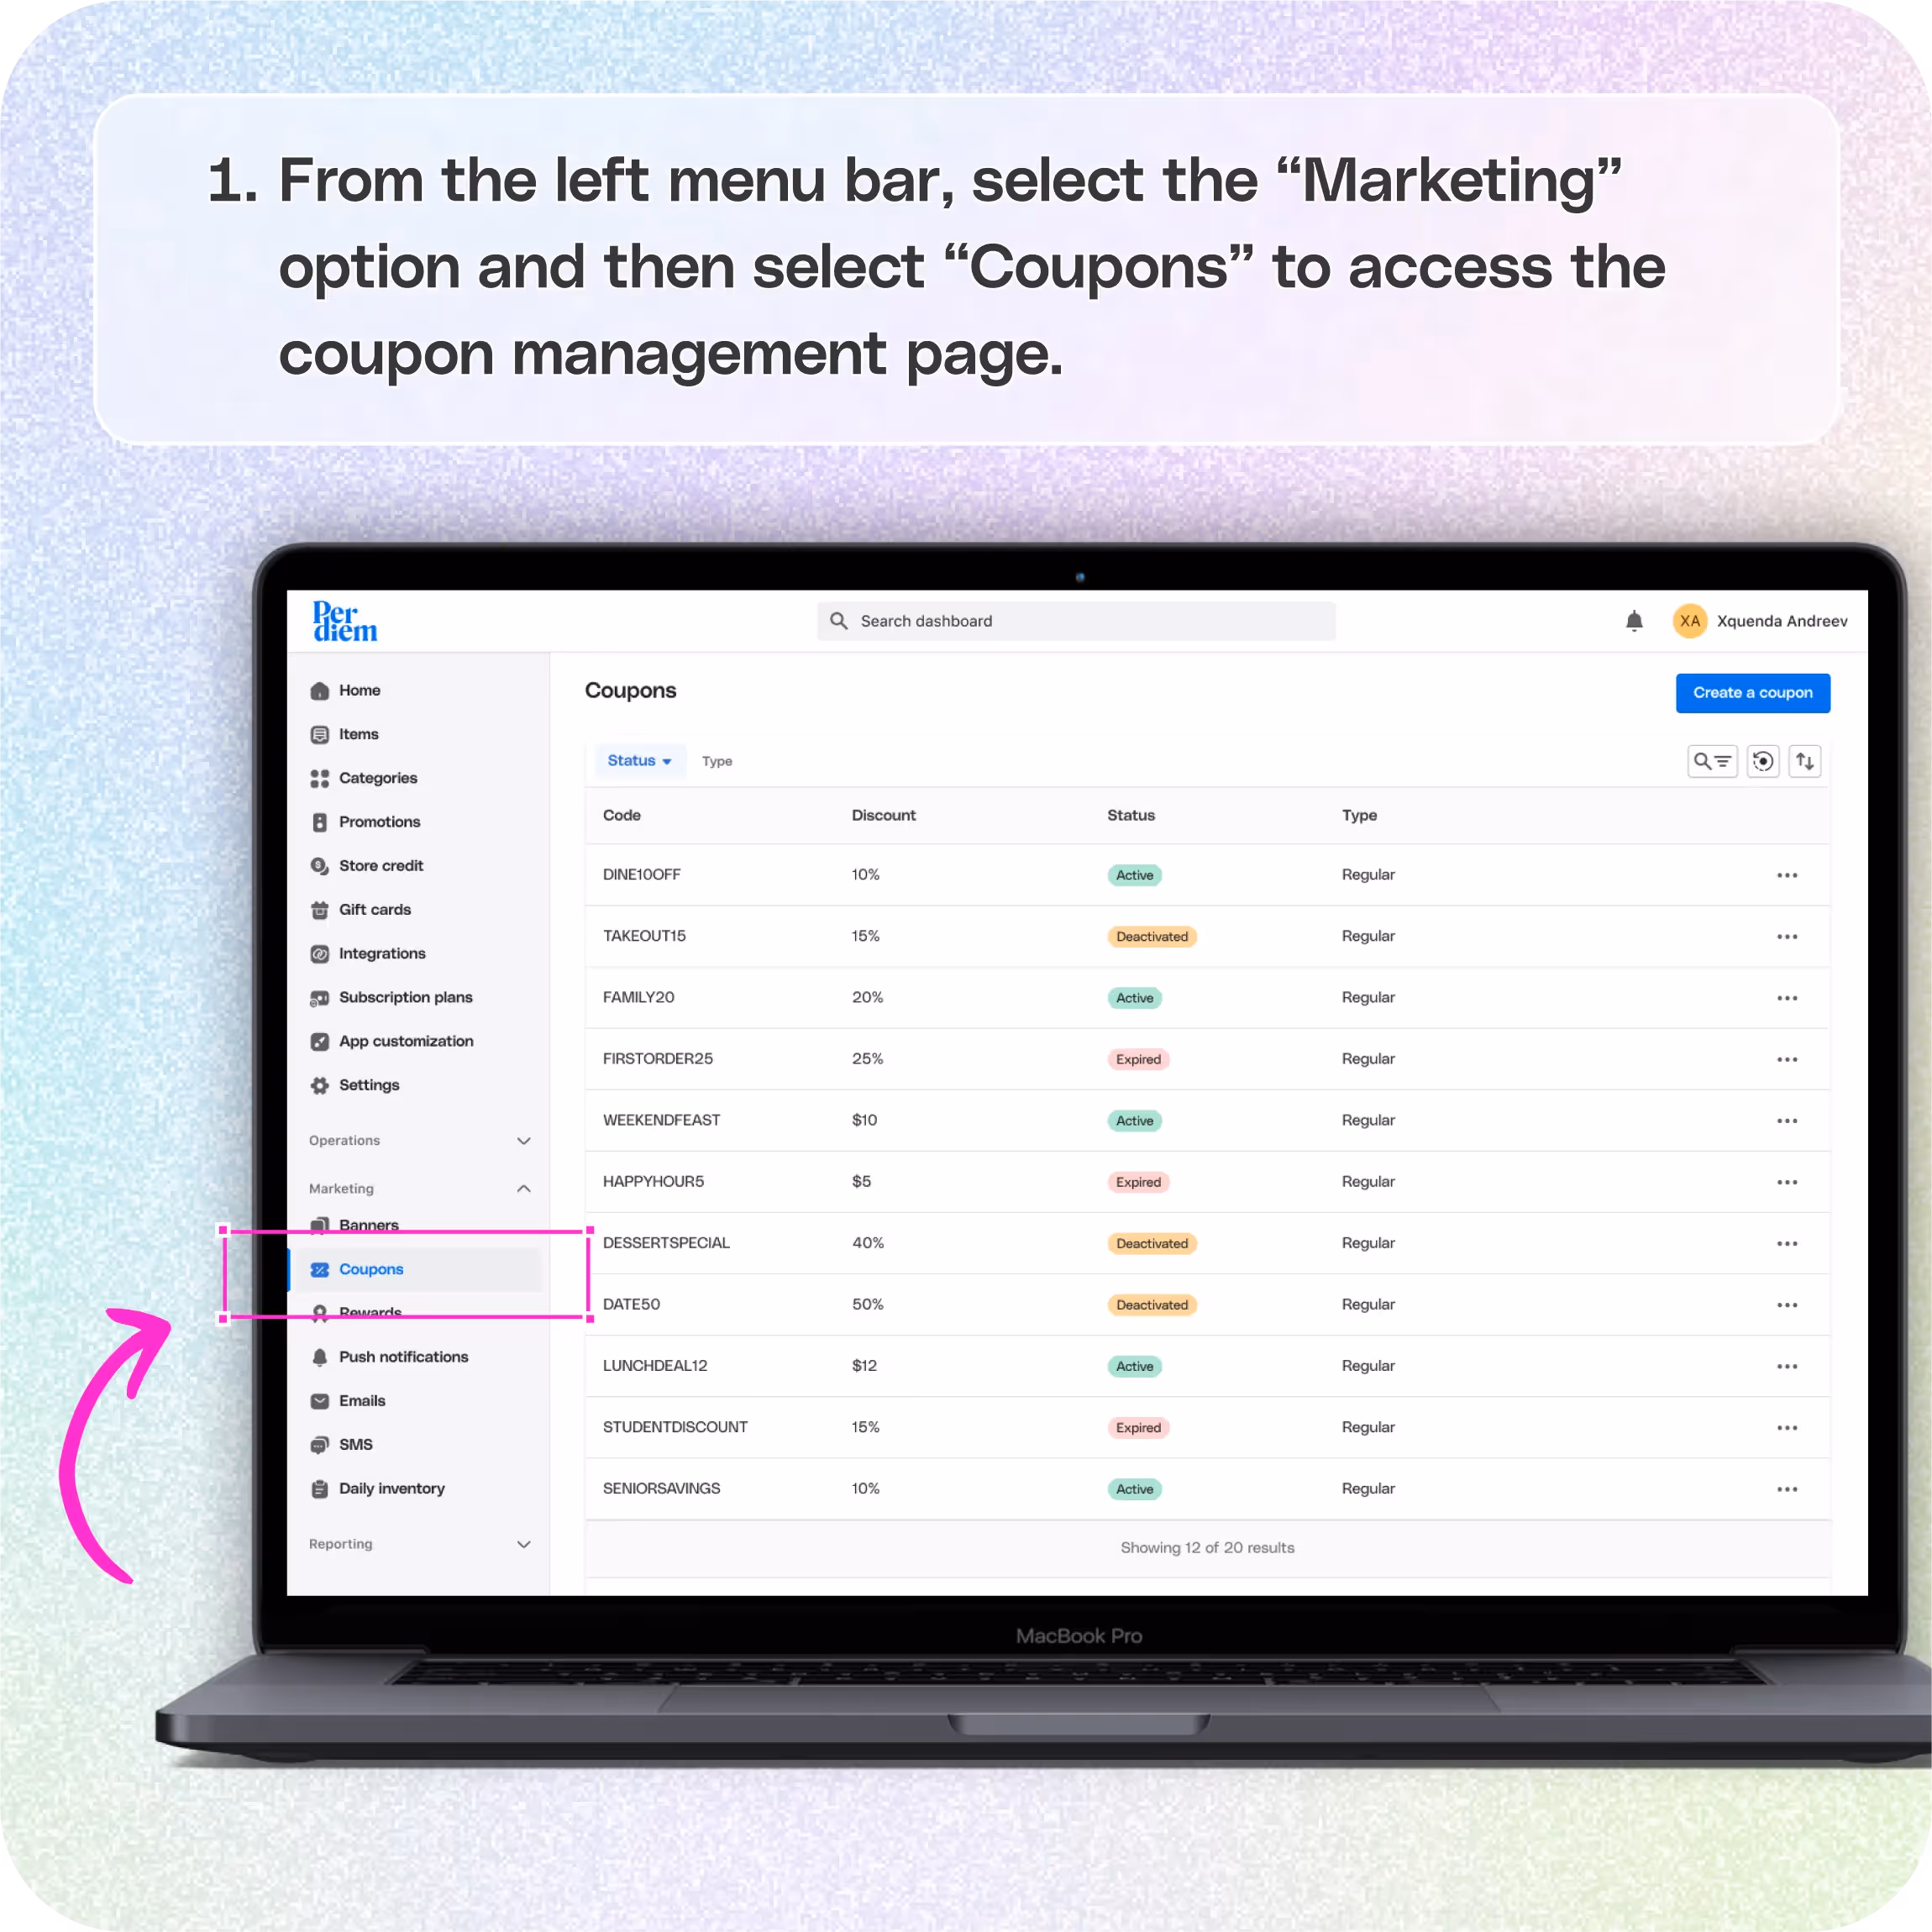


No items found.
Log in to your merchant dashboard
- Log in to your Per Diem merchant dashboard.
Go to the marketing section
- From the left menu bar, select Marketing.
- In the dropdown, choose Coupons.
Create a Coupon
- On the Coupons page, click the Create a Coupon button.
- This will start the process of setting up your new offer.
Create the code and set conditions
- In the setup box, create a custom coupon code.
- Set the discount amount and the minimum spend requirement for the coupon to be valid.
- Choose the period during which the coupon is active.
Assign items
- Click the Assign Items button.
- Select the items to which the coupon will apply.
- Choose the relevant locations and the discount application method.
- Once done, click Next to proceed to the next step.
Join the Per Diem Local Partner Program
Submit updates to your business details for review by Per Diem’s moderation team before they go live.
Thank you! Your submission has been received!
Oops! Something went wrong while submitting the form.
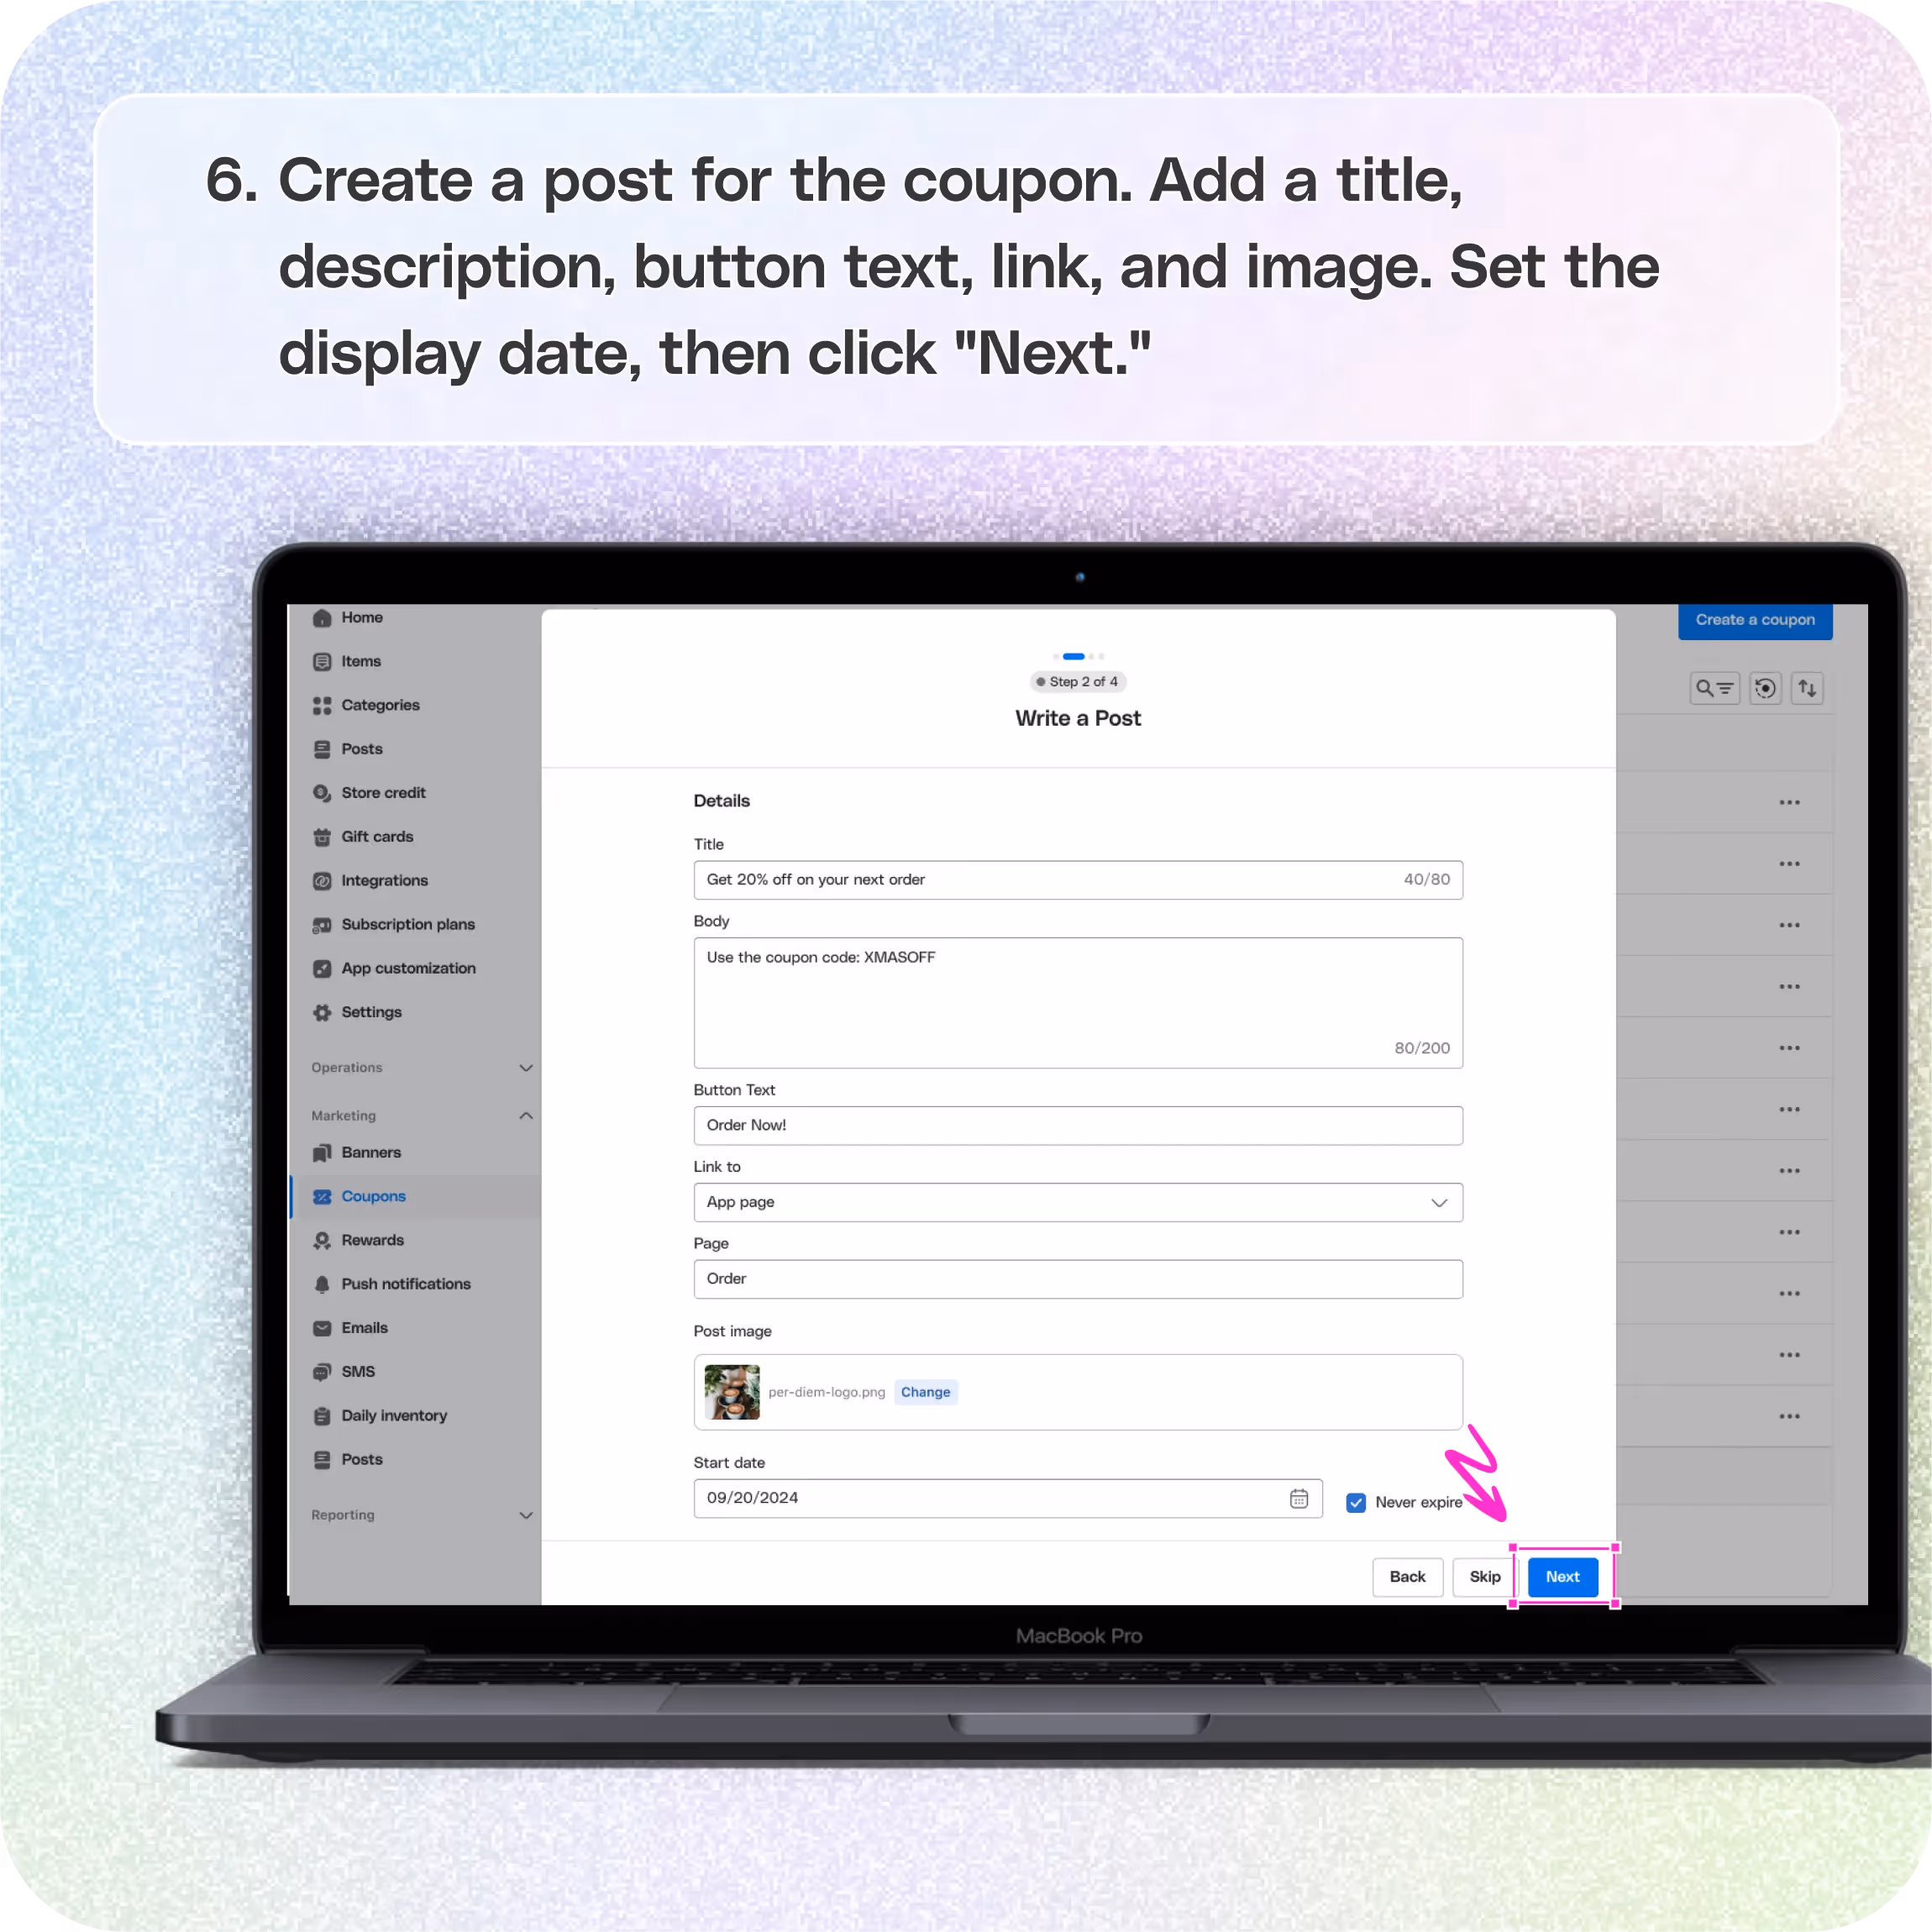
Step 2: Create a post for the coupon
Add details to the post
- Add a title and a short description of the coupon.
- Add the button text that will serve as the call to action.
- Choose the link to that specific item or coupon, and add an image.
- Set the display date and hit Next to continue.
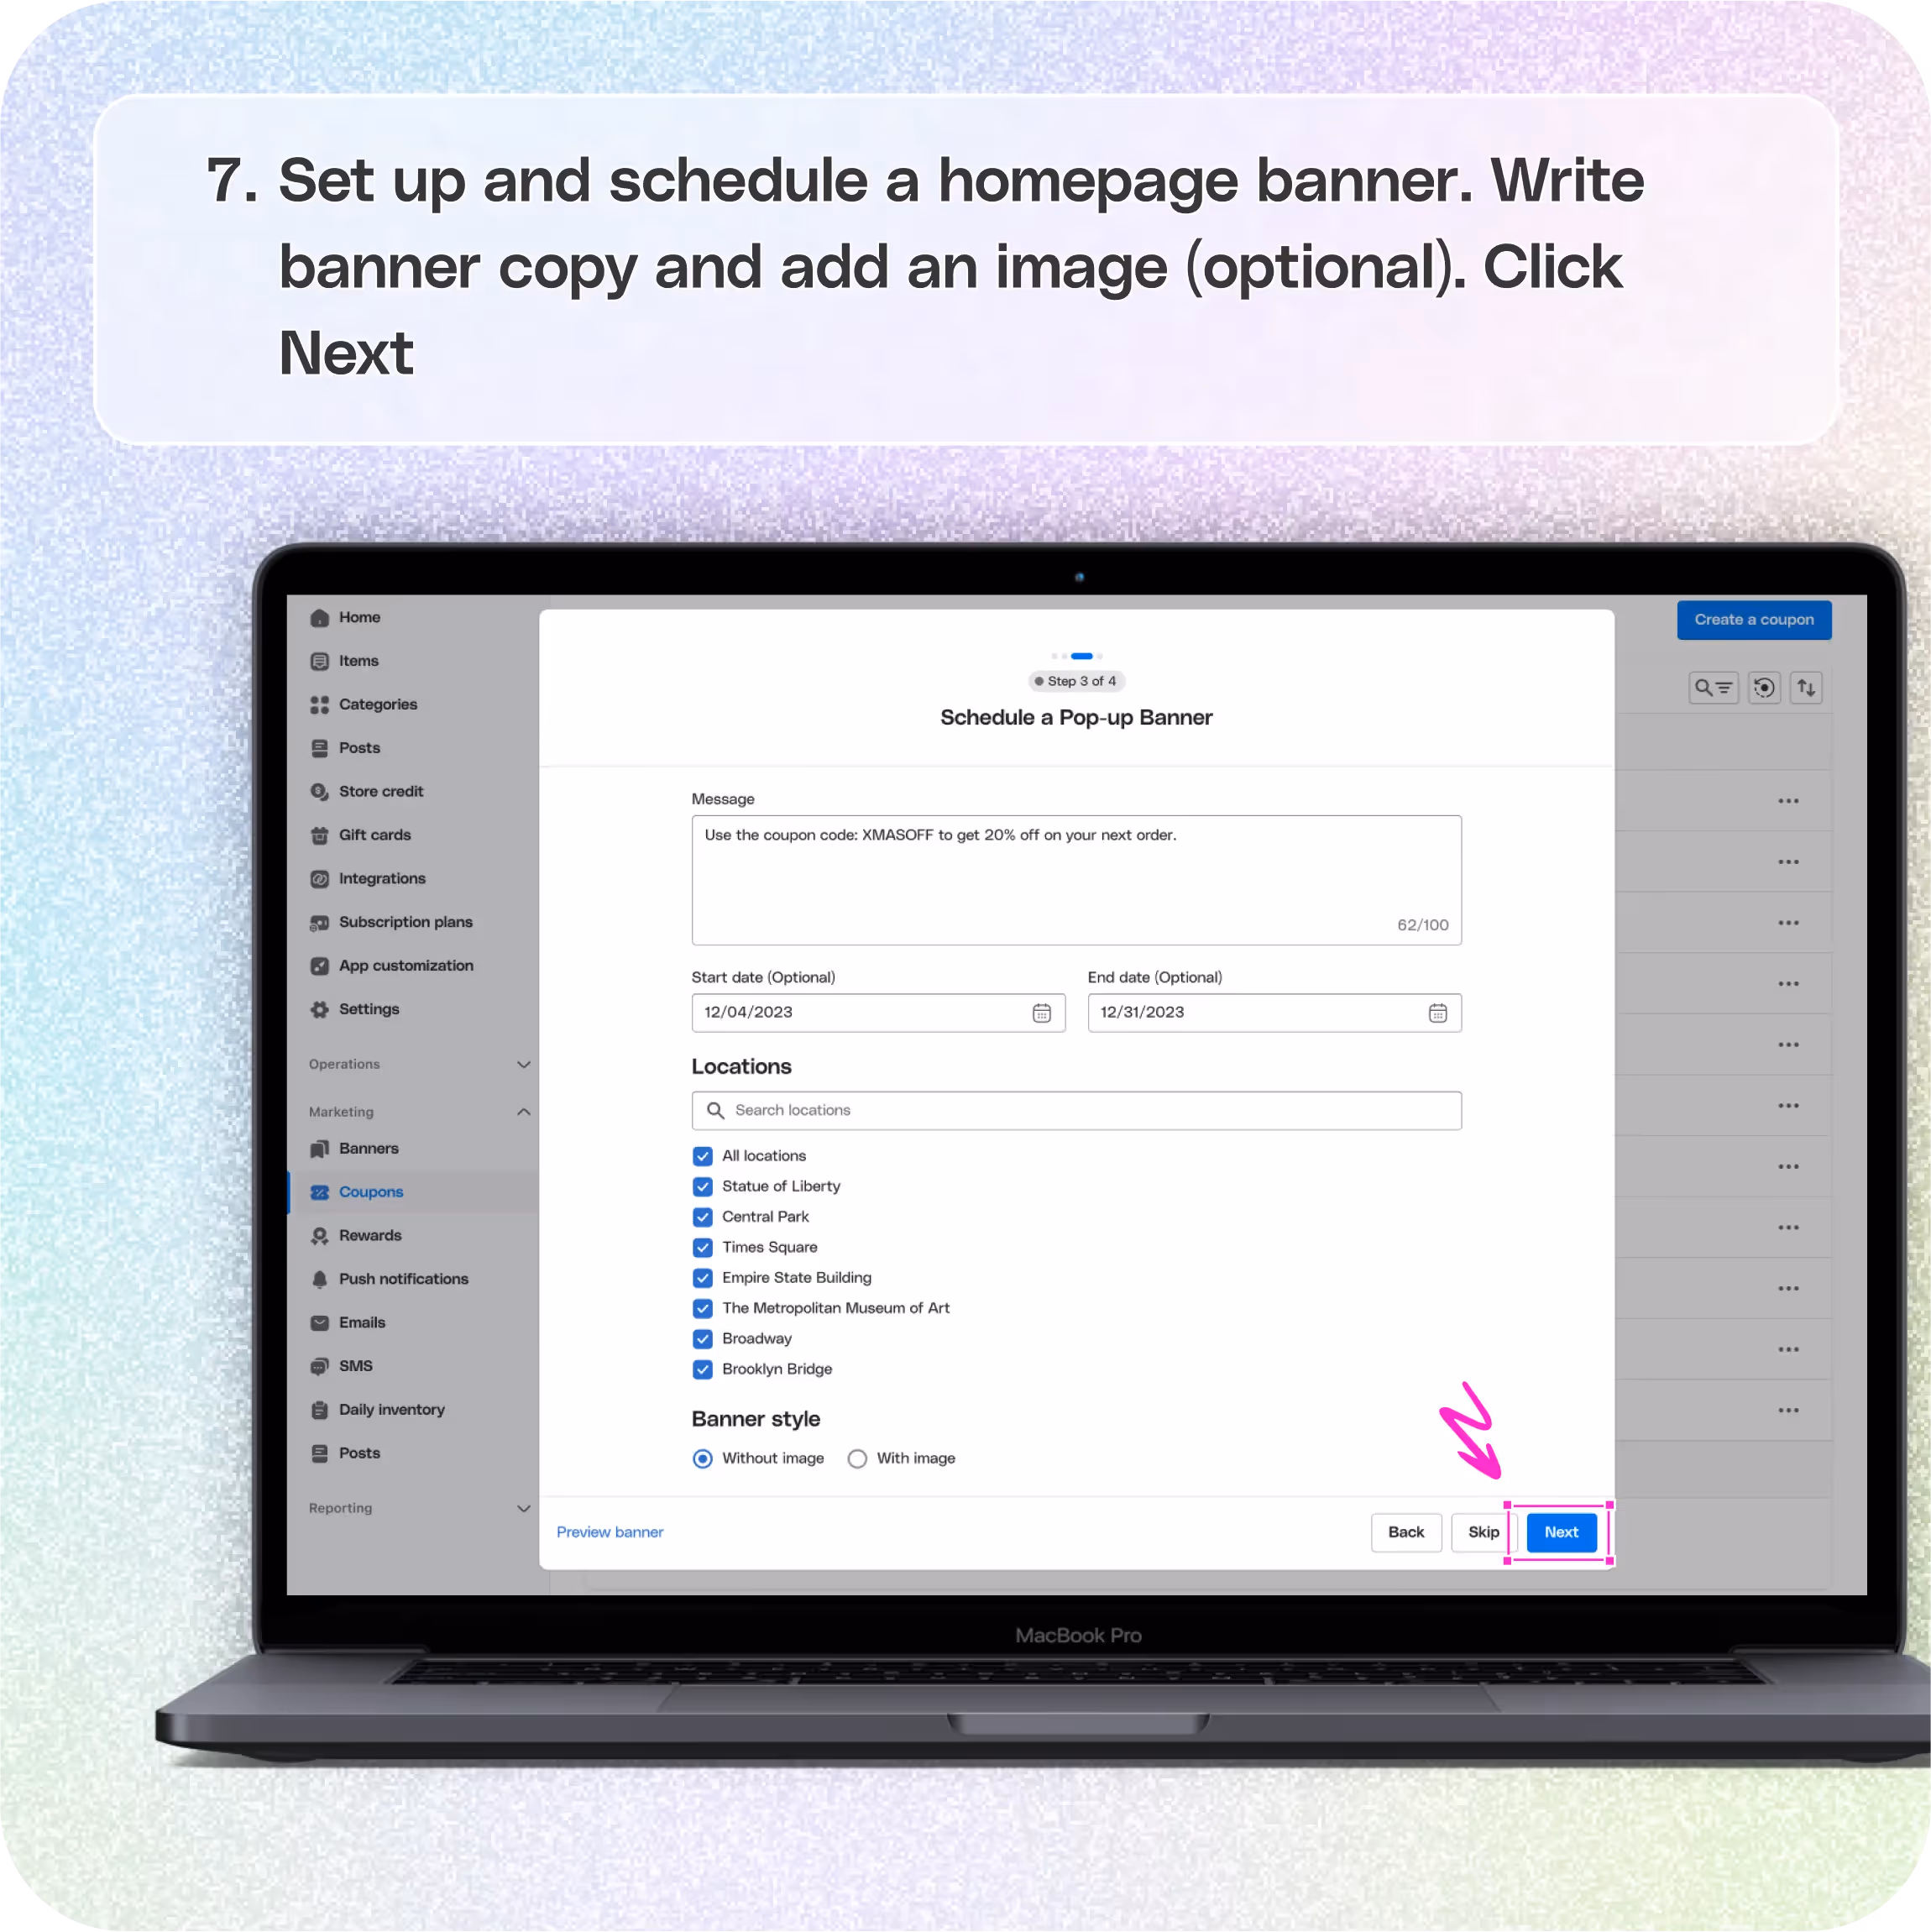
Step 3: Set up and schedule a homepage banner
Write banner copy
- Write a short promotional copy for the homepage banner about the coupon.
- Choose the locations where the banner will be displayed.
- Set the start and end date for the banner to be shown.
Add an image (optional)
- You can upload an image to accompany the banner or proceed without an image.
- Click Next to proceed to the next step.
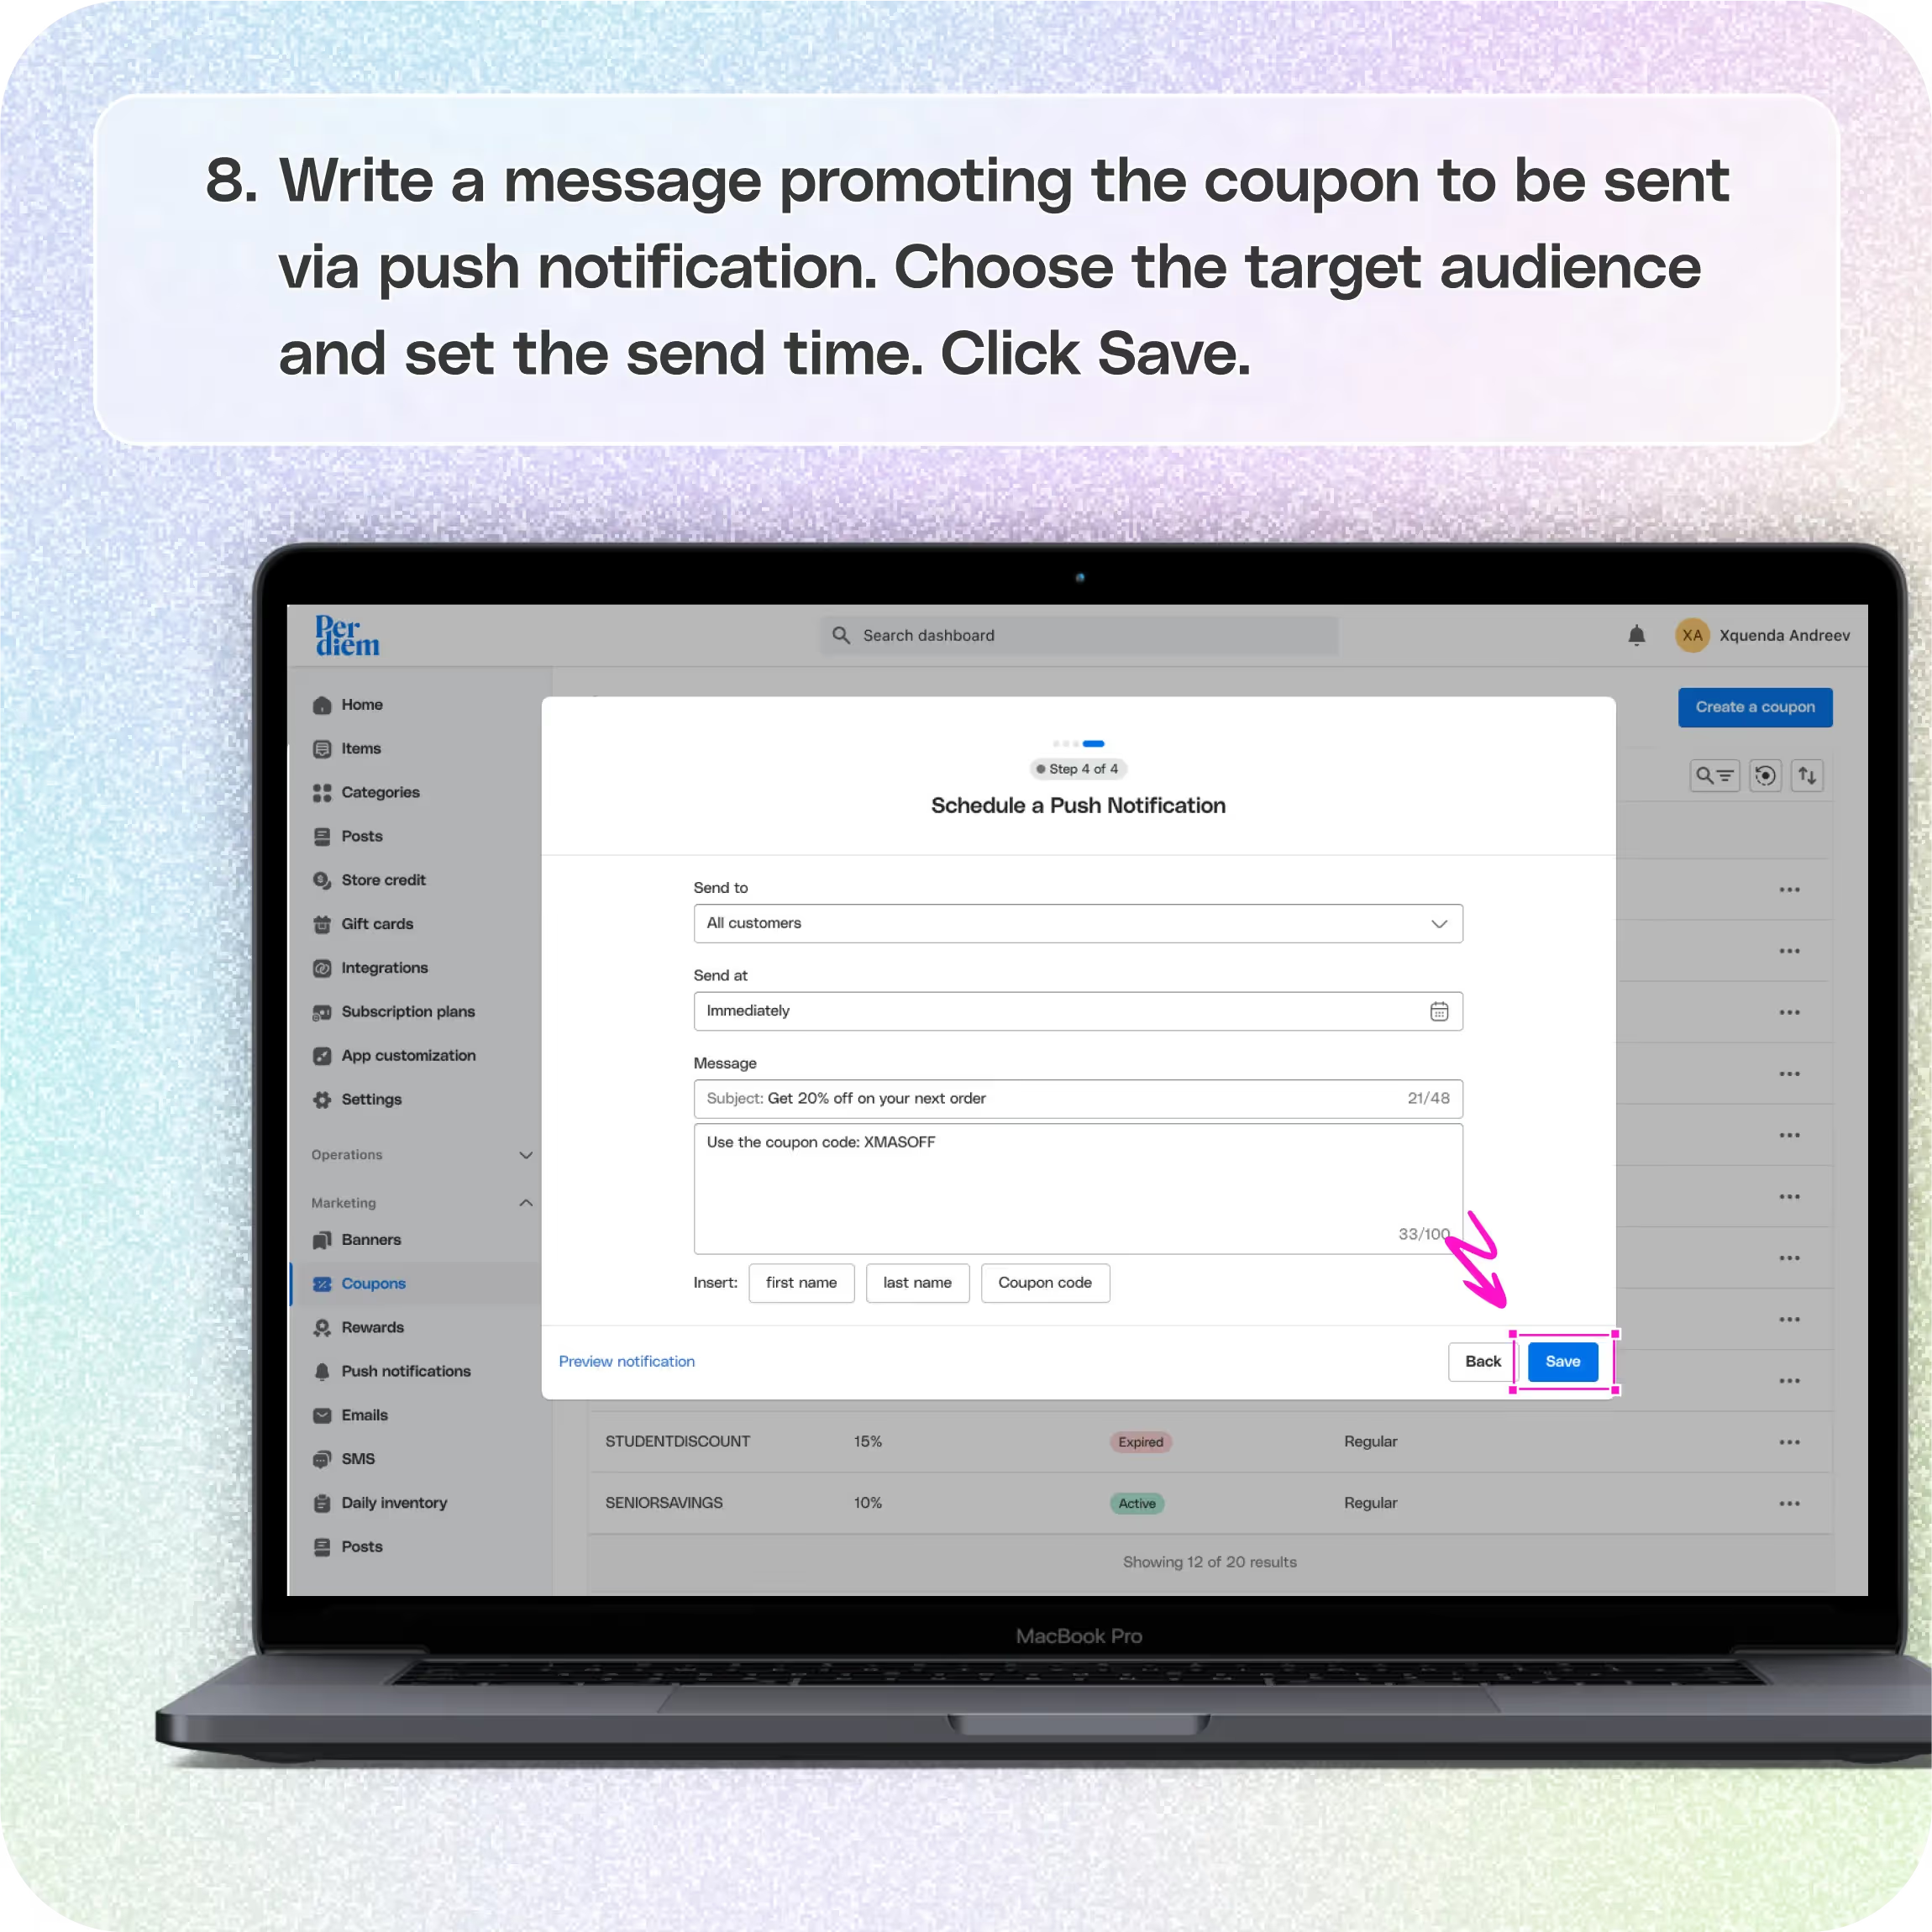
Step 4: Create and schedule a push notification
Write a push notification
- Write a message promoting the coupon to be sent via push notification.
Select the audience
- Choose the target audience for this notification.
- Set the send time and finalize the message.
Save
- Click Save to complete the setup.
Final Step: Preview and Save
- Preview all the steps you’ve completed.
- Make any necessary changes, then click Save to finalize your coupon creation and promotion workflow.
- Remember, you can skip any step in the workflow if needed


.svg)


Still have questions?Contact us
Ask anything or just say hi
Thank you! Your submission has been received!
Oops! Something went wrong while submitting the form.
Thank you! Your submission has been received!
Oops! Something went wrong while submitting the form.

