
.svg)

Set up restricted dates
Instructions

- Log in to your Per Diem merchant dashboard.
- Click on the "Operations" dropdown on the left side of the dashboard.
- After clicking "Operations," scroll to the bottom and select "Operation Times."
- Click on "Add Restricted Dates."
- Choose the month and day.
- Select the location that won't be available on that day.
- After adding all the information, press "Save."
- You can edit, delete, or add more restricted dates for your locations.
Still require support?
Contact support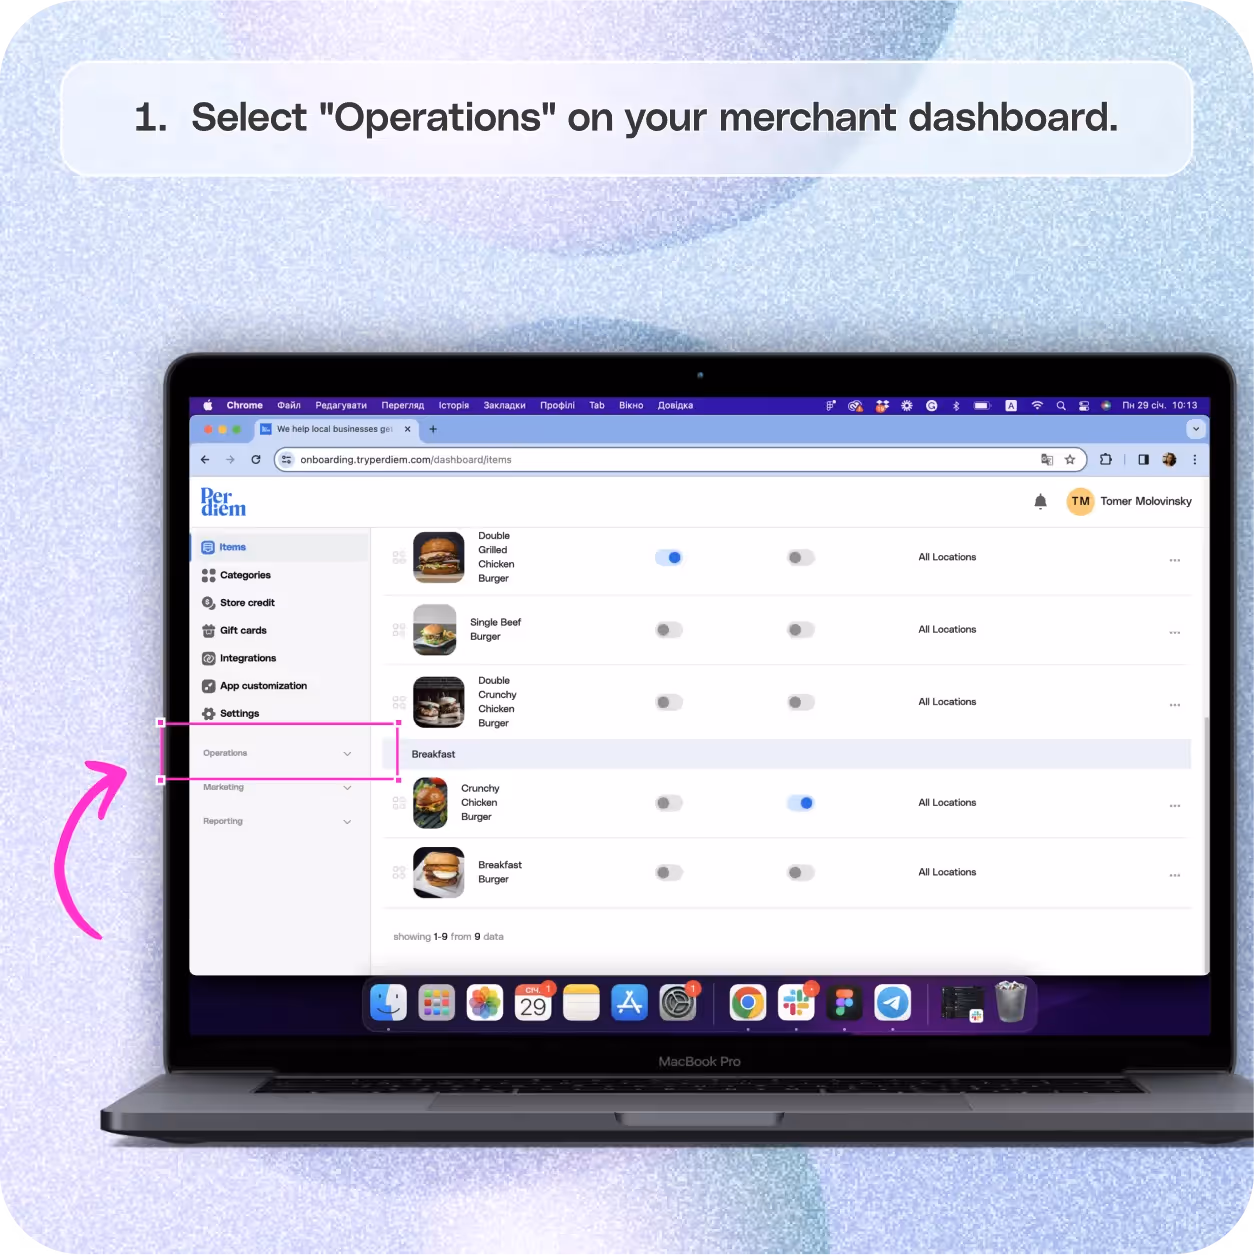

Select "Operations" on Your Merchant Dashboard
Keep your customers in the loop by setting up restricted dates, and specifying days when your location won't be fulfilling orders. Here's a straightforward guide:
Step 1
Log in to your Per Diem merchant dashboard.
Step 2
Click on the "Operations" dropdown on the left side of the dashboard.
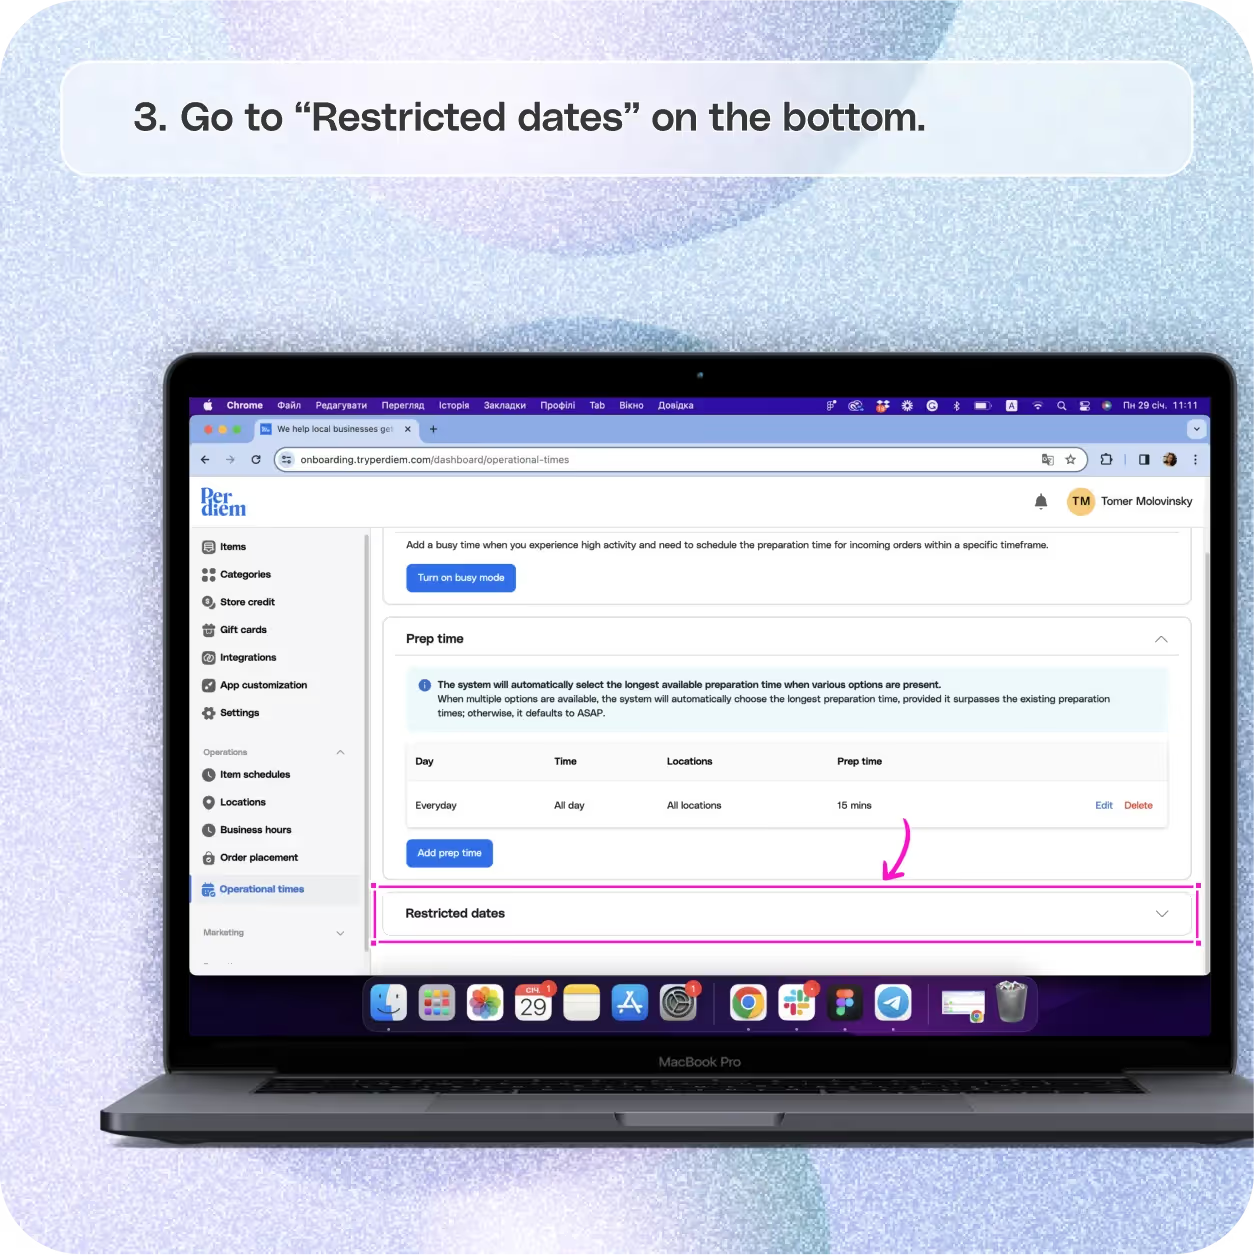
Select "Operation Times"
Maintain transparency by designating restricted dates:
Step 1
After clicking "Operations," scroll to the bottom and select "Operation Times."
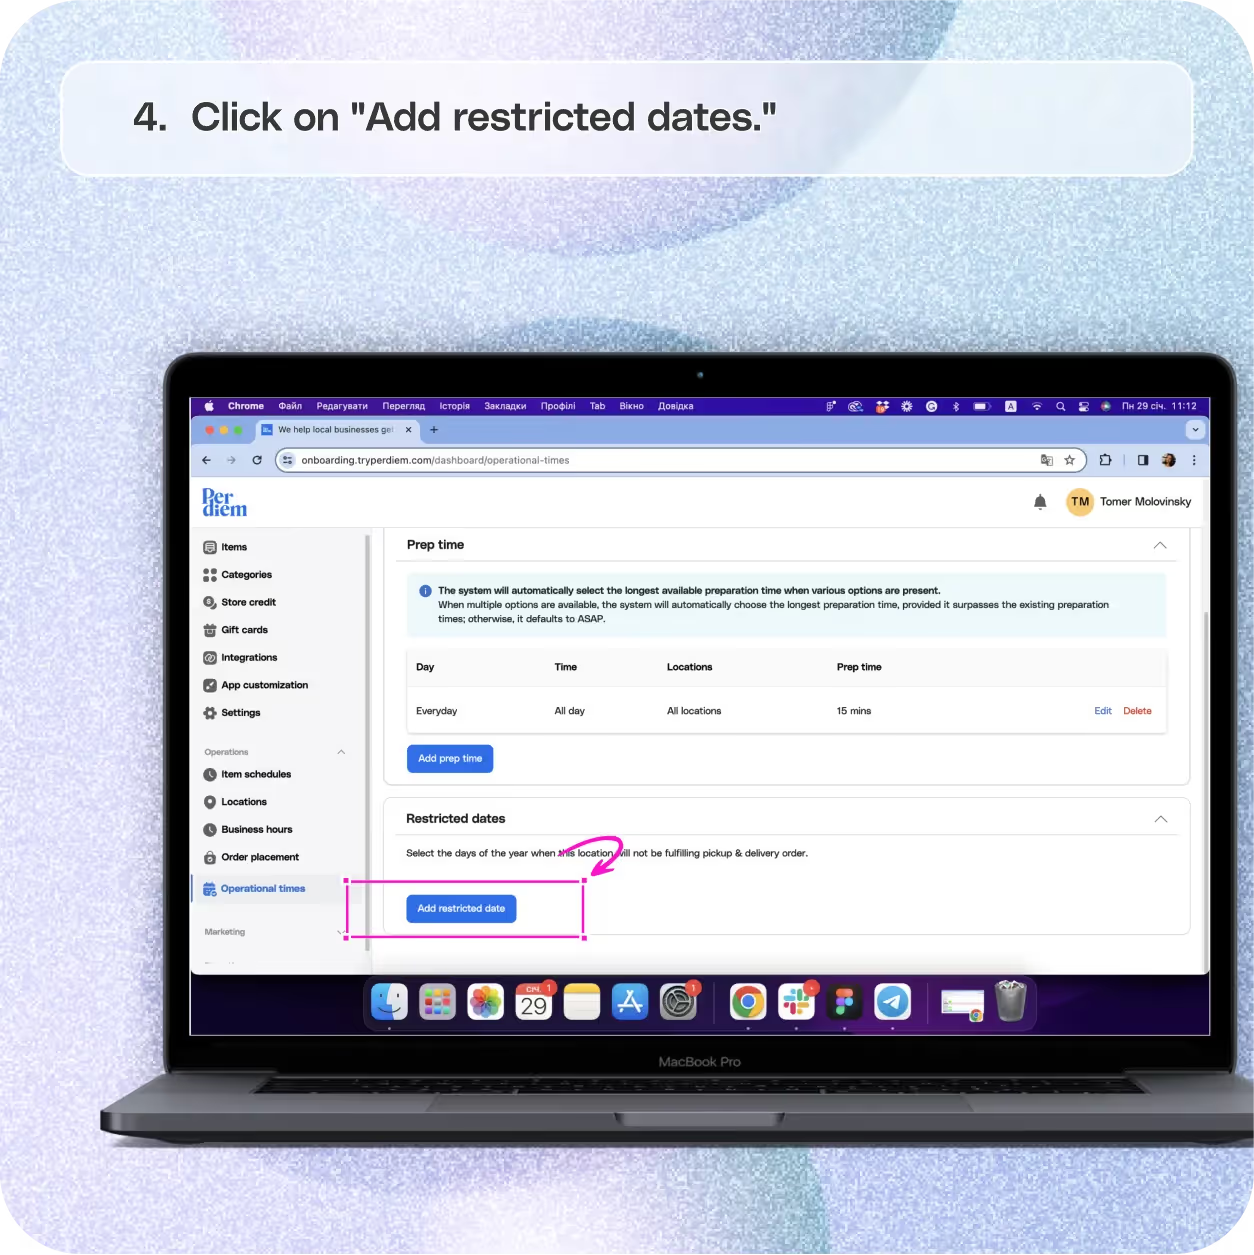
Select "Add Restricted Dates"
Define the days that your location won't be available for pickup or delivery orders:
Step 1
Click on "Add Restricted Dates."
Join the Per Diem Local Partner Program
Submit updates to your business details for review by Per Diem’s moderation team before they go live.

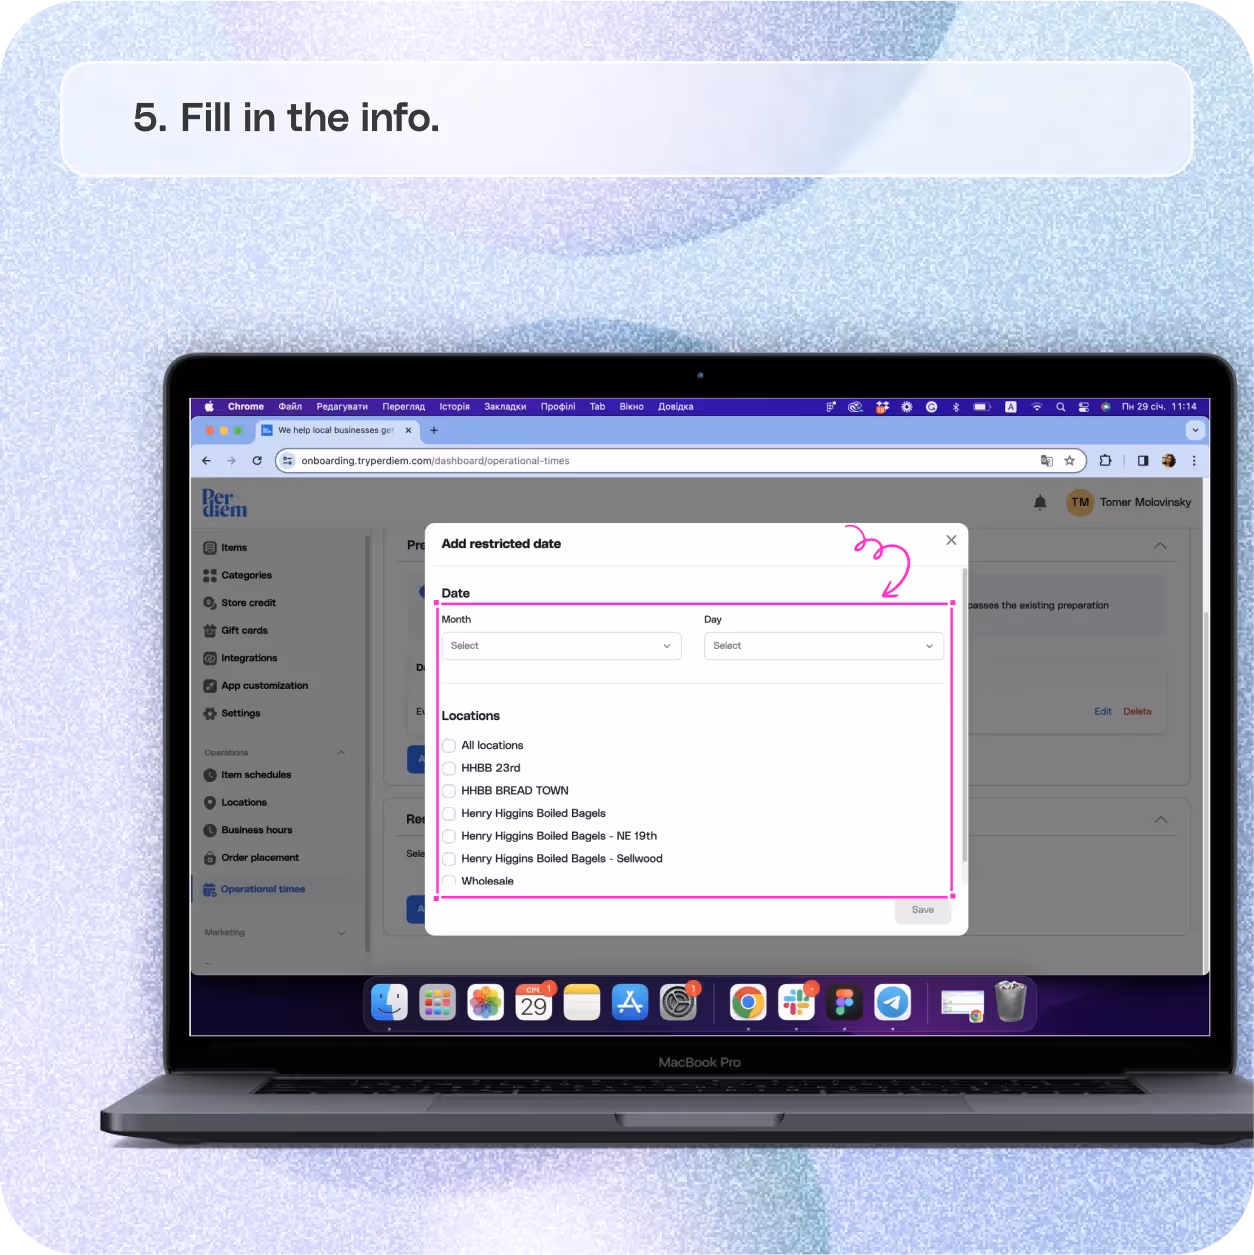
Fill in the Info
Provide details about the restricted date:
Step 1
Choose the month and day.
Step 2
Select the location that won't be available on that day.
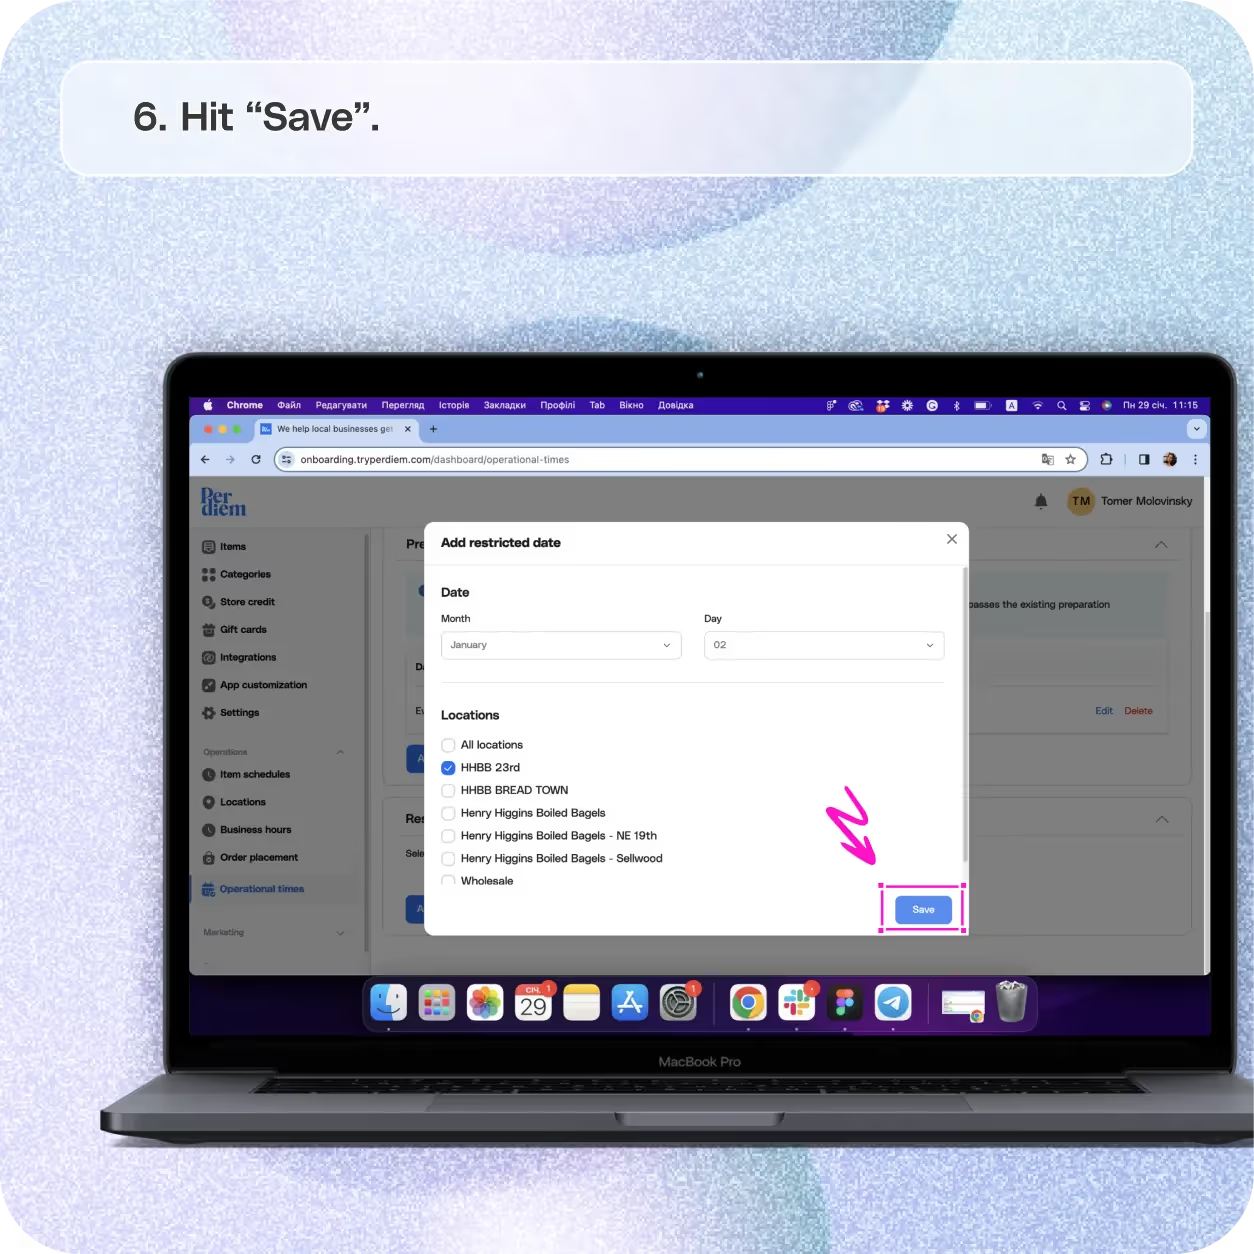
Hit Save
Ensure your updates are saved for accurate order management:
Step 1
After adding all the information, press "Save."
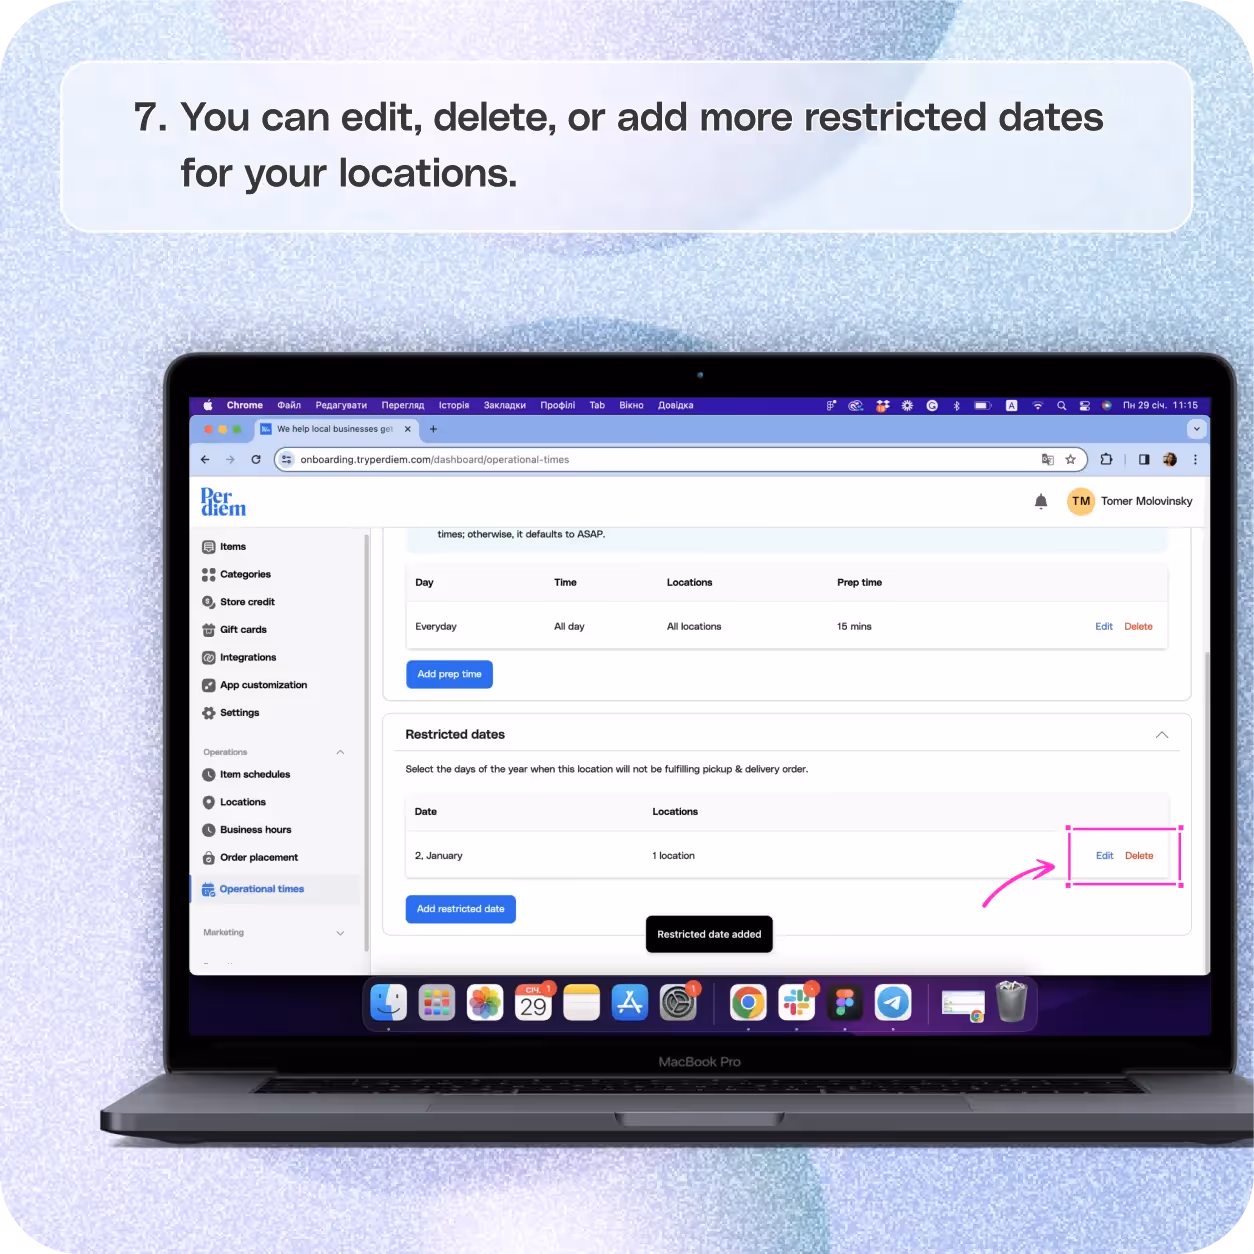
Edit Restricted Date
Maintain flexibility by managing your restricted dates:
Step 1
You can edit, delete, or add more restricted dates for your locations.


.svg)


Still have questions?Contact us
Ask anything or just say hi

