


























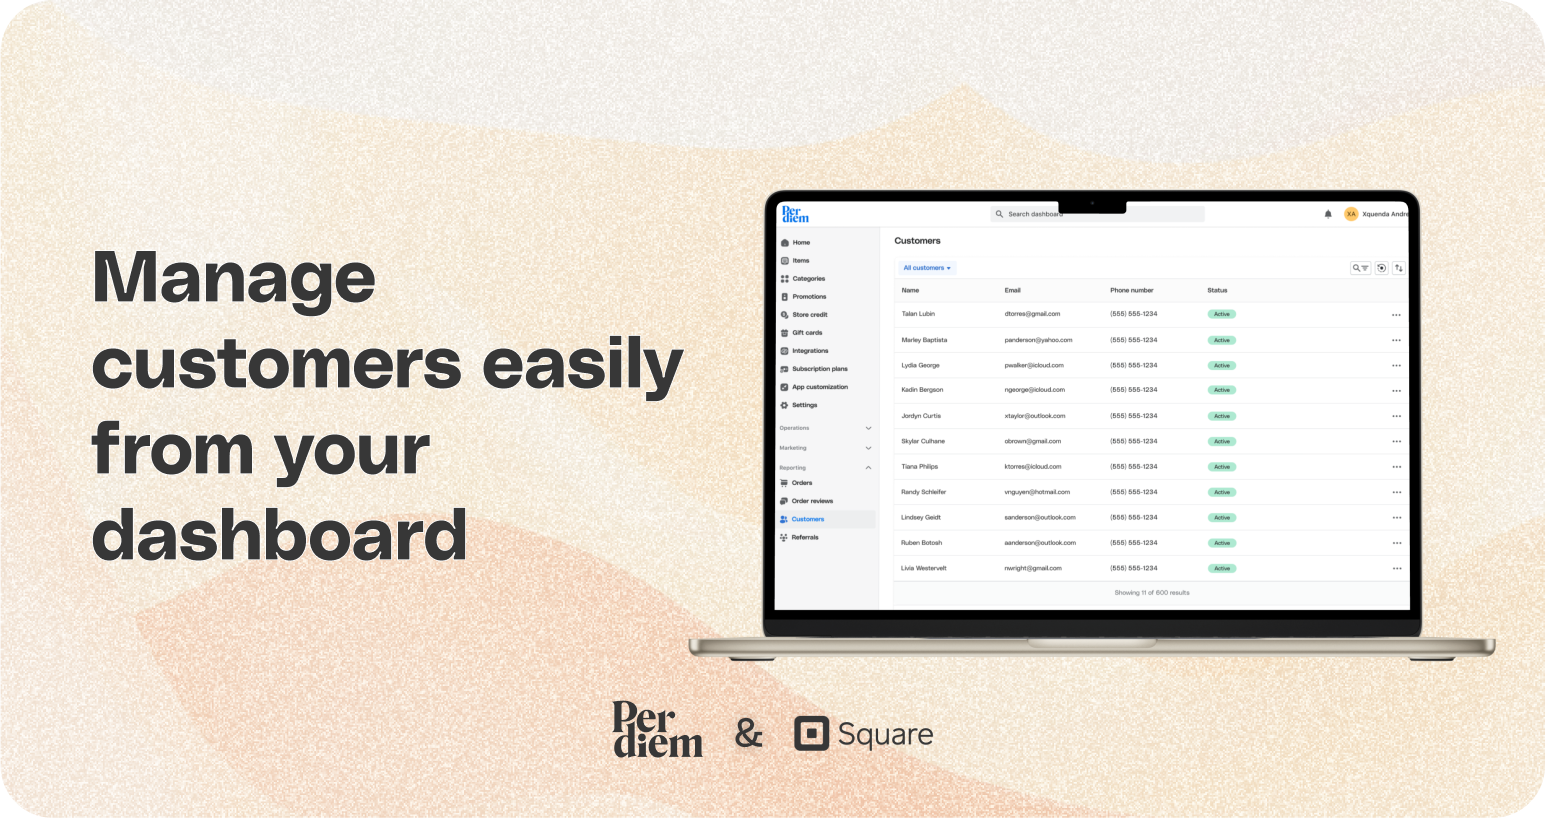
Manage customers easily from your dashboard
Efficiently manage and interact with your customers directly from your Per Diem merchant dashboard.
Instructions
- Log in to your Per Diem merchant dashboard.
- From the left menu bar, select "Reporting."
- Choose "Customers" from the dropdown menu.
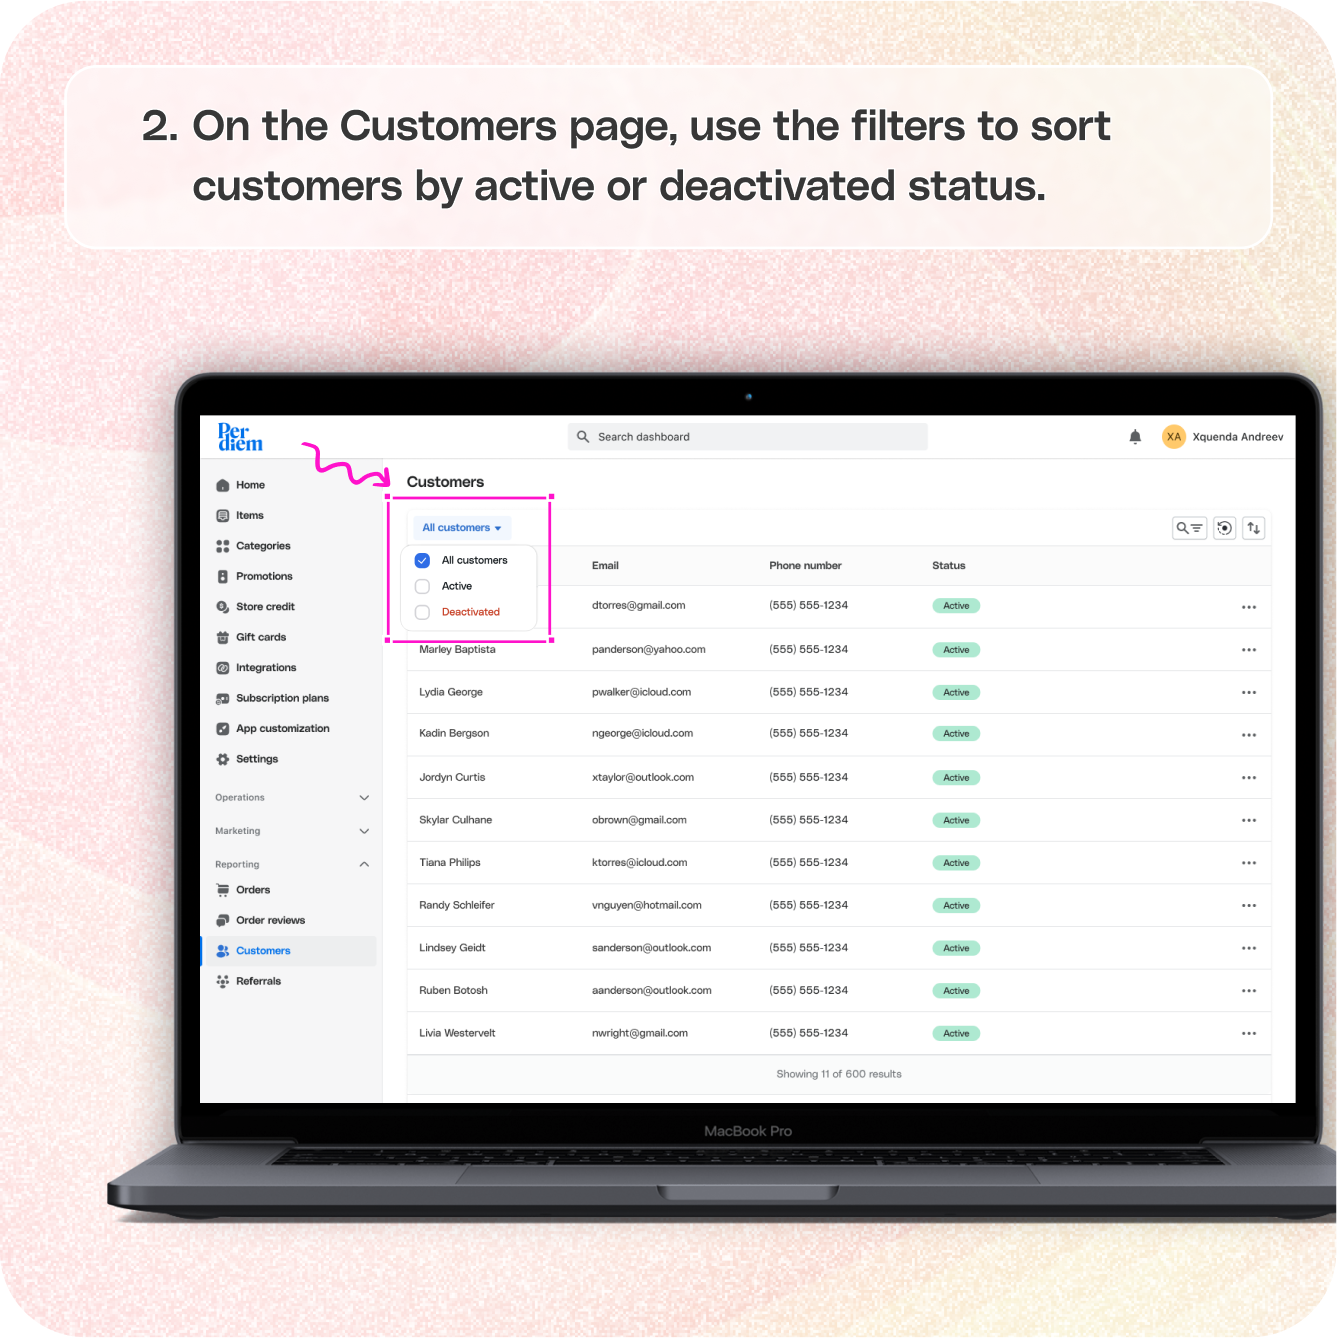
- On the Customers page, use the filters to sort customers by active or deactivated status.
- For updating your customers locate the customer you want to update.
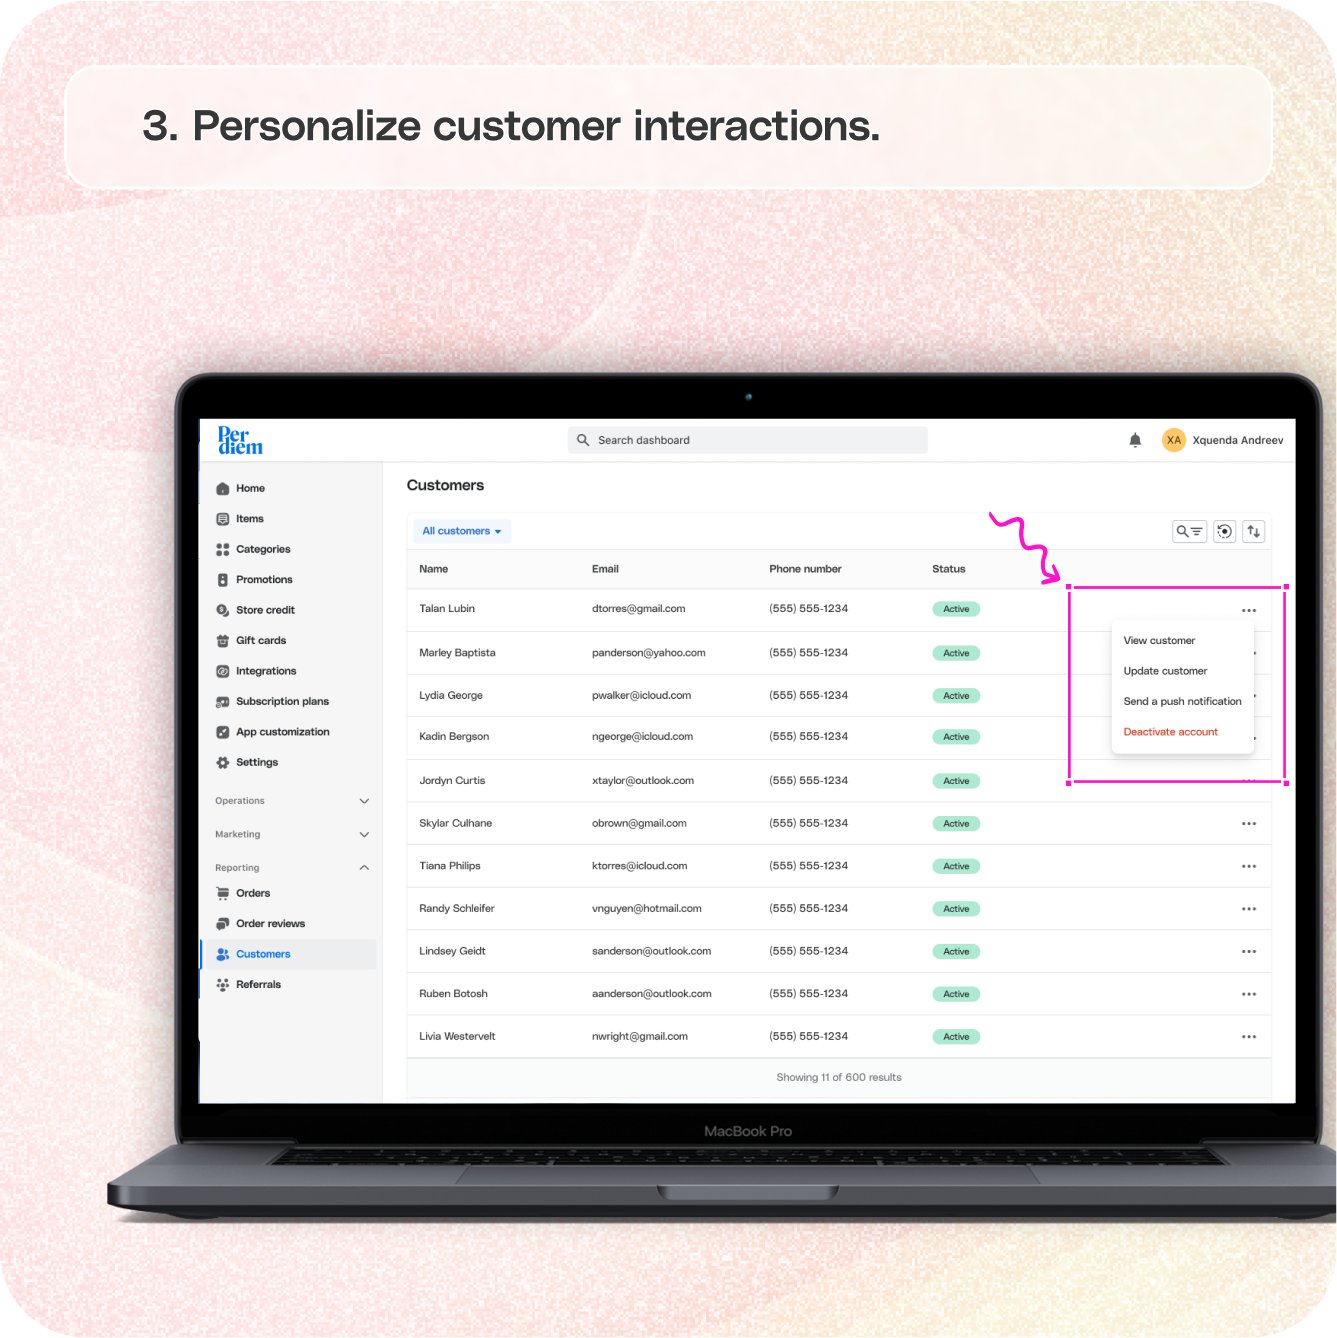
- Click on the three dots next to the customer's name.
- Select "View Customer Data" to review and update information.
- Send tailored push notifications directly to the customer from this option.
- To deactivate your customer identify the customer you wish to deactivate.
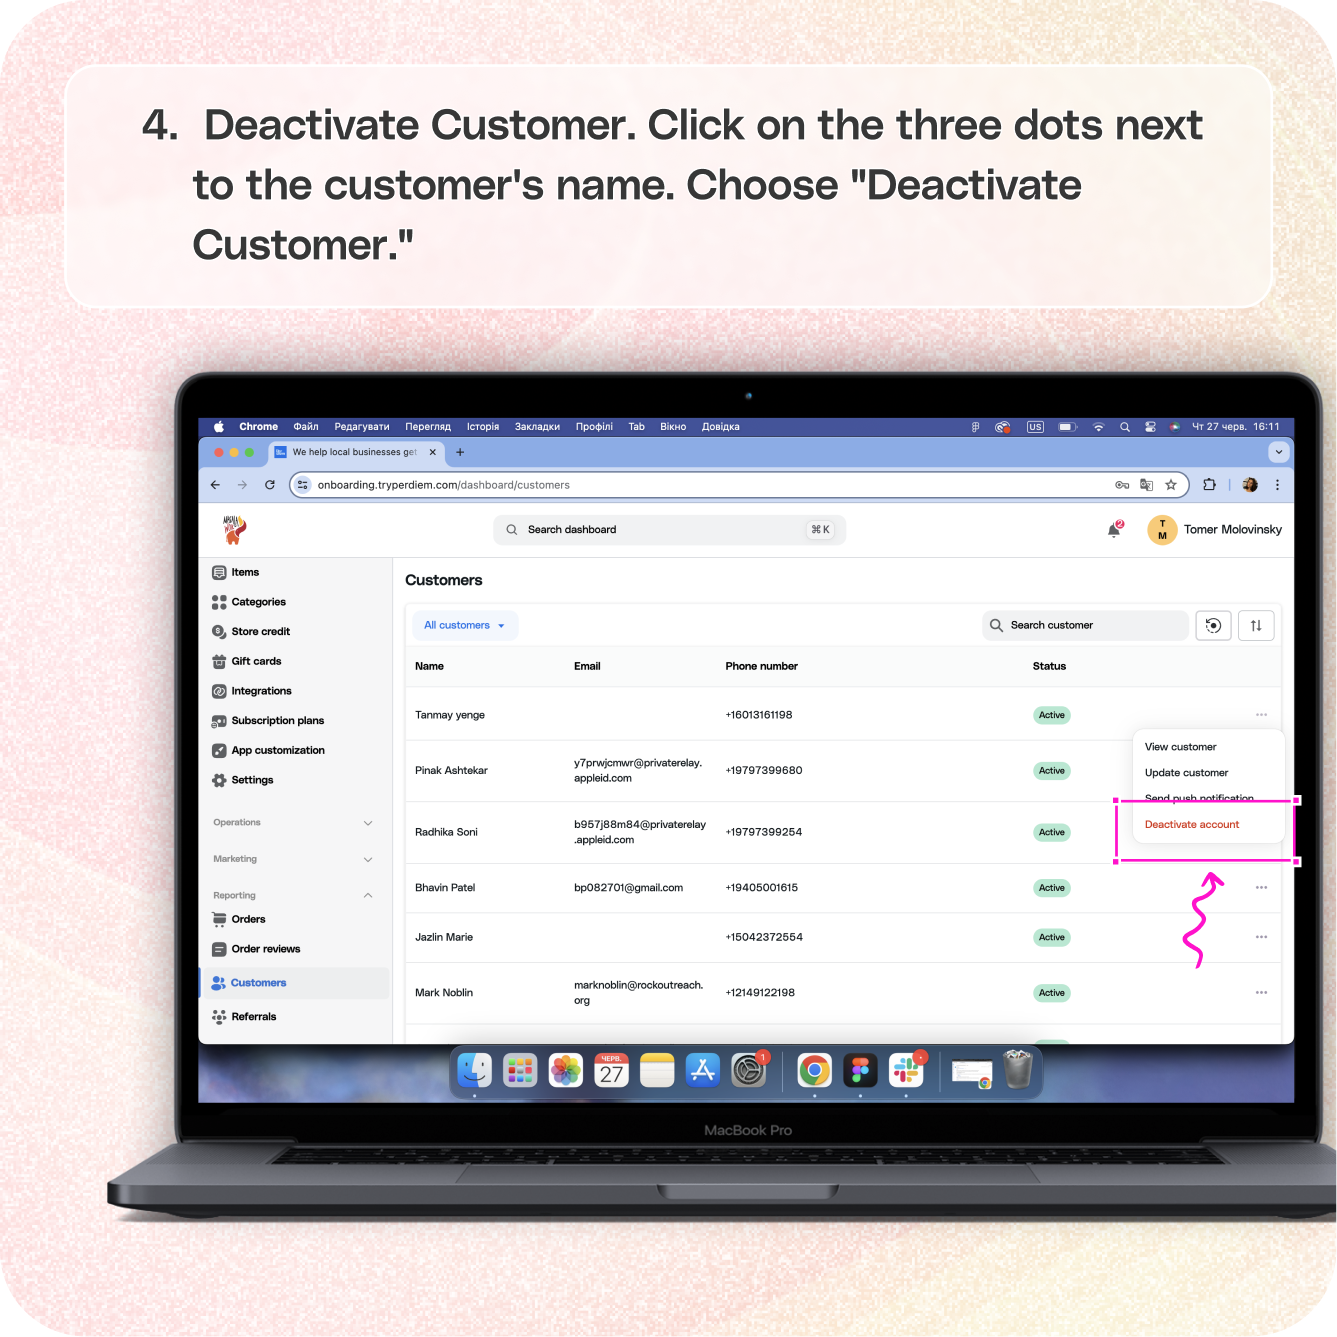
- Click on the three dots next to the customer's name.
- Choose "Deactivate Customer."
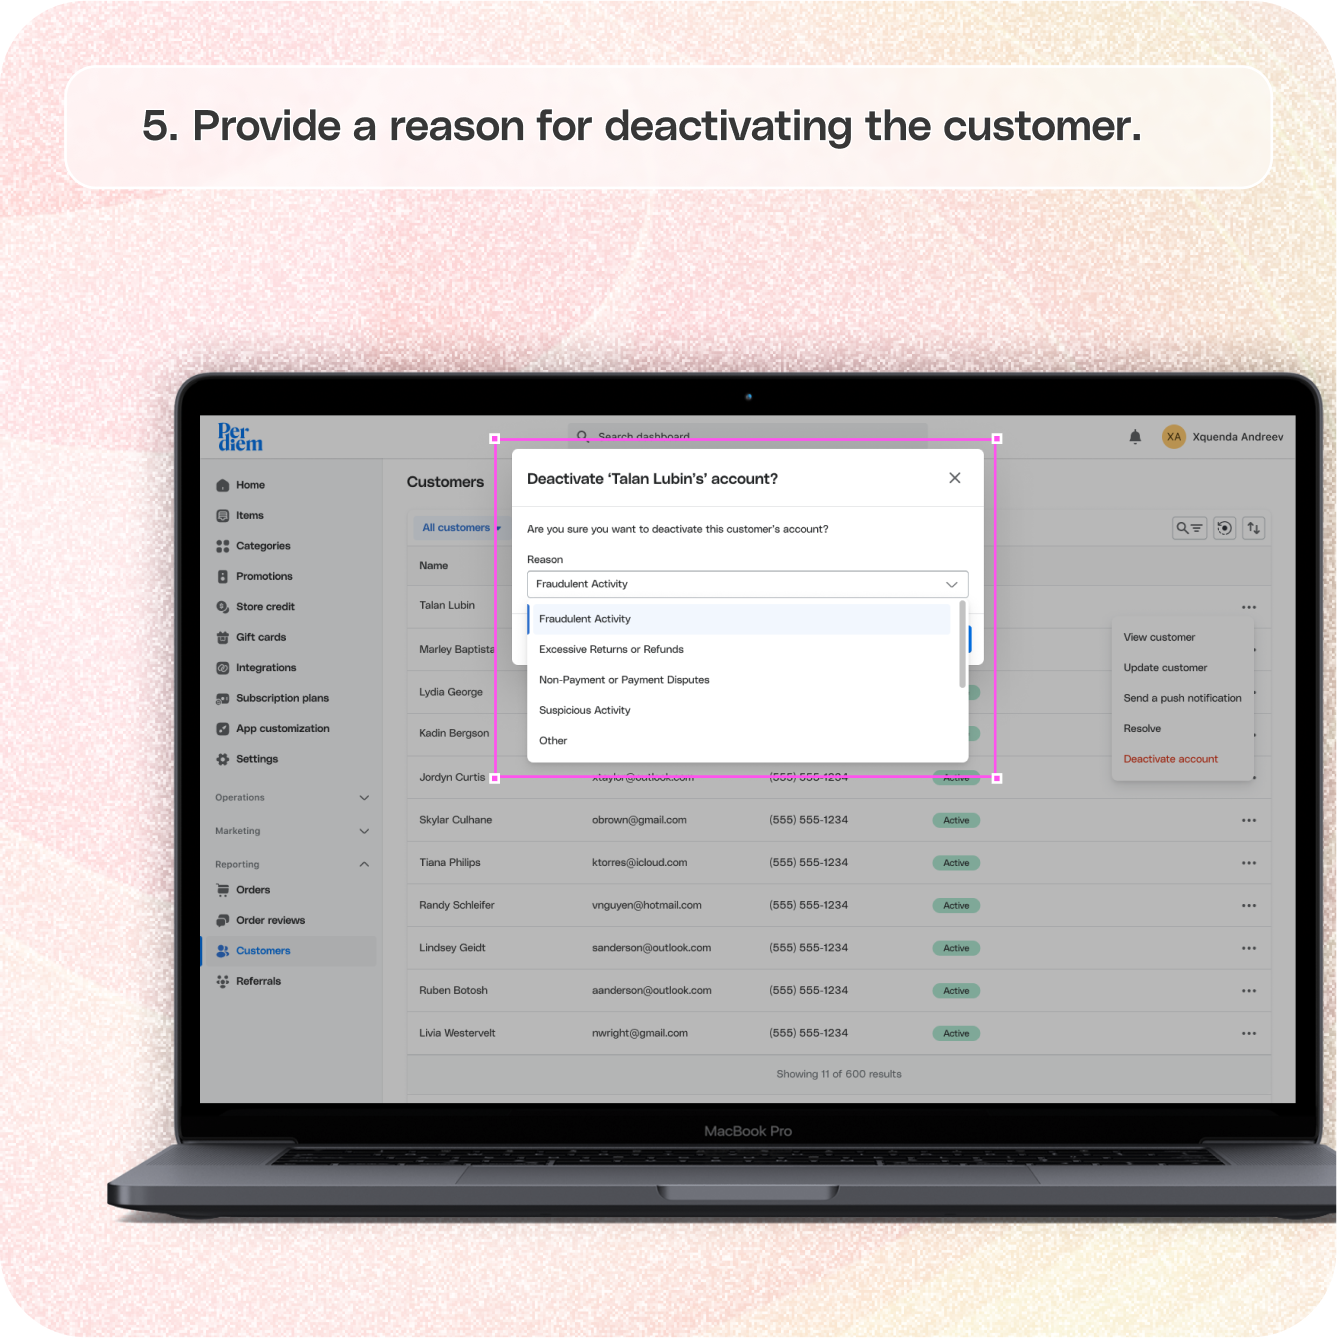
- Provide a reason for deactivating the customer.
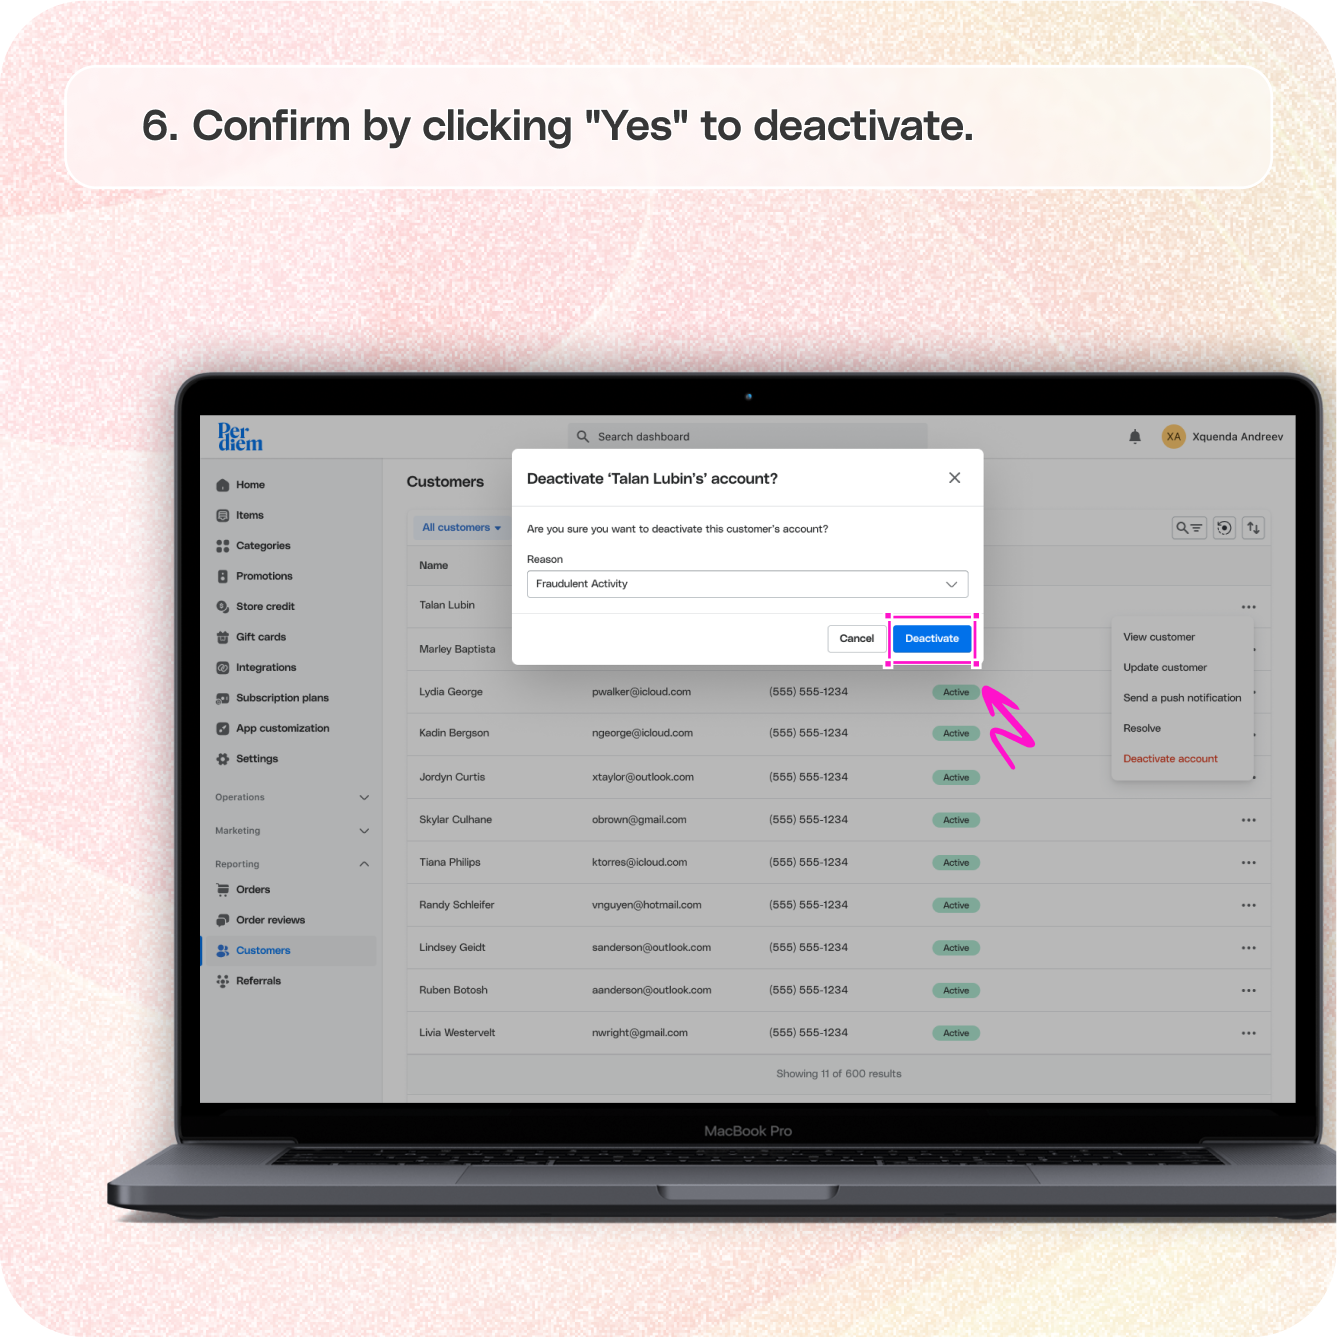
- Confirm by clicking "Yes" to deactivate.
Still require support?
Contact support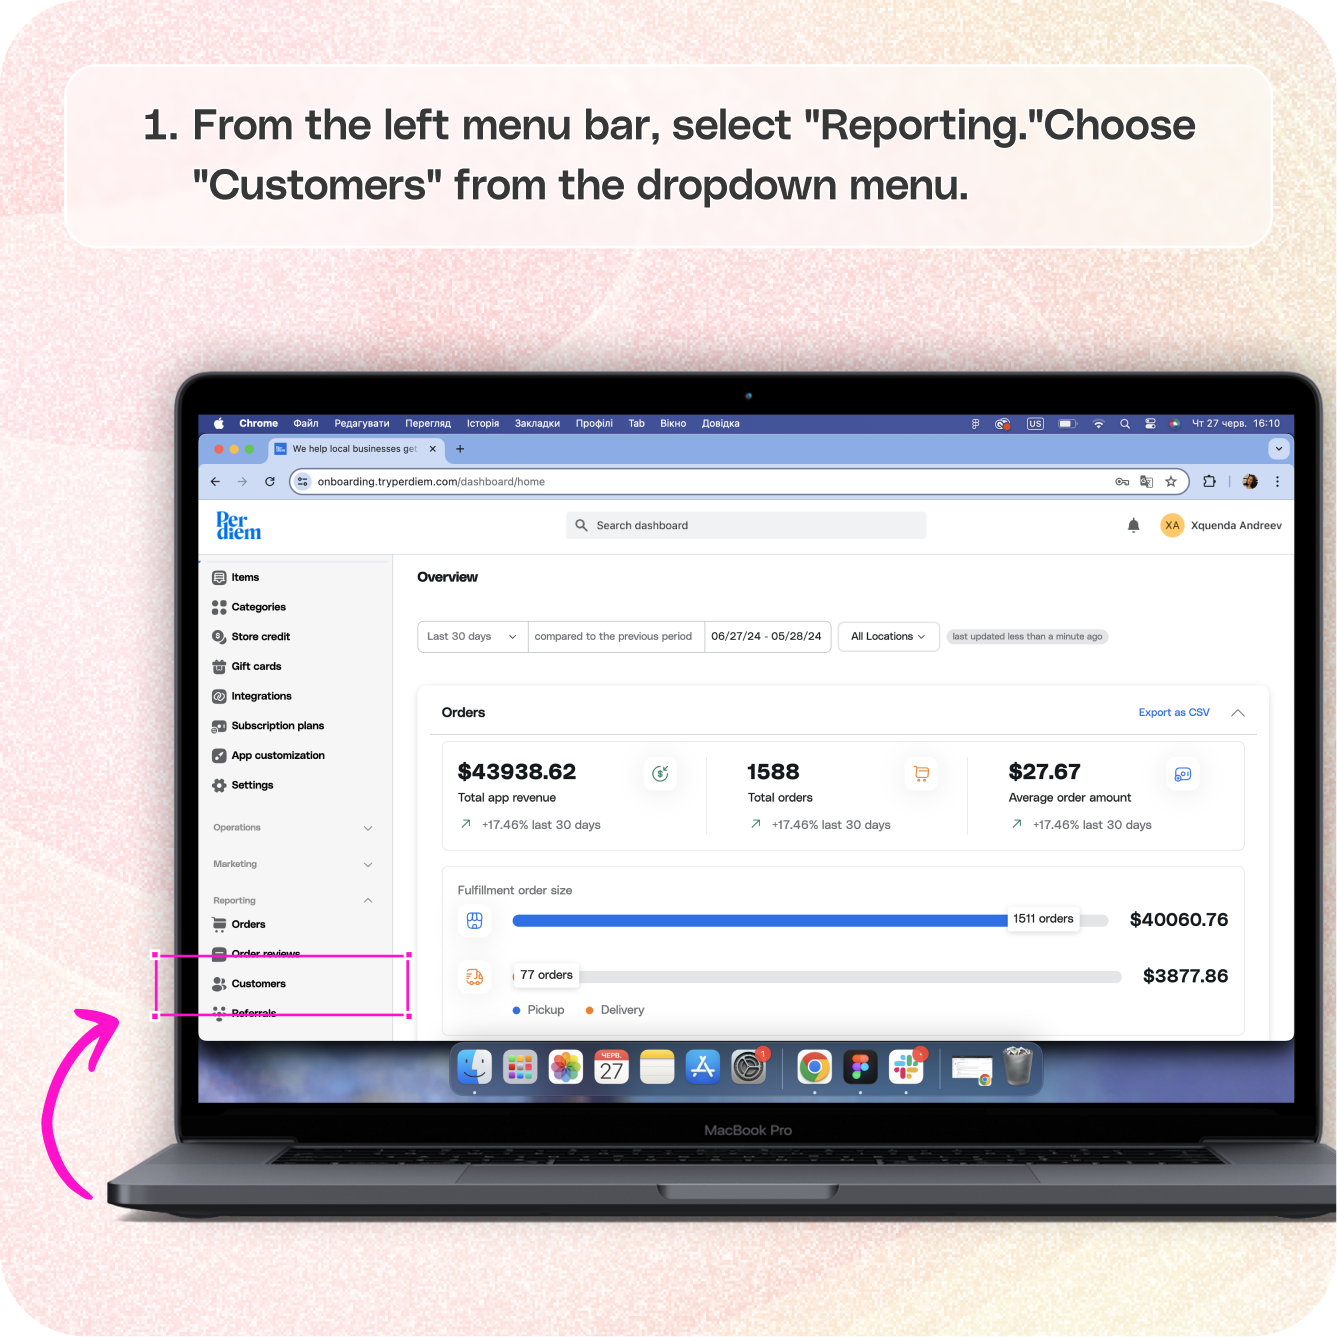
Log in to Your Merchant Dashboard
Streamline customer management with these simple steps:
Step 1
Log in to your Per Diem merchant dashboard.
Go to Reporting
Access customer management tools:
Step 1
From the left menu bar, select "Reporting."
Step 2
Choose "Customers" from the dropdown menu.
Filter Customers
Efficiently organize your customer base:
Step 1
On the Customers page, use the filters to sort customers by active or deactivated status.

Update Customers
Personalize customer interactions:
Step 1
Locate the customer you want to update.
Step 2
Click on the three dots next to the customer's name.
Step 3
Select "View Customer Data" to review and update information.
Step 4
Send tailored push notifications directly to the customer from this option.
Deactivate Customer
Manage customer relationships effectively:
Step 1
Identify the customer you wish to deactivate.
Step 2
Click on the three dots next to the customer's name.
Step 3
Choose "Deactivate Customer."
Step 4
Provide a reason for deactivating the customer.
Step 5
Confirm by clicking "Yes" to deactivate.
Still have questions?Contact us
Ask anything or just say hi